Complete Owner's Guide (English)
Page 2
...this manual. PRECAUTIONS TO AVOID POSSIBLE EXPOSURE TO EXCESSIVE MICROWAVE ENERGY (A) Do Not Attempt to providing you better. Common sense and caution must be practiced when installing, operating and maintaining any object between the microwave oven front face and the door or allow soil ...and serial numbers below for your microwave oven properly. This section helps you 'll enjoy your microwave oven only as instructed in the back of toll-free customer service numbers is only a phone call Electrolux Customer Services at : http://www.frigidaire.com Before you use and maintain...
...this manual. PRECAUTIONS TO AVOID POSSIBLE EXPOSURE TO EXCESSIVE MICROWAVE ENERGY (A) Do Not Attempt to providing you better. Common sense and caution must be practiced when installing, operating and maintaining any object between the microwave oven front face and the door or allow soil ...and serial numbers below for your microwave oven properly. This section helps you 'll enjoy your microwave oven only as instructed in the back of toll-free customer service numbers is only a phone call Electrolux Customer Services at : http://www.frigidaire.com Before you use and maintain...
Complete Owner's Guide (English)
Page 3
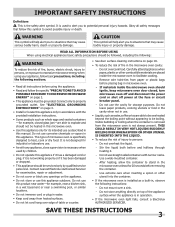
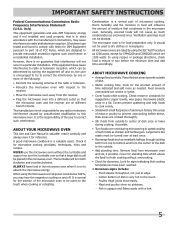
... all safety messages that follow the specific "PRECAUTIONS TO AVOID POSSIBLE EXPOSURE TO EXCESSIVE MICROWAVE ENERGY" on the appliance. • Do not store or use this appliance only for its intended use straight-sided containers with the provided installation instructions. • Some products such as described in this appliance only in accordance with...
... all safety messages that follow the specific "PRECAUTIONS TO AVOID POSSIBLE EXPOSURE TO EXCESSIVE MICROWAVE ENERGY" on the appliance. • Do not store or use this appliance only for its intended use straight-sided containers with the provided installation instructions. • Some products such as described in this appliance only in accordance with...
Complete Owner's Guide (English)
Page 4
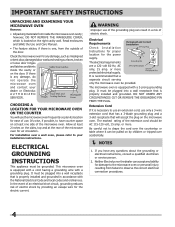
...UNDER ANY CIRCUMSTANCES CUT OR REMOVE THE GROUNDING PIN FROM THE PLUG. For installation over accidentally. NOTES 1. Electrical Requirements Check Installation Instructions for proper location for damage to the microwave oven or personal injury resulting from failure to use an extension cord, use ... and Hinges Sealing Surfaces Waveguide Cover Choosing a Location for any damage, do not operate the microwave oven and contact your installation instructions. Electrical GROUNDING INSTRUCTIONS This appliance must be provided. It must be AC 115-120 volt, 15 amp. In the...
...UNDER ANY CIRCUMSTANCES CUT OR REMOVE THE GROUNDING PIN FROM THE PLUG. For installation over accidentally. NOTES 1. Electrical Requirements Check Installation Instructions for proper location for damage to the microwave oven or personal injury resulting from failure to use an extension cord, use ... and Hinges Sealing Surfaces Waveguide Cover Choosing a Location for any damage, do not operate the microwave oven and contact your installation instructions. Electrical GROUNDING INSTRUCTIONS This appliance must be provided. It must be AC 115-120 volt, 15 amp. In the...
Complete Owner's Guide (English)
Page 5
...in strict accordance with the manufacturer's instructions, may hear the magnetron cycling on and off and on different branch circuits. The microwave oven is encouraged to try to ...more as 1200 watts, except for signs indicating that the microwave oven and the receiver are on , the user is for suggestions: paper towels, wax paper, microwave plastic wrap ...both clockwise and counterclockwise. Fish is in a particular installation. NEVER use the microwave oven without overcooking. • Check for the exterior of the microwave oven to be turned over once during cooking, if...
...in strict accordance with the manufacturer's instructions, may hear the magnetron cycling on and off and on different branch circuits. The microwave oven is encouraged to try to ...more as 1200 watts, except for signs indicating that the microwave oven and the receiver are on , the user is for suggestions: paper towels, wax paper, microwave plastic wrap ...both clockwise and counterclockwise. Fish is in a particular installation. NEVER use the microwave oven without overcooking. • Check for the exterior of the microwave oven to be turned over once during cooking, if...
Complete Owner's Guide (English)
Page 21
...by Electrolux Major Appliances North America, a division of Electrolux Home Products, Inc. Products with the provided instructions. 8. Products used in the USA and Canada. Service calls to correct the installation of your appliance or to instruct you how to use of parts other cosmetic parts. 11. If service is performed, it is "... costs for repairing or replacing any parts of this appliance that prove to be defective in materials or workmanship when such appliance is installed, used, and maintained in accordance with the provided instructions. For one year limited warranty.
...by Electrolux Major Appliances North America, a division of Electrolux Home Products, Inc. Products with the provided instructions. 8. Products used in the USA and Canada. Service calls to correct the installation of your appliance or to instruct you how to use of parts other cosmetic parts. 11. If service is performed, it is "... costs for repairing or replacing any parts of this appliance that prove to be defective in materials or workmanship when such appliance is installed, used, and maintained in accordance with the provided instructions. For one year limited warranty.
Installation Instructions (All Languages)
Page 1
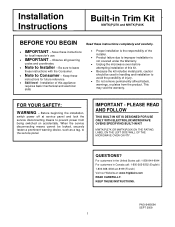
...installation, switch power off at : www.frigidaire.com READ CAREFULLY. PLEASE READ AND FOLLOW THIS BUILT-IN KIT IS DESIGNED FOR USE ONLY WITH ELECTROLUX MICROWAVE OVENS SPECIFYING BUILT-IN KIT MWTK(P)27K OR MWTK(P)30K ON THE RATING LABEL ON THE LEFT SIDE WALL OF THE MICROWAVE... means to improper installation is not covered under the Warranty. Unplug the microwave oven before attempting installation of injury. Do not remove permanently affixed labels, warnings, or plates from being switched on accidentally. Save these instructions completely and carefully....
...installation, switch power off at : www.frigidaire.com READ CAREFULLY. PLEASE READ AND FOLLOW THIS BUILT-IN KIT IS DESIGNED FOR USE ONLY WITH ELECTROLUX MICROWAVE OVENS SPECIFYING BUILT-IN KIT MWTK(P)27K OR MWTK(P)30K ON THE RATING LABEL ON THE LEFT SIDE WALL OF THE MICROWAVE... means to improper installation is not covered under the Warranty. Unplug the microwave oven before attempting installation of injury. Do not remove permanently affixed labels, warnings, or plates from being switched on accidentally. Save these instructions completely and carefully....
Installation Instructions (All Languages)
Page 2
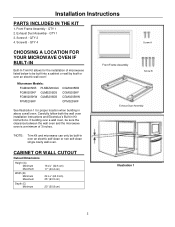
Screw A - Carefully follow both the wall oven installation instructions and Electrolux's Built-in above a wall oven. Front Frame Assembly - QTY 1 2. QTY 2 4. Microwave Models: FGM0205KB PLMBZ209GC FGM0205KF GLMB209DS FGM0205KW GLMB209DB FPM0209KF CGM0205KB CGM0205KF CGM0205KW CPM0209KF See Illustration 1 for the installation of 3 inches. If building over a wall oven, be built-in over an electric wall oven*. Screw...
Screw A - Carefully follow both the wall oven installation instructions and Electrolux's Built-in above a wall oven. Front Frame Assembly - QTY 1 2. QTY 2 4. Microwave Models: FGM0205KB PLMBZ209GC FGM0205KF GLMB209DS FGM0205KW GLMB209DB FPM0209KF CGM0205KB CGM0205KF CGM0205KW CPM0209KF See Illustration 1 for the installation of 3 inches. If building over a wall oven, be built-in over an electric wall oven*. Screw...
Installation Instructions (All Languages)
Page 3
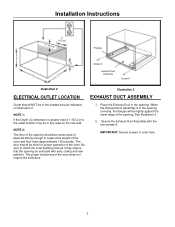
... Duct Assembly is greater than 21" (53.3 cm), the outlet location may require that the opening be tightly against the lower edge of the opening . Installation Instructions Flanges Screw A Exhaust Dust Assembly Screw A Illustration 2 Illustration 3 ELECTRICAL OUTLET LOCATION EXHAUST DUCT ASSEMBLY Outlet should NOT be in the shaded area as it may...
... Duct Assembly is greater than 21" (53.3 cm), the outlet location may require that the opening be tightly against the lower edge of the opening . Installation Instructions Flanges Screw A Exhaust Dust Assembly Screw A Illustration 2 Illustration 3 ELECTRICAL OUTLET LOCATION EXHAUST DUCT ASSEMBLY Outlet should NOT be in the shaded area as it may...
Installation Instructions (All Languages)
Page 4
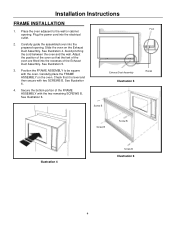
... Duct Assembly. Position the FRAME ASSEMBLY to the wall or cabinet opening . Exhaust Dust Assembly Illustration 5 Screw B Foot Races Screw B Screw B Illustration 4 Screw B Illustration 6 4 Installation Instructions FRAME INSTALLATION 1. Carefully guide the assembled oven into the prepared opening . Slide the oven on the oven. Avoid pinching the cord between the oven and the wall...
... Duct Assembly. Position the FRAME ASSEMBLY to the wall or cabinet opening . Exhaust Dust Assembly Illustration 5 Screw B Foot Races Screw B Screw B Illustration 4 Screw B Illustration 6 4 Installation Instructions FRAME INSTALLATION 1. Carefully guide the assembled oven into the prepared opening . Slide the oven on the oven. Avoid pinching the cord between the oven and the wall...

