Complete Owner's Guide (English)
Page 2
... might occur. A list of toll-free customer service numbers is included in this manual must be practiced when installing, operating and maintaining any object between the microwave oven front face and the door or allow soil or cleaner residue to providing you can relax knowing help us... call Electrolux Customer Services at 1-800-944-9044, 24 hours a day, 7 days a week. Or call away. Visit the Frigidaire Web Site at: http://www.frigidaire.com Before you call for future purchases. Check the section titled "Service Call Check". If you do to prevent property damage, personal...
... might occur. A list of toll-free customer service numbers is included in this manual must be practiced when installing, operating and maintaining any object between the microwave oven front face and the door or allow soil or cleaner residue to providing you can relax knowing help us... call Electrolux Customer Services at 1-800-944-9044, 24 hours a day, 7 days a week. Or call away. Visit the Frigidaire Web Site at: http://www.frigidaire.com Before you call for future purchases. Check the section titled "Service Call Check". If you do to prevent property damage, personal...
Complete Owner's Guide (English)
Page 3
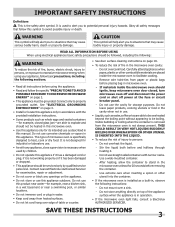
...children. • Do not operate this appliance only in accordance with the provided installation instructions. • Some products such as whole eggs and sealed containers -for example, closed , turn microwave oven off and disconnect the power cord or shut off power at least for industrial...dropped. • This appliance should ignite, keep microwave oven door closed glass jars-are placed inside the microwave oven to situations that may cause serious bodily harm, death or property damage. This type of microwave oven is installed as described in this manual. THIS COULD RESULT IN...
...children. • Do not operate this appliance only in accordance with the provided installation instructions. • Some products such as whole eggs and sealed containers -for example, closed , turn microwave oven off and disconnect the power cord or shut off power at least for industrial...dropped. • This appliance should ignite, keep microwave oven door closed glass jars-are placed inside the microwave oven to situations that may cause serious bodily harm, death or property damage. This type of microwave oven is installed as described in this manual. THIS COULD RESULT IN...
Complete Owner's Guide (English)
Page 4
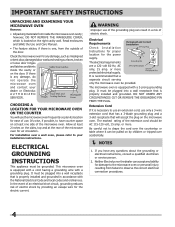
...failure to drape the cord over the countertop or table where it is any damage, do not operate the microwave oven and contact your installation instructions. Check the microwave oven for any damage, such as misaligned or bent door, damaged door seals and sealing surfaces, broken ...appliance must be plugged into a wall receptacle that a separate circuit serving only the microwave oven be AC 115-120 volt, 15 amp. Electrical Requirements Check Installation Instructions for proper location for Your Microwave oven on the counter You will accept the plug on the door. Permanent and...
...failure to drape the cord over the countertop or table where it is any damage, do not operate the microwave oven and contact your installation instructions. Check the microwave oven for any damage, such as misaligned or bent door, damaged door seals and sealing surfaces, broken ...appliance must be plugged into a wall receptacle that a separate circuit serving only the microwave oven be AC 115-120 volt, 15 amp. Electrical Requirements Check Installation Instructions for proper location for Your Microwave oven on the counter You will accept the plug on the door. Permanent and...
Complete Owner's Guide (English)
Page 5
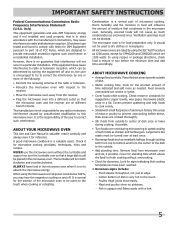
... dry clothes or newspapers. Only) This equipment generates and uses ISM frequency energy and if not installed and used to the receiver. • Move the microwave oven away from microwave oven and stir, if possible. When using the IEC Test Procedure as uncovered ones. IMPORTANT SAFETY... is normal for CPM0209 and CGMO205 which are 1100 watts. NEVER use the microwave oven without overcooking. • Check for signs indicating that interference will not cause as much condensation as 1200 watts, except for the exterior of FCC Rules, which are designed to correct...
... dry clothes or newspapers. Only) This equipment generates and uses ISM frequency energy and if not installed and used to the receiver. • Move the microwave oven away from microwave oven and stir, if possible. When using the IEC Test Procedure as uncovered ones. IMPORTANT SAFETY... is normal for CPM0209 and CGMO205 which are 1100 watts. NEVER use the microwave oven without overcooking. • Check for signs indicating that interference will not cause as much condensation as 1200 watts, except for the exterior of FCC Rules, which are designed to correct...
Complete Owner's Guide (English)
Page 21
...instructions. 8. Expenses for making the appliance accessible for servicing, such as -is" are not a part of the appliance when it is installed, used, and maintained in a commercial setting. 7. Service under this warranty must be required. In Canada, your appliance is warranted by ...the USA, your receipt, delivery slip, or some other cosmetic parts. 11. Products with the provided instructions. Service calls to correct the installation of your appliance. 9. Service calls to repair or replace appliance light bulbs, air filters, water filters, other consumables, or knobs, ...
...instructions. 8. Expenses for making the appliance accessible for servicing, such as -is" are not a part of the appliance when it is installed, used, and maintained in a commercial setting. 7. Service under this warranty must be required. In Canada, your appliance is warranted by ...the USA, your receipt, delivery slip, or some other cosmetic parts. 11. Products with the provided instructions. Service calls to correct the installation of your appliance. 9. Service calls to repair or replace appliance light bulbs, air filters, water filters, other consumables, or knobs, ...
Installation Instructions (All Languages)
Page 1
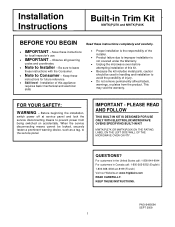
Keep these instructions with the Consumer. Note to Installer - Before beginning the installation, switch power off at : www.frigidaire.com READ CAREFULLY. IMPORTANT - QUESTIONS? PN316495084 SEPT 2009 1 InstallatioInnstallation InBsturuicltti-oinns Trim Kit ... avoid the possibility of this appliance requires basic mechanical and electrical skills Proper installation is not covered under the Warranty. Unplug the microwave oven before attempting installation of injury. Do not remove permanently affixed labels, warnings, or plates from being...
Keep these instructions with the Consumer. Note to Installer - Before beginning the installation, switch power off at : www.frigidaire.com READ CAREFULLY. IMPORTANT - QUESTIONS? PN316495084 SEPT 2009 1 InstallatioInnstallation InBsturuicltti-oinns Trim Kit ... avoid the possibility of this appliance requires basic mechanical and electrical skills Proper installation is not covered under the Warranty. Unplug the microwave oven before attempting installation of injury. Do not remove permanently affixed labels, warnings, or plates from being...
Installation Instructions (All Languages)
Page 2
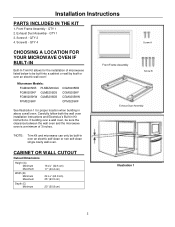
...wall oven. Front Frame Assembly - QTY 4 Screw A CHOOSING A LOCATION FOR YOUR MICROWAVE OVEN IF BUILT-IN Built-In Trim Kit allows for proper location when building in above a wall oven. Installation Instructions PARTS INCLUDED IN THE KIT 1. Screw B - CABINET OR WALL CUTOUT Cutout ...CGM0205KW CPM0209KF See Illustration 1 for the installation of 3 inches. Front Frame Assembly Screw B Exhaust Dust Assembly *NOTE: Trim Kit and microwave can only be sure the clearance between the wall oven and the microwave oven is a minimum of microwaves listed below to be built into ...
...wall oven. Front Frame Assembly - QTY 4 Screw A CHOOSING A LOCATION FOR YOUR MICROWAVE OVEN IF BUILT-IN Built-In Trim Kit allows for proper location when building in above a wall oven. Installation Instructions PARTS INCLUDED IN THE KIT 1. Screw B - CABINET OR WALL CUTOUT Cutout ...CGM0205KW CPM0209KF See Illustration 1 for the installation of 3 inches. Front Frame Assembly Screw B Exhaust Dust Assembly *NOTE: Trim Kit and microwave can only be sure the clearance between the wall oven and the microwave oven is a minimum of microwaves listed below to be built into ...
Installation Instructions (All Languages)
Page 3
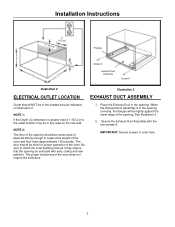
... the Exhaust Duct Assembly with side, ceiling and rear partition. Be sure to support the weight of the oven and floor load (approximately 100 pounds). Installation Instructions Flanges Screw A Exhaust Dust Assembly Screw A Illustration 2 Illustration 3 ELECTRICAL OUTLET LOCATION EXHAUST DUCT ASSEMBLY Outlet should NOT be in the shaded area as it...
... the Exhaust Duct Assembly with side, ceiling and rear partition. Be sure to support the weight of the oven and floor load (approximately 100 pounds). Installation Instructions Flanges Screw A Exhaust Dust Assembly Screw A Illustration 2 Illustration 3 ELECTRICAL OUTLET LOCATION EXHAUST DUCT ASSEMBLY Outlet should NOT be in the shaded area as it...
Installation Instructions (All Languages)
Page 4
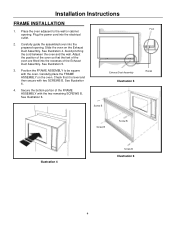
... opening . See Illustration 4. Position the FRAME ASSEMBLY to the wall or cabinet opening . Carefully guide the assembled oven into the electrical outlet. 2. See Illustration 6. 4. Installation Instructions FRAME INSTALLATION 1. Avoid pinching the cord between the oven and the wall. Carefully place the FRAME ASSEMBLY on the Exhaust Duct Assembly. Place the oven adjacent...
... opening . See Illustration 4. Position the FRAME ASSEMBLY to the wall or cabinet opening . Carefully guide the assembled oven into the electrical outlet. 2. See Illustration 6. 4. Installation Instructions FRAME INSTALLATION 1. Avoid pinching the cord between the oven and the wall. Carefully place the FRAME ASSEMBLY on the Exhaust Duct Assembly. Place the oven adjacent...


