
Network Installation Guide
Page 10
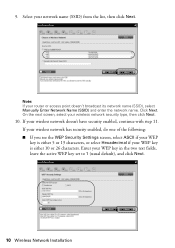
... one of the following: ■ If you see the WEP Security Settings screen, select ASCII if your WEP key is either 10 or 26 characters. Note: If your WEP key is either 5 or 13 characters, or select Hexadecimal if your router or access point doesn't broadcast its network name (SSID), select Manually...
... one of the following: ■ If you see the WEP Security Settings screen, select ASCII if your WEP key is either 10 or 26 characters. Note: If your WEP key is either 5 or 13 characters, or select Hexadecimal if your router or access point doesn't broadcast its network name (SSID), select Manually...
Network Installation Guide
Page 11
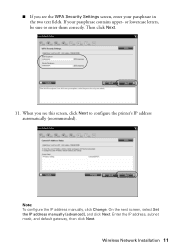
When you see this screen, click Next to enter them correctly. On the next screen, select Set the IP address manually (advanced), and click Next. Wireless Network Installation 11 or lowercase letters, be sure to configure the printer's IP address automatically (recommended). Then click Next. 11. Note: To configure the IP address manually, click Change. If your passphrase in the two text fields. ■ If you see the WPA Security Settings screen, enter your passphrase contains upper- Enter the IP address, subnet mask, and default gateway, then click Next.
When you see this screen, click Next to enter them correctly. On the next screen, select Set the IP address manually (advanced), and click Next. Wireless Network Installation 11 or lowercase letters, be sure to configure the printer's IP address automatically (recommended). Then click Next. 11. Note: To configure the IP address manually, click Change. If your passphrase in the two text fields. ■ If you see the WPA Security Settings screen, enter your passphrase contains upper- Enter the IP address, subnet mask, and default gateway, then click Next.
Network Installation Guide
Page 21
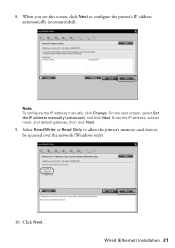
Wired (Ethernet) Installation 21 8. On the next screen, select Set the IP address manually (advanced), and click Next. Enter the IP address, subnet mask, and default gateway, then click Next. 9. Click Next. When you see this screen, click Next to be accessed over the network (Windows only). 10. Note: To configure the IP address manually, click Change. Select Read/Write or Read Only to allow the printer's memory card slots to configure the printer's IP address automatically (recommended).
Wired (Ethernet) Installation 21 8. On the next screen, select Set the IP address manually (advanced), and click Next. Enter the IP address, subnet mask, and default gateway, then click Next. 9. Click Next. When you see this screen, click Next to be accessed over the network (Windows only). 10. Note: To configure the IP address manually, click Change. Select Read/Write or Read Only to allow the printer's memory card slots to configure the printer's IP address automatically (recommended).
Network Installation Guide
Page 33
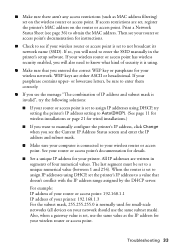
...9632; If you want to assign IP addresses using DHCP, set on the wireless router or access point. When the router is set to manually configure the printer's IP address, click Change when you see the message "The combination of four numerical values. If your wireless router or access point has ... IP address and subnet mask is invalid", try the following solutions: ■ If your router or access point is using DHCP, try setting the printer's IP address setting to your wireless router or access point. ■ Make sure there aren't any access restrictions (such as the IP address for...
...9632; If you want to assign IP addresses using DHCP, set on the wireless router or access point. When the router is set to manually configure the printer's IP address, click Change when you see the message "The combination of four numerical values. If your wireless router or access point has ... IP address and subnet mask is invalid", try the following solutions: ■ If your router or access point is using DHCP, try setting the printer's IP address setting to your wireless router or access point. ■ Make sure there aren't any access restrictions (such as the IP address for...
Network Installation Guide
Page 34
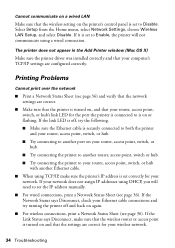
... ■ Print a Network Status Sheet (see page 36) and verify that the network settings are correct. ■ Make sure that the printer is turned on, and that the settings are configured correctly. If the Network Status says Disconnect, check your Ethernet cable connections and try turning...9632; For wireless connections, print a Network Status Sheet (see page 36). If the Link Status says Disconnect, make sure the printer's IP address is set the IP address manually. ■ For wired connections, print a Network Status Sheet (see page 36). If the link LED is off and back ...
... ■ Print a Network Status Sheet (see page 36) and verify that the network settings are correct. ■ Make sure that the printer is turned on, and that the settings are configured correctly. If the Network Status says Disconnect, check your Ethernet cable connections and try turning...9632; For wireless connections, print a Network Status Sheet (see page 36). If the Link Status says Disconnect, make sure the printer's IP address is set the IP address manually. ■ For wired connections, print a Network Status Sheet (see page 36). If the link LED is off and back ...
Network Installation Guide
Page 35
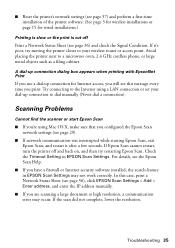
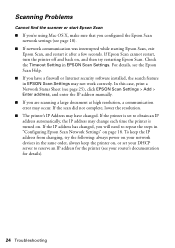
... X, make sure that you configured the Epson Scan network settings (see page 36), click EPSON Scan Settings > Add > Enter address, and enter the IP address manually. ■ If you are scanning a large document at high resolution, a communication error may not work correctly. If Epson Scan cannot restart, turn the printer off Print a Network Status Sheet...
... X, make sure that you configured the Epson Scan network settings (see page 36), click EPSON Scan Settings > Add > Enter address, and enter the IP address manually. ■ If you are scanning a large document at high resolution, a communication error may not work correctly. If Epson Scan cannot restart, turn the printer off Print a Network Status Sheet...

Using the Control Panel for Wireless Network Installation
Page 5
Press OK to select Manual Wireless LAN Setup, then press OK. 8. Press d to continue. 9. Press u to Your Wireless Network 5 Connecting to select Yes, then press OK. 6. Press d to select Enable, then press OK. 7.
Press OK to select Manual Wireless LAN Setup, then press OK. 8. Press d to continue. 9. Press u to Your Wireless Network 5 Connecting to select Yes, then press OK. 6. Press d to select Enable, then press OK. 7.
Using the Control Panel for Wireless Network Installation
Page 22
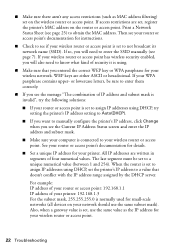
...: ■ If your router or access point is set to assign IP addresses using DHCP, try setting the printer's IP address setting to Auto(DHCP). ■ If you want to manually configure the printer's IP address, click Change when you will also need to obtain the MAC address. Print a Network Status Sheet... (see page 25) to enter the SSID manually (see the message "The combination of your printer: 192.168.1.3 For the subnet mask, 255.255.255.0 is set, use the same subnet mask). The last segment must be...
...: ■ If your router or access point is set to assign IP addresses using DHCP, try setting the printer's IP address setting to Auto(DHCP). ■ If you want to manually configure the printer's IP address, click Change when you will also need to obtain the MAC address. Print a Network Status Sheet... (see page 25) to enter the SSID manually (see the message "The combination of your printer: 192.168.1.3 For the subnet mask, 255.255.255.0 is set, use the same subnet mask). The last segment must be...
Using the Control Panel for Wireless Network Installation
Page 23
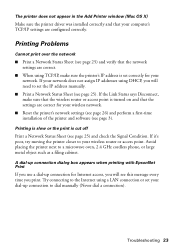
... that the settings are configured correctly. If the Link Status says Disconnect, make sure the printer's IP address is set correctly for your network. Troubleshooting 23 If your dial-up connection to dial manually (Never dial a connection). Printing Problems Cannot print over the network ■ Print a ...are correct. ■ When using a LAN connection or set the IP address manually. ■ Print a Network Status Sheet (see page 25) and check the Signal Condition. If it's poor, try moving the printer closer to the Internet using TCP/IP, make sure that the wireless router ...
... that the settings are configured correctly. If the Link Status says Disconnect, make sure the printer's IP address is set correctly for your network. Troubleshooting 23 If your dial-up connection to dial manually (Never dial a connection). Printing Problems Cannot print over the network ■ Print a ...are correct. ■ When using a LAN connection or set the IP address manually. ■ Print a Network Status Sheet (see page 25) and check the Signal Condition. If it's poor, try moving the printer closer to the Internet using TCP/IP, make sure that the wireless router ...
Using the Control Panel for Wireless Network Installation
Page 24
..., a communication error may not work correctly. For details, see page 25), click EPSON Scan Settings > Add > Enter address, and enter the IP address manually. ■ If you have changed , you configured the Epson Scan network settings (see your router's documentation for the printer (see page 18). ■ If network communication was interrupted while starting...
..., a communication error may not work correctly. For details, see page 25), click EPSON Scan Settings > Add > Enter address, and enter the IP address manually. ■ If you have changed , you configured the Epson Scan network settings (see your router's documentation for the printer (see page 18). ■ If network communication was interrupted while starting...
Product Brochure
Page 2
...-year limited with registration WorkForce 600 color all-in-one, instructional manual, CD-ROM with 802.11n Wired Ethernet (10/100 Mbps) Windows Vista®, XP, XP Professional x64, 2000 Mac OS® X 10.3.9, 10.4.11 and 10.5.x Epson printer driver, Web to Page, Epson Scan, ArcSoft® Print...4 Compared to all prints under glass. DURABrite is a registered trademark, Epson Preferred is a service mark and WorkForce is used during an eight-hour day. † One-year limited warranty to competitive monochrome laser printers priced at $199 or less, available as of March 2008. Copyright ...
...-year limited with registration WorkForce 600 color all-in-one, instructional manual, CD-ROM with 802.11n Wired Ethernet (10/100 Mbps) Windows Vista®, XP, XP Professional x64, 2000 Mac OS® X 10.3.9, 10.4.11 and 10.5.x Epson printer driver, Web to Page, Epson Scan, ArcSoft® Print...4 Compared to all prints under glass. DURABrite is a registered trademark, Epson Preferred is a service mark and WorkForce is used during an eight-hour day. † One-year limited warranty to competitive monochrome laser printers priced at $199 or less, available as of March 2008. Copyright ...

Quick Guide
Page 20
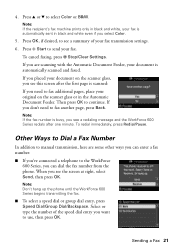
... and repeat the steps above. Place your speed dial list, see this screen: 3. Note: To dial the number using your telephone, by redialing, or by manually entering a fax number (as described below), redialing the previous fax number, or selecting an entry from your original(s) for faxing (see page 8). 2.
... and repeat the steps above. Place your speed dial list, see this screen: 3. Note: To dial the number using your telephone, by redialing, or by manually entering a fax number (as described below), redialing the previous fax number, or selecting an entry from your original(s) for faxing (see page 8). 2.
Quick Guide
Page 21
...after one minute. Sending a Fax 21 To cancel faxing, press y Stop/Clear Settings. If you need to manual transmission, here are scanning with the Automatic Document Feeder, your fax. When you can enter a fax number: ■ If you've connected a telephone to the WorkForce 600 Series..., you see a redialing message and the WorkForce 600 Series redials after the first...
...after one minute. Sending a Fax 21 To cancel faxing, press y Stop/Clear Settings. If you need to manual transmission, here are scanning with the Automatic Document Feeder, your fax. When you can enter a fax number: ■ If you've connected a telephone to the WorkForce 600 Series..., you see a redialing message and the WorkForce 600 Series redials after the first...
Quick Guide
Page 22
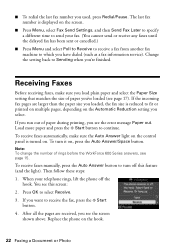
... the Paper Size setting that matches the size of paper you have dialed (such as a fax information service). Replace the phone on . To receive faxes manually, press the Auto Answer button to Sending when you loaded, the fax size is reduced to receive the fax, press the x Start button. 4. Then ... used, press Redial/Pause. You see page 15. If the incoming fax pages are received, you select. If you run out of rings before the WorkForce 600 Series answers, see this feature (and the light). When your fax. (You cannot send or receive any faxes until the delayed fax has been sent...
... the Paper Size setting that matches the size of paper you have dialed (such as a fax information service). Replace the phone on . To receive faxes manually, press the Auto Answer button to Sending when you loaded, the fax size is reduced to receive the fax, press the x Start button. 4. Then ... used, press Redial/Pause. You see page 15. If the incoming fax pages are received, you select. If you run out of rings before the WorkForce 600 Series answers, see this feature (and the light). When your fax. (You cannot send or receive any faxes until the delayed fax has been sent...


