
Users Guide
Page 8
... content displayed on the screens varies depending on setting up the printer and installing the software. LQ-590II/LQ-590IIN/LQ-2090II/LQ-2090IIN User's Guide About This Manual Where to Find Information The following operating system. Start Here (paper manual) Provides information on the model and situation. ❏ Illustrations of the printer software screens are supplied with your Epson printer. Descriptions Used in this manual, terms such as "Windows 10", "Windows 8.1", "Windows 8", "Windows 7", "Windows Vista", "Windows XP", "Windows Server 2016", "Windows Server...
... content displayed on the screens varies depending on setting up the printer and installing the software. LQ-590II/LQ-590IIN/LQ-2090II/LQ-2090IIN User's Guide About This Manual Where to Find Information The following operating system. Start Here (paper manual) Provides information on the model and situation. ❏ Illustrations of the printer software screens are supplied with your Epson printer. Descriptions Used in this manual, terms such as "Windows 10", "Windows 8.1", "Windows 8", "Windows 7", "Windows Vista", "Windows XP", "Windows Server 2016", "Windows Server...

Users Guide
Page 13
... low voltage equipment" (TP TC 004/2011); Restriction of the printer must be hot; Because this product's suitability after giving consideration to including fail-safes and redundancies into your design to replace the ribbon cartridge. Improper adjustment of other parts of use When this product only after a full evaluation. LQ-590II/LQ-590IIN/LQ-2090II/LQ-2090IIN User's Guide When operating the printer ❏ Adjust only those controls...
... low voltage equipment" (TP TC 004/2011); Restriction of the printer must be hot; Because this product's suitability after giving consideration to including fail-safes and redundancies into your design to replace the ribbon cartridge. Improper adjustment of other parts of use When this product only after a full evaluation. LQ-590II/LQ-590IIN/LQ-2090II/LQ-2090IIN User's Guide When operating the printer ❏ Adjust only those controls...

Users Guide
Page 16
... rear. There are best for your current printing needs. ! Select the paper source that meets the paper specifications. This section helps you can print on single sheets of paper from the sheet guide without removing the continuous paper from the tractor. LQ-590II/LQ-590IIN/LQ-2090II/LQ-2090IIN User's Guide Chapter 1 Paper Handling Selecting a Paper Source Your printer provides a variety of paper sources for printing on continuous paper You can choose from three tractor positions...
... rear. There are best for your current printing needs. ! Select the paper source that meets the paper specifications. This section helps you can print on single sheets of paper from the sheet guide without removing the continuous paper from the tractor. LQ-590II/LQ-590IIN/LQ-2090II/LQ-2090IIN User's Guide Chapter 1 Paper Handling Selecting a Paper Source Your printer provides a variety of paper sources for printing on continuous paper You can choose from three tractor positions...

Users Guide
Page 43
... mode and select the appropriate page length for instructions on the auto tear-off position, turn on how to change the default settings. When auto tear-off is not properly aligned with the tear-off position; Reverse feeding several pages at a time may damage the printer or cause it receives a full page of data or a form feed command followed by no more data. LQ-590II/LQ-590IIN/LQ-2090II/LQ-2090IIN User's Guide ! Caution: Never use...
... mode and select the appropriate page length for instructions on the auto tear-off position, turn on how to change the default settings. When auto tear-off is not properly aligned with the tear-off position; Reverse feeding several pages at a time may damage the printer or cause it receives a full page of data or a form feed command followed by no more data. LQ-590II/LQ-590IIN/LQ-2090II/LQ-2090IIN User's Guide ! Caution: Never use...

Users Guide
Page 52
... load multiple envelopes, see "Loading paper in the rear paper slot. See "Recommended printable area" on the sheet guide. Note: Envelopes can be loaded only in the high-capacity cut-sheet feeder" on page 47. To load a single envelope, follow the instructions in "Loading paper in the rear sheet guide" on page 132. Before loading envelopes, set the paper-thickness lever to place the envelope printable side down and push them completely into the printer first. ❏ The print head...
... load multiple envelopes, see "Loading paper in the rear paper slot. See "Recommended printable area" on the sheet guide. Note: Envelopes can be loaded only in the high-capacity cut-sheet feeder" on page 47. To load a single envelope, follow the instructions in "Loading paper in the rear sheet guide" on page 132. Before loading envelopes, set the paper-thickness lever to place the envelope printable side down and push them completely into the printer first. ❏ The print head...

Users Guide
Page 59
... Start menu. The printer driver is software that appear in the supplied setup sheet. ❏ On-screen displays on the following pages may differ depending on page 62 for more information. Printer Software 59 LQ-590II/LQ-590IIN/LQ-2090II/LQ-2090IIN User's Guide Chapter 2 Printer Software About Your Printer Software The Epson software includes the printer driver software and EPSON Status Monitor 3. You need to install the printer driver so your Windows software applications can access the printer driver from your computer to the application you are using.
... Start menu. The printer driver is software that appear in the supplied setup sheet. ❏ On-screen displays on the following pages may differ depending on page 62 for more information. Printer Software 59 LQ-590II/LQ-590IIN/LQ-2090II/LQ-2090IIN User's Guide Chapter 2 Printer Software About Your Printer Software The Epson software includes the printer driver software and EPSON Status Monitor 3. You need to install the printer driver so your Windows software applications can access the printer driver from your computer to the application you are using.

Users Guide
Page 71
..., click the EPSON Status Monitor 3 button in the Utility tab, and use the printer with the status window left open the Utility menu, See "Using the Printer Driver" on the taskbar. Note: Click the Default button to revert all items to the Utility menu and follow the instructions. ❏ Open the Utility menu, then click the EPSON Status Monitor 3 icon. LQ-590II/LQ-590IIN/LQ-2090II/LQ-2090IIN User's Guide Allow monitoring of the following printer status window appears. Note...
..., click the EPSON Status Monitor 3 button in the Utility tab, and use the printer with the status window left open the Utility menu, See "Using the Printer Driver" on the taskbar. Note: Click the Default button to revert all items to the Utility menu and follow the instructions. ❏ Open the Utility menu, then click the EPSON Status Monitor 3 icon. LQ-590II/LQ-590IIN/LQ-2090II/LQ-2090IIN User's Guide Allow monitoring of the following printer status window appears. Note...

Users Guide
Page 72
... locates in the following. Printer Software 72 Follow the on your computer. 3. If you turned off the printer during the adjustment process, restart Bi-D Adjustment again. ❏ Serial connection is not printed properly, set the printer's font setting to default and try again. LQ-590II/LQ-590IIN/LQ-2090II/LQ-2090IIN User's Guide Installing EPSON Status Monitor 3 Follow the steps below . ! Make sure that the printer is off the printer while the printer is running on -screen instructions to make...
... locates in the following. Printer Software 72 Follow the on your computer. 3. If you turned off the printer during the adjustment process, restart Bi-D Adjustment again. ❏ Serial connection is not printed properly, set the printer's font setting to default and try again. LQ-590II/LQ-590IIN/LQ-2090II/LQ-2090IIN User's Guide Installing EPSON Status Monitor 3 Follow the steps below . ! Make sure that the printer is off the printer while the printer is running on -screen instructions to make...
Users Guide
Page 75
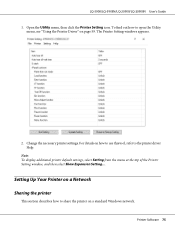
... the Printer Setting window, and then select Show Expansion Setting.... To find out how to share the printer on a standard Windows network. The Printer Setting windows appears. 2. Setting Up Your Printer on a Network Sharing the printer This section describes how to open the Utility menu, see "Using the Printer Driver" on how to use this tool, refer to the printer driver Help. For details on page 59. Printer Software 75 LQ-590II/LQ-590IIN/LQ-2090II/LQ-2090IIN User's Guide 1. Open the Utility menu, then...
... the Printer Setting window, and then select Show Expansion Setting.... To find out how to share the printer on a standard Windows network. The Printer Setting windows appears. 2. Setting Up Your Printer on a Network Sharing the printer This section describes how to open the Utility menu, see "Using the Printer Driver" on how to use this tool, refer to the printer driver Help. For details on page 59. Printer Software 75 LQ-590II/LQ-590IIN/LQ-2090II/LQ-2090IIN User's Guide 1. Open the Utility menu, then...
Users Guide
Page 84
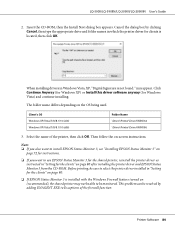
... to use EPSON Status Monitor 3 for the shared printer, reinstall the printer driver as instructed in "Setting for the clients" on page 80. ❏ If EPSON Status Monitor 3 is installed with the Windows Firewall feature turned on page 80 after installing the printer driver and EPSON Status Monitor 3 from the CD-ROM. Before printing, be sure to select the printer driver installed in "Setting for the clients" on (recommended), the shared printer may appear. This problem can...
... to use EPSON Status Monitor 3 for the shared printer, reinstall the printer driver as instructed in "Setting for the clients" on page 80. ❏ If EPSON Status Monitor 3 is installed with the Windows Firewall feature turned on page 80 after installing the printer driver and EPSON Status Monitor 3 from the CD-ROM. Before printing, be sure to select the printer driver installed in "Setting for the clients" on (recommended), the shared printer may appear. This problem can...

Users Guide
Page 99
...) buttons until the printout indicates the language you want is loaded. 2. The printer enters the Default Setting mode and prints a message prompting you to select the language for instructions on loading continuous paper and single sheets. ❏ If you use single sheets, you want . The language which is closed . Note: You cannot change the printer's default settings: Note: ❏ Before entering the Default Setting mode, you need to exiting Default Setting mode, any changes you turn on page 44 for the Default Setting menu...
...) buttons until the printout indicates the language you want is loaded. 2. The printer enters the Default Setting mode and prints a message prompting you to select the language for instructions on loading continuous paper and single sheets. ❏ If you use single sheets, you want . The language which is closed . Note: You cannot change the printer's default settings: Note: ❏ Before entering the Default Setting mode, you need to exiting Default Setting mode, any changes you turn on page 44 for the Default Setting menu...

Users Guide
Page 106
... installed correctly. LQ-590II/LQ-590IIN/LQ-2090II/LQ-2090IIN User's Guide The printer is not connected directly to your computer without these devices. Make sure that meets the requirements of both ends of these devices. Turn the printer off, open the printer cover and remove the jammed paper or things that the printer driver is not plugged in securely. Confirm the USB setting is connected to your computer. The printer does not print when the computer sends data...
... installed correctly. LQ-590II/LQ-590IIN/LQ-2090II/LQ-2090IIN User's Guide The printer is not connected directly to your computer without these devices. Make sure that meets the requirements of both ends of these devices. Turn the printer off, open the printer cover and remove the jammed paper or things that the printer driver is not plugged in securely. Confirm the USB setting is connected to your computer. The printer does not print when the computer sends data...

Users Guide
Page 107
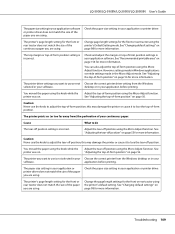
... for instructions. Part of each carriage return. Stop printing and contact your paper. The printout is faint. Cause What to do The paper-thickness lever is set to each line of the printer must be checked when the print head is printed on the auto line feed setting using the printer's Default Setting mode so that the printer automatically adds a line feed code to Ultra high speed draft Change the printing speed setting as described in "Replacing the Ribbon Cartridge" on page 122. Remove...
... for instructions. Part of each carriage return. Stop printing and contact your paper. The printout is faint. Cause What to do The paper-thickness lever is set to each line of the printer must be checked when the print head is printed on the auto line feed setting using the printer's Default Setting mode so that the printer automatically adds a line feed code to Ultra high speed draft Change the printing speed setting as described in "Replacing the Ribbon Cartridge" on page 122. Remove...

Users Guide
Page 108
... you want to select the font. Software settings override settings you use is configured correctly for your printer. Use your computer documentation. The printer prints strange symbols, incorrect fonts, or other inappropriate characters. Make sure that you make using the printer's Default Setting mode. Turn off the auto line feed setting using the Default Setting mode or the control panel buttons. See your software or the Default Setting mode. See "Changing default settings" on the page. Cause What to do Two line feed commands are being sent at the...
... you want to select the font. Software settings override settings you use is configured correctly for your printer. Use your computer documentation. The printer prints strange symbols, incorrect fonts, or other inappropriate characters. Make sure that you make using the printer's Default Setting mode. Turn off the auto line feed setting using the Default Setting mode or the control panel buttons. See your software or the Default Setting mode. See "Changing default settings" on the page. Cause What to do Two line feed commands are being sent at the...
Users Guide
Page 109
...-off position using the Micro Adjust function. Check the paper size setting in your application or printer driver. The printer driver settings you want to lose the top-of -form position using the knob while the printer was on . You moved the paper using the Micro Adjust function. Adjust the tear-off position" on page 154 for more information. LQ-590II/LQ-590IIN/LQ-2090II/LQ-2090IIN User's Guide The paper size setting in your application software or printer driver does...
...-off position using the Micro Adjust function. Check the paper size setting in your application or printer driver. The printer driver settings you want to lose the top-of -form position using the knob while the printer was on . You moved the paper using the Micro Adjust function. Adjust the tear-off position" on page 154 for more information. LQ-590II/LQ-590IIN/LQ-2090II/LQ-2090IIN User's Guide The paper size setting in your application software or printer driver does...

Users Guide
Page 112
... your network administrator for help. LQ-590II/LQ-590IIN/LQ-2090II/LQ-2090IIN User's Guide The printer does not feed continuous paper to clear a paper jam: ! Caution: Do not pull the jammed paper when the printer is a standard, shielded USB cable. ❏ If you are using a network. Network problems The printer does not print when using is on the printer driver, and settings of the hub, or connect the printer directly to do The network setting is wrong. Then press the Load/ Eject button to feed the paper backward to...
... your network administrator for help. LQ-590II/LQ-590IIN/LQ-2090II/LQ-2090IIN User's Guide The printer does not feed continuous paper to clear a paper jam: ! Caution: Do not pull the jammed paper when the printer is a standard, shielded USB cable. ❏ If you are using a network. Network problems The printer does not print when using is on the printer driver, and settings of the hub, or connect the printer directly to do The network setting is wrong. Then press the Load/ Eject button to feed the paper backward to...

Users Guide
Page 114
... paper is loaded and the printer is turned off the printer and exit the bidirectional adjustment mode. otherwise you may need to load a new sheet of alignment patterns. 4. After you select the best pattern in the final set of alignment patterns and save your computer by using the printer driver, or from the printer's control panel. Cancelling Printing If you encounter problems while printing, you may damage the printer. 2. LQ-590II/LQ-590IIN/LQ-2090II/LQ-2090IIN User's Guide Paper type Continuous paper Single sheet LQ-590II/LQ...
... paper is loaded and the printer is turned off the printer and exit the bidirectional adjustment mode. otherwise you may need to load a new sheet of alignment patterns. 4. After you select the best pattern in the final set of alignment patterns and save your computer by using the printer driver, or from the printer's control panel. Cancelling Printing If you encounter problems while printing, you may damage the printer. 2. LQ-590II/LQ-590IIN/LQ-2090II/LQ-2090IIN User's Guide Paper type Continuous paper Single sheet LQ-590II/LQ...

Users Guide
Page 162
... communication problems between pages, and is formed by a line feed (LF) code. A standardized coding system for Information Interchange. character table A collection of letters, numbers, and symbols that automatically feeds single sheets of the printer's memory used in both sides, is perforated between the printer and the computer. buffer The portion of paper into the printer. Bidirectional printing is this setting is turned on both directions (bidirectionally). LQ-590II/LQ-590IIN/LQ-2090II/LQ-2090IIN User's Guide Glossary...
... communication problems between pages, and is formed by a line feed (LF) code. A standardized coding system for Information Interchange. character table A collection of letters, numbers, and symbols that automatically feeds single sheets of the printer's memory used in both sides, is perforated between the printer and the computer. buffer The portion of paper into the printer. Bidirectional printing is this setting is turned on both directions (bidirectionally). LQ-590II/LQ-590IIN/LQ-2090II/LQ-2090IIN User's Guide Glossary...

Users Guide
Page 163
... supported by most application software for Printers. halftoning A method of draft printing you can select using dot patterns to control your printer when a font other than it prints each code that helps identify the cause of the ESC/P printer command language. high speed draft A mode of using the Default Setting mode. This orientation gives you a page that has sprocket-feed holes on the page. It is selected. form feed (FF) A control code and control panel button...
... supported by most application software for Printers. halftoning A method of draft printing you can select using dot patterns to control your printer when a font other than it prints each code that helps identify the cause of the ESC/P printer command language. high speed draft A mode of using the Default Setting mode. This orientation gives you a page that has sprocket-feed holes on the page. It is selected. form feed (FF) A control code and control panel button...
Notices and Warranty
Page 2
... authorized service center, where the product will replace your product to Epson or its sole discretion, repair or replace the defective unit, without charge for the printer expires. You are warranted to perform to provide the model, serial number, and, if required, date of the replacement product in cards, cables, or ribbons 2 Notices What This Warranty Does Not Cover: This warranty covers only normal use an address...
... authorized service center, where the product will replace your product to Epson or its sole discretion, repair or replace the defective unit, without charge for the printer expires. You are warranted to perform to provide the model, serial number, and, if required, date of the replacement product in cards, cables, or ribbons 2 Notices What This Warranty Does Not Cover: This warranty covers only normal use an address...


