Product Brochure
Page 2
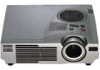
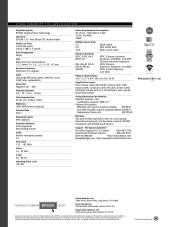
....7 million colors Brightness 1000 ANSI lumens (typical) Contrast Ratio 400:1 Product/Accessory Part Numbers EPSON PowerLite 710c multimedia projector EMP-710 Optional Accessories Wheeled soft case for projector/laptop ELPKS18 Soft shell shoulder case for projector/laptop ELPKS13 Replacement lamp unit ELPLP10B Illumination Ratio 90% (typical) Projection Methods Front projection Rear/ceiling mount Audio Built...
....7 million colors Brightness 1000 ANSI lumens (typical) Contrast Ratio 400:1 Product/Accessory Part Numbers EPSON PowerLite 710c multimedia projector EMP-710 Optional Accessories Wheeled soft case for projector/laptop ELPKS18 Soft shell shoulder case for projector/laptop ELPKS13 Replacement lamp unit ELPLP10B Illumination Ratio 90% (typical) Projection Methods Front projection Rear/ceiling mount Audio Built...

User Manual
Page 76
Also, do not touch the glass portion of the lamp assembly. Contact your local EPSON dealer for a spare lamp. Turn off the power and allow the unit to cool down , then remove the power cord. Request part number ELPLP10B (EMP-700/500) or ELPLP10S (EMP-710). ♦ Warning: Let the lamp cool before replacing it. The amount of time...
Also, do not touch the glass portion of the lamp assembly. Contact your local EPSON dealer for a spare lamp. Turn off the power and allow the unit to cool down , then remove the power cord. Request part number ELPLP10B (EMP-700/500) or ELPLP10S (EMP-710). ♦ Warning: Let the lamp cool before replacing it. The amount of time...

User Manual
Page 77
... about an hour to completely cool down. Mount new lamp. Tighten the mounting screws for the lamp with the screwdriver. 5. Tighten the lamp cover screw with the spare lamp, then remove. Remove the lamp cover after the unit is correct, and then press it into place securely. s s s s s Replacing the Lamp 59 Loosen two mounting screws for the...
... about an hour to completely cool down. Mount new lamp. Tighten the mounting screws for the lamp with the screwdriver. 5. Tighten the lamp cover screw with the spare lamp, then remove. Remove the lamp cover after the unit is correct, and then press it into place securely. s s s s s Replacing the Lamp 59 Loosen two mounting screws for the...


