User Guide
Page 2
Contents Welcome 4 Prepare to View and Print 8 View Photos and Print 12 Do More With Your Photos 18 Print From an External Device 26 Save Photos 32 Print From a Computer 35 Copy Photos to and From Your Computer 53 Replace Print Pack 56 Take PictureMate With You 60 Set PictureMate Preferences 61 Printer Care and Troubleshooting 64 Set Up Network Printing 78 2
Contents Welcome 4 Prepare to View and Print 8 View Photos and Print 12 Do More With Your Photos 18 Print From an External Device 26 Save Photos 32 Print From a Computer 35 Copy Photos to and From Your Computer 53 Replace Print Pack 56 Take PictureMate With You 60 Set PictureMate Preferences 61 Printer Care and Troubleshooting 64 Set Up Network Printing 78 2
User Guide
Page 6
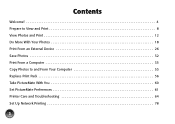
... directly from retailers that sell printer supplies. Basics explains how to 9,999 photos on your memory card. To find the nearest reseller, call 800-GO-EPSON (800-463-7766). sales) or www.epson.ca (Canadian sales). Supported Photo Formats Make sure your photos meet these requirements for using PictureMate. You can also buy a Print...
... directly from retailers that sell printer supplies. Basics explains how to 9,999 photos on your memory card. To find the nearest reseller, call 800-GO-EPSON (800-463-7766). sales) or www.epson.ca (Canadian sales). Supported Photo Formats Make sure your photos meet these requirements for using PictureMate. You can also buy a Print...

User Guide
Page 11
Note: When you are not using PictureMate, press the P On button on the side of the printer. 11 Using the P On Button You can use the P On button on the remote control. Press any unused paper in a dry area to full operation. ... return to turn it flat in the original package and keep it on the side of 20 sheets at a time. Note: Load a maximum of the printer to return PictureMate to prevent curling. Load your photos begins automatically after 3 minutes. The power light turns green.
Note: When you are not using PictureMate, press the P On button on the side of the printer. 11 Using the P On Button You can use the P On button on the remote control. Press any unused paper in a dry area to full operation. ... return to turn it flat in the original package and keep it on the side of 20 sheets at a time. Note: Load a maximum of the printer to return PictureMate to prevent curling. Load your photos begins automatically after 3 minutes. The power light turns green.

User Guide
Page 14
... have a memory card (or thumb drive) inserted, it . Note: The date comes from the printer. If this information is incorrect, adjust the date setting on PictureMate's hard drive. Whenever PictureMate does not have enough paper loaded, then press Print to start printing. If you need to cancel... printing, press Clear Stop/ After printing, you see a screen like the following, showing the number of photos to be ...
... have a memory card (or thumb drive) inserted, it . Note: The date comes from the printer. If this information is incorrect, adjust the date setting on PictureMate's hard drive. Whenever PictureMate does not have enough paper loaded, then press Print to start printing. If you need to cancel... printing, press Clear Stop/ After printing, you see a screen like the following, showing the number of photos to be ...
User Guide
Page 26
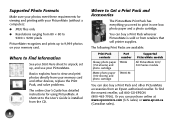
... safekeeping. Note: You must remove your memory card or the printer will read photos from the card, not from your camera. 1 Make sure PictureMate is on your camera manual to see if it supports PictBridge. Printing From a Digital Camera You can back up photos from a camera. 3 Turn... on but not printing. 2 Make sure there are no memory cards in PictureMate's slots. Print From an External Device PictureMate can print photos stored on a: ● PictBridge-enabled digital camera (this page) ● USB-connected external drive, such as a thumb drive (see page 28)...
... safekeeping. Note: You must remove your memory card or the printer will read photos from the card, not from your camera. 1 Make sure PictureMate is on your camera manual to see if it supports PictBridge. Printing From a Digital Camera You can back up photos from a camera. 3 Turn... on but not printing. 2 Make sure there are no memory cards in PictureMate's slots. Print From an External Device PictureMate can print photos stored on a: ● PictBridge-enabled digital camera (this page) ● USB-connected external drive, such as a thumb drive (see page 28)...

User Guide
Page 31
... Encryption is enabled. 6 Press u or d to change the first digit, then press r to move to the next setting. ● Printer ID If multiple Bluetooth-enabled printers are in Discoverable mode. Then press OK. 8 At the confirmation screen, press OK again. 9 Choose options for PictureMate in the same communication range, you will be entered into...
... Encryption is enabled. 6 Press u or d to change the first digit, then press r to move to the next setting. ● Printer ID If multiple Bluetooth-enabled printers are in Discoverable mode. Then press OK. 8 At the confirmation screen, press OK again. 9 Choose options for PictureMate in the same communication range, you will be entered into...

User Guide
Page 33
If you may lose photos on the screen to cancel the backup, press Clear. Stop/ Caution: Avoid handling the printer during backup. Note: You can select photos to delete from a memory card. 1 From the Home menu, select Photo Storage. 2 Select Delete Selected Photos or ... photos, you see a selection screen like the following: 33 Deleting Photos from Print History You can delete photos from the print history only, not from PictureMate's print history, or delete all photos, skip to step 6. ● If you choose to delete all the photos. 4 Press OK. 5 Select Save All Photos. 6...
If you may lose photos on the screen to cancel the backup, press Clear. Stop/ Caution: Avoid handling the printer during backup. Note: You can select photos to delete from a memory card. 1 From the Home menu, select Photo Storage. 2 Select Delete Selected Photos or ... photos, you see a selection screen like the following: 33 Deleting Photos from Print History You can delete photos from the print history only, not from PictureMate's print history, or delete all photos, skip to step 6. ● If you choose to delete all the photos. 4 Press OK. 5 Select Save All Photos. 6...
User Guide
Page 35
...your computer. Installing Software and Connecting PictureMate DO NOT connect PictureMate to your computer with your computer, you must first: ● Install the PictureMate software on page 53 for free updates to check Epson's support website at epson.com/support for instructions. See "...dealer or from Epson. Note: Periodically, it were a drive on printing from the PictureMate CD as if it 's a good idea to your computer. Download instructions are posted for instructions on your PictureMate printer software. Once your software is installed and PictureMate is connected to...
...your computer. Installing Software and Connecting PictureMate DO NOT connect PictureMate to your computer with your computer, you must first: ● Install the PictureMate software on page 53 for free updates to check Epson's support website at epson.com/support for instructions. See "...dealer or from Epson. Note: Periodically, it were a drive on printing from the PictureMate CD as if it 's a good idea to your computer. Download instructions are posted for instructions on your PictureMate printer software. Once your software is installed and PictureMate is connected to...

User Guide
Page 37
...the X in the Windows Control Panel. 6 Follow the on-screen instructions to install the rest of PictureMate. If you have another printer, you see a message that installation is automatically set as your default printer. After a moment, you can change this setting in the corner to close it. 5 Connect ...the USB cable to any open USB port on your computer. Note: PictureMate is complete, click Exit. 37 Then connect the other ...
...the X in the Windows Control Panel. 6 Follow the on-screen instructions to install the rest of PictureMate. If you have another printer, you see a message that installation is automatically set as your default printer. After a moment, you can change this setting in the corner to close it. 5 Connect ...the USB cable to any open USB port on your computer. Note: PictureMate is complete, click Exit. 37 Then connect the other ...

User Guide
Page 40
Now you 're done, eject the CD. Printing From a Computer Follow these basic printing instructions for your Macintosh on PictureMate (see page 47) Printing From a Windows Computer You can print photos from an imaging application, the Windows Photo Gallery in Windows Vista (page 41), or ...the Picture and Fax Viewer in Windows XP (page 43). 40 8 When you see this screen, click Add Printer. 9 Follow the steps on the right side of the screen to add PictureMate. 10 Follow the on-screen instructions to install the rest of the software and register your...
Now you 're done, eject the CD. Printing From a Computer Follow these basic printing instructions for your Macintosh on PictureMate (see page 47) Printing From a Windows Computer You can print photos from an imaging application, the Windows Photo Gallery in Windows Vista (page 41), or ...the Picture and Fax Viewer in Windows XP (page 43). 40 8 When you see this screen, click Add Printer. 9 Follow the steps on the right side of the screen to add PictureMate. 10 Follow the on-screen instructions to install the rest of the software and register your...

User Guide
Page 41
Print icon 3 Click the Print icon at the top of the screen and select Printer Properties. 41 Printing with the Windows Vista Photo Gallery 1 Locate the photo you want to print on your printer is selected, then choose PictureMate Photo Paper as the Paper type setting. (4 × 6 in is automatically selected as the Paper size setting.) 5 Click Options in the lower right corner of the screen, then select Print from the drop-down menu that appears. Options 4 Make sure your computer. 2 Right-click the photo, highlight Open With, and select Windows Photo Gallery.
Print icon 3 Click the Print icon at the top of the screen and select Printer Properties. 41 Printing with the Windows Vista Photo Gallery 1 Locate the photo you want to print on your printer is selected, then choose PictureMate Photo Paper as the Paper type setting. (4 × 6 in is automatically selected as the Paper size setting.) 5 Click Options in the lower right corner of the screen, then select Print from the drop-down menu that appears. Options 4 Make sure your computer. 2 Right-click the photo, highlight Open With, and select Windows Photo Gallery.

User Guide
Page 42
...select Mid or Max. ● You can select People, Landscapes, or Night scene. You see the printer settings window: Sample photo 6 Choose from two color effects: Sepia (for an old-fashioned brown look...set the Expansion slider to print a photo without borders. If too much of photos that PictureMate can correct it appropriately. If you see a white edge on the sample photo (the changes...may be slower). ● Select Fix Red-Eye to print with a digital camera, select Digital Camera Correction to minimize common digital flaws. ● Select Enhance Fine Details to bring out the fine details...
...select Mid or Max. ● You can select People, Landscapes, or Night scene. You see the printer settings window: Sample photo 6 Choose from two color effects: Sepia (for an old-fashioned brown look...set the Expansion slider to print a photo without borders. If too much of photos that PictureMate can correct it appropriately. If you see a white edge on the sample photo (the changes...may be slower). ● Select Fix Red-Eye to print with a digital camera, select Digital Camera Correction to minimize common digital flaws. ● Select Enhance Fine Details to bring out the fine details...

User Guide
Page 43
... appears on your photo cartridge status. Cancel Print icon 3 Click the Print icon at the bottom of your print job. Tip: For more information about printer settings, click Help. 7 Click OK. 8 When you want to print on your computer screen...
... appears on your photo cartridge status. Cancel Print icon 3 Click the Print icon at the bottom of your print job. Tip: For more information about printer settings, click Help. 7 Click OK. 8 When you want to print on your computer screen...

User Guide
Page 45
...a color cast. Auto Correction improves the quality of your photo edges are automatically expanded. Select Borders to print with a digital camera, select Digital Camera Correction to minimize common digital flaws. ● Select Enhance Fine Details to see the effects on your photo, select Mid or Max. ● ...effects in your original). Effect lets you want to print a photo without borders. You can correct it appropriately. You see the printer settings screen: Sample image 7 Choose from two color effects: Sepia (for an old-fashioned look like before you choose the subject of...
...a color cast. Auto Correction improves the quality of your photo edges are automatically expanded. Select Borders to print with a digital camera, select Digital Camera Correction to minimize common digital flaws. ● Select Enhance Fine Details to see the effects on your photo, select Mid or Max. ● ...effects in your original). Effect lets you want to print a photo without borders. You can correct it appropriately. You see the printer settings screen: Sample image 7 Choose from two color effects: Sepia (for an old-fashioned look like before you choose the subject of...

User Guide
Page 46
Tip: For more information about printer settings, click Help. 8 Click OK. 9 At the Photo Printing Wizard screen, click Next. 10 When you see your print job. Full page photo print 46 Cancel During printing, this screen, select Full page photo print and click Next. You can cancel printing if necessary and see this window appears on your computer screen showing the progress of your photo cartridge status.
Tip: For more information about printer settings, click Help. 8 Click OK. 9 At the Photo Printing Wizard screen, click Next. 10 When you see your print job. Full page photo print 46 Cancel During printing, this screen, select Full page photo print and click Next. You can cancel printing if necessary and see this window appears on your computer screen showing the progress of your photo cartridge status.

User Guide
Page 47
Printing From a Macintosh See the section below : 3 Select EPSON PictureMate PM300 as the Printer setting. 4 Click d to expand the Print window, if necessary. 5 Open the Paper Size menu and place your cursor on the 4 × 6 in (Borders) to print ...
Printing From a Macintosh See the section below : 3 Select EPSON PictureMate PM300 as the Printer setting. 4 Click d to expand the Print window, if necessary. 5 Open the Paper Size menu and place your cursor on the 4 × 6 in (Borders) to print ...

User Guide
Page 49
... click Resume. ● To pause printing for all jobs, click Pause Printer. ● To check photo cartridge status, click Utility, then select EPSON Status Monitor. 12 When you want to print. 2 Open the File menu and select Page Setup. 3 Select your PictureMate model from the Format for menu. 4 Open the Paper Size menu...
... click Resume. ● To pause printing for all jobs, click Pause Printer. ● To check photo cartridge status, click Utility, then select EPSON Status Monitor. 12 When you want to print. 2 Open the File menu and select Page Setup. 3 Select your PictureMate model from the Format for menu. 4 Open the Paper Size menu...

User Guide
Page 50
For more information about printer settings, click ?. 9 Choose from the following settings: ● Select Enhance Fine Details to bring out the fine details of an image to the maximum print ...
For more information about printer settings, click ?. 9 Choose from the following settings: ● Select Enhance Fine Details to bring out the fine details of an image to the maximum print ...

User Guide
Page 56
... damage to the right) ● Replace the photo cartridge (see page 59. The Print Pack contains a new photo cartridge and photo paper. Note: Use your printer not covered by Epson's warranty. 56 Buying a Print Pack You can also buy a PictureMate Print Pack wherever PictureMate is sold or from an...
... damage to the right) ● Replace the photo cartridge (see page 59. The Print Pack contains a new photo cartridge and photo paper. Note: Use your printer not covered by Epson's warranty. 56 Buying a Print Pack You can also buy a PictureMate Print Pack wherever PictureMate is sold or from an...

User Guide
Page 60
.... 1 Press the P On button on top of the sun and don't leave it 's designed to carry short distances. Take PictureMate With You PictureMate's handle makes it easy to balance the printer's weight. Packing Your PictureMate If PictureMate is installed. Then lower the screen. 6 Place the remote control in or the optional carrying case. Caution: Keep...
.... 1 Press the P On button on top of the sun and don't leave it 's designed to carry short distances. Take PictureMate With You PictureMate's handle makes it easy to balance the printer's weight. Packing Your PictureMate If PictureMate is installed. Then lower the screen. 6 Place the remote control in or the optional carrying case. Caution: Keep...

