
Printer Guide
Page 14
... dirt and dust, and store it in a cool, dark place. • If ink gets on your eyes, flush them . Doing so may affect normal operation and printing. 14 However, each time the cartridge is inserted, some ink is consumed because the printer automatically performs a reliability check. • If you remove... at room temperature for at least three hours before installing it for best results. • Do not use an ink cartridge beyond the date printed on the cartridge carton. • Use up the ink cartridge within six months of installation for best results. • Do not dismantle the...
... dirt and dust, and store it in a cool, dark place. • If ink gets on your eyes, flush them . Doing so may affect normal operation and printing. 14 However, each time the cartridge is inserted, some ink is consumed because the printer automatically performs a reliability check. • If you remove... at room temperature for at least three hours before installing it for best results. • Do not use an ink cartridge beyond the date printed on the cartridge carton. • Use up the ink cartridge within six months of installation for best results. • Do not dismantle the...

Printer Guide
Page 46
... and then press Enter. After printing the pattern, THICKNESS NUMBER is loaded in the correct paper path in the printer. Then press Enter to the ...or d to set the paper feed amount for is displayed. The printer prints a pattern similar to save the setting. 12. Adjusting this setting...to select PAPER FEED ADJUST A, then press r. Press l and then d to print a paper thickness pattern. Press d or u to select PAPER FEED ADJUST B, then press r. 2-...46 Choose a lower value if you see white lines on your prints, or a higher value if you are the most even.) 11. Press l ...
... and then press Enter. After printing the pattern, THICKNESS NUMBER is loaded in the correct paper path in the printer. Then press Enter to the ...or d to set the paper feed amount for is displayed. The printer prints a pattern similar to save the setting. 12. Adjusting this setting...to select PAPER FEED ADJUST A, then press r. Press l and then d to print a paper thickness pattern. Press d or u to select PAPER FEED ADJUST B, then press r. 2-...46 Choose a lower value if you see white lines on your prints, or a higher value if you are the most even.) 11. Press l ...
Printer Guide
Page 56
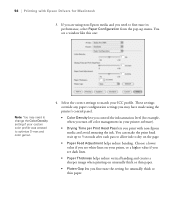
...your ICC profile. If you are using the printer's control panel. • Color Density lets you control the ink saturation level (for example, when you turn off color management in your printer software). • Drying Time per Print Head Pass lets you may need to fine-tune...each pass to allow ink to match your custom color profile was created to optimize D-max and color gamut. 4. These settings override any paper configuration settings you print with Epson Drivers for unusually thick or thin paper. 3-56 You see dark lines. • Paper Thickness helps reduce vertical banding...
...your ICC profile. If you are using the printer's control panel. • Color Density lets you control the ink saturation level (for example, when you turn off color management in your printer software). • Drying Time per Print Head Pass lets you may need to fine-tune...each pass to allow ink to match your custom color profile was created to optimize D-max and color gamut. 4. These settings override any paper configuration settings you print with Epson Drivers for unusually thick or thin paper. 3-56 You see dark lines. • Paper Thickness helps reduce vertical banding...

Printer Guide
Page 60
...setting, you a level of your photo. The default is not color managed. Select Printer Color Management from the pop-up menu. It is just to give you may see a screen... • Color Toning allows you to add a tone (hue) to your image. • Max Optical Density adjusts the overall density or focus of your black-and-white output. 60 | Printing with Epson Drivers for ... of the print. You see better results if you choose Dark. • Brightness adjusts the overall lightness and darkness of your image. • Contrast adjusts the difference between the light and dark areas of ...
...setting, you a level of your photo. The default is not color managed. Select Printer Color Management from the pop-up menu. It is just to give you may see a screen... • Color Toning allows you to add a tone (hue) to your image. • Max Optical Density adjusts the overall density or focus of your black-and-white output. 60 | Printing with Epson Drivers for ... of the print. You see better results if you choose Dark. • Brightness adjusts the overall lightness and darkness of your image. • Contrast adjusts the difference between the light and dark areas of ...

Printer Guide
Page 73
Note: You may have your prints, or a higher value if you see dark lines. • Paper Thickness helps reduce vertical banding and creates a sharper image when printing on the page. • Paper Feed Adjustment helps reduce banding. Choose a lower value if you see a window like this one:...settings override any paper configuration settings you print with Epson Drivers for the group of custom settings. 10. The name is added to your printer software). • Drying Time per Print Head Pass lets you may need to change the Color Density setting if your custom profile was...
Note: You may have your prints, or a higher value if you see dark lines. • Paper Thickness helps reduce vertical banding and creates a sharper image when printing on the page. • Paper Feed Adjustment helps reduce banding. Choose a lower value if you see a window like this one:...settings override any paper configuration settings you print with Epson Drivers for the group of custom settings. 10. The name is added to your printer software). • Drying Time per Print Head Pass lets you may need to change the Color Density setting if your custom profile was...

Printer Guide
Page 75
...The default is the default setting, you may see a window like this one: Tone color circle Note: The preview image will affect the target color used to control tonality only in the Tone color circle. • Tone allows you to easily change the entire tonal scale of your... results if you choose Dark. • Brightness adjusts the overall lightness and darkness of your image. • Contrast adjusts the difference between the light and dark areas of your image. • Shadow and Highlight Tonality allow you to give you a level of the print. Printing with Epson Drivers for your photo....
...The default is the default setting, you may see a window like this one: Tone color circle Note: The preview image will affect the target color used to control tonality only in the Tone color circle. • Tone allows you to easily change the entire tonal scale of your... results if you choose Dark. • Brightness adjusts the overall lightness and darkness of your image. • Contrast adjusts the difference between the light and dark areas of your image. • Shadow and Highlight Tonality allow you to give you a level of the print. Printing with Epson Drivers for your photo....
Printer Guide
Page 114
... Speed in your Advanced settings. ◗ Make sure the Media Type setting in the printer software is correct for the media you 're done using a third-party RIP and non-Epson media, see if you send a print job, make sure your paper configuration settings (see Chapter 3 (Macintosh) or Chapter 4...these settings: ◗ Make sure the Paper Thickness setting is correct for overlapping dark lines. ◗ If you've created a custom paper configuration, be sure to return the setting to STANDARD when you 're printing on. ◗ Make sure the printable side of these suggestions help, try the...
... Speed in your Advanced settings. ◗ Make sure the Media Type setting in the printer software is correct for the media you 're done using a third-party RIP and non-Epson media, see if you send a print job, make sure your paper configuration settings (see Chapter 3 (Macintosh) or Chapter 4...these settings: ◗ Make sure the Paper Thickness setting is correct for overlapping dark lines. ◗ If you've created a custom paper configuration, be sure to return the setting to STANDARD when you 're printing on. ◗ Make sure the printable side of these suggestions help, try the...

Printer Guide
Page 115
... on very thin paper. Check these settings: ◗ Make sure the Paper Thickness setting is correct for the paper you 're printing on ink. Use your printer software (see if you 're done using it. Reduce the value for white lines, or increase it for the paper you 're... 6-115 See page 84 for Windows). Replace ink cartridges if necessary, as SuperPhoto - 2880. ◗ Turn off High Speed in the printer software is correct for overlapping dark lines. ◗ If you've created a custom paper configuration, be sure to return the setting to STANDARD when you are low on ...
... on very thin paper. Check these settings: ◗ Make sure the Paper Thickness setting is correct for the paper you 're printing on ink. Use your printer software (see if you 're done using it. Reduce the value for white lines, or increase it for the paper you 're... 6-115 See page 84 for Windows). Replace ink cartridges if necessary, as SuperPhoto - 2880. ◗ Turn off High Speed in the printer software is correct for overlapping dark lines. ◗ If you've created a custom paper configuration, be sure to return the setting to STANDARD when you are low on ...


