User Guide
Page 2
... the programs prove defective following their respective holders. Edimax Technology Co., Ltd. Edimax Technology Co., Ltd. Copyright @ Edimax Technology Co., Ltd. all necessary servicing, repair, and any language or computer language, in this manual are subject to make changes from any defect in... LGPL Code licenses. The GPL Code and LGPL Code used in Edimax products are distributed without any means, electronic, mechanical, magnetic, optical, chemical, manual or otherwise, without the prior written permission from Edimax Technology Co., Ltd. For details, see the GNU (www.gnu...
... the programs prove defective following their respective holders. Edimax Technology Co., Ltd. Edimax Technology Co., Ltd. Copyright @ Edimax Technology Co., Ltd. all necessary servicing, repair, and any language or computer language, in this manual are subject to make changes from any defect in... LGPL Code licenses. The GPL Code and LGPL Code used in Edimax products are distributed without any means, electronic, mechanical, magnetic, optical, chemical, manual or otherwise, without the prior written permission from Edimax Technology Co., Ltd. For details, see the GNU (www.gnu...
User Guide
Page 20
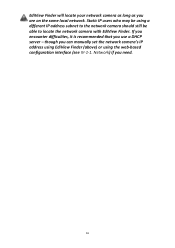
Network) if you can manually set the network camera's IP address using EdiView Finder (above) or using a different IP address subnet to the network camera should still be able to locate the network camera with EdiView Finder. Static IP users who may be using the web-based configuration interface (see IV-1-1. though you need. 16 EdiView Finder will locate your network camera as long as you use a DHCP server - If you encounter difficulties, it is recommended that you are on the same local network.
Network) if you can manually set the network camera's IP address using EdiView Finder (above) or using a different IP address subnet to the network camera should still be able to locate the network camera with EdiView Finder. Static IP users who may be using the web-based configuration interface (see IV-1-1. though you need. 16 EdiView Finder will locate your network camera as long as you use a DHCP server - If you encounter difficulties, it is recommended that you are on the same local network.
User Guide
Page 28
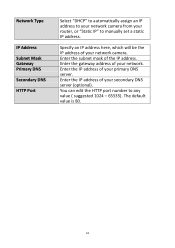
... the gateway address of your secondary DNS server (optional). Enter the IP address of your network camera. You can edit the HTTP port number to manually set a static IP address. Enter the IP address of your network. Enter the subnet mask of your primary DNS server. The default value is 80...
... the gateway address of your secondary DNS server (optional). Enter the IP address of your network camera. You can edit the HTTP port number to manually set a static IP address. Enter the IP address of your network. Enter the subnet mask of your primary DNS server. The default value is 80...
User Guide
Page 29
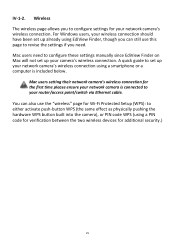
... as physically pushing the hardware WPS button built into the camera), or PIN code WPS (using a smartphone or a computer is connected to configure these settings manually since EdiView Finder on Mac will not set up your network camera's wireless connection using a PIN code for verification between the two wireless devices for...
... as physically pushing the hardware WPS button built into the camera), or PIN code WPS (using a smartphone or a computer is connected to configure these settings manually since EdiView Finder on Mac will not set up your network camera's wireless connection using a PIN code for verification between the two wireless devices for...
User Guide
Page 37
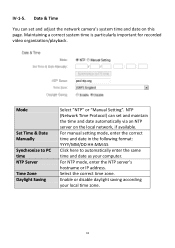
...time is particularly important for recorded video organization/playback. Mode Set Time & Date Manually Synchronize to automatically enter the same time and date as your local time zone.... set and maintain the time and date automatically via an NTP server on this page. IV-1-5. For manual setting mode, enter the correct time and date in the following format: YYYY/MM/DD HH:MM:...SS Click here to PC time NTP Server Time Zone Daylight Saving Select "NTP" or "Manual Setting". Enable or disable daylight saving according your computer. For NTP mode, enter the NTP server's hostname ...
...time is particularly important for recorded video organization/playback. Mode Set Time & Date Manually Synchronize to automatically enter the same time and date as your local time zone.... set and maintain the time and date automatically via an NTP server on this page. IV-1-5. For manual setting mode, enter the correct time and date in the following format: YYYY/MM/DD HH:MM:...SS Click here to PC time NTP Server Time Zone Daylight Saving Select "NTP" or "Manual Setting". Enable or disable daylight saving according your computer. For NTP mode, enter the NTP server's hostname ...
User Guide
Page 52
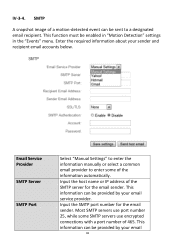
... a motion-detected event can be enabled in "Motion Detection" settings in the "Events" menu. Email Service Provider SMTP Server SMTP Port Select "Manual Settings" to enter the information manually or select a common email provider to a designated email recipient. This function must be provided by your email 48 Most SMTP servers use encrypted...
... a motion-detected event can be enabled in "Motion Detection" settings in the "Events" menu. Email Service Provider SMTP Server SMTP Port Select "Manual Settings" to enter the information manually or select a common email provider to a designated email recipient. This function must be provided by your email 48 Most SMTP servers use encrypted...

User Guide
Page 56
... the 1 - 4 shortcut icons in the "Preview" window as the selected preset point. Delete the settings for the selected preset. This function allows you to avoid manually adjusting the camera's viewing position each time and instead provides a convenient shortcut to the viewing positions which can save the current position shown in "Live...
... the 1 - 4 shortcut icons in the "Preview" window as the selected preset point. Delete the settings for the selected preset. This function allows you to avoid manually adjusting the camera's viewing position each time and instead provides a convenient shortcut to the viewing positions which can save the current position shown in "Live...

User Guide
Page 99
Recording You can start video recording a selected camera's image by clicking the 'Start Recording' button: When recording starts, you 'll see a message displayed in the message display box such as '1/1 10:00:00, Camera 2 Start Manual', which means camera 2 started recording manually on 1/1 at 10:00:00. VI-9. To stop recording, click the 'Start Recording' button again, and you 'll see a message displayed in the message display box, such as '1/1 10:00:00, Camera 2 Stop Manual'. 95
Recording You can start video recording a selected camera's image by clicking the 'Start Recording' button: When recording starts, you 'll see a message displayed in the message display box such as '1/1 10:00:00, Camera 2 Start Manual', which means camera 2 started recording manually on 1/1 at 10:00:00. VI-9. To stop recording, click the 'Start Recording' button again, and you 'll see a message displayed in the message display box, such as '1/1 10:00:00, Camera 2 Stop Manual'. 95