Owners Manual
Page 1
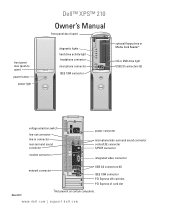
... front panel door (push to open) power button power light Dell™ XPS™ 210 Owner's Manual front panel door (open) diagnostic lights hard drive activity light headphone connector microphone connector IEEE 1394 connector optional floppy drive or Media Card Reader* CD or DVD drive light USB 2.0 connectors (2) voltage selection switch line-out connector line-in connector...
... front panel door (push to open) power button power light Dell™ XPS™ 210 Owner's Manual front panel door (open) diagnostic lights hard drive activity light headphone connector microphone connector IEEE 1394 connector optional floppy drive or Media Card Reader* CD or DVD drive light USB 2.0 connectors (2) voltage selection switch line-out connector line-in connector...
Owners Manual
Page 4
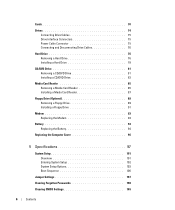
... feature in the Operating system 31 Hyper-Threading and Dual-Core Technology 31 2 Solving Problems 33 Troubleshooting Tips 33 Battery Problems 33 Drive Problems 34 CD and DVD drive problems 34 Hard drive problems 35 E-Mail, Modem, and Internet Problems 35 Error Messages 37 Media Card Reader Problems 38 IEEE 1394 Device Problems 38...
... feature in the Operating system 31 Hyper-Threading and Dual-Core Technology 31 2 Solving Problems 33 Troubleshooting Tips 33 Battery Problems 33 Drive Problems 34 CD and DVD drive problems 34 Hard drive problems 35 E-Mail, Modem, and Internet Problems 35 Error Messages 37 Media Card Reader Problems 38 IEEE 1394 Device Problems 38...
Owners Manual
Page 6
... Connector 75 Connecting and Disconnecting Drive Cables 76 Hard Drive 76 Removing a Hard Drive 76 Installing a Hard Drive 78 CD/DVD Drive 81 Removing a CD/DVD Drive 81 Installing a CD/DVD Drive 83 Media Card Reader 85 Removing a Media Card Reader 85 Installing a Media Card Reader 87 Floppy Drive (Optional 89 Removing a Floppy Drive 89 Installing a Floppy Drive 91 Modem 93 Replacing the...
... Connector 75 Connecting and Disconnecting Drive Cables 76 Hard Drive 76 Removing a Hard Drive 76 Installing a Hard Drive 78 CD/DVD Drive 81 Removing a CD/DVD Drive 81 Installing a CD/DVD Drive 83 Media Card Reader 85 Removing a Media Card Reader 85 Installing a Media Card Reader 87 Floppy Drive (Optional 89 Removing a Floppy Drive 89 Installing a Floppy Drive 91 Modem 93 Replacing the...
Owners Manual
Page 11
...DSS is necessary for correct search for components, such as the memory, hard drive, and operating system • Customer Care - Finding Information 11 support.dell.com NOTE: Select your operating system and language, and then drives, and USB devices. Service call and order status, and warranty and ...call status, support history, service contract, and online discussions with other Dell customers • Upgrades - NOTE: The support.dell.com user interface may vary depending on your selections. • How to use Windows XP • How to work with programs and files • How ...
...DSS is necessary for correct search for components, such as the memory, hard drive, and operating system • Customer Care - Finding Information 11 support.dell.com NOTE: Select your operating system and language, and then drives, and USB devices. Service call and order status, and warranty and ...call status, support history, service contract, and online discussions with other Dell customers • Upgrades - NOTE: The support.dell.com user interface may vary depending on your selections. • How to use Windows XP • How to work with programs and files • How ...
Owners Manual
Page 14
...shutdown. Use the pink microphone connector to attach a personal computer microphone for devices that you use the power button to the hard drive. The power light illuminates and blinks or remains solid to attach headphones and most kinds of speakers. The computer is recommended that... you use the back USB connectors for devices that typically remain connected, such as external hard drives and other storage devices. On computers with a sound card, the microphone connector is recommended that you connect occasionally, such as printers...
...shutdown. Use the pink microphone connector to attach a personal computer microphone for devices that you use the power button to the hard drive. The power light illuminates and blinks or remains solid to attach headphones and most kinds of speakers. The computer is recommended that... you use the back USB connectors for devices that typically remain connected, such as external hard drives and other storage devices. On computers with a sound card, the microphone connector is recommended that you connect occasionally, such as printers...

Owners Manual
Page 26
...(including high-speed CD-RW media) while DVD-writable drives can be able to write to a temporary folder on the CD later. Use blank CD-RWs if you have inserted your computer hard drive. When prompted, insert a blank CD or DVD into the drive and click OK. • If you have two ...CD/DVD drives, select the drive into which you have created automatically ejects. The computer copies the data from the...
...(including high-speed CD-RW media) while DVD-writable drives can be able to write to a temporary folder on the CD later. Use blank CD-RWs if you have inserted your computer hard drive. When prompted, insert a blank CD or DVD into the drive and click OK. • If you have two ...CD/DVD drives, select the drive into which you have created automatically ejects. The computer copies the data from the...
Owners Manual
Page 28
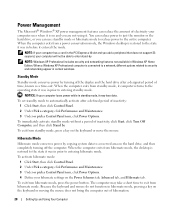
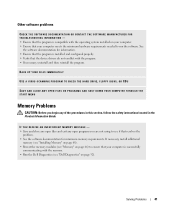
... display and the hard drive after a defined period of inactivity: 1 Click Start, then click Control Panel. 2 Under Pick a category, click Performance and Maintenance. 3 Under or pick a Control Panel icon, click Power Options. Hibernate Mode Hibernate mode conserves power by NOTE: Windows XP Professional includes security...click Power Options. 4 Define your computer loses power while in certain windows. You can reduce power to just the monitor or the hard drive, or you are not using it entered the mode. When the computer exits from hibernate mode. The computer may lose data. Power...
... display and the hard drive after a defined period of inactivity: 1 Click Start, then click Control Panel. 2 Under Pick a category, click Performance and Maintenance. 3 Under or pick a Control Panel icon, click Power Options. Hibernate Mode Hibernate mode conserves power by NOTE: Windows XP Professional includes security...click Power Options. 4 Define your computer loses power while in certain windows. You can reduce power to just the monitor or the hard drive, or you are not using it entered the mode. When the computer exits from hibernate mode. The computer may lose data. Power...
Owners Manual
Page 29
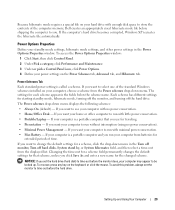
...is a portable computer that scheme, unless you click Save As and enter a new name for extended periods of the computer memory, Dell creates an appropriately sized hibernate mode file before shipping the computer to you want to use for a scheme, click the drop-down...is a portable computer and you use your computer with no power conservation). • Minimal Power Management - If the computer's hard drive becomes corrupted, Windows XP recreates the hibernate file automatically. Changing the time-out for a scheme field permanently changes the default settings for that you run ...
...is a portable computer that scheme, unless you click Save As and enter a new name for extended periods of the computer memory, Dell creates an appropriately sized hibernate mode file before shipping the computer to you want to use for a scheme, click the drop-down...is a portable computer and you use your computer with no power conservation). • Minimal Power Management - If the computer's hard drive becomes corrupted, Windows XP recreates the hibernate file automatically. Changing the time-out for a scheme field permanently changes the default settings for that you run ...
Owners Manual
Page 30
... When running in the Windows taskbar for quick access. • Set the computer to prompt you for systems that the hard drive indicator may blink when the hard drive is an option for your Windows password before the computer exits from the corresponding drop-down menu and click OK. In this...hibernate settings you want to mute. Hibernate Tab The Hibernate tab allows you may notice that are ordered with Microsoft® Windows® XP Media Center Edition 2005 and dual core processors. To resume normal computer operation, briefly press the power button, press any key on the ...
... When running in the Windows taskbar for quick access. • Set the computer to prompt you for systems that the hard drive indicator may blink when the hard drive is an option for your Windows password before the computer exits from the corresponding drop-down menu and click OK. In this...hibernate settings you want to mute. Hibernate Tab The Hibernate tab allows you may notice that are ordered with Microsoft® Windows® XP Media Center Edition 2005 and dual core processors. To resume normal computer operation, briefly press the power button, press any key on the ...

Owners Manual
Page 35
... D B Y M O D E I N W I N D O W S B E F O R E W R I T I S C - Solving Problems 35 The CD/DVD-RW drive must receive a steady stream of the procedures in this section, follow the safety instructions located in Windows Help and Support Center for information on page... Click Do not allow attachments to a CD/DVD-RW drive C L O S E O T H E R P R O G R A M S - The modem does not operate while it is interrupted, an error occurs. C H E C K T H E M I C R O S O F T O U T L O O K ® E X P R E S S S E C U R I T Y S E T T I N G S - Hard drive problems RUN CHECK DISK - 1 Click Start, then click...
... D B Y M O D E I N W I N D O W S B E F O R E W R I T I S C - Solving Problems 35 The CD/DVD-RW drive must receive a steady stream of the procedures in this section, follow the safety instructions located in Windows Help and Support Center for information on page... Click Do not allow attachments to a CD/DVD-RW drive C L O S E O T H E R P R O G R A M S - The modem does not operate while it is interrupted, an error occurs. C H E C K T H E M I C R O S O F T O U T L O O K ® E X P R E S S S E C U R I T Y S E T T I N G S - Hard drive problems RUN CHECK DISK - 1 Click Start, then click...
Owners Manual
Page 41
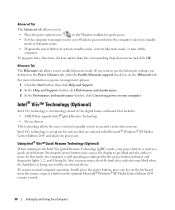
... that your computer meets the minimum hardware requirements needed to ensure that your computer is successfully communicating with the memory. • Run the Dell Diagnostics (see if that resolves the problem. • See the software documentation for information. • Ensure that the program is installed ...Problems 41 See the software documentation for minimum memory requirements. BACK UP YOUR FILES IMMEDIATELY USE A VIRUS-SCANNING PROGRAM TO CHECK THE HARD DRIVE, FLOPPY DISKS, OR CDS SAVE AND CLOSE ANY OPEN FILES OR PROGRAMS AND SHUT DOWN YOUR COMPUTER THROUGH THE START MENU Memory...
... that your computer meets the minimum hardware requirements needed to ensure that your computer is successfully communicating with the memory. • Run the Dell Diagnostics (see if that resolves the problem. • See the software documentation for information. • Ensure that the program is installed ...Problems 41 See the software documentation for minimum memory requirements. BACK UP YOUR FILES IMMEDIATELY USE A VIRUS-SCANNING PROGRAM TO CHECK THE HARD DRIVE, FLOPPY DISKS, OR CDS SAVE AND CLOSE ANY OPEN FILES OR PROGRAMS AND SHUT DOWN YOUR COMPUTER THROUGH THE START MENU Memory...

Owners Manual
Page 50
... of the same type into your computer (see "Memory" on page 66). • If the problem persists, contact Dell (see "Contacting Dell" on page 112). 50 Troubleshooting Tools Light Pattern Problem Description A possible graphics card failure has occurred. Reinstall all USB ... continue to install additional memory modules (one module (see "Contacting Dell" on page 68) and restart the computer. Reseat all cable connections. A possible USB failure has occurred. A possible floppy drive or hard drive failure has occurred. Memory modules are detected, but a memory configuration...
... of the same type into your computer (see "Memory" on page 66). • If the problem persists, contact Dell (see "Contacting Dell" on page 112). 50 Troubleshooting Tools Light Pattern Problem Description A possible graphics card failure has occurred. Reinstall all USB ... continue to install additional memory modules (one module (see "Contacting Dell" on page 68) and restart the computer. Reseat all cable connections. A possible USB failure has occurred. A possible floppy drive or hard drive failure has occurred. Memory modules are detected, but a memory configuration...

Owners Manual
Page 51
... boot sequence is correct for the devices installed on your computer. • If the problem persists, contact Dell (see "Contacting Dell" on page 70). 2 If the problem persists, reinstall the card that all hard drive and CD/DVD drive cables are properly connected to the system board (see "System Board Components" on page 65). •...
... boot sequence is correct for the devices installed on your computer. • If the problem persists, contact Dell (see "Contacting Dell" on page 70). 2 If the problem persists, reinstall the card that all hard drive and CD/DVD drive cables are properly connected to the system board (see "System Board Components" on page 65). •...
Owners Manual
Page 55
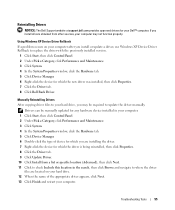
... click Properties. 7 Click the Driver tab. 8 Click Roll Back Driver. Using Windows XP Device Driver Rollback If a problem occurs on your hard drive. 12 When the name of the appropriate driver appears, click Next. 13 Click Finish and restart your Dell™ computer. Drivers can be required to replace the driver with the previously...
... click Properties. 7 Click the Driver tab. 8 Click Roll Back Driver. Using Windows XP Device Driver Rollback If a problem occurs on your hard drive. 12 When the name of the appropriate driver appears, click Next. 13 Click Finish and restart your Dell™ computer. Drivers can be required to replace the driver with the previously...
Owners Manual
Page 56
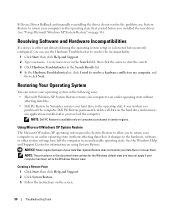
...can restore your operating system in when you to return your computer to an earlier operating state (without affecting data files. • Dell PC Restore by Symantec restores your computer has been set to the hardware, software, or other system settings have left the computer in ... and Hardware Incompatibilities If a device is either not detected during the operating system setup or is available only on the hard drive and removes any applications installed after you installed the new driver (see "Using Microsoft Windows XP System Restore" on the screen. 56 Troubleshooting Tools
...can restore your operating system in when you to return your computer to an earlier operating state (without affecting data files. • Dell PC Restore by Symantec restores your computer has been set to the hardware, software, or other system settings have left the computer in ... and Hardware Incompatibilities If a device is either not detected during the operating system setup or is available only on the hard drive and removes any applications installed after you installed the new driver (see "Using Microsoft Windows XP System Restore" on the screen. 56 Troubleshooting Tools

Owners Manual
Page 58
...NOTE: If you wish to the operating state it was turned on the computer. Enabling System Restore If you reinstall Windows XP with www.dell.com appears at the top of free hard-disk space available, System Restore is available only on computers purchased in when you purchased the computer. Use...restoring your computer and try again. 3 On the next screen that appear, such as the End User License Agreement, are permanently deleted from the hard drive. If possible, back up the data before using PC Restore. If you see the Microsoft® Windows® desktop, then shut down the ...
...NOTE: If you wish to the operating state it was turned on the computer. Enabling System Restore If you reinstall Windows XP with www.dell.com appears at the top of free hard-disk space available, System Restore is available only on computers purchased in when you purchased the computer. Use...restoring your computer and try again. 3 On the next screen that appear, such as the End User License Agreement, are permanently deleted from the hard drive. If possible, back up the data before using PC Restore. If you see the Microsoft® Windows® desktop, then shut down the ...

Owners Manual
Page 59
... your computer's operating system to its original state. 1 Log on the hard drive. 6 Right-click Local Disk (C) in when you do not remove PC Restore from your computer, even to c:\dell\utilities\DSR. 3 Double-click the filename DSRIRRemv2.exe. Troubleshooting Tools 59 ...a local administrator. 2 In Windows Explorer, go to gain additional hard-drive space. 7 Click Next. Removing Dell PC Restore NOTICE: Removing Dell PC Restore from the hard drive permanently deletes the PC Restore utility from the hard drive, you can never recall it to remove the PC Restore partition on...
... your computer's operating system to its original state. 1 Log on the hard drive. 6 Right-click Local Disk (C) in when you do not remove PC Restore from your computer, even to c:\dell\utilities\DSR. 3 Double-click the filename DSRIRRemv2.exe. Troubleshooting Tools 59 ...a local administrator. 2 In Windows Explorer, go to gain additional hard-drive space. 7 Click Next. Removing Dell PC Restore NOTICE: Removing Dell PC Restore from the hard drive permanently deletes the PC Restore utility from the hard drive, you can never recall it to remove the PC Restore partition on...

Owners Manual
Page 64
CAUTION: To guard against electrical shock, always unplug your computer from the electrical outlet before opening the cover. 2 1 3 4 7 6 5 1 drive release latch 4 hard drive 7 front-panel door 2 CD/DVD drive 5 heat sink assembly 3 power supply and fan 6 power button 64 Removing and Installing Parts Inside View of Your Computer CAUTION: Before you begin any of the procedures in this section, follow the safety instructions located in the Product Information Guide.
CAUTION: To guard against electrical shock, always unplug your computer from the electrical outlet before opening the cover. 2 1 3 4 7 6 5 1 drive release latch 4 hard drive 7 front-panel door 2 CD/DVD drive 5 heat sink assembly 3 power supply and fan 6 power button 64 Removing and Installing Parts Inside View of Your Computer CAUTION: Before you begin any of the procedures in this section, follow the safety instructions located in the Product Information Guide.

Owners Manual
Page 74
... the computer and devices to the connector labeled "SATA0 (blue connector)" on . 6 Uninstall the card's driver. A serial ATA hard drive should be connected to electrical outlets, and then turn them on the system board. 74 Removing and Installing Parts...these devices: • One SATA (serial ATA) drive • One FlexBay drive (optional floppy drive or Media Card Reader) • One CD or DVD drive 2 3 1 1 FlexBay for optional floppy drive or Media Card Reader (under CD/DVD drive) 2 CD/DVD drive 3 hard drive Connect a SATA optical drive to the connector labeled "SATA1" on page 61....
... the computer and devices to the connector labeled "SATA0 (blue connector)" on . 6 Uninstall the card's driver. A serial ATA hard drive should be connected to electrical outlets, and then turn them on the system board. 74 Removing and Installing Parts...these devices: • One SATA (serial ATA) drive • One FlexBay drive (optional floppy drive or Media Card Reader) • One CD or DVD drive 2 3 1 1 FlexBay for optional floppy drive or Media Card Reader (under CD/DVD drive) 2 CD/DVD drive 3 hard drive Connect a SATA optical drive to the connector labeled "SATA1" on page 61....

Owners Manual
Page 76
... this section, follow the safety instructions located in hole on a surface, such as a foam pad, that it . Hard Drive CAUTION: Before you are keyed for your computer. Removing a Hard Drive 1 Follow the procedures in "Before You Begin" on page 61. 2 Press in on the blue tabs on each end...the black connector at each side of the drive and slide the drive up your files before removing the cover. that contains data you begin any of the procedures in this procedure. The serial ATA interface connectors are replacing a hard drive that is configured for correct insertion; NOTICE:...
... this section, follow the safety instructions located in hole on a surface, such as a foam pad, that it . Hard Drive CAUTION: Before you are keyed for your computer. Removing a Hard Drive 1 Follow the procedures in "Before You Begin" on page 61. 2 Press in on the blue tabs on each end...the black connector at each side of the drive and slide the drive up your files before removing the cover. that contains data you begin any of the procedures in this procedure. The serial ATA interface connectors are replacing a hard drive that is configured for correct insertion; NOTICE:...


