Setup and Features Information Tech Sheet
Page 3
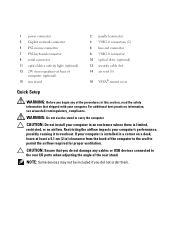
... stereo speakers-at least a 5.1 cm (2 in) clearance from the back of the computer to the wall to overheat. For additional best practices information, see www.dell.com/regulatory_compliance. CAUTION: Ensure that shipped with your computer's performance, possibly causing it to permit the airflow...(2) 6 line-out connector 8 USB 2.0 connector 10 optical drive (optional) 12 security cable slot 14 air vent (3) 16 VESA® mount cover Quick Setup WARNING: Before you begin any cables or USB devices connected to carry the computer. Restricting the airflow impacts your computer. WARNING:...
... stereo speakers-at least a 5.1 cm (2 in) clearance from the back of the computer to the wall to overheat. For additional best practices information, see www.dell.com/regulatory_compliance. CAUTION: Ensure that shipped with your computer's performance, possibly causing it to permit the airflow...(2) 6 line-out connector 8 USB 2.0 connector 10 optical drive (optional) 12 security cable slot 14 air vent (3) 16 VESA® mount cover Quick Setup WARNING: Before you begin any cables or USB devices connected to carry the computer. Restricting the airflow impacts your computer. WARNING:...
Setup and Features Information Tech Sheet
Page 4
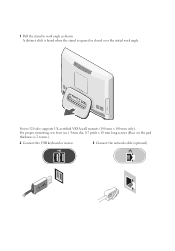
For proper mounting, use four (ea.) 4 mm dia, 0.7 pitch x 10 mm long screws (Base on the pad thickness is opened or closed over the initial work angle as shown. A distinct click is heard when the stand is 2.6 mm.). 2 Connect the USB keyboard or mouse. 3 Connect the network cable (optional). Vostro 320 also supports UL-certified VESA wall mounts (100 mm x 100 mm only). 1 Pull the stand to work angle.
For proper mounting, use four (ea.) 4 mm dia, 0.7 pitch x 10 mm long screws (Base on the pad thickness is opened or closed over the initial work angle as shown. A distinct click is heard when the stand is 2.6 mm.). 2 Connect the USB keyboard or mouse. 3 Connect the network cable (optional). Vostro 320 also supports UL-certified VESA wall mounts (100 mm x 100 mm only). 1 Pull the stand to work angle.


