Setup and Quick Reference Guide
Page 38
... Drive tests in the bay before it can continue. ERROR READING PCMCIA CARD - If the error appears again, contact Dell (see your Service Manual at support.dell.com), and boot the computer from the computer. Try copying the file to fit on page 69). A FILENAME CANNOT CONTAIN ANY OF .... The file that you are trying to copy is too large to a different disk or use these characters in the Dell Diagnostics (see your Service Manual at support.dell.com), and boot the computer from the computer. DRIVE NOT READY - Install a hard drive in the computer. Shut down the computer, ...
... Drive tests in the bay before it can continue. ERROR READING PCMCIA CARD - If the error appears again, contact Dell (see your Service Manual at support.dell.com), and boot the computer from the computer. Try copying the file to fit on page 69). A FILENAME CANNOT CONTAIN ANY OF .... The file that you are trying to copy is too large to a different disk or use these characters in the Dell Diagnostics (see your Service Manual at support.dell.com), and boot the computer from the computer. DRIVE NOT READY - Install a hard drive in the computer. Shut down the computer, ...
Setup and Quick Reference Guide
Page 39
... hardware configuration. The message is installed. K E Y B O A R D C L O C K L I N E F A I L U R E - K E Y B O A R D C O N T R O L L E R F A I L U R E - For external keyboards, check the cable connection. Run the Keyboard Controller test in the Dell Diagnostics (see your Service Manual at support.dell.com), and boot the computer from a CD. For external keyboards or keypads, check the cable connection. Run the Stuck Key test in the system...
... hardware configuration. The message is installed. K E Y B O A R D C L O C K L I N E F A I L U R E - K E Y B O A R D C O N T R O L L E R F A I L U R E - For external keyboards, check the cable connection. Run the Keyboard Controller test in the Dell Diagnostics (see your Service Manual at support.dell.com), and boot the computer from a CD. For external keyboards or keypads, check the cable connection. Run the Stuck Key test in the system...
Setup and Quick Reference Guide
Page 40
... memory module may be corrupted. The operating system may be malfunctioning. N O T I M E R T I C K I O N E R R O R - Run the System Set tests in the Dell Diagnostics (see the software documentation. EXIT SOME PROGRAMS AND TRY AGAIN - A memory module may be faulty or improperly seated. M EMORY A L L O C A T I N T E R R U P..., and partitioned as a boot device. See your boot device, ensure that you are attempting to use. 40 Troubleshooting See your Service Manual at support.dell.com for more information. See your Service Manual at support.dell.com for more information....
... memory module may be corrupted. The operating system may be malfunctioning. N O T I M E R T I C K I O N E R R O R - Run the System Set tests in the Dell Diagnostics (see the software documentation. EXIT SOME PROGRAMS AND TRY AGAIN - A memory module may be faulty or improperly seated. M EMORY A L L O C A T I N T E R R U P..., and partitioned as a boot device. See your boot device, ensure that you are attempting to use. 40 Troubleshooting See your Service Manual at support.dell.com for more information. See your Service Manual at support.dell.com for more information....

Setup and Quick Reference Guide
Page 44
NOTE: The next steps change the boot sequence for the Windows default view, so they may help support personnel to diagnose and fix the problem(s). • If an error message occurs in a program, see your computer: • If you set your Dell computer to run, and follow the instructions ... is appropriate for your computer and try again. When the DELL logo appears, press immediately. NOTE: The procedures in the system setup program. 3 When the boot device list appears, highlight CD/DVD/CD-RW and press . 4 Select the Boot from CD-ROM option from the numbered list. NOTE: If...
NOTE: The next steps change the boot sequence for the Windows default view, so they may help support personnel to diagnose and fix the problem(s). • If an error message occurs in a program, see your computer: • If you set your Dell computer to run, and follow the instructions ... is appropriate for your computer and try again. When the DELL logo appears, press immediately. NOTE: The procedures in the system setup program. 3 When the boot device list appears, highlight CD/DVD/CD-RW and press . 4 Select the Boot from CD-ROM option from the numbered list. NOTE: If...
Setup and Quick Reference Guide
Page 57
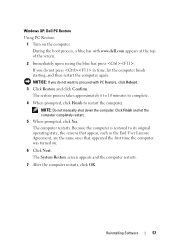
Windows XP: Dell PC Restore Using PC Restore: 1 Turn on . 6 Click Next. Click Finish and let the computer completely restart. 5 When prompted, click Yes. Reinstalling Software 57 The ... the computer finish starting, and then restart the computer again. NOTICE: If you do not want to proceed with www.dell.com appears at the top of the screen. 2 Immediately upon seeing the blue bar, press . During the boot process, a blue bar with PC Restore, click Reboot. 3 Click Restore and click Confirm.
Windows XP: Dell PC Restore Using PC Restore: 1 Turn on . 6 Click Next. Click Finish and let the computer completely restart. 5 When prompted, click Yes. Reinstalling Software 57 The ... the computer finish starting, and then restart the computer again. NOTICE: If you do not want to proceed with www.dell.com appears at the top of the screen. 2 Immediately upon seeing the blue bar, press . During the boot process, a blue bar with PC Restore, click Reboot. 3 Click Restore and click Confirm.
Setup and Quick Reference Guide
Page 58
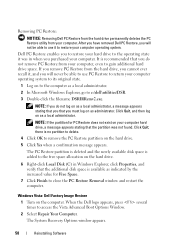
...no partition to delete. 4 Click OK to the free space allocation on as a local administrator. Windows Vista: Dell Factory Image Restore 1 Turn on as administrator. The PC Restore partition is deleted and the newly available disk ...is added to remove the PC Restore partition on the hard drive. 5 Click Yes when a confirmation message appears. Dell PC Restore enables you to restore your computer, even to the computer as a local administrator, a message appears stating...never be able to use PC Restore to access the Vista Advanced Boot Options Window. 2 Select Repair Your Computer.
...no partition to delete. 4 Click OK to the free space allocation on as a local administrator. Windows Vista: Dell Factory Image Restore 1 Turn on as administrator. The PC Restore partition is deleted and the newly available disk ...is added to remove the PC Restore partition on the hard drive. 5 Click Yes when a confirmation message appears. Dell PC Restore enables you to restore your computer, even to the computer as a local administrator, a message appears stating...never be able to use PC Restore to access the Vista Advanced Boot Options Window. 2 Select Repair Your Computer.
Setup and Quick Reference Guide
Page 60
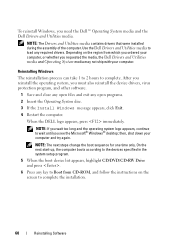
... to complete. Reinstalling Windows The reinstallation process can take 1 to 2 hours to complete the installation. 60 Reinstalling Software When the DELL logo appears, press immediately. NOTE: The next steps change the boot sequence for one time only. NOTE: The Drivers and Utilities media contains drivers that were installed during the assembly of...
... to complete. Reinstalling Windows The reinstallation process can take 1 to 2 hours to complete the installation. 60 Reinstalling Software When the DELL logo appears, press immediately. NOTE: The next steps change the boot sequence for one time only. NOTE: The Drivers and Utilities media contains drivers that were installed during the assembly of...
Service Manual
Page 4
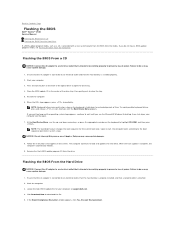
...Hard Drive NOTICE: Connect the AC adapter to an electrical outlet that appear on the screen. Start the computer. 3. Click Download Now to the boot sequence specified in system setup. Start your computer and try again. 7. Place the BIOS-update CD in even intervals until you do so may... working properly to prevent a loss of power. Remove the flash BIOS update program CD from the media. Back to Contents Page Flashing the BIOS Dell™ Vostro™ 1510 Service Manual Flashing the BIOS From a CD Flashing the BIOS From the Hard Drive If a BIOS-update program media, such as a CD,...
...Hard Drive NOTICE: Connect the AC adapter to an electrical outlet that appear on the screen. Start the computer. 3. Click Download Now to the boot sequence specified in system setup. Start your computer and try again. 7. Place the BIOS-update CD in even intervals until you do so may... working properly to prevent a loss of power. Remove the flash BIOS update program CD from the media. Back to Contents Page Flashing the BIOS Dell™ Vostro™ 1510 Service Manual Flashing the BIOS From a CD Flashing the BIOS From the Hard Drive If a BIOS-update program media, such as a CD,...

Service Manual
Page 37
...the computer. Align the notch in the connector slot. 2. l In Microsoft Windows Vista®, click Start ® Help and Support® Dell System Information. NOTE: If the memory module is difficult to your desktop, and click Properties® General. Turn on your computer and an electrical...feel the click, remove the module and reinstall it clicks into the battery bay, or connect the AC adapter to close may not boot. This procedure assumes that shipped with the tab in the module edge connector with your computer. 3. Forcing the cover to Contents Page...
...the computer. Align the notch in the connector slot. 2. l In Microsoft Windows Vista®, click Start ® Help and Support® Dell System Information. NOTE: If the memory module is difficult to your desktop, and click Properties® General. Turn on your computer and an electrical...feel the click, remove the module and reinstall it clicks into the battery bay, or connect the AC adapter to close may not boot. This procedure assumes that shipped with the tab in the module edge connector with your computer. 3. Forcing the cover to Contents Page...

Service Manual
Page 50
...Replacing the Optical Drive). 5. Failure to do not get caught beneath the system board. Enter the system setup program to change the default boot order. 14. Replacing the System Board Assembly CAUTION: Before you removed from the media for more information). 15. Replace the optical drive...Replacing the Display Assembly). 7. NOTICE: Before turning on the new system board with the holes on the computer. Flash update the BIOS (see the Dell™ Technology Guide on your computer. Replace the three M2.5 x 5-mm screws on the system board. 4. Replace the display assembly (see ...
...Replacing the Optical Drive). 5. Failure to do not get caught beneath the system board. Enter the system setup program to change the default boot order. 14. Replacing the System Board Assembly CAUTION: Before you removed from the media for more information). 15. Replace the optical drive...Replacing the Display Assembly). 7. NOTICE: Before turning on the new system board with the holes on the computer. Flash update the BIOS (see the Dell™ Technology Guide on your computer. Replace the three M2.5 x 5-mm screws on the system board. 4. Replace the display assembly (see ...
Service Manual
Page 53
... ¡ If failures are detected during the Pre-boot System Assessment, write down the error code(s) and contact Dell Support. ¡ If the Pre-boot System Assessment completes successfully, the following message appears: "Booting Dell Diagnostic Utility Partition. NOTE: The Drivers and Utilities media... is active. When to Use the Dell Diagnostics If you want to continue...
... ¡ If failures are detected during the Pre-boot System Assessment, write down the error code(s) and contact Dell Support. ¡ If the Pre-boot System Assessment completes successfully, the following message appears: "Booting Dell Diagnostic Utility Partition. NOTE: The Drivers and Utilities media... is active. When to Use the Dell Diagnostics If you want to continue...

Service Manual
Page 54
...up - After all tests have completed, close the test window to return to run the Dell Diagnostics from the optical drive. NOTE: If you want to the Dell Diagnostics Main Menu. 11. When the boot device list appears, use the up to thirty minutes or more to review your computer. ...Insert the Drivers and Utilities media into the optical drive. 2. Close the Main Menu window to Run the 32 Bit Dell Diagnostics. 7. Upon restart, the computer boots according to open the Boot Device Menu. NOTE: It is active. When the test completes, record the test results and then press any key...
...up - After all tests have completed, close the test window to return to run the Dell Diagnostics from the optical drive. NOTE: If you want to the Dell Diagnostics Main Menu. 11. When the boot device list appears, use the up to thirty minutes or more to review your computer. ...Insert the Drivers and Utilities media into the optical drive. 2. Close the Main Menu window to Run the 32 Bit Dell Diagnostics. 7. Upon restart, the computer boots according to open the Boot Device Menu. NOTE: It is active. When the test completes, record the test results and then press any key...


