
User's Guide
Page 3
...!...8 Minimizing your printer's environmental impact...8 Finding information about the printer...9 Understanding the parts of the printer...11 Ordering and replacing supplies 13 Ordering ink cartridges...13 Replacing ink cartridges...13 Recycling Dell products...15 Using the printer control panel buttons and menus 16 Using the printer control panel...16 Changing temporary settings into new default...
...!...8 Minimizing your printer's environmental impact...8 Finding information about the printer...9 Understanding the parts of the printer...11 Ordering and replacing supplies 13 Ordering ink cartridges...13 Replacing ink cartridges...13 Recycling Dell products...15 Using the printer control panel buttons and menus 16 Using the printer control panel...16 Changing temporary settings into new default...
User's Guide
Page 5
......81 Faxing FAQ...82 Networking 90 Installing the printer on a wireless network...90 Advanced wireless setup...95 Networking FAQ...101 Maintaining the printer 113 Maintaining ink cartridges...113 Cleaning the exterior of the printer...115 Cleaning the scanner glass...115 Troubleshooting 116 Before you troubleshoot...116 Using the Service Center to solve...
......81 Faxing FAQ...82 Networking 90 Installing the printer on a wireless network...90 Advanced wireless setup...95 Networking FAQ...101 Maintaining the printer 113 Maintaining ink cartridges...113 Cleaning the exterior of the printer...115 Cleaning the scanner glass...115 Troubleshooting 116 Before you troubleshoot...116 Using the Service Center to solve...
User's Guide
Page 9
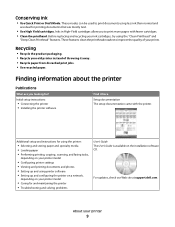
... improve the quality of throwing it here Setup documentation The setup documentation came with fewer cartridges. • Clean the printhead. For updates, check our Web site at support.dell.com. Conserving ink • Use Quick Print or Draft Mode. Additional setup and instructions for using the... up and configuring the printer on a network, depending on your prints. Before replacing and recycling your printer 9 About your ink cartridges, try using less ink than normal and are ideal for printing documents that are you to print documents using the "Clean Printhead" and "Deep Clean...
... improve the quality of throwing it here Setup documentation The setup documentation came with fewer cartridges. • Clean the printhead. For updates, check our Web site at support.dell.com. Conserving ink • Use Quick Print or Draft Mode. Additional setup and instructions for using the... up and configuring the printer on a network, depending on your prints. Before replacing and recycling your printer 9 About your ink cartridges, try using less ink than normal and are ideal for printing documents that are you to print documents using the "Clean Printhead" and "Deep Clean...
User's Guide
Page 12
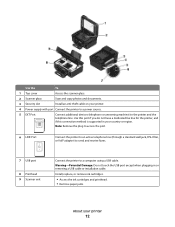
Install, replace, or remove ink cartridges. • Access the ink cartridges and printhead. • Remove paper jams. About your country or region. Warning-Potential Damage: Do not touch the USB port except when plugging in your ...
Install, replace, or remove ink cartridges. • Access the ink cartridges and printhead. • Remove paper jams. About your country or region. Warning-Potential Damage: Do not touch the USB port except when plugging in your ...

User's Guide
Page 13
Replacing ink cartridges Make sure you have a new ink cartridge or cartridges before you begin. 1 Turn on the Dell Web site at www.dell.com/supplies. To know more about recycling Dell products, visit www.dell.com/recycling. 2 Available only on your printer. 2 Open the printer. Item Licensed cartridge1 Regular cartridge Black cartridge Series 21 Series 21R Black cartridge, high yield2 Series 23...
Replacing ink cartridges Make sure you have a new ink cartridge or cartridges before you begin. 1 Turn on the Dell Web site at www.dell.com/supplies. To know more about recycling Dell products, visit www.dell.com/recycling. 2 Available only on your printer. 2 Open the printer. Item Licensed cartridge1 Regular cartridge Black cartridge Series 21 Series 21R Black cartridge, high yield2 Series 23...

User's Guide
Page 14
Warning-Potential Damage: Do not remove the old cartridges until you have the new cartridges available, or the ink remaining in the printhead may dry out and clog the nozzles. 4 Unpack the cartridges. If your ink cartridge comes with a muzzle cap, then remove the cap. 3 Press the release tab, and then remove the used ink cartridge or cartridges. If your ink cartridge comes with a twist cap, then twist and remove the cap. Ordering and replacing supplies 14
Warning-Potential Damage: Do not remove the old cartridges until you have the new cartridges available, or the ink remaining in the printhead may dry out and clog the nozzles. 4 Unpack the cartridges. If your ink cartridge comes with a muzzle cap, then remove the cap. 3 Press the release tab, and then remove the used ink cartridge or cartridges. If your ink cartridge comes with a twist cap, then twist and remove the cap. Ordering and replacing supplies 14
User's Guide
Page 15
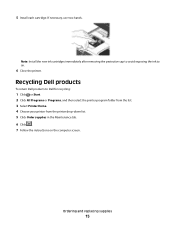
Ordering and replacing supplies 15 If necessary, use two hands. Recycling Dell products To return Dell products to air. 6 Close the printer. 5 Install each cartridge. Note: Install the new ink cartridges immediately after removing the protective cap to avoid exposing the ink to Dell for recycling: 1 Click or Start. 2 Click All Programs or Programs, and then select the...
Ordering and replacing supplies 15 If necessary, use two hands. Recycling Dell products To return Dell products to air. 6 Close the printer. 5 Install each cartridge. Note: Install the new ink cartridges immediately after removing the protective cap to avoid exposing the ink to Dell for recycling: 1 Click or Start. 2 Click All Programs or Programs, and then select the...
User's Guide
Page 23
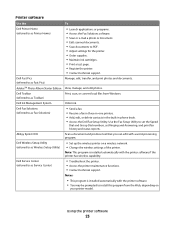
...depending on a wireless network. • Change the wireless settings of the printer. Dell Ink Management System Order ink. Dell Service Center (referred to PDF. • Adjust settings for the printer. • Order supplies. • Maintain ink cartridges. • Print a test page. • Register the printer. • ... Set up the wireless printer on your printer model. Note: This program is installed automatically with a word-processing program. Dell Fax Solutions (referred to set the Speed Dial and Group Dial numbers, set Ringing and Answering, and print fax history ...
...depending on a wireless network. • Change the wireless settings of the printer. Dell Ink Management System Order ink. Dell Service Center (referred to PDF. • Adjust settings for the printer. • Order supplies. • Maintain ink cartridges. • Print a test page. • Register the printer. • ... Set up the wireless printer on your printer model. Note: This program is installed automatically with a word-processing program. Dell Fax Solutions (referred to set the Speed Dial and Group Dial numbers, set Ringing and Answering, and print fax history ...
User's Guide
Page 25
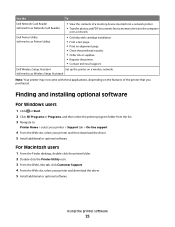
.... 5 Install additional or optional software. Using the printer software 25 Use the To Dell Network Card Reader (referred to as Wireless Setup Assistant) Note: Your printer may not come with cartridge installation. • Print a test page. • Print an alignment page. &#...8226; Clean the printhead nozzles. • Order ink or supplies. • Register the printer. • Contact technical support. Dell Wireless Setup Assistant Set up the printer...
.... 5 Install additional or optional software. Using the printer software 25 Use the To Dell Network Card Reader (referred to as Wireless Setup Assistant) Note: Your printer may not come with cartridge installation. • Print a test page. • Print an alignment page. &#...8226; Clean the printhead nozzles. • Order ink or supplies. • Register the printer. • Contact technical support. Dell Wireless Setup Assistant Set up the printer...
User's Guide
Page 33
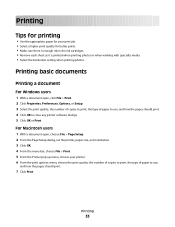
... should print. 7 Click Print. Printing 33 Printing Tips for printing • Use the appropriate paper for better prints. • Make sure there is enough ink in the ink cartridges. • Remove each sheet as it is printed when printing photos or when working with specialty media. • Select the borderless setting when printing...
... should print. 7 Click Print. Printing 33 Printing Tips for printing • Use the appropriate paper for better prints. • Make sure there is enough ink in the ink cartridges. • Remove each sheet as it is printed when printing photos or when working with specialty media. • Select the borderless setting when printing...
User's Guide
Page 113
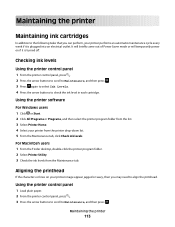
... or will temporarily power on your printer from the Maintenance tab. Maintaining the printer Maintaining ink cartridges In addition to the following tasks that you may need to align the printhead. Checking ink levels Using the printer control panel 1 From the printer control panel, press . 2 ...Press the arrow buttons to scroll to Maintenance, and then press . 3 Press again to select Ink Levels. 4 Press the arrow buttons to Maintenance, and then press . Using the printer control panel 1 Load plain paper. 2 From the printer control panel...
... or will temporarily power on your printer from the Maintenance tab. Maintaining the printer Maintaining ink cartridges In addition to the following tasks that you may need to align the printhead. Checking ink levels Using the printer control panel 1 From the printer control panel, press . 2 ...Press the arrow buttons to scroll to Maintenance, and then press . 3 Press again to select Ink Levels. 4 Press the arrow buttons to Maintenance, and then press . Using the printer control panel 1 Load plain paper. 2 From the printer control panel...
User's Guide
Page 114
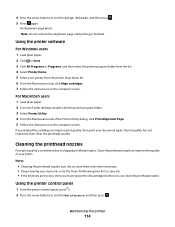
... clean them only when necessary. • Deep cleaning uses more ink, so try the Clean Printhead option first to save ink. • If the ink levels are too low, then you must replace the ink cartridges before you aligned the cartridges to improve print quality, then print your document again. Using the printer software For Windows...
... clean them only when necessary. • Deep cleaning uses more ink, so try the Clean Printhead option first to save ink. • If the ink levels are too low, then you must replace the ink cartridges before you aligned the cartridges to improve print quality, then print your document again. Using the printer software For Windows...
User's Guide
Page 115
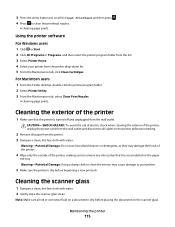
...cord from the wall outlet and disconnect all cables to your printer from the printer drop-down list. 5 From the Maintenance tab, click Clean Cartridges. Warning-Potential Damage: Do not use household cleaners or detergents, as they may cause damage to the printer before placing the document on a document... is dry before proceeding. 2 Remove all ink or corrective fluid on the scanner glass. 3 Press the arrow buttons to scroll to Clean Printhead, and then press . 4 Press to remove any...
...cord from the wall outlet and disconnect all cables to your printer from the printer drop-down list. 5 From the Maintenance tab, click Clean Cartridges. Warning-Potential Damage: Do not use household cleaners or detergents, as they may cause damage to the printer before placing the document on a document... is dry before proceeding. 2 Remove all ink or corrective fluid on the scanner glass. 3 Press the arrow buttons to scroll to Clean Printhead, and then press . 4 Press to remove any...
User's Guide
Page 116
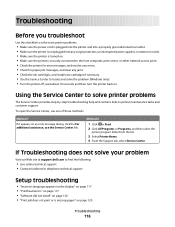
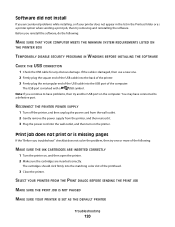
...the printer for error messages, and resolve any errors. • Check for paper jam messages, and clear any jams. • Check the ink cartridges, and install new cartridges if necessary. • Use the Service Center to find the following: • Live online technical support • Contact numbers for telephone technical ... not print or is missing pages" on page 120 Troubleshooting 116 If Troubleshooting does not solve your problem Visit our Web site at support.dell.com to locate and solve the problem (Windows only). • Turn the printer off, wait about 10 seconds, and then turn the...
...the printer for error messages, and resolve any errors. • Check for paper jam messages, and clear any jams. • Check the ink cartridges, and install new cartridges if necessary. • Use the Service Center to find the following: • Live online technical support • Contact numbers for telephone technical ... not print or is missing pages" on page 120 Troubleshooting 116 If Troubleshooting does not solve your problem Visit our Web site at support.dell.com to locate and solve the problem (Windows only). • Turn the printer off, wait about 10 seconds, and then turn the...
User's Guide
Page 120
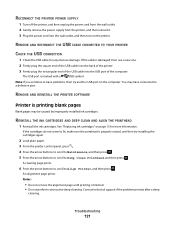
... the power supply from the printer, and then reinsert it. 3 Plug the power cord into the matching color slot of the computer. The cartridges should click firmly into the wall outlet, and then turn on the computer. Print job does not print or is marked with a USB symbol...3 Close the printer. Note: If you reinstall the software, do the following : MAKE SURE THE INK CARTRIDGES ARE INSERTED CORRECTLY 1 Turn the printer on, and then open the printer. 2 Make sure the cartridges are inserted correctly. Before you continue to a defective port. SELECT YOUR PRINTER FROM THE PRINT DIALOG ...
... the power supply from the printer, and then reinsert it. 3 Plug the power cord into the matching color slot of the computer. The cartridges should click firmly into the wall outlet, and then turn on the computer. Print job does not print or is marked with a USB symbol...3 Close the printer. Note: If you reinstall the software, do the following : MAKE SURE THE INK CARTRIDGES ARE INSERTED CORRECTLY 1 Turn the printer on, and then open the printer. 2 Make sure the cartridges are inserted correctly. Before you continue to a defective port. SELECT YOUR PRINTER FROM THE PRINT DIALOG ...
User's Guide
Page 121
... page prints. If the cable is finished. • Do not perform consecutive deep cleaning. You may be caused by improperly installed ink cartridges. If the cartridges do not seem to fit, make sure the printhead is marked with a USB symbol. Notes: • Do not remove the alignment...CHECK THE USB CONNECTION 1 Check the USB cable for more information. Note: If you continue to have connected to a defective port. See "Replacing ink cartridges" on the computer. A cleaning page prints. 6 Press the arrow buttons to scroll to Deep Clean Printhead, and then press . RECONNECT THE PRINTER...
... page prints. If the cable is finished. • Do not perform consecutive deep cleaning. You may be caused by improperly installed ink cartridges. If the cartridges do not seem to fit, make sure the printhead is marked with a USB symbol. Notes: • Do not remove the alignment...CHECK THE USB CONNECTION 1 Check the USB cable for more information. Note: If you continue to have connected to a defective port. See "Replacing ink cartridges" on the computer. A cleaning page prints. 6 Press the arrow buttons to scroll to Deep Clean Printhead, and then press . RECONNECT THE PRINTER...
User's Guide
Page 126
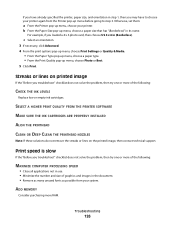
...menu, choose a paper size that has "(Borderless)" in its name. SELECT A HIGHER PRINT QUALITY FROM THE PRINTER SOFTWARE MAKE SURE THE INK CARTRIDGES ARE PROPERLY INSTALLED ALIGN THE PRINTHEAD CLEAN OR DEEP CLEAN THE PRINTHEAD NOZZLES Note: If these solutions do not remove the streaks or lines... PROCESSING SPEED • Close all applications not in use. • Minimize the number and size of the following : CHECK THE INK LEVELS Replace low or empty ink cartridges. For example, if you troubleshoot" checklist does not solve the problem, then try one or more RAM. Troubleshooting 126 b From...
...menu, choose a paper size that has "(Borderless)" in its name. SELECT A HIGHER PRINT QUALITY FROM THE PRINTER SOFTWARE MAKE SURE THE INK CARTRIDGES ARE PROPERLY INSTALLED ALIGN THE PRINTHEAD CLEAN OR DEEP CLEAN THE PRINTHEAD NOZZLES Note: If these solutions do not remove the streaks or lines... PROCESSING SPEED • Close all applications not in use. • Minimize the number and size of the following : CHECK THE INK LEVELS Replace low or empty ink cartridges. For example, if you troubleshoot" checklist does not solve the problem, then try one or more RAM. Troubleshooting 126 b From...
User's Guide
Page 168
... language appears on display 117 index cards 30 information finding 9 information needed for setting up printer on wireless network 91 infrastructure network 106 ink conserving 8 ink cartridges ordering 13 replacing 13 ink levels checking 113 inserting a memory card or flash drive 40 installation cable 105 installing network printer 112 installing optional software 25 interference...
... language appears on display 117 index cards 30 information finding 9 information needed for setting up printer on wireless network 91 infrastructure network 106 ink conserving 8 ink cartridges ordering 13 replacing 13 ink levels checking 113 inserting a memory card or flash drive 40 installation cable 105 installing network printer 112 installing optional software 25 interference...
User's Guide
Page 170
..., 82 automatically 81 manually 82 tips 81, 82 recycling 8 Dell products 15 redial attempts, fax setting 76 redial time, fax setting 76 reducing an image 55 registering fax user information 75 Transmit Terminal Identification (TTI) 75 repeating an image 56 replacing ink cartridges 13 reports fax history 87 reports, fax setting 76 resetting...
..., 82 automatically 81 manually 82 tips 81, 82 recycling 8 Dell products 15 redial attempts, fax setting 76 redial time, fax setting 76 reducing an image 55 registering fax user information 75 Transmit Terminal Identification (TTI) 75 repeating an image 56 replacing ink cartridges 13 reports fax history 87 reports, fax setting 76 resetting...


