Dell™ Technology Guide
Page 82
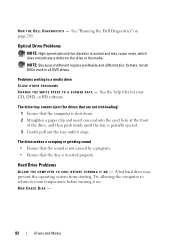
... not indicate a defect in all DVDs work in the drive or the media. RUN CHECK DISK - 82 Drives and Media The drive tray cannot eject (for your CD, DVD, or BD software. Hard Drive Problems A L L O W T H E C O M P U T E R T O C O O L B E F O R E T U R N I N G I T E S P E E D T O A S L O W E R R A T E - Problems writing to ... Problems NOTE: High-speed optical drive vibration is inserted properly. R U N THE DELL D I A G N O S T I C S - NOTE: Because of the drive, and then push firmly until the tray is partially ejected. 3 Gently pull out the tray until it on page 281.
... not indicate a defect in all DVDs work in the drive or the media. RUN CHECK DISK - 82 Drives and Media The drive tray cannot eject (for your CD, DVD, or BD software. Hard Drive Problems A L L O W T H E C O M P U T E R T O C O O L B E F O R E T U R N I N G I T E S P E E D T O A S L O W E R R A T E - Problems writing to ... Problems NOTE: High-speed optical drive vibration is inserted properly. R U N THE DELL D I A G N O S T I C S - NOTE: Because of the drive, and then push firmly until the tray is partially ejected. 3 Gently pull out the tray until it on page 281.
Dell™ Technology Guide
Page 204
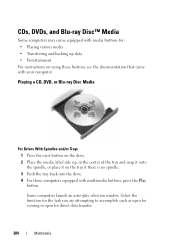
...it onto the spindle, or place it on using these buttons see the documentation that came with multimedia buttons, press the Play button. CDs, DVDs, and Blu-ray Disc™ Media Some computers may come equipped with media buttons for direct data transfer. 204 Multimedia Some computers... launch an auto-play selection window. Playing a CD, DVD, or Blu-ray Disc Media For Drives With Spindles and/or Trays 1 Press the eject button on the drive. 2 Place the media, label side up data • Entertainment For instructions...
...it onto the spindle, or place it on using these buttons see the documentation that came with multimedia buttons, press the Play button. CDs, DVDs, and Blu-ray Disc™ Media Some computers may come equipped with media buttons for direct data transfer. 204 Multimedia Some computers... launch an auto-play selection window. Playing a CD, DVD, or Blu-ray Disc Media For Drives With Spindles and/or Trays 1 Press the eject button on the drive. 2 Place the media, label side up data • Entertainment For instructions...
Dell™ Technology Guide
Page 205
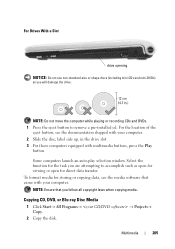
For the location of the eject button, see the media software that you follow all copyright laws when copying media. Copying CD, DVD, or Blu-ray Disc Media 1 Click Start→ All Programs→ → Projects→ Copy. 2 Copy the disk. Some computers launch an ... will damage the drive. To format media for direct data transfer. NOTE: Do not move the computer while playing or recording CDs and DVDs. 1 Press the eject button to accomplish such as you are attempting to remove a pre-installed cd. NOTE: Ensure that came with multimedia buttons, press the Play button.
For the location of the eject button, see the media software that you follow all copyright laws when copying media. Copying CD, DVD, or Blu-ray Disc Media 1 Click Start→ All Programs→ → Projects→ Copy. 2 Copy the disk. Some computers launch an ... will damage the drive. To format media for direct data transfer. NOTE: Do not move the computer while playing or recording CDs and DVDs. 1 Press the eject button to accomplish such as you are attempting to remove a pre-installed cd. NOTE: Ensure that came with multimedia buttons, press the Play button.
Dell™ Technology Guide
Page 206
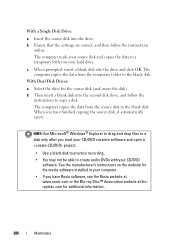
HINT: Use Microsoft® Windows® Explorer to drag and drop files to a disk only after you start your CD/DVD creation software and open a project. • Use a blank disk to practice recording. • You may not be able to the blank disk.... at bluraydisc.com for additional information. 206 Multimedia When you have finished copying the source disk, it automatically ejects. With Dual Disk Drives: a Select the drive for the media software installed in your CD/DVD software. b Then insert a blank disk into the second disk drive, and follow the instructions online. ...
HINT: Use Microsoft® Windows® Explorer to drag and drop files to a disk only after you start your CD/DVD creation software and open a project. • Use a blank disk to practice recording. • You may not be able to the blank disk.... at bluraydisc.com for additional information. 206 Multimedia When you have finished copying the source disk, it automatically ejects. With Dual Disk Drives: a Select the drive for the media software installed in your CD/DVD software. b Then insert a blank disk into the second disk drive, and follow the instructions online. ...
Setup Guide
Page 19
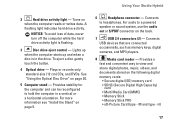
To eject a disc gently touch the button. 4 Optical drive - Provides stability for the computer and can be reconfigured to a powered speaker or sound system, use the audio ... up and when a disc is flashing. 3 Disc drive eject control - Connects USB devices that are connected occasionally, such as memory keys, digital cameras, and MP3 players. 8 Media card reader - Plays or records only standard-size (12 cm) CDs, and DVDs. M and type - Using Your Studio Hybrid 2 Hard drive activity light - A flashing light indicates hard...
To eject a disc gently touch the button. 4 Optical drive - Provides stability for the computer and can be reconfigured to a powered speaker or sound system, use the audio ... up and when a disc is flashing. 3 Disc drive eject control - Connects USB devices that are connected occasionally, such as memory keys, digital cameras, and MP3 players. 8 Media card reader - Plays or records only standard-size (12 cm) CDs, and DVDs. M and type - Using Your Studio Hybrid 2 Hard drive activity light - A flashing light indicates hard...
Setup Guide
Page 22
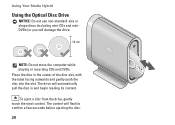
The control will damage the drive. 12 cm NOTE: Do not move the computer while playing or recording CDs and DVDs. Using Your Studio Hybrid Using the Optical Disc Drive NOTICE: Do not use non-standard-size or shape discs (including mini-CDs and miniDVDs) or you will flash to confirm a few seconds before ejecting the disc. 20 To eject a disc from the drive, gently touch the eject control. Place the disc in and begin reading its content. The drive will automatically pull the disc in the center of the disc slot, with the label facing outwards and gently push the disc into the slot.
The control will damage the drive. 12 cm NOTE: Do not move the computer while playing or recording CDs and DVDs. Using Your Studio Hybrid Using the Optical Disc Drive NOTICE: Do not use non-standard-size or shape discs (including mini-CDs and miniDVDs) or you will flash to confirm a few seconds before ejecting the disc. 20 To eject a disc from the drive, gently touch the eject control. Place the disc in and begin reading its content. The drive will automatically pull the disc in the center of the disc slot, with the label facing outwards and gently push the disc into the slot.


