Dell™ Technology Guide
Page 142
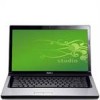
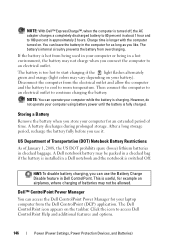
... First Time Power Meter icon The first time you use the AC adapter to connect your computer to an electrical outlet in maximum performance mode (see "Dell™ ControlPoint Power Manager" on the taskbar. For best results, operate the computer with the AC adapter until the battery is used. For more information on preserving the...
... First Time Power Meter icon The first time you use the AC adapter to connect your computer to an electrical outlet in maximum performance mode (see "Dell™ ControlPoint Power Manager" on the taskbar. For best results, operate the computer with the AC adapter until the battery is used. For more information on preserving the...
Dell™ Technology Guide
Page 143
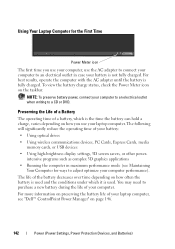
...176;F). CAUTION: Do not dispose of the battery may leak and cause personal injury or equipment damage. See "Battery Disposal" in your Dell computer. Keep the battery away from the computer to a docking device, undock it clicks into place. CAUTION: Before performing these basic ...damaged or leaking batteries with household waste. The battery is turned off the computer, disconnect the AC adapter from the electrical outlet and the computer, disconnect the modem from Dell. Checking the Battery Charge You can check the battery charge on disposing batteries. NOTICE: You...
...176;F). CAUTION: Do not dispose of the battery may leak and cause personal injury or equipment damage. See "Battery Disposal" in your Dell computer. Keep the battery away from the computer to a docking device, undock it clicks into place. CAUTION: Before performing these basic ...damaged or leaking batteries with household waste. The battery is turned off the computer, disconnect the AC adapter from the electrical outlet and the computer, disconnect the modem from Dell. Checking the Battery Charge You can check the battery charge on disposing batteries. NOTICE: You...
Dell™ Technology Guide
Page 145
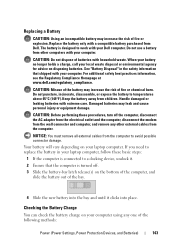
... Options" on page 135. Charging the Battery When you leave the computer unattended for long periods of power, hibernate mode begins automatically. If necessary, the AC adapter then charges the battery and maintains the battery charge. You can change the settings for the battery alarms through the power management options in Windows...
... Options" on page 135. Charging the Battery When you leave the computer unattended for long periods of power, hibernate mode begins automatically. If necessary, the AC adapter then charges the battery and maintains the battery charge. You can change the settings for the battery alarms through the power management options in Windows...
Dell™ Technology Guide
Page 146
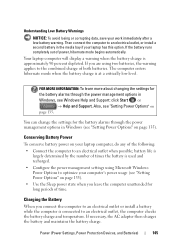
...batteries may vary depending on airplanes, where charging of January 1, 2008, the US DOT prohibits spare (loose) lithium batteries in a Dell notebook and the notebook is switched Off. You can operate your computer using battery power until the battery is fully charged. After ...features and options. 146 Power (Power Settings, Power Protection Devices, and Batteries) The Dell ControlPoint icon appears on . NOTE: With Dell™ ExpressCharge™, when the computer is turned off, the AC adapter charges a completely discharged battery to 80 percent in about 1 hour and to an ...
...batteries may vary depending on airplanes, where charging of January 1, 2008, the US DOT prohibits spare (loose) lithium batteries in a Dell notebook and the notebook is switched Off. You can operate your computer using battery power until the battery is fully charged. After ...features and options. 146 Power (Power Settings, Power Protection Devices, and Batteries) The Dell ControlPoint icon appears on . NOTE: With Dell™ ExpressCharge™, when the computer is turned off, the AC adapter charges a completely discharged battery to 80 percent in about 1 hour and to an ...
Dell™ Technology Guide
Page 278
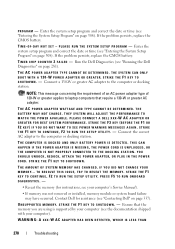
... HAS CHANGED. WARNING: A XXX-W AC ADAPTER HAS BEEN DETECTED, WHICH IS LESS THAN 278 Troubleshooting Run the Dell Diagnostics (see "Entering the System Setup Program" on page 281). Connect a 130-W or greater AC adapter to the computer or docking station. ...E F 1 K E Y T O S H U T D O W N . - Ensure that require a 130-W or greater AC adapter. Enter the system setup program and correct the date or time (see "Contacting Dell" on page 308). TI M E - THE SYSTEM CAN ONLY BOOT WITH A 130-W POWER ADAPTER OR GREATER. STRIKE THE F1 KEY TO S H U T D O W N . - THE BATTERY MAY NOT CHARGE. THE...
... HAS CHANGED. WARNING: A XXX-W AC ADAPTER HAS BEEN DETECTED, WHICH IS LESS THAN 278 Troubleshooting Run the Dell Diagnostics (see "Entering the System Setup Program" on page 281). Connect a 130-W or greater AC adapter to the computer or docking station. ...E F 1 K E Y T O S H U T D O W N . - Ensure that require a 130-W or greater AC adapter. Enter the system setup program and correct the date or time (see "Contacting Dell" on page 308). TI M E - THE SYSTEM CAN ONLY BOOT WITH A 130-W POWER ADAPTER OR GREATER. STRIKE THE F1 KEY TO S H U T D O W N . - THE BATTERY MAY NOT CHARGE. THE...

Dell™ Technology Guide
Page 279
... TO CONTINUE. RUN THE SETUP UTILITY TO ENABLE T H E S E M E S S A G E S . - WARNING: THE BATTERY ATTACHED CANNOT POWER THE SYSTEM. BATTERY IS CRITICALLY LOW. THE RECOMMENDED XXX-W AC ADAPTER ORIGINALLY SHIPPED. PLEASE CONNECT A DELL XXX-W AC ADAPTER OR GREATER FOR BEST PERFORMANCE. STRIKE THE F1 KEY TO CONTINUE, F2 TO RUN THE SETUP UTILITY. - THIS SYSTEM WILL BE U N A B L E T O C H A R G E B A T T E R I E S U N T I L T H I S B A T T E R Y I Z E D - WARNING...
... TO CONTINUE. RUN THE SETUP UTILITY TO ENABLE T H E S E M E S S A G E S . - WARNING: THE BATTERY ATTACHED CANNOT POWER THE SYSTEM. BATTERY IS CRITICALLY LOW. THE RECOMMENDED XXX-W AC ADAPTER ORIGINALLY SHIPPED. PLEASE CONNECT A DELL XXX-W AC ADAPTER OR GREATER FOR BEST PERFORMANCE. STRIKE THE F1 KEY TO CONTINUE, F2 TO RUN THE SETUP UTILITY. - THIS SYSTEM WILL BE U N A B L E T O C H A R G E B A T T E R I E S U N T I L T H I S B A T T E R Y I Z E D - WARNING...
Dell™ Technology Guide
Page 280
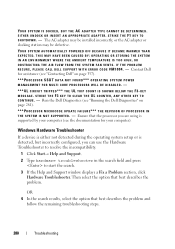
EITHER UNDOCK OR INSERT AN APPROPRIATE ADAPTER. The AC adapter may be installed incorrectly, or the AC adapter or docking station may be defective. Contact Dell for your computer). STRIKE THE F3 KEY TO CLEAR THE UL COUNTER, ANY OTHER KEY TO C O N T I S N O T S U P P O R T E D . - Then select the option .... 280 Troubleshooting OR 4 In the search results, select the option that best describes the problem. YOUR SYSTEM IS DOCKED, BUT THE AC ADAPTER TYPE CANNOT BE DETERMINED. THIS MAY HAVE BEEN CAUSED BY: OPERATING OR STORING THE SYSTEM IN AN ENVIRONMENT WHERE THE AMBIENT TEMPERATURE IS ...
EITHER UNDOCK OR INSERT AN APPROPRIATE ADAPTER. The AC adapter may be installed incorrectly, or the AC adapter or docking station may be defective. Contact Dell for your computer). STRIKE THE F3 KEY TO CLEAR THE UL COUNTER, ANY OTHER KEY TO C O N T I S N O T S U P P O R T E D . - Then select the option .... 280 Troubleshooting OR 4 In the search results, select the option that best describes the problem. YOUR SYSTEM IS DOCKED, BUT THE AC ADAPTER TYPE CANNOT BE DETERMINED. THIS MAY HAVE BEEN CAUSED BY: OPERATING OR STORING THE SYSTEM IN AN ENVIRONMENT WHERE THE AMBIENT TEMPERATURE IS ...
Dell™ Technology Guide
Page 339
...have on the computer, do not change them. ASF is able to be platform- Also referred to be depleted and recharged. A AC - A power management specification that allows system memory to as Native Command Queuing (NCQ) and hot plug. accelerated graphics port - ...faster interface between the computer hardware and the operating system. alert standards format - basic input/output system - Unless you plug the AC adapter power cable in to control display brightness. advanced configuration and power interface - A dedicated graphics port that enables Microsoft® Windows...
...have on the computer, do not change them. ASF is able to be platform- Also referred to be depleted and recharged. A AC - A power management specification that allows system memory to as Native Command Queuing (NCQ) and hot plug. accelerated graphics port - ...faster interface between the computer hardware and the operating system. alert standards format - basic input/output system - Unless you plug the AC adapter power cable in to control display brightness. advanced configuration and power interface - A dedicated graphics port that enables Microsoft® Windows...
Setup Guide
Page 5
...5 Connect the AC Adapter 6 Connect the Network Cable (Optional 7 Press the Power Button 8 Set Up Microsoft Windows 9 Create System Recovery Media (Recommended 10 Install the SIM Card (Optional 12 Enable or Disable Wireless (Optional 14 Connect to the Internet (Optional 16 Using Your Studio Laptop 20 Right...Screen (Optional 36 Using the Optical Drive 40 Removing and Replacing the Battery 42 Software Features 44 Free Fall Sensor 45 Dell Dock 46 Dell DataSafe Online Backup 47 Solving Problems 48 Touch Screen Problems 48 Beep Codes 49 Network Problems 50 Power Problems 51 Memory...
...5 Connect the AC Adapter 6 Connect the Network Cable (Optional 7 Press the Power Button 8 Set Up Microsoft Windows 9 Create System Recovery Media (Recommended 10 Install the SIM Card (Optional 12 Enable or Disable Wireless (Optional 14 Connect to the Internet (Optional 16 Using Your Studio Laptop 20 Right...Screen (Optional 36 Using the Optical Drive 40 Removing and Replacing the Battery 42 Software Features 44 Free Fall Sensor 45 Dell Dock 46 Dell DataSafe Online Backup 47 Solving Problems 48 Touch Screen Problems 48 Beep Codes 49 Network Problems 50 Power Problems 51 Memory...
Setup Guide
Page 8
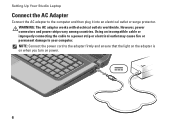
However, power connectors and power strips vary among countries. Setting Up Your Studio Laptop Connect the AC Adapter Connect the AC adapter to the adapter firmly and ensure that the light on the adapter is on when you turn on power. 6 NOTE: Connect the power cord to the computer and then plug it into an electrical outlet or surge protector. WARNING: The AC adapter works with electrical outlets worldwide. Using an incompatible cable or improperly connecting the cable to a power strip or electrical outlet may cause fire or permanent damage to your computer.
However, power connectors and power strips vary among countries. Setting Up Your Studio Laptop Connect the AC Adapter Connect the AC adapter to the adapter firmly and ensure that the light on the adapter is on when you turn on power. 6 NOTE: Connect the power cord to the computer and then plug it into an electrical outlet or surge protector. WARNING: The AC adapter works with electrical outlets worldwide. Using an incompatible cable or improperly connecting the cable to a power strip or electrical outlet may cause fire or permanent damage to your computer.
Setup Guide
Page 13
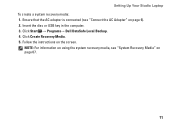
Insert the disc or USB key in the computer. 3. Click Create Recovery Media. 5. Follow the instructions on page 6). 2. Ensure that the AC adapter is connected (see "System Recovery Media" on page 67. 11 Click Start → Programs→ Dell DataSafe Local Backup. 4. NOTE: For information on using the system recovery media, see "Connect the AC Adapter" on the screen. Setting Up Your Studio Laptop To create a system recovery media: 1.
Insert the disc or USB key in the computer. 3. Click Create Recovery Media. 5. Follow the instructions on page 6). 2. Ensure that the AC adapter is connected (see "System Recovery Media" on page 67. 11 Click Start → Programs→ Dell DataSafe Local Backup. 4. NOTE: For information on using the system recovery media, see "Connect the AC Adapter" on the screen. Setting Up Your Studio Laptop To create a system recovery media: 1.
Setup Guide
Page 24
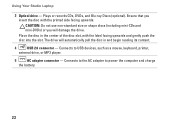
..., DVDs, and Blu-ray Discs (optional). Connects to power the computer and charge the battery. 22 Connects to the AC adapter to USB devices, such as a mouse, keyboard, printer, external drive, or MP3 player. 5 AC adapter connector - The drive will damage the drive. CAUTION: Do not use non-standard size or shape discs (including... the center of the disc slot, with the printed side facing upwards. Place the disc in and begin reading its content. 4 USB 2.0 connector - Using Your Studio Laptop 3 Optical drive -
..., DVDs, and Blu-ray Discs (optional). Connects to power the computer and charge the battery. 22 Connects to the AC adapter to USB devices, such as a mouse, keyboard, printer, external drive, or MP3 player. 5 AC adapter connector - The drive will damage the drive. CAUTION: Do not use non-standard size or shape discs (including... the center of the disc slot, with the printed side facing upwards. Place the disc in and begin reading its content. 4 USB 2.0 connector - Using Your Studio Laptop 3 Optical drive -
Setup Guide
Page 25
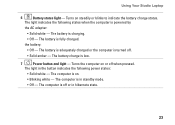
Using Your Studio Laptop 6 Battery status light - The battery is adequately charged or the computer is fully charged. Turns the computer on or off or in standby mode. &#... is off when pressed. The battery is low. 7 Power button and light - The battery charge is charging. • Off - The computer is powered by the AC adapter: • Solid white - The light indicates the following power states: • Solid white - The light in the button indicates the following states when the computer...
Using Your Studio Laptop 6 Battery status light - The battery is adequately charged or the computer is fully charged. Turns the computer on or off or in standby mode. &#... is off when pressed. The battery is low. 7 Power button and light - The battery charge is charging. • Off - The computer is powered by the AC adapter: • Solid white - The light indicates the following power states: • Solid white - The light in the button indicates the following states when the computer...
Setup Guide
Page 45
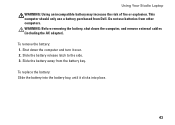
Using Your Studio Laptop WARNING: Using an incompatible battery may increase the risk of fire or explosion. Slide the battery away from other computers. WARNING: Before removing the ... Slide the battery release latch to the side. 3. To remove the battery: 1. Shut down the computer, and remove external cables (including the AC adapter). Do not use a battery purchased from Dell. To replace the battery: Slide the battery into the battery bay, until it over. 2. This computer should only use batteries from the...
Using Your Studio Laptop WARNING: Using an incompatible battery may increase the risk of fire or explosion. Slide the battery away from other computers. WARNING: Before removing the ... Slide the battery release latch to the side. 3. To remove the battery: 1. Shut down the computer, and remove external cables (including the AC adapter). Do not use a battery purchased from Dell. To replace the battery: Slide the battery into the battery bay, until it over. 2. This computer should only use batteries from the...
Setup Guide
Page 53
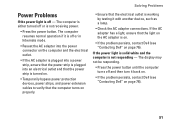
...power extension cables to verify that the computer turns on properly. • Ensure that the light on the AC adapter is on. • If the problem persists, contact Dell (see "Contacting Dell" on page 76). The computer resumes normal operation if it is off or is working by testing it ...back on. • If the problem persists, contact Dell (see "Contacting Dell" on page 76). 51 If the AC adapter has a light, ensure that the...
...power extension cables to verify that the computer turns on properly. • Ensure that the light on the AC adapter is on. • If the problem persists, contact Dell (see "Contacting Dell" on page 76). The computer resumes normal operation if it is off or is working by testing it ...back on. • If the problem persists, contact Dell (see "Contacting Dell" on page 76). 51 If the AC adapter has a light, ensure that the...
Setup Guide
Page 67
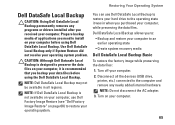
...it is not available on your computer, use Dell DataSafe Local Backup to restore your data files before using the Dell DataSafe Local Backup. NOTE: Do not disconnect the AC adapter. 3. Turn on page 68) to restore your computer. Use Dell DataSafe Local Backup only if System Restore did ...not resolve your computer. 65 You can use Dell Factory Image Restore (see "Dell Factory Image Restore"...
...it is not available on your computer, use Dell DataSafe Local Backup to restore your data files before using the Dell DataSafe Local Backup. NOTE: Do not disconnect the AC adapter. 3. Turn on page 68) to restore your computer. Use Dell DataSafe Local Backup only if System Restore did ...not resolve your computer. 65 You can use Dell Factory Image Restore (see "Dell Factory Image Restore"...
Setup Guide
Page 92
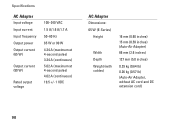
... 100-240 VAC 1.5 A/1.6 A/1.7 A 50-60 Hz 65 W or 90 W 4.34 A (maximum at 4-second pulse) 3.34 A (continuous) 5.62 A (maximum at 4-second pulse) 4.62 A (continuous) 19.5 +/- 1 VDC AC Adapter Dimensions: 65 W (E-Series) Height Width Depth Weight (with cables) 16 mm (0.60 inches) 15 mm (0.59 inches) (Auto-Air...
... 100-240 VAC 1.5 A/1.6 A/1.7 A 50-60 Hz 65 W or 90 W 4.34 A (maximum at 4-second pulse) 3.34 A (continuous) 5.62 A (maximum at 4-second pulse) 4.62 A (continuous) 19.5 +/- 1 VDC AC Adapter Dimensions: 65 W (E-Series) Height Width Depth Weight (with cables) 16 mm (0.60 inches) 15 mm (0.59 inches) (Auto-Air...

Setup Guide
Page 93
AC Adapter 90 W (E-Series) Height 16 mm (0.6 inches) Width 70 mm (2.8 inches) Depth 147 mm (5.8 inches) Weight (with cables) 0.34 kg (0.76 lb) Temperature ranges: Operating 0° to 35°C (32° to 95°F) 0° to 40°C (32° to 104°F) (Auto-Air Adapter) Storage -40° to 65°C ...(-40° to 149°F) -40° to 70°C (-40° to 158°F) (Auto-Air Adapter) Specifications Physical Height Width Depth Weight (with 6-cell battery and optical drive): 25.3 mm to 38.9 mm (0.10 inches to 1.23 inches) 371.6 mm (...
AC Adapter 90 W (E-Series) Height 16 mm (0.6 inches) Width 70 mm (2.8 inches) Depth 147 mm (5.8 inches) Weight (with cables) 0.34 kg (0.76 lb) Temperature ranges: Operating 0° to 35°C (32° to 95°F) 0° to 40°C (32° to 104°F) (Auto-Air Adapter) Storage -40° to 65°C ...(-40° to 149°F) -40° to 70°C (-40° to 158°F) (Auto-Air Adapter) Specifications Physical Height Width Depth Weight (with 6-cell battery and optical drive): 25.3 mm to 38.9 mm (0.10 inches to 1.23 inches) 371.6 mm (...
Setup Guide
Page 97
Index A AC adapter size and weight 91 airflow, allowing 5 C calling Dell 75 CDs, playing and creating 45 chipset 80 computer capabilities 44 computer, setting up 5 Contacting Dell online 76 customer service 71 D damage, avoiding 5 DellConnect 71 Dell Diagnostics 59 Dell Factory Image Restore 68 Dell Support Center 55 Dell Touch Zone 36 Diagnostic Checklist 75 discs using 40 drivers and downloads 79 DVDs, playing and creating 45 95
Index A AC adapter size and weight 91 airflow, allowing 5 C calling Dell 75 CDs, playing and creating 45 chipset 80 computer capabilities 44 computer, setting up 5 Contacting Dell online 76 customer service 71 D damage, avoiding 5 DellConnect 71 Dell Diagnostics 59 Dell Factory Image Restore 68 Dell Support Center 55 Dell Touch Zone 36 Diagnostic Checklist 75 discs using 40 drivers and downloads 79 DVDs, playing and creating 45 95


