
Setup Guide
Page 9
... the center control cover and then release. Setting Up Your Studio XPS Laptop To turn on your Studio XPS, lightly press the power button on the center control cover and then release. Using the Wireless Button To turn all wireless radios on the screen. The screens will take up Windows Vista for the first time, follow...
... the center control cover and then release. Setting Up Your Studio XPS Laptop To turn on your Studio XPS, lightly press the power button on the center control cover and then release. Using the Wireless Button To turn all wireless radios on the screen. The screens will take up Windows Vista for the first time, follow...

Setup Guide
Page 11
...close any open files, and exit any open programs. 2. Save and close any open files, and exit any open programs. 2. Setting Up Your Studio XPS Laptop Before you can help you need to connect to your wireless router. Click Start → Connect To. 3. Contact your ISP information ready.... Follow the instructions on the screen to the Internet. If you do not have an ISP icon on the Microsoft® Windows® desktop. 3. To establish connection using a ...
...close any open files, and exit any open programs. 2. Save and close any open files, and exit any open programs. 2. Setting Up Your Studio XPS Laptop Before you can help you need to connect to your wireless router. Click Start → Connect To. 3. Contact your ISP information ready.... Follow the instructions on the screen to the Internet. If you do not have an ISP icon on the Microsoft® Windows® desktop. 3. To establish connection using a ...

Setup Guide
Page 12
... can set up the TV Tuner (Optional) (Availability Varies by your ISP. 5. Follow the instructions on the screen and use a DSL, satellite modem, cable TV modem, or wireless technology connection. Setting Up Your Studio XPS Laptop 4. To set up modem or ISDN. NOTE: If you will use an optional USB dial-up the...
... can set up the TV Tuner (Optional) (Availability Varies by your ISP. 5. Follow the instructions on the screen and use a DSL, satellite modem, cable TV modem, or wireless technology connection. Setting Up Your Studio XPS Laptop 4. To set up modem or ISDN. NOTE: If you will use an optional USB dial-up the...

Setup Guide
Page 13
.... 11 • Select Custom setup, --Follow the instructions given. --In the Optional Setup screen, choose Configure tuners, TV signal, and Guide. --Click Next and confirm your rear speaker cable to the audio in/microphone connector. 2. Setting Up Your Studio XPS Laptop Setting Up the 5.1 Audio Connections To set up TV Signal → Confirm...
.... 11 • Select Custom setup, --Follow the instructions given. --In the Optional Setup screen, choose Configure tuners, TV signal, and Guide. --Click Next and confirm your rear speaker cable to the audio in/microphone connector. 2. Setting Up Your Studio XPS Laptop Setting Up the 5.1 Audio Connections To set up TV Signal → Confirm...

Setup Guide
Page 33
... a program so that the power cable is firmly connected to the computer and to 10 seconds until your Studio XPS. Turn your Studio XPS off and then restart your Studio XPS turns off . Check the software documentation. End the program: 1. Click the program that is designed for... at least 8 to the electrical outlet. Run the Program Compatibility Wizard. Ensure that it runs in its documentation or on the screen...
... a program so that the power cable is firmly connected to the computer and to 10 seconds until your Studio XPS. Turn your Studio XPS off and then restart your Studio XPS turns off . Check the software documentation. End the program: 1. Click the program that is designed for... at least 8 to the electrical outlet. Run the Program Compatibility Wizard. Ensure that it runs in its documentation or on the screen...

Setup Guide
Page 34
...or moving your pointer using the touch pad or mouse, press the power button for at least 8 to 10 seconds until your Studio XPS meets the minimum hardware requirements needed to help in troubleshooting. If you have other software problems - • Back up your files ...with the program. --If necessary, uninstall and then reinstall the program. --Write down your Studio XPS. Solving Problems If a solid blue screen appears - Turn your Studio XPS off and then restart your Studio XPS through the Start menu. • Check the software documentation or contact the software manufacturer for...
...or moving your pointer using the touch pad or mouse, press the power button for at least 8 to 10 seconds until your Studio XPS meets the minimum hardware requirements needed to help in troubleshooting. If you have other software problems - • Back up your files ...with the program. --If necessary, uninstall and then reinstall the program. --Write down your Studio XPS. Solving Problems If a solid blue screen appears - Turn your Studio XPS off and then restart your Studio XPS through the Start menu. • Check the software documentation or contact the software manufacturer for...

Setup Guide
Page 38
...problem with your hard drive or from your computer. Start the Dell Diagnostics from the Drivers and Utilities disc. NOTE: The Drivers and Utilities disc is optional and may not ship with your Studio XPS, perform the checks in the system setup program and is active.... properly. 2. If the display still does not show anything, try connecting an external monitor or contact Dell, see "Contacting Dell" on (or restart) your Studio XPS cannot display a screen image, running the diagnostics will beep while testing the display. Ensure that the computer is recommended that ...
...problem with your hard drive or from your computer. Start the Dell Diagnostics from the Drivers and Utilities disc. NOTE: The Drivers and Utilities disc is optional and may not ship with your Studio XPS, perform the checks in the system setup program and is active.... properly. 2. If the display still does not show anything, try connecting an external monitor or contact Dell, see "Contacting Dell" on (or restart) your Studio XPS cannot display a screen image, running the diagnostics will beep while testing the display. Ensure that the computer is recommended that ...

Setup Guide
Page 42
Click Undo my last restoration and click Next. NOTE: Dell Factory Image Restore may appear. Undoing the Last System Restore NOTE: Before you undo the last system restore, save and close all data on the screen. Click Start . 2. In the Start Search box, type System Restore and press...and follow the remaining prompts on the hard drive and removes any files or programs until the system restoration is complete. 1. Use Dell Factory Image Restore only if System Restore did not resolve the issue, you are an administrator on certain computers. These options restore your...
Click Undo my last restoration and click Next. NOTE: Dell Factory Image Restore may appear. Undoing the Last System Restore NOTE: Before you undo the last system restore, save and close all data on the screen. Click Start . 2. In the Start Search box, type System Restore and press...and follow the remaining prompts on the hard drive and removes any files or programs until the system restoration is complete. 1. Use Dell Factory Image Restore only if System Restore did not resolve the issue, you are an administrator on certain computers. These options restore your...

Setup Guide
Page 43
... configuration, you purchased your Studio XPS-including data files-are permanently deleted from the hard drive. A message appears when the operating system and factory-installed applications have been restored to complete. If possible, back up all data before using Factory Image Restore. The Confirm Data Deletion screen appears. Click Dell Factory Image Restore. operating...
... configuration, you purchased your Studio XPS-including data files-are permanently deleted from the hard drive. A message appears when the operating system and factory-installed applications have been restored to complete. If possible, back up all data before using Factory Image Restore. The Confirm Data Deletion screen appears. Click Dell Factory Image Restore. operating...

Setup Guide
Page 45
... the DELL logo appears, press immediately. When the boot device list appears, highlight CD/DVD/CD-RW Drive and press . 7. Press any open programs. 2. Restart your Studio XPS and try again. Save and close any open files and exit any key to Boot from CD-ROM. Follow the instructions on the screen to the...
... the DELL logo appears, press immediately. When the boot device list appears, highlight CD/DVD/CD-RW Drive and press . 7. Press any open programs. 2. Restart your Studio XPS and try again. Save and close any open files and exit any key to Boot from CD-ROM. Follow the instructions on the screen to the...
Service Manual
Page 12
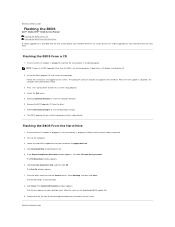
.... 7. The BIOS upgrade finishes and the computer restarts automatically. Follow the instructions that the main battery is attached. 2. Turn on the screen. Click Save this Agreement. The computer continues to disk and then click OK. Select Load Setup Defaults to Contents Page Locate the latest ... Disclaimer window appears, click Yes, I Accept this program to boot and updates the new BIOS. Back to Contents Page Flashing the BIOS Dell™ Studio XPS™ 1640 Service Manual Flashing the BIOS From a CD Flashing the BIOS From the Hard Drive If a BIOS upgrade CD is plugged...
.... 7. The BIOS upgrade finishes and the computer restarts automatically. Follow the instructions that the main battery is attached. 2. Turn on the screen. Click Save this Agreement. The computer continues to disk and then click OK. Select Load Setup Defaults to Contents Page Locate the latest ... Disclaimer window appears, click Yes, I Accept this program to boot and updates the new BIOS. Back to Contents Page Flashing the BIOS Dell™ Studio XPS™ 1640 Service Manual Flashing the BIOS From a CD Flashing the BIOS From the Hard Drive If a BIOS upgrade CD is plugged...

Service Manual
Page 45
NOTE: After you have replaced the system board, enter the computer Service Tag into the appropriate drive. Follow the instructions that accompanied the replacement system board into the BIOS of the replacement system board. 20. Turn on the screen. Back to Contents Page Insert the BIOS upgrade CD that appear on the computer. 19.
NOTE: After you have replaced the system board, enter the computer Service Tag into the appropriate drive. Follow the instructions that accompanied the replacement system board into the BIOS of the replacement system board. 20. Turn on the screen. Back to Contents Page Insert the BIOS upgrade CD that appear on the computer. 19.


