Setup Guide
Page 14
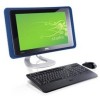
Fan noise is on automatically when the computer gets hot. WARNING: Ensure that none of the computer air vents are turned on or off. 7 5 6 12 Blocking the vents will cause serious thermal problems. 2 Camera activity light (optional) - Using Your Studio One Front View Features 1 23 4 1 Air vents - Internal fans create airflow through the vents to prevent the computer from overheating. Indicates if the camera is normal and does not indicate a problem with the fan or the computer. The fans are blocked.
Fan noise is on automatically when the computer gets hot. WARNING: Ensure that none of the computer air vents are turned on or off. 7 5 6 12 Blocking the vents will cause serious thermal problems. 2 Camera activity light (optional) - Using Your Studio One Front View Features 1 23 4 1 Air vents - Internal fans create airflow through the vents to prevent the computer from overheating. Indicates if the camera is normal and does not indicate a problem with the fan or the computer. The fans are blocked.
Setup Guide
Page 17
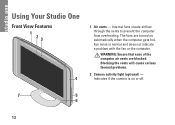
...Studio One 3 Headphone or line-out connector - Connects to an audio cable for voice or to headphones. The light in power-on the back of your computer. 4 Microphone or line-in sleep state OR the system board cannot start initialization. there is flashing. 6 Power button and light - Turns...speaker or sound system, use the line out connector on state. • Blinking amber - A flashing light indicates hard drive activity. Turns the computer on when the computer reads or writes data. the computer is in connector - There may be an issue with either the ...
...Studio One 3 Headphone or line-out connector - Connects to an audio cable for voice or to headphones. The light in power-on the back of your computer. 4 Microphone or line-in sleep state OR the system board cannot start initialization. there is flashing. 6 Power button and light - Turns...speaker or sound system, use the line out connector on state. • Blinking amber - A flashing light indicates hard drive activity. Turns the computer on when the computer reads or writes data. the computer is in connector - There may be an issue with either the ...
Setup Guide
Page 25
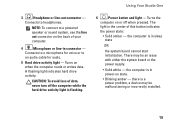
... fingerprints. 23 Solving Problems This section provides troubleshooting information for your problem using the following guidelines, see "Using Support Tools" on page 30 or "Contacting Dell" on screen) and wipe the surface and sides of the touch screen to wipe the touch screen. 3. To enable multi-touch features, click the Multi...-touch settings icon in the system tray. • Certain touch screen features may not be disabled. If the touch screen starts losing its sensitivity - Turn off the computer. 2.
... fingerprints. 23 Solving Problems This section provides troubleshooting information for your problem using the following guidelines, see "Using Support Tools" on page 30 or "Contacting Dell" on screen) and wipe the surface and sides of the touch screen to wipe the touch screen. 3. To enable multi-touch features, click the Multi...-touch settings icon in the system tray. • Certain touch screen features may not be disabled. If the touch screen starts losing its sensitivity - Turn off the computer. 2.
Setup Guide
Page 28
...the power cable into a power strip, ensure that the power strip is creating interference by testing it with either turned off - For assistance, contact Dell (see "Contacting Dell" on page 44). An unwanted signal is plugged into an electrical outlet and that hinders reception on page 44).... For assistance, contact Dell (see "Contacting Dell" on page 44). There is not responding - The computer is turned on the computer and the electrical outlet. • If the computer is plugged into both...
...the power cable into a power strip, ensure that the power strip is creating interference by testing it with either turned off - For assistance, contact Dell (see "Contacting Dell" on page 44). An unwanted signal is plugged into an electrical outlet and that hinders reception on page 44).... For assistance, contact Dell (see "Contacting Dell" on page 44). There is not responding - The computer is turned on the computer and the electrical outlet. • If the computer is plugged into both...
Setup Guide
Page 30
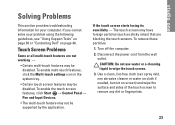
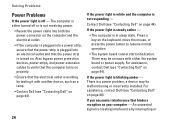
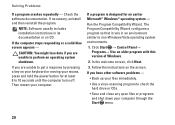
..., uninstall and then reinstall the program. Then restart your files immediately. • Use a virus-scanning program to non-Windows Vista operating system environments. 1. If you are unable to 10 seconds until the computer turns off. NOTE: Software usually includes installation instructions in an environment similar to check the hard drive or CDs...
..., uninstall and then reinstall the program. Then restart your files immediately. • Use a virus-scanning program to non-Windows Vista operating system environments. 1. If you are unable to 10 seconds until the computer turns off. NOTE: Software usually includes installation instructions in an environment similar to check the hard drive or CDs...

Setup Guide
Page 35
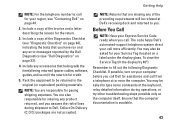
... steps. NOTE: The Drivers and Utilities media is active. NOTE: If your computer. 33 Turn on (or restart) your computer cannot display a screen image, see "Contacting Dell" on page 27 and run the Dell Diagnostics before you contact Dell for technical assistance. In the search results, select the option that is located on a hidden...
... steps. NOTE: The Drivers and Utilities media is active. NOTE: If your computer. 33 Turn on (or restart) your computer cannot display a screen image, see "Contacting Dell" on page 27 and run the Dell Diagnostics before you contact Dell for technical assistance. In the search results, select the option that is located on a hidden...
Setup Guide
Page 39
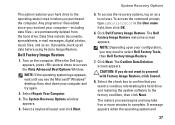
...click OK. 6. If possible, back up all data before using Factory Image Restore. The Dell Factory Image Restore welcome screen appears. A message appears when the operating system and 37 Data...purchased the computer. Any programs or files added since you see the Microsoft® Windows® desktop; NOTE: If the operating system logo appears, wait until you received your computer-...Advanced Boot Options Window. The restore process begins and may need to proceed with Factory Image Restore, click Cancel. 8. Select a keyboard layout and click Next. Click Next. Turn on the computer...
...click OK. 6. If possible, back up all data before using Factory Image Restore. The Dell Factory Image Restore welcome screen appears. A message appears when the operating system and 37 Data...purchased the computer. Any programs or files added since you see the Microsoft® Windows® desktop; NOTE: If the operating system logo appears, wait until you received your computer-...Advanced Boot Options Window. The restore process begins and may need to proceed with Factory Image Restore, click Cancel. 8. Select a keyboard layout and click Next. Click Next. Turn on the computer...
Setup Guide
Page 45
... at the computer itself. Remember to fill out the following Diagnostic Checklist. Include any product returned, and you call. If possible, turn on your computer before you have run and any of loss during operations, or try other troubleshooting steps possible only at the keyboard,... relay detailed information during shipment to Dell. Include a copy of the invoice and a letter describing the reason for the return. 3. Pack the equipment to be asked for your ...
... at the computer itself. Remember to fill out the following Diagnostic Checklist. Include any product returned, and you call. If possible, turn on your computer before you have run and any of loss during operations, or try other troubleshooting steps possible only at the keyboard,... relay detailed information during shipment to Dell. Include a copy of the invoice and a letter describing the reason for the return. 3. Pack the equipment to be asked for your ...


