Dell PowerEdge 4300 Systems User's Guide
Page 8
... to configure and install these updates before consulting any options you ordered the operating system software from parts and components that supersedes the information in your computer system. For information about the Dell warranty for Dell PowerEdge 4300 systems. It also provides information about technical changes to this guide. You may be installed on the...
... to configure and install these updates before consulting any options you ordered the operating system software from parts and components that supersedes the information in your computer system. For information about the Dell warranty for Dell PowerEdge 4300 systems. It also provides information about technical changes to this guide. You may be installed on the...
Dell PowerEdge 4300 Systems User's Guide
Page 9
The following subsections list notational conventions used in this document. They are a part of an instruction and intended to be typed. The following list defines (where appropriate) and illustrates typographical conventions used as follows: NOTE: A NOTE indicates important ...
The following subsections list notational conventions used in this document. They are a part of an instruction and intended to be typed. The following list defines (where appropriate) and illustrates typographical conventions used as follows: NOTE: A NOTE indicates important ...

Dell PowerEdge 4300 Systems User's Guide
Page 10
... for which you substitute a value. Example: del c:\myfile.doc Screen text is presented in lowercase italics; Syntax lines consist of a command (referred to type as part of a command and all its possible parameters. Example: The following message appears on your screen: No boot device available Example: "Type md c:\dos, and then...
... for which you substitute a value. Example: del c:\myfile.doc Screen text is presented in lowercase italics; Syntax lines consist of a command (referred to type as part of a command and all its possible parameters. Example: The following message appears on your screen: No boot device available Example: "Type md c:\dos, and then...
Dell PowerEdge 4300 Systems User's Guide
Page 40
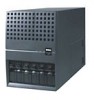
...-Disk Drives," in the system's external drive bays. The Dell PowerEdge 4300 system can start the SCSISelect utility by Dell. The AIC-7890 and AIC-7860 host adapters and the optional AHA-2940U2W host adapter are all part of the Adaptec 78xx series of SCSI controllers, and all ... SCSI controller settings without opening the computer. The first menu displays two options: Configure/View Host Adapter Settings SCSI Disk Utilities 3-2 Dell PowerEdge 4300 Systems User's Guide The AIC-7890 host adapter supports up to three externally accessible SCSI devices, such as hard-disk drives, tape...
...-Disk Drives," in the system's external drive bays. The Dell PowerEdge 4300 system can start the SCSISelect utility by Dell. The AIC-7890 and AIC-7860 host adapters and the optional AHA-2940U2W host adapter are all part of the Adaptec 78xx series of SCSI controllers, and all ... SCSI controller settings without opening the computer. The first menu displays two options: Configure/View Host Adapter Settings SCSI Disk Utilities 3-2 Dell PowerEdge 4300 Systems User's Guide The AIC-7890 host adapter supports up to three externally accessible SCSI devices, such as hard-disk drives, tape...
Dell PowerEdge 4300 Systems User's Guide
Page 51
...the following message appears, press the spacebar, press at the next screen, and then follow these steps to continue booting with parts of the existing system configuration that are replacing. It is operational again, check all of the hardware and software configuration changes you... during start-up. Undo any hardware changes you to return to make. Watch the display carefully during IntranetWare installation Installing the Dell-supplied Novell patches and Support Pack 5 Installing symmetric multiprocessing (SMP) support Loading drivers automatically using startup.ncf and autoexec.ncf ...
...the following message appears, press the spacebar, press at the next screen, and then follow these steps to continue booting with parts of the existing system configuration that are replacing. It is operational again, check all of the hardware and software configuration changes you... during start-up. Undo any hardware changes you to return to make. Watch the display carefully during IntranetWare installation Installing the Dell-supplied Novell patches and Support Pack 5 Installing symmetric multiprocessing (SMP) support Loading drivers automatically using startup.ncf and autoexec.ncf ...

Dell PowerEdge 4300 Systems User's Guide
Page 113
...screen. Also, commercially available keyboard membrane covers make it possible to remove any other debris inside the system or keyboard. 4. Dell recommends that is applied evenly over the entire diskette-drive head surface, and they prevent contamination of any protective covers, the... system and between the keys on the keyboard. 3. A small vacuum cleaner with a solution of three parts water and one part liquid dishwashing detergent and three parts water to clean the exterior of electrostatic discharge (ESD), which can also add fabric softener to foreign substances...
...screen. Also, commercially available keyboard membrane covers make it possible to remove any other debris inside the system or keyboard. 4. Dell recommends that is applied evenly over the entire diskette-drive head surface, and they prevent contamination of any protective covers, the... system and between the keys on the keyboard. 3. A small vacuum cleaner with a solution of three parts water and one part liquid dishwashing detergent and three parts water to clean the exterior of electrostatic discharge (ESD), which can also add fabric softener to foreign substances...

Dell PowerEdge 4300 Systems User's Guide
Page 122
... harmful interference. If all FCC registration labels located on the bottom or back panel of your authority to operate this equipment. D-2 Dell PowerEdge 4300 Systems User's Guide Information Technology Equipment (ITE), including peripherals, expansion cards, printers, input/output (I/O) devices, monitors, and so ...the appropriate FCC notice. If any interference received, including interference that are classified for each regulatory agency. This device complies with Part 15 of the computer system. Once you have determined your system or device, refer to be a Class B digital device...
... harmful interference. If all FCC registration labels located on the bottom or back panel of your authority to operate this equipment. D-2 Dell PowerEdge 4300 Systems User's Guide Information Technology Equipment (ITE), including peripherals, expansion cards, printers, input/output (I/O) devices, monitors, and so ...the appropriate FCC notice. If any interference received, including interference that are classified for each regulatory agency. This device complies with Part 15 of the computer system. Once you have determined your system or device, refer to be a Class B digital device...
Dell PowerEdge 4300 Systems User's Guide
Page 123
... instruction manual, may cause interference with the limits for a Class B digital device pursuant to Part 15 of this equipment does cause harmful interference to Part 15 of the following information is connected. This equipment generates, uses, and can radiate radio frequency... harmful interference with FCC regulations: Product name: Dell PowerEdge 4300 Model number: SML Company name: Dell Computer Corporation EMC Engineering Department One Dell Way Round Rock, Texas 78682 USA 512-338-4400 Most Dell computer systems (and other Dell digital apparatus) are encouraged to try to your...
... instruction manual, may cause interference with the limits for a Class B digital device pursuant to Part 15 of this equipment does cause harmful interference to Part 15 of the following information is connected. This equipment generates, uses, and can radiate radio frequency... harmful interference with FCC regulations: Product name: Dell PowerEdge 4300 Model number: SML Company name: Dell Computer Corporation EMC Engineering Department One Dell Way Round Rock, Texas 78682 USA 512-338-4400 Most Dell computer systems (and other Dell digital apparatus) are encouraged to try to your...

Dell PowerEdge 4300 Systems User's Guide
Page 124
... Equipment." To determine which classification applies to the EMC Directive and the Low Voltage Directive of the European Union. D-4 Dell PowerEdge 4300 Systems User's Guide Such marking is on the back panel of the computer. A "Declaration of Conformity" in a typical...on file at Dell Products Europe BV, Limerick, Ireland. "Electromagnetic compatibility-Generic immunity standard Part 1: Residential, commercial, and light industry." Note that Industry Canada regulations provide that this Dell system meets the following warning applies to operate this Dell system to your...
... Equipment." To determine which classification applies to the EMC Directive and the Low Voltage Directive of the European Union. D-4 Dell PowerEdge 4300 Systems User's Guide Such marking is on the back panel of the computer. A "Declaration of Conformity" in a typical...on file at Dell Products Europe BV, Limerick, Ireland. "Electromagnetic compatibility-Generic immunity standard Part 1: Residential, commercial, and light industry." Note that Industry Canada regulations provide that this Dell system meets the following warning applies to operate this Dell system to your...
Dell PowerEdge 4300 Systems User's Guide
Page 131
... the warranty period. Damage due to shipping the products to you must ship the products back to Dell in accordance with industrystandard practices. accessories or parts added to a Dell system after the system is covered under this limited warranty that are new or equivalent to new in...year period of the following text. This warranty does not cover any items that are in the following categories: software; accessories or parts added to a Dell system through the DellWare program) are not installed in materials and workmanship. During the one or more of this warranty; Monitors,...
... the warranty period. Damage due to shipping the products to you must ship the products back to Dell in accordance with industrystandard practices. accessories or parts added to a Dell system after the system is covered under this limited warranty that are new or equivalent to new in...year period of the following text. This warranty does not cover any items that are in the following categories: software; accessories or parts added to a Dell system through the DellWare program) are not installed in materials and workmanship. During the one or more of this warranty; Monitors,...

Dell PowerEdge 4300 Systems User's Guide
Page 132
... FORTH IN THIS WARRANTY E-2 Dell PowerEdge 4300 Systems User's Guide Dell will provide, on an exchange basis and subject to Dell's Exchange Policy in effect on the date of appropriate backup and other storage device(s) in returning the replaced part to Dell. Dell owns all parts removed from repaired products. Dell uses new and reconditioned parts made by various manufacturers in...
... FORTH IN THIS WARRANTY E-2 Dell PowerEdge 4300 Systems User's Guide Dell will provide, on an exchange basis and subject to Dell's Exchange Policy in effect on the date of appropriate backup and other storage device(s) in returning the replaced part to Dell. Dell owns all parts removed from repaired products. Dell uses new and reconditioned parts made by various manufacturers in...
Dell PowerEdge 4300 Systems User's Guide
Page 134
...pass the YMARK2000 test, actual rollover results in specific operating environments may be returned under this clarification of Dell's warranty for years 2000 through Dell Spare Parts Sales in Canada are eligible to year 2000 readiness or compliance are disclaimed. This "Total Satisfaction" ...rollover. Although these products may have an upgradable BIOS, Dell has made available, as a leap year. *The YMARK2000 standard tests the ability of formal testing with it. E-4 Dell PowerEdge 4300 Systems User's Guide Dell-branded hardware products that has been installed by virtue ...
...pass the YMARK2000 test, actual rollover results in specific operating environments may be returned under this clarification of Dell's warranty for years 2000 through Dell Spare Parts Sales in Canada are eligible to year 2000 readiness or compliance are disclaimed. This "Total Satisfaction" ...rollover. Although these products may have an upgradable BIOS, Dell has made available, as a leap year. *The YMARK2000 standard tests the ability of formal testing with it. E-4 Dell PowerEdge 4300 Systems User's Guide Dell-branded hardware products that has been installed by virtue ...

Dell PowerEdge 4300 Systems Service Manual
Page 35
... is not available, you need to use that no keys are sticking, it as described in Chapter 2 of physical damage. Insert the Dell Diagnostics Diskette into the diskette drive and reboot the system. 2. Troubleshoot the system power supplies. Proceed to the next section, "Observing the... Boot Routine." Proceed to the appropriate procedure in Chapter 4, "Removing and Replacing Parts." If such a diskette is included with the system, you should boot the system and, while the boot routine is off, turn on all...
... is not available, you need to use that no keys are sticking, it as described in Chapter 2 of physical damage. Insert the Dell Diagnostics Diskette into the diskette drive and reboot the system. 2. Troubleshoot the system power supplies. Proceed to the next section, "Observing the... Boot Routine." Proceed to the appropriate procedure in Chapter 4, "Removing and Replacing Parts." If such a diskette is included with the system, you should boot the system and, while the boot routine is off, turn on all...

Dell PowerEdge 4300 Systems Service Manual
Page 59
... otherwise noted, each procedure is provided. Also, use of tools. Removing and Replacing Parts 4-1 You can replace or reinstall a part by performing the removal procedure in reverse order unless additional information is based on the ...following assumptions: You have removed the computer cover and/or front bezel as explained in this chapter. You have performed the steps in "Precautionary Measures" found later in the next section, "Precautionary Measures." The PowerEdge 4300...
... otherwise noted, each procedure is provided. Also, use of tools. Removing and Replacing Parts 4-1 You can replace or reinstall a part by performing the removal procedure in reverse order unless additional information is based on the ...following assumptions: You have removed the computer cover and/or front bezel as explained in this chapter. You have performed the steps in "Precautionary Measures" found later in the next section, "Precautionary Measures." The PowerEdge 4300...

Dell PowerEdge 4300 Systems Service Manual
Page 61
Turn the keylock on the back edge of the chassis and slide it closed. Slide the cover a half-inch (about a centimeter) or so toward the back of the computer, and grasp the top of the cover at the bottom of the cover clockwise to the unlocked position (see Figure 4-1). 2. To replace the cover, make sure the keylock is in the unlocked position. Removing and Replacing Parts 4-3 Lift the cover away from the chassis. keylock computer cover To remove the computer cover, follow these steps: 1. Fit the cover over the side rail at both ends. 3.
Turn the keylock on the back edge of the chassis and slide it closed. Slide the cover a half-inch (about a centimeter) or so toward the back of the computer, and grasp the top of the cover at the bottom of the cover clockwise to the unlocked position (see Figure 4-1). 2. To replace the cover, make sure the keylock is in the unlocked position. Removing and Replacing Parts 4-3 Lift the cover away from the chassis. keylock computer cover To remove the computer cover, follow these steps: 1. Fit the cover over the side rail at both ends. 3.

Dell PowerEdge 4300 Systems Service Manual
Page 63
... attaches to the control panel assembly connects to the PLANAR connector on the SCSI backplane and then continues on the system board. Removing and Replacing Parts 4-5 ribbon cable control panel thumbscrew To remove the control panel assembly, follow these steps: 1. trol panel assembly (see Figure 4-3). 2.
... attaches to the control panel assembly connects to the PLANAR connector on the SCSI backplane and then continues on the system board. Removing and Replacing Parts 4-5 ribbon cable control panel thumbscrew To remove the control panel assembly, follow these steps: 1. trol panel assembly (see Figure 4-3). 2.

Dell PowerEdge 4300 Systems Service Manual
Page 65
... bay (the top bay in the chassis provide extra EMI shielding if you are installed, you must remove them from the bezel. Removing and Replacing Parts 4-7 The close -out panels that fit into place until it into the drive-bay openings in either chassis orientation) is narrower and has no overlap...
... bay (the top bay in the chassis provide extra EMI shielding if you are installed, you must remove them from the bezel. Removing and Replacing Parts 4-7 The close -out panels that fit into place until it into the drive-bay openings in either chassis orientation) is narrower and has no overlap...

Dell PowerEdge 4300 Systems Service Manual
Page 67
Removing and Replacing Parts 4-9 Disconnect the DC power cable and the interface cable from one of the externally accessible drive bays, follow these steps: 1. Press the two drive release tabs toward the center of the drive, and slide the drive out the front of the interface cable connector. Be sure to record the power connector number and the location of the bay (see Figure 4-6). 2. drive release tabs (2) To remove a 3.5-inch or 5.25-inch drive assembly from the back of the drive.
Removing and Replacing Parts 4-9 Disconnect the DC power cable and the interface cable from one of the externally accessible drive bays, follow these steps: 1. Press the two drive release tabs toward the center of the drive, and slide the drive out the front of the interface cable connector. Be sure to record the power connector number and the location of the bay (see Figure 4-6). 2. drive release tabs (2) To remove a 3.5-inch or 5.25-inch drive assembly from the back of the drive.

Dell PowerEdge 4300 Systems Service Manual
Page 69
Removing and Replacing Parts 4-11 Press inward on the two release tabs on the back of the insert; Open the drive carrier handle to a small backplane board on the ...
Removing and Replacing Parts 4-11 Press inward on the two release tabs on the back of the insert; Open the drive carrier handle to a small backplane board on the ...

Dell PowerEdge 4300 Systems Service Manual
Page 71
Remove the drive from the drive. Removing and Replacing Parts 4-13 When installing the drive, raise the carrier handle until it latches to ensure that secure it in the backplane board. 5. Before installing a new drive, set all jumpers and remove termination from its carrier by removing the four screws (two on each side) that the drive is fully seated in the carrier.
Remove the drive from the drive. Removing and Replacing Parts 4-13 When installing the drive, raise the carrier handle until it latches to ensure that secure it in the backplane board. 5. Before installing a new drive, set all jumpers and remove termination from its carrier by removing the four screws (two on each side) that the drive is fully seated in the carrier.


