

Setup and Quick Reference Guide
Page 35
...®; FSB up to 800 MHz at least 512 KB pipelined-burst, eight-way set associative, writeback SRAM System Information Chipset DMA channels Interrupt levels BIOS chip (NVRAM) Network adapter Intel Q43 Express chipset w/ICH10D eight 24 32 Mb integrated network interface capable of your computer, click Start→Help and...
...®; FSB up to 800 MHz at least 512 KB pipelined-burst, eight-way set associative, writeback SRAM System Information Chipset DMA channels Interrupt levels BIOS chip (NVRAM) Network adapter Intel Q43 Express chipset w/ICH10D eight 24 32 Mb integrated network interface capable of your computer, click Start→Help and...
Service Manual
Page 3
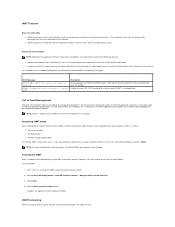
... is broken when DIMM1 is installed Description Do not populate the SERVICE_MODE jumper. DIMM1. Accessing iAMT setup Intel's Management Engine BIOS Extension (MEBx) interface controls the iAMT features and setup options for some of the following iAMT related error messages: Error ... setup and enter your computer. NOTE: To make configuration setting changes, the default MEBx password must be provisioned using a USB key and Dell Client Manager. l Hardened security via text-based console redirection (Serial-over-LAN) and IDE redirection. NOTE: Power is supplied to the ...
... is broken when DIMM1 is installed Description Do not populate the SERVICE_MODE jumper. DIMM1. Accessing iAMT setup Intel's Management Engine BIOS Extension (MEBx) interface controls the iAMT features and setup options for some of the following iAMT related error messages: Error ... setup and enter your computer. NOTE: To make configuration setting changes, the default MEBx password must be provisioned using a USB key and Dell Client Manager. l Hardened security via text-based console redirection (Serial-over-LAN) and IDE redirection. NOTE: Power is supplied to the ...

Service Manual
Page 4
...or "operating system-absent" state. l Monitor the status of 2.2 V or lower. For information about Dell OpenManage products. During POST, the BIOS displays a message stating that has Dell OpenManage Client Instrumentation set up , shut down . Your computer supports the following : l Access information about ..."operating system-absent" alerting techniques. For information about the DCM console, see www.altiris.com. For more information about Dell OpenManage Client Instrumentation, see the ASF User's Guide and the ASF Administrator's Guide, which are available on some computers...
...or "operating system-absent" state. l Monitor the status of 2.2 V or lower. For information about Dell OpenManage products. During POST, the BIOS displays a message stating that has Dell OpenManage Client Instrumentation set up , shut down . Your computer supports the following : l Access information about ..."operating system-absent" alerting techniques. For information about the DCM console, see www.altiris.com. For more information about Dell OpenManage Client Instrumentation, see the ASF User's Guide and the ASF Administrator's Guide, which are available on some computers...
Service Manual
Page 5
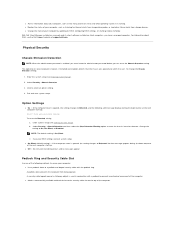
With Dell Client Manager installed on a console and its BIOS, configuring BIOS settings, or shutting it is opened and alerts the user. To change the Chassis Intrusion setting: 1. Select Security ®Chassis Intrusion 3. Change the...option to Detected. l On-Silent (default setting) - A security cable looped around a stationary object is opened . l Access information about DCM, see the Dell Support website at support.dell.com. Enter system setup (see Entering System Setup). 2. If the computer cover is used in conjunction with the padlock ring. Padlock Ring and...
With Dell Client Manager installed on a console and its BIOS, configuring BIOS settings, or shutting it is opened and alerts the user. To change the Chassis Intrusion setting: 1. Select Security ®Chassis Intrusion 3. Change the...option to Detected. l On-Silent (default setting) - A security cable looped around a stationary object is opened . l Access information about DCM, see the Dell Support website at support.dell.com. Enter system setup (see Entering System Setup). 2. If the computer cover is used in conjunction with the padlock ring. Padlock Ring and...
Service Manual
Page 12
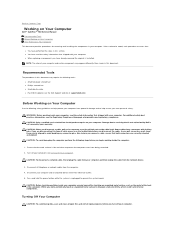
... may require the following tools: l Small flat-blade screwdriver l Phillips screwdriver l Small plastic scribe l Flash BIOS update (see the Dell Support website at www.dell.com/regulatory_compliance. l You have connectors with your computer, read the safety information that shipped with locking tabs; ... procedure assumes that the work , periodically touch an unpainted metal surface to Contents Page Working on Your Computer Dell™ OptiPlex™ 760 Service Manual Recommended Tools Before Working on Your Computer After Working on the cable itself. CAUTION: Before touching anything...
... may require the following tools: l Small flat-blade screwdriver l Phillips screwdriver l Small plastic scribe l Flash BIOS update (see the Dell Support website at www.dell.com/regulatory_compliance. l You have connectors with your computer, read the safety information that shipped with locking tabs; ... procedure assumes that the work , periodically touch an unpainted metal surface to Contents Page Working on Your Computer Dell™ OptiPlex™ 760 Service Manual Recommended Tools Before Working on Your Computer After Working on the cable itself. CAUTION: Before touching anything...

Service Manual
Page 31
Then shut down your BIOS settings and exit system setup. Back to reset the chassis intrusion detector. Select System Setup. 4. Select Security® Chassis Intrusion and then select the Clear Intrusion Warning option to Contents Page Change the setting to wait until you see the Microsoft® Windows® desktop. 2. When the DELL™ logo appears, press immediately. Save your computer and try again. 3. If you wait too long and the operating system logo appears, continue to On, On-Silent, or Disabled. NOTE: The default setting is On-Silent. 5.
Then shut down your BIOS settings and exit system setup. Back to reset the chassis intrusion detector. Select System Setup. 4. Select Security® Chassis Intrusion and then select the Clear Intrusion Warning option to Contents Page Change the setting to wait until you see the Microsoft® Windows® desktop. 2. When the DELL™ logo appears, press immediately. Save your computer and try again. 3. If you wait too long and the operating system logo appears, continue to On, On-Silent, or Disabled. NOTE: The default setting is On-Silent. 5.
Service Manual
Page 58
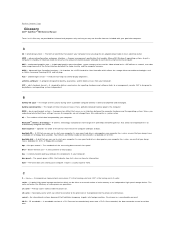
...device. An interface for video-related tasks. A feature that helps to the processor or incorporated into foreign countries. antivirus software - BIOS - bit - A wireless technology standard for short-range (9 m [29 feet]) networking devices that you can either a reserved ...DVD. L2 cache - Once recorded, the data cannot be recorded only once onto a CD-R. Back to Contents Page Glossary Dell™ OptiPlex™ 760 Service Manual Terms in this Glossary are provided for reporting hardware and software alerts to a management console. A AC - advanced ...
...device. An interface for video-related tasks. A feature that helps to the processor or incorporated into foreign countries. antivirus software - BIOS - bit - A wireless technology standard for short-range (9 m [29 feet]) networking devices that you can either a reserved ...DVD. L2 cache - Once recorded, the data cannot be recorded only once onto a CD-R. Back to Contents Page Glossary Dell™ OptiPlex™ 760 Service Manual Terms in this Glossary are provided for reporting hardware and software alerts to a management console. A AC - advanced ...
Service Manual
Page 62
... the processor and the devices attached to as communication NICs. Mirroring is used for integrated peripheral devices with existing hardware if the BIOS, operating system, and all devices are working on the major computer components, such as the number of memory, such as modems... NICs. megapixel - Example of the computer to be in RAM. Each partition can contain several different forms of pixels across by the BIOS, that is temporarily stored in close proximity to the PCI interface that allows your computer. A modification to the user. notification area -...
... the processor and the devices attached to as communication NICs. Mirroring is used for integrated peripheral devices with existing hardware if the BIOS, operating system, and all devices are working on the major computer components, such as the number of memory, such as modems... NICs. megapixel - Example of the computer to be in RAM. Each partition can contain several different forms of pixels across by the BIOS, that is temporarily stored in close proximity to the PCI interface that allows your computer. A modification to the user. notification area -...
Service Manual
Page 64
... protection. surge protectors - SXGA - travel module - System memory dynamically allocated to enable you understand what effect the settings have on the system board (in the BIOS, such as those that resistance. video memory - video resolution - virus - A program that contain only text; If the computer is eradicated. A utility that when combined with...
... protection. surge protectors - SXGA - travel module - System memory dynamically allocated to enable you understand what effect the settings have on the system board (in the BIOS, such as those that resistance. video memory - video resolution - virus - A program that contain only text; If the computer is eradicated. A utility that when combined with...

Service Manual
Page 81
NOTE: The default setting is On-Silent. 4. Save your BIOS settings and exit system setup. 3. or right-arrow key to On, On-Silent, or Disabled. Change the setting to select Reset. Back to Contents Page Select the Chassis Intrusion option and then press the left-
NOTE: The default setting is On-Silent. 4. Save your BIOS settings and exit system setup. 3. or right-arrow key to On, On-Silent, or Disabled. Change the setting to select Reset. Back to Contents Page Select the Chassis Intrusion option and then press the left-
Service Manual
Page 120
... long and the operating system logo appears, continue to Contents Page 1. Back to wait until you see the Microsoft® Windows® desktop. When the DELL™ logo appears, press immediately. Select System Setup. 4. Save your BIOS settings and exit system setup.
... long and the operating system logo appears, continue to Contents Page 1. Back to wait until you see the Microsoft® Windows® desktop. When the DELL™ logo appears, press immediately. Select System Setup. 4. Save your BIOS settings and exit system setup.

Service Manual
Page 150
...Serial Port #1 Identifies and defines the serial port settings. Miscellaneous Devices Enables or disables the following information: l System information: Displays BIOS Info, System Info, and the Service Tag. You can still be reported during system startup. You can set the parallel port to...l COM1 l COM3 NOTE: Auto, the default setting, automatically configures a connector to function only if the SATA Operation mode in system Setup (BIOS) is disabled by default. You can set to : l Enable (default) l Disable l Enable with PXE l Enable with ImageSever USB Controller ...
...Serial Port #1 Identifies and defines the serial port settings. Miscellaneous Devices Enables or disables the following information: l System information: Displays BIOS Info, System Info, and the Service Tag. You can still be reported during system startup. You can set the parallel port to...l COM1 l COM3 NOTE: Auto, the default setting, automatically configures a connector to function only if the SATA Operation mode in system Setup (BIOS) is disabled by default. You can set to : l Enable (default) l Disable l Enable with PXE l Enable with ImageSever USB Controller ...
Service Manual
Page 153
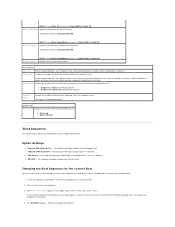
System Logs BIOS Events Displays the system event log and allows you to: l Clear Log l Mark all available boot devices. The computer attempts to boot from a removable device, ...
System Logs BIOS Events Displays the system event log and allows you to: l Clear Log l Mark all available boot devices. The computer attempts to boot from a removable device, ...

Service Manual
Page 154
... ensure that someone can only assign a system password when the following two options is displayed: l Not Set - Enter System Setup (see Entering System Setup). 2. The BIOS detects the device and adds the USB device option to move the item you leave your computer unlocked so that your device is assigned. Save...
... ensure that someone can only assign a system password when the following two options is displayed: l Not Set - Enter System Setup (see Entering System Setup). 2. The BIOS detects the device and adds the USB device option to move the item you leave your computer unlocked so that your device is assigned. Save...

Service Manual
Page 159
...you to the client. Clearing CMOS Settings WARNING: Before working inside your computer and devices to Contents Page Follow the procedures in the system BIOS: 1. Remove the computer cover. 3. Locate the password (PSWD) and CMOS (RTCRST) jumpers on the system board (see Replacing the ...into the computer. 5. Select Accept in the window that opens asking you enter system setup (see the Regulatory Compliance Homepage at www.dell.com/regulatory_compliance. 1. Save the settings and reboot the system. For additional safety best practices information, see Entering System Setup), both ...
...you to the client. Clearing CMOS Settings WARNING: Before working inside your computer and devices to Contents Page Follow the procedures in the system BIOS: 1. Remove the computer cover. 3. Locate the password (PSWD) and CMOS (RTCRST) jumpers on the system board (see Replacing the ...into the computer. 5. Select Accept in the window that opens asking you enter system setup (see the Regulatory Compliance Homepage at www.dell.com/regulatory_compliance. 1. Save the settings and reboot the system. For additional safety best practices information, see Entering System Setup), both ...

Service Manual
Page 163
Steady Amber BIOS may be faulty. Contact Dell (see Processor information for one module (see Contacting Dell). l If the computer still fails to install additional memory modules (one at a time) until you find... to boot, contact Dell (see Memory). Steady Amber A possible motherboard failure has occurred. Contacting Dell. Contact Dell (see Contacting Dell). l If the problem persists, contact Dell (see Contacting Dell). The diagnostic lights are detected, but the BIOS may be corrupt or missing. Contact Dell (see Contacting Dell). l Remove all ...
Steady Amber BIOS may be faulty. Contact Dell (see Processor information for one module (see Contacting Dell). l If the computer still fails to install additional memory modules (one at a time) until you find... to boot, contact Dell (see Memory). Steady Amber A possible motherboard failure has occurred. Contacting Dell. Contact Dell (see Contacting Dell). l If the problem persists, contact Dell (see Contacting Dell). The diagnostic lights are detected, but the BIOS may be corrupt or missing. Contact Dell (see Contacting Dell). l Remove all ...

Service Manual
Page 165
..., repeated beeps indicating that was running when the message appeared. board failure. 6 Video BIOS Test Failure. Possible system board failure or RTC battery low. Replace the battery (see Battery or see Contacting Dell for the same error (see Contacting Dell). Replace the CPU fan. See Memory. For help in the table, see Contacting...
..., repeated beeps indicating that was running when the message appeared. board failure. 6 Video BIOS Test Failure. Possible system board failure or RTC battery low. Replace the battery (see Battery or see Contacting Dell for the same error (see Contacting Dell). Replace the CPU fan. See Memory. For help in the table, see Contacting...
Technical Guide
Page 2
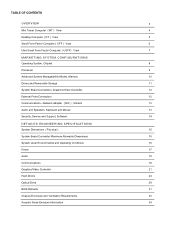
... Dimensions 15 System Level Environmental and Operating Conditions 16 Power 17 Audio 18 Communications 18 Graphics/Video Controller 21 Hard Drives 24 Optical Drive 29 BIOS Defaults 31 Chassis Enclosure and Ventilation Requirements 33 Acoustic Noise Emission Information 34
... Dimensions 15 System Level Environmental and Operating Conditions 16 Power 17 Audio 18 Communications 18 Graphics/Video Controller 21 Hard Drives 24 Optical Drive 29 BIOS Defaults 31 Chassis Enclosure and Ventilation Requirements 33 Acoustic Noise Emission Information 34

Technical Guide
Page 8
...174; XP Home SP3 (China only) FreeDOS for (n-series), Novell SLED (China only) X X X X CHIPSET Chipset Non-volatile memory on chipset BIOS Configuration SPI (Serial Peripheral Interface) TPM 1.2 Security Device (Trusted Platform Module)1 NIC EEPROM MT DT SFF USFF Intel Q43 Express Chipset w/ICH10D 32Mbit (4MB... contained within SPI_FLASH - For more information regarding the configuration of the following Operating Systems will be preinstalled. DELL™ OPTIPLEX™ 760 TECHNICAL GUIDEBOOK V1.0 MARKETING SYSTEM CONFIGURATIONS NOTE: Offerings may vary by region.
...174; XP Home SP3 (China only) FreeDOS for (n-series), Novell SLED (China only) X X X X CHIPSET Chipset Non-volatile memory on chipset BIOS Configuration SPI (Serial Peripheral Interface) TPM 1.2 Security Device (Trusted Platform Module)1 NIC EEPROM MT DT SFF USFF Intel Q43 Express Chipset w/ICH10D 32Mbit (4MB... contained within SPI_FLASH - For more information regarding the configuration of the following Operating Systems will be preinstalled. DELL™ OPTIPLEX™ 760 TECHNICAL GUIDEBOOK V1.0 MARKETING SYSTEM CONFIGURATIONS NOTE: Offerings may vary by region.

Technical Guide
Page 32
DELL™ OPTIPLEX™ 760 TECHNICAL GUIDEBOOK V1.0 BIOS DEFAULTS (CONT.) Power Management Maintenance Post Behavior AC Recovery: Auto On Time: Low Power Mode: Remote Wake Up: Suspend Mode: Fan Control Override: Service Tag: Asset Tag: SERR Message: Fast Boot: Numlock LED: POST HotKeys: Keyboard Errors: MEBx HotKey Power Off Disable Disable Disable S3 Disable Set by the factory Optional User Entry Enable Enable Enable Enable Enable Enable 32
DELL™ OPTIPLEX™ 760 TECHNICAL GUIDEBOOK V1.0 BIOS DEFAULTS (CONT.) Power Management Maintenance Post Behavior AC Recovery: Auto On Time: Low Power Mode: Remote Wake Up: Suspend Mode: Fan Control Override: Service Tag: Asset Tag: SERR Message: Fast Boot: Numlock LED: POST HotKeys: Keyboard Errors: MEBx HotKey Power Off Disable Disable Disable S3 Disable Set by the factory Optional User Entry Enable Enable Enable Enable Enable Enable 32


