Owner's Manual
Page 4
...Board...36 Installing the System Board...38 Removing the Heat Sink...39 Installing the Heat Sink...40 Removing the Power Connector Port...40 Installing the Power-Connector Port...41 Removing the Input/Output (I/O) Board...42 Installing the I/O Board...43 Removing the Display Bezel...43 Installing the ...Display Hinges...51 Installing the Display Hinges...52 Removing the LVDS and Camera Cable...52 Installing the LVDS and Camera Cable...54 3 Docking Port Information...55 4 System Setup...57 Boot Sequence...57 Navigation Keys...57 System Setup Options...58 Updating the BIOS ...65 System and Setup...
...Board...36 Installing the System Board...38 Removing the Heat Sink...39 Installing the Heat Sink...40 Removing the Power Connector Port...40 Installing the Power-Connector Port...41 Removing the Input/Output (I/O) Board...42 Installing the I/O Board...43 Removing the Display Bezel...43 Installing the ...Display Hinges...51 Installing the Display Hinges...52 Removing the LVDS and Camera Cable...52 Installing the LVDS and Camera Cable...54 3 Docking Port Information...55 4 System Setup...57 Boot Sequence...57 Navigation Keys...57 System Setup Options...58 Updating the BIOS ...65 System and Setup...
Owner's Manual
Page 8
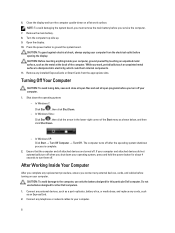
... opening the display. In Windows 7: Click Start , then click Shut Down. - Do not use only the battery designed for other Dell computers. 1. CAUTION: To guard against electrical shock, always unplug your computer from the appropriate slots. Connect any external devices, cards, ...and cables before you service the computer. 7. Connect any external devices, such as a port replicator, battery slice, or media base, and replace any replacement procedure, ensure you shut down your computer, ground yourself by touching ...
... opening the display. In Windows 7: Click Start , then click Shut Down. - Do not use only the battery designed for other Dell computers. 1. CAUTION: To guard against electrical shock, always unplug your computer from the appropriate slots. Connect any external devices, cards, ...and cables before you service the computer. 7. Connect any external devices, such as a port replicator, battery slice, or media base, and replace any replacement procedure, ensure you shut down your computer, ground yourself by touching ...

Owner's Manual
Page 40
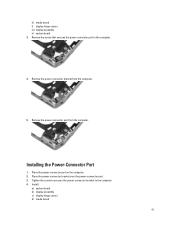
... Before Working Inside Your Computer. 2. Installing the Heat Sink 1. Tighten the screws to secure the heat sink to the system board. 4. Removing the Power Connector Port 1. Install: a) system board b) display assembly c) display hinge covers d) media board e) palmrest f) bluetooth module g) keyboard h) keyboard trim i) base cover j) optical drive k) hard drive l) battery m) ExpressCard n) SD...
... Before Working Inside Your Computer. 2. Installing the Heat Sink 1. Tighten the screws to secure the heat sink to the system board. 4. Removing the Power Connector Port 1. Install: a) system board b) display assembly c) display hinge covers d) media board e) palmrest f) bluetooth module g) keyboard h) keyboard trim i) base cover j) optical drive k) hard drive l) battery m) ExpressCard n) SD...
Owner's Manual
Page 41
Remove the screw that secures the power connector port to the computer. 4. Installing the Power-Connector Port 1. Install: a) system board b) display assembly c) display hinge covers d) media board 41 Remove the power connector port from the computer. 5. k) media board l) display hinge covers m) display assembly n) system board 3. Tighten the screw to secures the power-connector bracket...
Remove the screw that secures the power connector port to the computer. 4. Installing the Power-Connector Port 1. Install: a) system board b) display assembly c) display hinge covers d) media board 41 Remove the power connector port from the computer. 5. k) media board l) display hinge covers m) display assembly n) system board 3. Tighten the screw to secures the power-connector bracket...
Owner's Manual
Page 55
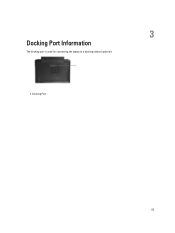
Docking Port 55 3 Docking Port Information The docking port is used for connecting the laptop to a docking station (optional). 1.
Docking Port 55 3 Docking Port Information The docking port is used for connecting the laptop to a docking station (optional). 1.
Owner's Manual
Page 59
... Default Setting: All drives are reported during system startup. Allows you to configure the internal SATA hard-drive controller. You can set the serial port to: • Disabled • COM1 (Default Setting) • COM2 • COM3 • COM4 NOTE: The operating system may allocate... resources even if the setting is disabled. Allows you to configure the SATA drives on the docking station operates. Option Parallel Port Serial Port SATA Operation Drives SMART Reporting Description • Disabled • Enabled • Enabled w/PXE (Default Setting) Allows you to define ...
... Default Setting: All drives are reported during system startup. Allows you to configure the internal SATA hard-drive controller. You can set the serial port to: • Disabled • COM1 (Default Setting) • COM2 • COM3 • COM4 NOTE: The operating system may allocate... resources even if the setting is disabled. Allows you to configure the SATA drives on the docking station operates. Option Parallel Port Serial Port SATA Operation Drives SMART Reporting Description • Disabled • Enabled • Enabled w/PXE (Default Setting) Allows you to define ...

Owner's Manual
Page 60
The options are enabled The options are: • Enable Internal Modem • Enable Microphone • Enable eSATA Ports • Enable Hard Drive Free Fall Protection • Enable Module Bay • Enable ExpressCard • Enable Camera • Enable Media Card • Disable Media Card ... by default. Allows you to choose the operating mode of the USB PowerShare feature. The options are: • Enable Boot Support • Enable External USB Port Default Setting: both the options are enabled. The option is 100% Allows you to define the USB configuration.
The options are enabled The options are: • Enable Internal Modem • Enable Microphone • Enable eSATA Ports • Enable Hard Drive Free Fall Protection • Enable Module Bay • Enable ExpressCard • Enable Camera • Enable Media Card • Disable Media Card ... by default. Allows you to choose the operating mode of the USB PowerShare feature. The options are: • Enable Boot Support • Enable External USB Port Default Setting: both the options are enabled. The option is 100% Allows you to define the USB configuration.

Owner's Manual
Page 72
... speaker amplifier Volume controls Video Type Controller Communications Network adapter Wireless Ports and Connectors Audio Video: Latitude E6230 Latitude E6330 Network adapter USB Memory card reader Docking port Subscriber Identity Module (SIM) card Contactless Smart Card Supported Smart Cards/Technologies Display Type Size Latitude E6230 Latitude E6330 microphone-in -1 memory card reader one one eSATA/USB 2.0 compliant- connector...
... speaker amplifier Volume controls Video Type Controller Communications Network adapter Wireless Ports and Connectors Audio Video: Latitude E6230 Latitude E6330 Network adapter USB Memory card reader Docking port Subscriber Identity Module (SIM) card Contactless Smart Card Supported Smart Cards/Technologies Display Type Size Latitude E6230 Latitude E6330 microphone-in -1 memory card reader one one eSATA/USB 2.0 compliant- connector...
Specifications
Page 1
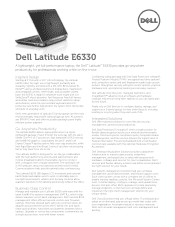
... everyday work comfortably even in low-light environments, while E-port docking solutions allow seamless transition to better deploy, configure, manage, and update those devices. Long battery life and 3- The Latitude E6330 180 degree LCD movement and optional backlit keyboard enable users to work . Dell systems management solutions help protect the system from drops and...
... everyday work comfortably even in low-light environments, while E-port docking solutions allow seamless transition to better deploy, configure, manage, and update those devices. Long battery life and 3- The Latitude E6330 180 degree LCD movement and optional backlit keyboard enable users to work . Dell systems management solutions help protect the system from drops and...
Specifications
Page 2
...and manufacturing variability. Discover leading-edge laptops at Dell.com/Latitude 1. Availability and terms of Ltd Hardware Warranty, write Dell USA LP, Attn: Warranties, One Dell Way, Round Rock, TX 78682 or see www.dell.com/warranty. 11. Only available in select countries... and Intel Responsiveness Technologies Graphics8 Options Display Storage9 Options Optical Drive Options Multimedia Options Battery Options Power Options Connectivity Ports, Slots & Chassis Input Device Options Dimensions & Weight12 Regulatory and Environmental Compliance Systems Management Warranty & Support Services...
...and manufacturing variability. Discover leading-edge laptops at Dell.com/Latitude 1. Availability and terms of Ltd Hardware Warranty, write Dell USA LP, Attn: Warranties, One Dell Way, Round Rock, TX 78682 or see www.dell.com/warranty. 11. Only available in select countries... and Intel Responsiveness Technologies Graphics8 Options Display Storage9 Options Optical Drive Options Multimedia Options Battery Options Power Options Connectivity Ports, Slots & Chassis Input Device Options Dimensions & Weight12 Regulatory and Environmental Compliance Systems Management Warranty & Support Services...
User Guide
Page 40
... up -to manage systems on the criticality. Located under the System Utilities folder on the system is a dual eSATA / USB combo port. A few of the key benefits of your system. Dell Latitude Ultrabook, E-Family & Mobile Precision Reimage "How-To" Guide a. The tool is primarily targeted at Customers who want to -date with either...
... up -to manage systems on the criticality. Located under the System Utilities folder on the system is a dual eSATA / USB combo port. A few of the key benefits of your system. Dell Latitude Ultrabook, E-Family & Mobile Precision Reimage "How-To" Guide a. The tool is primarily targeted at Customers who want to -date with either...


