

Quick Reference Guide
Page 17
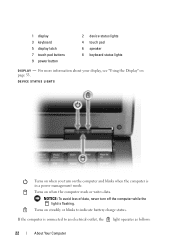
About Your Computer Front View 9 8 7 1 display 3 keyboard 5 display latch 7 touch pad buttons 9 power button 1 2 3 4 5 6 2 device status lights 4 touch pad 6 speaker 8 keyboard status lights Quick Reference Guide 17
About Your Computer Front View 9 8 7 1 display 3 keyboard 5 display latch 7 touch pad buttons 9 power button 1 2 3 4 5 6 2 device status lights 4 touch pad 6 speaker 8 keyboard status lights Quick Reference Guide 17
Quick Reference Guide
Page 29
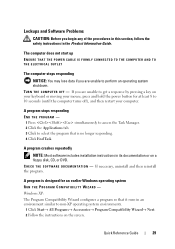
... Windows operating system RUN THE PROGRAM COMPATIBILITY WIZARD - Lockups and Software Problems CAUTION: Before you are unable to get a response by pressing a key on your keyboard or moving your computer.
... Windows operating system RUN THE PROGRAM COMPATIBILITY WIZARD - Lockups and Software Problems CAUTION: Before you are unable to get a response by pressing a key on your keyboard or moving your computer.
Quick Reference Guide
Page 30
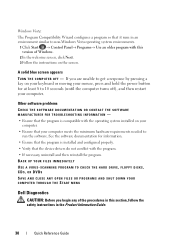
...DRIVE, FLOPPY DISKS, CDS, OR DVDS SAVE AND CLOSE ANY OPEN FILES OR PROGRAMS AND SHUT DOWN YOUR COMPUTER THROUGH THE START MENU Dell Diagnostics CAUTION: Before you are unable to run the software. Other software problems CHECK THE SOFTWARE DOCUMENTATION OR CONTACT THE SOFTWARE MANUFACTURER FOR ...the program. See the software documentation for information. • Ensure that the device drivers do not conflict with the operating system installed on your keyboard or moving your mouse, press and hold the power button for at least 8 to 10 seconds (until the computer turns off), and then...
...DRIVE, FLOPPY DISKS, CDS, OR DVDS SAVE AND CLOSE ANY OPEN FILES OR PROGRAMS AND SHUT DOWN YOUR COMPUTER THROUGH THE START MENU Dell Diagnostics CAUTION: Before you are unable to run the software. Other software problems CHECK THE SOFTWARE DOCUMENTATION OR CONTACT THE SOFTWARE MANUFACTURER FOR ...the program. See the software documentation for information. • Ensure that the device drivers do not conflict with the operating system installed on your keyboard or moving your mouse, press and hold the power button for at least 8 to 10 seconds (until the computer turns off), and then...
Quick Reference Guide
Page 31
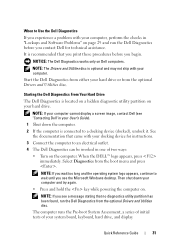
... your computer. Select Diagnostics from the optional Drivers and Utilities disc. NOTE: If you see "Contacting Dell" in one of your system board, keyboard, hard drive, and display. Starting the Dell Diagnostics From Your Hard Drive The Dell Diagnostics is connected to wait until you see a message stating that came with your docking device...
... your computer. Select Diagnostics from the optional Drivers and Utilities disc. NOTE: If you see "Contacting Dell" in one of your system board, keyboard, hard drive, and display. Starting the Dell Diagnostics From Your Hard Drive The Dell Diagnostics is connected to wait until you see a message stating that came with your docking device...
User's Guide
Page 4
... Mode 43 Configuring Power Management Settings 44 Accessing Power Options Properties 44 Charging the Battery 45 Replacing the Battery 45 Storing a Battery 46 5 Using the Keyboard 47 Numeric Keypad 47 Key Combinations 48 System Functions 48 Battery 48 CD or DVD Tray 48 Display Functions 48 Wireless Networking and Bluetooth®...
... Mode 43 Configuring Power Management Settings 44 Accessing Power Options Properties 44 Charging the Battery 45 Replacing the Battery 45 Storing a Battery 46 5 Using the Keyboard 47 Numeric Keypad 47 Key Combinations 48 System Functions 48 Battery 48 CD or DVD Tray 48 Display Functions 48 Wireless Networking and Bluetooth®...

User's Guide
Page 7
... . . 98 Using the Security Management Software . . . . 98 Computer Tracking Software 98 If Your Computer Is Lost or Stolen 99 11 Cleaning Your Computer 101 Computer, Keyboard, and Display 101 Touch Pad 101 Floppy Drive 102 CDs and DVDs 102 12 Troubleshooting 103...
... . . 98 Using the Security Management Software . . . . 98 Computer Tracking Software 98 If Your Computer Is Lost or Stolen 99 11 Cleaning Your Computer 101 Computer, Keyboard, and Display 101 Touch Pad 101 Floppy Drive 102 CDs and DVDs 102 12 Troubleshooting 103...
User's Guide
Page 22
... latch 7 touch pad buttons 9 power button 2 device status lights 4 touch pad 6 speaker 8 keyboard status lights D IS PL A Y - For more information about your display, see "Using the Display" on when the computer reads or writes data. DEVICE STATUS LIGHTS ...
... latch 7 touch pad buttons 9 power button 2 device status lights 4 touch pad 6 speaker 8 keyboard status lights D IS PL A Y - For more information about your display, see "Using the Display" on when the computer reads or writes data. DEVICE STATUS LIGHTS ...
User's Guide
Page 23
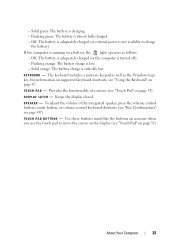
If the computer is running on page 47. For information on supported keyboard shortcuts, see "Touch Pad" on page 48"). T O U C H P A D - T O U C H P A D B U T T O N S - Solid orange: The battery charge is low. - Keeps the display closed. Use these buttons much ..." on page 51). Provides the functionality of the integrated speaker, press the volume control buttons, mute button, or volume-control keyboard shortcuts (see "Touch Pad" on page 51). The keyboard includes a numeric keypad as well as follows: - - Solid green: The battery is not available to move the cursor on...
If the computer is running on page 47. For information on supported keyboard shortcuts, see "Touch Pad" on page 48"). T O U C H P A D - T O U C H P A D B U T T O N S - Solid orange: The battery charge is low. - Keeps the display closed. Use these buttons much ..." on page 51). Provides the functionality of the integrated speaker, press the volume control buttons, mute button, or volume-control keyboard shortcuts (see "Touch Pad" on page 51). The keyboard includes a numeric keypad as well as follows: - - Solid green: The battery is not available to move the cursor on...

User's Guide
Page 24
A Turns on when the numeric keypad is enabled. 24 About Your Computer KEYBOARD STATUS LIGHTS The green lights located above the keyboard indicate the following: 9 Turns on when the uppercase letter function is enabled. Turns on when wireless devices are enabled.
A Turns on when the numeric keypad is enabled. 24 About Your Computer KEYBOARD STATUS LIGHTS The green lights located above the keyboard indicate the following: 9 Turns on when the uppercase letter function is enabled. Turns on when wireless devices are enabled.

User's Guide
Page 27
Back View 1 23 4 5 6 7 8 About Your Computer 27 D E V I C E L A T C H R E L E A S E - You can install devices such as a mouse, keyboard, or printer. Right Side View 1 2 3 1 media bay 3 USB connectors (2) 2 device latch release M ED IA B A Y - Press the latch release to eject any device installed in the media bay. USB CONNECTORS Connect USB devices, such as an optical drive, second battery, or a Dell TravelLite™ module in the media bay.
Back View 1 23 4 5 6 7 8 About Your Computer 27 D E V I C E L A T C H R E L E A S E - You can install devices such as a mouse, keyboard, or printer. Right Side View 1 2 3 1 media bay 3 USB connectors (2) 2 device latch release M ED IA B A Y - Press the latch release to eject any device installed in the media bay. USB CONNECTORS Connect USB devices, such as an optical drive, second battery, or a Dell TravelLite™ module in the media bay.

User's Guide
Page 28
...) 4 5 serial connector 6 7 AC adapter connector 8 modem connector (RJ-11) S-video TV-out connector video connector air vents USB CONNECTORS Connect USB devices, such as a mouse, keyboard, or printer. Connects the computer to the modem connector. To avoid damaging the computer, do not plug a telephone line into the network connector. The two...
...) 4 5 serial connector 6 7 AC adapter connector 8 modem connector (RJ-11) S-video TV-out connector video connector air vents USB CONNECTORS Connect USB devices, such as a mouse, keyboard, or printer. Connects the computer to the modem connector. To avoid damaging the computer, do not plug a telephone line into the network connector. The two...

User's Guide
Page 47
The keypad numbers and symbols are marked in blue on an external keyboard. Using the Keyboard 47 The 9 light indicates that the keypad is active. • To disable the keypad, press again. 5 Using the Keyboard Numeric Keypad numeric keypad The numeric keypad functions like the numeric keypad on the right of the keypad keys. Each key on the keypad has multiple functions. To type a number or symbol, hold down and press the desired key. • To enable the keypad, press .
The keypad numbers and symbols are marked in blue on an external keyboard. Using the Keyboard 47 The 9 light indicates that the keypad is active. • To disable the keypad, press again. 5 Using the Keyboard Numeric Keypad numeric keypad The numeric keypad functions like the numeric keypad on the right of the keypad keys. Each key on the keypad has multiple functions. To type a number or symbol, hold down and press the desired key. • To enable the keypad, press .
User's Guide
Page 48
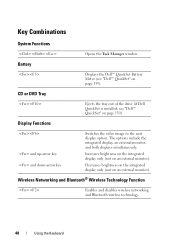
... disables wireless networking and Bluetooth wireless technology. 48 Using the Keyboard Key Combinations System Functions Battery Opens the Task Manager window. Display Functions Ejects the tray out of the drive (if Dell QuickSet is installed; Increases brightness on the integrated display only ...on the integrated display only (not on an external monitor). CD or DVD Tray Displays the Dell™ QuickSet Battery Meter (see "Dell™ QuickSet" on page 139). see "Dell™ QuickSet" on page 139). The options include the integrated display, an external monitor, ...
... disables wireless networking and Bluetooth wireless technology. 48 Using the Keyboard Key Combinations System Functions Battery Opens the Task Manager window. Display Functions Ejects the tray out of the drive (if Dell QuickSet is installed; Increases brightness on the integrated display only ...on the integrated display only (not on an external monitor). CD or DVD Tray Displays the Dell™ QuickSet Battery Meter (see "Dell™ QuickSet" on page 139). see "Dell™ QuickSet" on page 139). The options include the integrated display, an external monitor, ...

User's Guide
Page 49
... the Advanced tab in the Power Options Properties window. Opens the Search Results-Computer dialog box (if the computer is required. Dell QuickSet is connected to a network). Puts the computer into hibernate mode. Decreases the volume of the integrated speakers and external speakers..., if attached. Power Management Activates a power management mode. You can reprogram this keyboard shortcut to restore minimized windows following the use of the Windows logo key and key combination. Opens the System Properties dialog box....
... the Advanced tab in the Power Options Properties window. Opens the Search Results-Computer dialog box (if the computer is required. Dell QuickSet is connected to a network). Puts the computer into hibernate mode. Decreases the volume of the integrated speakers and external speakers..., if attached. Power Management Activates a power management mode. You can reprogram this keyboard shortcut to restore minimized windows following the use of the Windows logo key and key combination. Opens the System Properties dialog box....

User's Guide
Page 50
... Windows Mobility Center. Windows logo key and Opens the Run dialog box. Windows logo key and Opens the System Properties dialog box. 50 Using the Keyboard This key combination functions as a toggle to cycle through programs on the Windows Notification area by using Windows Flip 3-D (only if using the Aero interface...
... Windows Mobility Center. Windows logo key and Opens the Run dialog box. Windows logo key and Opens the System Properties dialog box. 50 Using the Keyboard This key combination functions as a toggle to cycle through programs on the Windows Notification area by using Windows Flip 3-D (only if using the Aero interface...

User's Guide
Page 51
... The touch pad detects the pressure and movement of the touch pad or use your finger to press the left touch-pad button. Using the Keyboard 51 For information about the Control Panel, see "Windows Help and Support" on the display. To access Help and Support, see Windows Help and ...Support. To adjust keyboard operation, such as you to move the cursor, lightly slide your finger over the touch pad. • To select an object, lightly tap once on...
... The touch pad detects the pressure and movement of the touch pad or use your finger to press the left touch-pad button. Using the Keyboard 51 For information about the Control Panel, see "Windows Help and Support" on the display. To access Help and Support, see Windows Help and ...Support. To adjust keyboard operation, such as you to move the cursor, lightly slide your finger over the touch pad. • To select an object, lightly tap once on...

User's Guide
Page 52
... the Touch Pad tab to adjust touch pad and track stick settings. 3 Click OK to save the settings and close the window. 52 Using the Keyboard See the Windows Help and Support for information about the Control Panel,. To access Windows Help and Support, see "Windows Help and Support" on the...
... the Touch Pad tab to adjust touch pad and track stick settings. 3 Click OK to save the settings and close the window. 52 Using the Keyboard See the Windows Help and Support for information about the Control Panel,. To access Windows Help and Support, see "Windows Help and Support" on the...

User's Guide
Page 53
... decrease brightness on the integrated display only (not on an external monitor). Using the Display 53 6 Using the Display Adjusting Brightness When a Dell™ computer is connected to an external monitor and you try to change the brightness level, the Brightness Meter may appear, but the brightness... the computer with an external device (such as an external monitor or projector) attached and turned on, the image may appear on the keyboard. NOTE: Brightness key combinations only affect the display on your portable computer, not monitors or projectors that you need to switch the video...
... decrease brightness on the integrated display only (not on an external monitor). Using the Display 53 6 Using the Display Adjusting Brightness When a Dell™ computer is connected to an external monitor and you try to change the brightness level, the Brightness Meter may appear, but the brightness... the computer with an external device (such as an external monitor or projector) attached and turned on, the image may appear on the keyboard. NOTE: Brightness key combinations only affect the display on your portable computer, not monitors or projectors that you need to switch the video...
User's Guide
Page 101
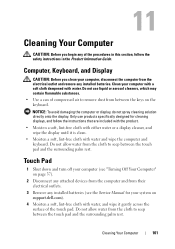
... use liquid or aerosol cleaners, which may contain flammable substances. • Use a can of compressed air to remove dust from between the keys on support.dell.com). 4 Moisten a soft, lint-free cloth with water, and wipe it is clean. • Moisten a soft, lint-free cloth with water and wipe the ...computer and keyboard. Do not allow water from the cloth to seep between the touch pad and the surrounding palm rest. Do not allow water from the cloth...
... use liquid or aerosol cleaners, which may contain flammable substances. • Use a can of compressed air to remove dust from between the keys on support.dell.com). 4 Moisten a soft, lint-free cloth with water, and wipe it is clean. • Moisten a soft, lint-free cloth with water and wipe the ...computer and keyboard. Do not allow water from the cloth to seep between the touch pad and the surrounding palm rest. Do not allow water from the cloth...

User's Guide
Page 104
...detected during the Pre-boot System Assessment, write down your hard drive. Then shut down the error code(s) and contact Dell (see "Contacting Dell" on . 1 Shut down and restart the computer. 104 Troubleshooting Select Diagnostics from the diagnostics utility partition on your ...you receive the message Booting Dell Diagnostic Utility Partition. See the documentation that came with your docking device for instructions. 3 Connect the computer to an electrical outlet. 4 The Dell Diagnostics can be invoked in one of your system board, keyboard, hard drive, and display...
...detected during the Pre-boot System Assessment, write down your hard drive. Then shut down the error code(s) and contact Dell (see "Contacting Dell" on . 1 Shut down and restart the computer. 104 Troubleshooting Select Diagnostics from the diagnostics utility partition on your ...you receive the message Booting Dell Diagnostic Utility Partition. See the documentation that came with your docking device for instructions. 3 Connect the computer to an electrical outlet. 4 The Dell Diagnostics can be invoked in one of your system board, keyboard, hard drive, and display...


