Dell™ Technology Guide
Page 4
... Taskbar 35 Customizing the Taskbar 35 Displaying Hidden Icons From the Notification Area 35 Adding Icons in the Notification Area 35 Desktop Icons and Shortcuts 36 Deleting an Icon From the Desktop ... Windows XP 41 Start Button (Menu 42 Overview 42 Customizing the Start Menu 43 Control Panel 44 Accessing and Using the Control Panel 45 Customizing Your Computer Settings 45 Managing Your Computer Performance 45 3 Monitors and Displays 47 Cleaning Your Computer's Display Screen 47 Adjusting the Resolution of Your Display 48 Windows Vista 49 4 Contents
... Taskbar 35 Customizing the Taskbar 35 Displaying Hidden Icons From the Notification Area 35 Adding Icons in the Notification Area 35 Desktop Icons and Shortcuts 36 Deleting an Icon From the Desktop ... Windows XP 41 Start Button (Menu 42 Overview 42 Customizing the Start Menu 43 Control Panel 44 Accessing and Using the Control Panel 45 Customizing Your Computer Settings 45 Managing Your Computer Performance 45 3 Monitors and Displays 47 Cleaning Your Computer's Display Screen 47 Adjusting the Resolution of Your Display 48 Windows Vista 49 4 Contents
Dell™ Technology Guide
Page 17
... tab of the Display Properties Menu 244 Accessing Additional Functions With the Advanced Button 245 Accessing the Video Card Control Features . . . . 245 Getting Help for Video Display Resolution Problems 245 Adjusting Display Settings With the Vendor Video Card Control Panel 246 Windows Vista ...246 Windows XP 246 Using the Wizards 247 Using a Video Card Wizard to Configure Display Settings 247 Contents 17
... tab of the Display Properties Menu 244 Accessing Additional Functions With the Advanced Button 245 Accessing the Video Card Control Features . . . . 245 Getting Help for Video Display Resolution Problems 245 Adjusting Display Settings With the Vendor Video Card Control Panel 246 Windows Vista ...246 Windows XP 246 Using the Wizards 247 Using a Video Card Wizard to Configure Display Settings 247 Contents 17
Dell™ Technology Guide
Page 18
... 248 Getting Help for Video Card Control Panels . . . 249 Troubleshooting Display Settings 249 Where to Find Help 249 Resolving Common Problems 249 17 Security and Privacy 251 Protecting Your Computer-Using Administrator Rights, User Groups, and ...
... 248 Getting Help for Video Card Control Panels . . . 249 Troubleshooting Display Settings 249 Where to Find Help 249 Resolving Common Problems 249 17 Security and Privacy 251 Protecting Your Computer-Using Administrator Rights, User Groups, and ...
Dell™ Technology Guide
Page 39
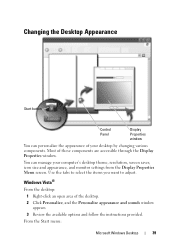
... instructions provided. Windows Vista® From the desktop: 1 Right-click an open area of these components are accessible through the Display Properties window. Changing the Desktop Appearance Start button Control Panel Display Properties window You can manage your desktop by changing various components. You can personalize the appearance of your computer's desktop theme...
... instructions provided. Windows Vista® From the desktop: 1 Right-click an open area of these components are accessible through the Display Properties window. Changing the Desktop Appearance Start button Control Panel Display Properties window You can manage your desktop by changing various components. You can personalize the appearance of your computer's desktop theme...
Dell™ Technology Guide
Page 40
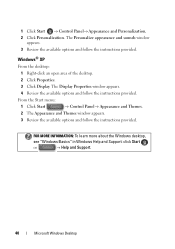
.... 40 Microsoft Windows Desktop Windows® XP From the desktop: 1 Right-click an open area of the desktop. 2 Click Properties. 3 Click Display. From the Start menu: 1 Click Start → Control Panel→ Appearance and Themes. 2 The Appearance and Themes window appears. 3 Review the available options and follow the instructions provided. The Personalize...
.... 40 Microsoft Windows Desktop Windows® XP From the desktop: 1 Right-click an open area of the desktop. 2 Click Properties. 3 Click Display. From the Start menu: 1 Click Start → Control Panel→ Appearance and Themes. 2 The Appearance and Themes window appears. 3 Review the available options and follow the instructions provided. The Personalize...
Dell™ Technology Guide
Page 44
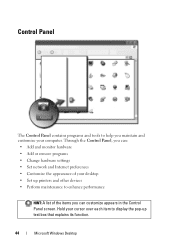
... programs and tools to enhance performance HINT: A list of your computer. Through the Control Panel, you can customize appears in the Control Panel screen. Hold your cursor over each item to display the pop-up printers and other devices • Perform maintenance to help you can : • Add and monitor hardware • Add...
... programs and tools to enhance performance HINT: A list of your computer. Through the Control Panel, you can customize appears in the Control Panel screen. Hold your cursor over each item to display the pop-up printers and other devices • Perform maintenance to help you can : • Add and monitor hardware • Add...
Dell™ Technology Guide
Page 45
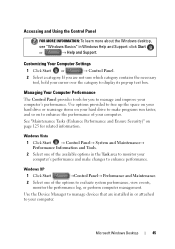
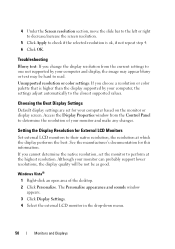
...and so on your hard drive to make changes to enhance performance. If you to manage and improve your cursor over the category to display its pop-up the space on your hard drive or rearrange items on to enhance the performance of the options to evaluate system performance..., view events, monitor the performance log, or perform computer management. Use options provided to free up text box. Accessing and Using the Control Panel FOR MORE INFORMATION: To learn more about the Windows desktop, see "Windows Basics" in or attached to your computer. Windows Vista 1 Click Start...
...and so on your hard drive to make changes to enhance performance. If you to manage and improve your cursor over the category to display its pop-up the space on your hard drive or rearrange items on to enhance the performance of the options to evaluate system performance..., view events, monitor the performance log, or perform computer management. Use options provided to free up text box. Accessing and Using the Control Panel FOR MORE INFORMATION: To learn more about the Windows desktop, see "Windows Basics" in or attached to your computer. Windows Vista 1 Click Start...
Dell™ Technology Guide
Page 48
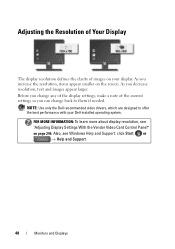
... more about display resolution, see Windows Help and Support: click Start or → Help and Support. 48 Monitors and Displays Adjusting the Resolution of Your Display The display resolution defines the... clarity of the current settings so you can change back to offer the best performance with your display. As... you increase the resolution, items appear smaller on the screen. NOTE: Use only the Dell recommended video drivers, which are ...
... more about display resolution, see Windows Help and Support: click Start or → Help and Support. 48 Monitors and Displays Adjusting the Resolution of Your Display The display resolution defines the... clarity of the current settings so you can change back to offer the best performance with your display. As... you increase the resolution, items appear smaller on the screen. NOTE: Use only the Dell recommended video drivers, which are ...
Dell™ Technology Guide
Page 50
...'s documentation for External LCD Monitors Set external LCD monitors to their native resolution, the resolution at the highest resolution. If you change the display resolution from the Control Panel to determine the resolution of the desktop. 2 Click Personalize. Unsupported resolution or color settings: If you choose a resolution or color palette that is...
...'s documentation for External LCD Monitors Set external LCD monitors to their native resolution, the resolution at the highest resolution. If you change the display resolution from the Control Panel to determine the resolution of the desktop. 2 Click Personalize. Unsupported resolution or color settings: If you choose a resolution or color palette that is...
Dell™ Technology Guide
Page 53
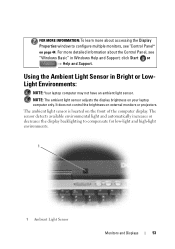
...: The ambient light sensor adjusts the display brightness on external monitors or projectors. The ambient light sensor is located on page 44. For more about the Control Panel, see "Control Panel" on the front of the computer display. The sensor detects available environmental light ...and automatically increases or decreases the display backlighting to configure multiple monitors, see "Windows Basic" in Bright or...
...: The ambient light sensor adjusts the display brightness on external monitors or projectors. The ambient light sensor is located on page 44. For more about the Control Panel, see "Control Panel" on the front of the computer display. The sensor detects available environmental light ...and automatically increases or decreases the display backlighting to configure multiple monitors, see "Windows Basic" in Bright or...

Dell™ Technology Guide
Page 56
...PC, graphics, and semiconductor companies, has developed an open-standards based, royaltyfree, and extensible interface, DisplayPort, suited for delivering flat panel display technology to enable NVIDIA SLI (Scalable Link Interface) or ATI Crossfire technologies. Detailed information about the benefits of "direct drive" digital ...more identical graphics cards can be found on the NVIDIA and ATI websites respectively. 56 Monitors and Displays NVIDIA SLI and ATI Crossfire Technologies In some graphics configurations, two or more information, see www.displayport.org. Features and ...
...PC, graphics, and semiconductor companies, has developed an open-standards based, royaltyfree, and extensible interface, DisplayPort, suited for delivering flat panel display technology to enable NVIDIA SLI (Scalable Link Interface) or ATI Crossfire technologies. Detailed information about the benefits of "direct drive" digital ...more identical graphics cards can be found on the NVIDIA and ATI websites respectively. 56 Monitors and Displays NVIDIA SLI and ATI Crossfire Technologies In some graphics configurations, two or more information, see www.displayport.org. Features and ...
Dell™ Technology Guide
Page 130
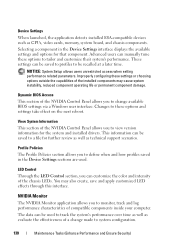
...profiles to define when and how profiles saved in the Device Settings interface displays the available settings and options for that component. Dynamic BIOS Access This section of the NVIDIA Control Panel allows you to monitor, track and log performance characteristics of compatible components... to system configuration. 130 Maintenance Tasks (Enhance Performance and Ensure Security) View System Information This section of the NVIDIA Control Panel allows you to these options and settings take effect on the next reboot. You may cause system instability, reduced component operating...
...profiles to define when and how profiles saved in the Device Settings interface displays the available settings and options for that component. Dynamic BIOS Access This section of the NVIDIA Control Panel allows you to monitor, track and log performance characteristics of compatible components... to system configuration. 130 Maintenance Tasks (Enhance Performance and Ensure Security) View System Information This section of the NVIDIA Control Panel allows you to these options and settings take effect on the next reboot. You may cause system instability, reduced component operating...
Dell™ Technology Guide
Page 137
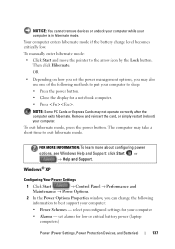
... computer may not operate correctly after the computer exits hibernate. Windows® XP Configuring Your Power Settings 1 Click Start → Control Panel → Performance and Maintenance → Power Options. 2 In the Power Options Properties window, you may also use one of the following... information to sleep: • Press the power button. • Close the display for a notebook computer. • Press . Your computer enters hibernate mode if the battery charge level becomes critically low. OR • ...
... computer may not operate correctly after the computer exits hibernate. Windows® XP Configuring Your Power Settings 1 Click Start → Control Panel → Performance and Maintenance → Power Options. 2 In the Power Options Properties window, you may also use one of the following... information to sleep: • Press the power button. • Close the display for a notebook computer. • Press . Your computer enters hibernate mode if the battery charge level becomes critically low. OR • ...
Dell™ Technology Guide
Page 176
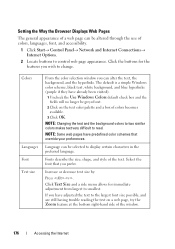
... trouble reading the text on the text color palette and a box of colors, languages, font, and accessibility. 1 Click Start→ Control Panel→ Network and Internet Connections→ Internet Options. 2 Locate buttons to control web page appearance. NOTE: Changing the text and the background colors...). 1 Uncheck the Use Windows Colors default check box and the fields will no longer be selected to change. If you wish to display certain characters in the preferred language. Click the buttons for immediate adjustment from largest to read. Click Text Size and a side menu...
... trouble reading the text on the text color palette and a box of colors, languages, font, and accessibility. 1 Click Start→ Control Panel→ Network and Internet Connections→ Internet Options. 2 Locate buttons to control web page appearance. NOTE: Changing the text and the background colors...). 1 Uncheck the Use Windows Colors default check box and the fields will no longer be selected to change. If you wish to display certain characters in the preferred language. Click the buttons for immediate adjustment from largest to read. Click Text Size and a side menu...

Dell™ Technology Guide
Page 177
...information. Hold the key down while pressing the plus (+) key to zoom in. This option provides a visual display of all the tabs that are open . 1 Click Start→ Control Panel→ Network and Internet Connections→ Internet Options. 2 In the Tabs section, click Settings. 3 Click to...of Internet Explorer running simultaneously. You can delete or decrease the amount of space the history logs use. 1 Click Start→ Control Panel→ Network and Internet Connections→ Internet Options. 2 Delete the files in the browsing history by clicking Delete, or minimize the ...
...information. Hold the key down while pressing the plus (+) key to zoom in. This option provides a visual display of all the tabs that are open . 1 Click Start→ Control Panel→ Network and Internet Connections→ Internet Options. 2 In the Tabs section, click Settings. 3 Click to...of Internet Explorer running simultaneously. You can delete or decrease the amount of space the history logs use. 1 Click Start→ Control Panel→ Network and Internet Connections→ Internet Options. 2 Delete the files in the browsing history by clicking Delete, or minimize the ...

Dell™ Technology Guide
Page 185
A check next to a toolbar indicates that displays all the available toolbars for later reference by requiring a password to assist you as you want to add, click Favorites→ Add to block content from the Internet. 1 Click Start→ Control Panel→ Network and Internet Connections→ Internet Options. 2 Open the Content tab. 3 Click...
A check next to a toolbar indicates that displays all the available toolbars for later reference by requiring a password to assist you as you want to add, click Favorites→ Add to block content from the Internet. 1 Click Start→ Control Panel→ Network and Internet Connections→ Internet Options. 2 Open the Content tab. 3 Click...
Service Manual
Page 17
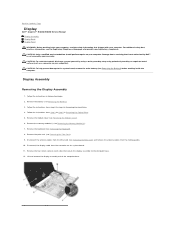
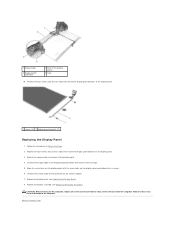
.../regulatory_compliance. Remove the battery (see Removing the Memory Module(s)). 7. Remove the memory module(s) (see Removing the Battery). 3. Back to Contents Page Display Dell™ Inspiron™ N4020/N4030 Service Manual Display Assembly Display Bezel Display Panel WARNING: Before working inside your computer, read the safety information that shipped with your computer. Damage due to servicing that is not...
.../regulatory_compliance. Remove the battery (see Removing the Memory Module(s)). 7. Remove the memory module(s) (see Removing the Battery). 3. Back to Contents Page Display Dell™ Inspiron™ N4020/N4030 Service Manual Display Assembly Display Bezel Display Panel WARNING: Before working inside your computer, read the safety information that shipped with your computer. Damage due to servicing that is not...
Service Manual
Page 19
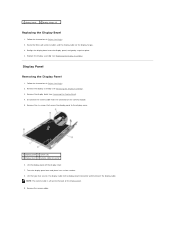
... that secures the display cable to the display-board connector and disconnect the display cable. Turn the display panel over the display panel, and gently snap into place. 4. 1 display bezel 2 display hinges (2) Replacing the Display Bezel 1. Remove the display bezel (see Replacing the Display Assembly). Display Panel Removing the Display Panel 1. Lift the tape that secure the display panel to the back of the display panel. 9. Realign the display bezel over...
... that secures the display cable to the display-board connector and disconnect the display cable. Turn the display panel over the display panel, and gently snap into place. 4. 1 display bezel 2 display hinges (2) Replacing the Display Bezel 1. Remove the display bezel (see Replacing the Display Assembly). Display Panel Removing the Display Panel 1. Lift the tape that secure the display panel to the back of the display panel. 9. Realign the display bezel over...
Service Manual
Page 20
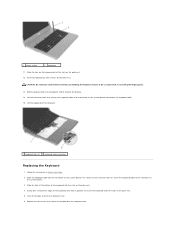
.... 2. Replace the four screws (two on the computer, replace all screws and ensure that secure the display-panel brackets to the computer. Connect the camera cable to Contents Page Failure to the display panel. 1 screws (4) 2 display-panel brackets (2) Replacing the Display Panel 1. Back to the connector on each side) that no stray screws remain inside the computer. Follow...
.... 2. Replace the four screws (two on the computer, replace all screws and ensure that secure the display-panel brackets to the computer. Connect the camera cable to Contents Page Failure to the display panel. 1 screws (4) 2 display-panel brackets (2) Replacing the Display Panel 1. Back to the connector on each side) that no stray screws remain inside the computer. Follow...
Service Manual
Page 27
... palm rest. 4. Replace the two screws that secures the keyboard cable to the computer base. Follow the instructions in scratching the display panel. 13. Ease the keyboard up until it towards the display. 14. Without pulling hard on the system board. 3. Gently press around the edges of the keyboard into the connector on... to do so could result in Before You Begin. 2. 1 plastic scribe 2 keyboard 11. CAUTION: Be extremely careful when removing and handling the keyboard. Close the display and turn the computer over. 6.
... palm rest. 4. Replace the two screws that secures the keyboard cable to the computer base. Follow the instructions in scratching the display panel. 13. Ease the keyboard up until it towards the display. 14. Without pulling hard on the system board. 3. Gently press around the edges of the keyboard into the connector on... to do so could result in Before You Begin. 2. 1 plastic scribe 2 keyboard 11. CAUTION: Be extremely careful when removing and handling the keyboard. Close the display and turn the computer over. 6.


