Dell™ Technology Guide
Page 6
... Your Keyboard 67 Using the Numeric Keypad on a Laptop Computer 68 General Keyboard Shortcuts 69 5 Printers-Settings and Drivers 71 Accessing Printer Information 71 Changing Printer Settings 72 For Windows Vista 72 For Windows® XP 72 Setting up Printers 73 Adding a Printer 73 Setting the Default Printer 74 Sharing Printers on a Network...
... Your Keyboard 67 Using the Numeric Keypad on a Laptop Computer 68 General Keyboard Shortcuts 69 5 Printers-Settings and Drivers 71 Accessing Printer Information 71 Changing Printer Settings 72 For Windows Vista 72 For Windows® XP 72 Setting up Printers 73 Adding a Printer 73 Setting the Default Printer 74 Sharing Printers on a Network...
Dell™ Technology Guide
Page 7
... Reinstalling a Driver 80 Drive Problems 81 Optical Drive Problems 82 Hard Drive Problems 82 Working with RAID 83 RAID Level 0 83 RAID Level 1 84 RAID Level 0+1 Configuration 86 RAID Level 5 Configuration 87 Setting Your Computer to RAID-Enabled Mode 87 Configuring RAID 88 7 Shutting Down Your Computer 99 Windows Vista 99 Windows®...
... Reinstalling a Driver 80 Drive Problems 81 Optical Drive Problems 82 Hard Drive Problems 82 Working with RAID 83 RAID Level 0 83 RAID Level 1 84 RAID Level 0+1 Configuration 86 RAID Level 5 Configuration 87 Setting Your Computer to RAID-Enabled Mode 87 Configuring RAID 88 7 Shutting Down Your Computer 99 Windows Vista 99 Windows®...
Dell™ Technology Guide
Page 16
...Your Laptop Media Device 209 Playing Media Using the Dell Travel Remote . . . . . 210 Adjusting the Volume on Your Computer 210 Enabling S/PDIF Digital Audio Through the Media Software 210 Enabling S/PDIF Digital Audio in the Windows Audio Driver 211 Setting up the Cyberlink (CL) Headphones ...211 Using a Digital Camera With Your Computer . . . . . 212 Using Windows Media Player 212 16 Connecting Your Computer to a TV and Adjusting Display ...
...Your Laptop Media Device 209 Playing Media Using the Dell Travel Remote . . . . . 210 Adjusting the Volume on Your Computer 210 Enabling S/PDIF Digital Audio Through the Media Software 210 Enabling S/PDIF Digital Audio in the Windows Audio Driver 211 Setting up the Cyberlink (CL) Headphones ...211 Using a Digital Camera With Your Computer . . . . . 212 Using Windows Media Player 212 16 Connecting Your Computer to a TV and Adjusting Display ...
Dell™ Technology Guide
Page 48
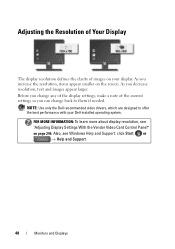
As you can change any of the display settings, make a note of images on your Dell-installed operating system. As you increase the resolution, items appear smaller on page 246. Before you change back to offer the best performance with your ... Control Panel" on the screen. FOR MORE INFORMATION: To learn more about display resolution, see Windows Help and Support: click Start or → Help and Support. 48 Monitors and Displays NOTE: Use only the Dell recommended video drivers, which are designed to them if needed. Adjusting the Resolution of Your Display The display...
As you can change any of the display settings, make a note of images on your Dell-installed operating system. As you increase the resolution, items appear smaller on page 246. Before you change back to offer the best performance with your ... Control Panel" on the screen. FOR MORE INFORMATION: To learn more about display resolution, see Windows Help and Support: click Start or → Help and Support. 48 Monitors and Displays NOTE: Use only the Dell recommended video drivers, which are designed to them if needed. Adjusting the Resolution of Your Display The display...

Dell™ Technology Guide
Page 49
... a program at a specific resolution, both the video card and the display must support the resolution, and the necessary video drivers must be installed. Monitors and Displays 49 Windows® XP 1 Right-click an open area of the desktop. 2 Click Properties. Windows Vista® 1 Right-click an open area of the desktop. 2 Click Personalize.
... a program at a specific resolution, both the video card and the display must support the resolution, and the necessary video drivers must be installed. Monitors and Displays 49 Windows® XP 1 Right-click an open area of the desktop. 2 Click Properties. Windows Vista® 1 Right-click an open area of the desktop. 2 Click Personalize.
Dell™ Technology Guide
Page 64
...From the Taskbar 1 Use your computer. Using a USB Pointing Device (Mouse) Your computer usually auto-detects and installs the drivers for more about using a USB pointing device, see Windows Help and Support: click Start or → Help and Support. NOTE: Certain mice may need to the USB port.... Also, see the pointing device's manufacturer's guide for your mouse when the mouse is connected to install the appropriate drivers manually. 2 On the Touch...
...From the Taskbar 1 Use your computer. Using a USB Pointing Device (Mouse) Your computer usually auto-detects and installs the drivers for more about using a USB pointing device, see Windows Help and Support: click Start or → Help and Support. NOTE: Certain mice may need to the USB port.... Also, see the pointing device's manufacturer's guide for your mouse when the mouse is connected to install the appropriate drivers manually. 2 On the Touch...
Dell™ Technology Guide
Page 65
..." on page 265 HINT: If you still have problems with the pointing device, check the software driver for the device. For more information on System Restore see "Using Microsoft® Windows® System Restore" on page 79. You may have to perform different sets of functions: &#...8226; Alphanumeric keys for typing letters, numbers, punctuation, and symbols • Control keys for performing certain actions: , , , and the Windows logo key • Function keys, labeled ,< F2>, , and so on, for performing specific tasks • Navigation keys for moving the cursor around ...
..." on page 265 HINT: If you still have problems with the pointing device, check the software driver for the device. For more information on System Restore see "Using Microsoft® Windows® System Restore" on page 79. You may have to perform different sets of functions: &#...8226; Alphanumeric keys for typing letters, numbers, punctuation, and symbols • Control keys for performing certain actions: , , , and the Windows logo key • Function keys, labeled ,< F2>, , and so on, for performing specific tasks • Navigation keys for moving the cursor around ...
Dell™ Technology Guide
Page 72
... Use the tabs in this window to change the settings. 3 Select either Properties or Printing Preferences. EXAMPLE: If you have will determine the type of available printers, and right-click the desired printer to view your photo paper type. 72 Printers-Settings and Drivers For more information, see Microsoft...® Windows® Help and Support: click Start or → Help and Support.
... Use the tabs in this window to change the settings. 3 Select either Properties or Printing Preferences. EXAMPLE: If you have will determine the type of available printers, and right-click the desired printer to view your photo paper type. 72 Printers-Settings and Drivers For more information, see Microsoft...® Windows® Help and Support: click Start or → Help and Support.
Dell™ Technology Guide
Page 73
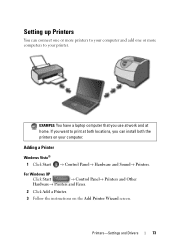
Printers-Settings and Drivers 73 EXAMPLE: You have a laptop computer that you can connect one or more printers to your computer and add one or more computers to print at both the printers on the Add Printer Wizard screen. For Windows XP Click Start → Control ...Panel→ Printers and Other Hardware→ Printers and Faxes. 2 Click Add a Printer. 3 Follow the instructions on your printer. Adding a Printer Windows Vista® 1 Click Start → Control Panel→ Hardware and Sound→ Printers. If you want to your computer. Setting up Printers You...
Printers-Settings and Drivers 73 EXAMPLE: You have a laptop computer that you can connect one or more printers to your computer and add one or more computers to print at both the printers on the Add Printer Wizard screen. For Windows XP Click Start → Control ...Panel→ Printers and Other Hardware→ Printers and Faxes. 2 Click Add a Printer. 3 Follow the instructions on your printer. Adding a Printer Windows Vista® 1 Click Start → Control Panel→ Hardware and Sound→ Printers. If you want to your computer. Setting up Printers You...

Dell™ Technology Guide
Page 74
..., you can add your printer to a network, see "Networks (LAN, Wireless, Mobile Broadband)" on installing a network service, see Windows Help and Support: click Start or → Help and Support. 74 Printers-Settings and Drivers To share your printer on a Network A shared printer is also called a network printer. Setting the Default Printer Set...
..., you can add your printer to a network, see "Networks (LAN, Wireless, Mobile Broadband)" on installing a network service, see Windows Help and Support: click Start or → Help and Support. 74 Printers-Settings and Drivers To share your printer on a Network A shared printer is also called a network printer. Setting the Default Printer Set...
Dell™ Technology Guide
Page 75
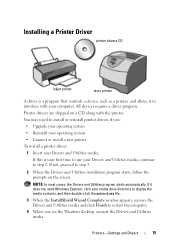
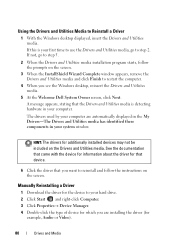
..., click your media drive directory to display the media contents, and then double-click the autorcd.exe file. 3 When the InstallShield Wizard Complete window appears, remove the Drivers and Utilities media and click Finish to restart the computer. 4 When you : • Upgrade your operating system • Reinstall your operating system • Connect...
..., click your media drive directory to display the media contents, and then double-click the autorcd.exe file. 3 When the InstallShield Wizard Complete window appears, remove the Drivers and Utilities media and click Finish to restart the computer. 4 When you : • Upgrade your operating system • Reinstall your operating system • Connect...
Dell™ Technology Guide
Page 76
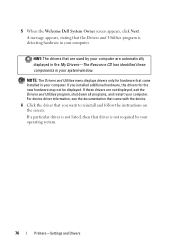
... came with the device. 6 Click the driver that are not displayed, exit the Drivers and Utilities program, shut down all programs, and restart your system window. 5 When the Welcome Dell System Owner screen appears, click Next. HINT: The drivers that you installed additional hardware, the drivers for hardware that the Drivers and Utilities program is not required...
... came with the device. 6 Click the driver that are not displayed, exit the Drivers and Utilities program, shut down all programs, and restart your system window. 5 When the Welcome Dell System Owner screen appears, click Next. HINT: The drivers that you installed additional hardware, the drivers for hardware that the Drivers and Utilities program is not required...
Dell™ Technology Guide
Page 79
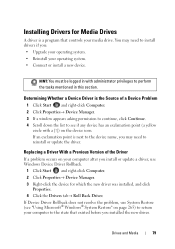
... not resolve the problem, use Windows Device Driver Rollback. 1 Click Start and right-click Computer. 2 Click Properties→ Device Manager. 3 Right-click the device for Media Drives A driver is the Source of the Driver If a problem occurs on your media drive. Drives and Media 79 Installing Drivers for which the new driver was installed, and click...
... not resolve the problem, use Windows Device Driver Rollback. 1 Click Start and right-click Computer. 2 Click Properties→ Device Manager. 3 Right-click the device for Media Drives A driver is the Source of the Driver If a problem occurs on your media drive. Drives and Media 79 Installing Drivers for which the new driver was installed, and click...
Dell™ Technology Guide
Page 80
...-click the type of device for which you see the Windows desktop, reinsert the Drivers and Utilities media. 5 At the Welcome Dell System Owner screen, click Next. HINT: The drivers for that device. 6 Click the driver that the Drivers and Utilities media is your system window. See the documentation that came with the device for information about...
...-click the type of device for which you see the Windows desktop, reinsert the Drivers and Utilities media. 5 At the Welcome Dell System Owner screen, click Next. HINT: The drivers for that device. 6 Click the driver that the Drivers and Utilities media is your system window. See the documentation that came with the device for information about...
Dell™ Technology Guide
Page 81
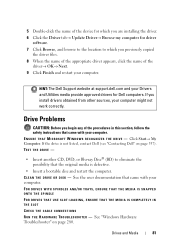
... another CD, DVD, or Blu-ray Disc® (BD) to which you are installing the driver. 6 Click the Driver tab→ Update Driver→ Browse my computer for Dell computers. CLEAN THE DRIVE OR DISK - FOR DRIVES WITH SPINDLES AND/OR TRAYS, ENSURE THAT THE...Windows Hardware Troubleshooter" on page 337). Drives and Media 81 5 Double-click the name of the device for which you install drivers obtained from other sources, your computer might not work correctly. HINT: The Dell Support website at support.dell.com and your Drivers and Utilities media provide approved drivers for driver...
... another CD, DVD, or Blu-ray Disc® (BD) to which you are installing the driver. 6 Click the Driver tab→ Update Driver→ Browse my computer for Dell computers. CLEAN THE DRIVE OR DISK - FOR DRIVES WITH SPINDLES AND/OR TRAYS, ENSURE THAT THE...Windows Hardware Troubleshooter" on page 337). Drives and Media 81 5 Double-click the name of the device for which you install drivers obtained from other sources, your computer might not work correctly. HINT: The Dell Support website at support.dell.com and your Drivers and Utilities media provide approved drivers for driver...
Dell™ Technology Guide
Page 107
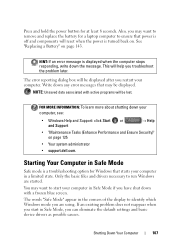
...for at least 8 seconds. Starting Your Computer in Safe Mode Safe mode is a troubleshooting option for Windows that may want to run Windows are using. Only the basic files and drivers necessary to start in Safe Mode, you have shut down any error messages that starts your computer ...in Safe Mode if you can eliminate the default settings and basic device drivers as possible causes. Shutting Down Your Computer 107 See "Replacing a Battery" on page 125 • Your system administrator • support.dell.com. This will be lost. Write down with active programs will be...
...for at least 8 seconds. Starting Your Computer in Safe Mode Safe mode is a troubleshooting option for Windows that may want to run Windows are using. Only the basic files and drivers necessary to start in Safe Mode, you have shut down any error messages that starts your computer ...in Safe Mode if you can eliminate the default settings and basic device drivers as possible causes. Shutting Down Your Computer 107 See "Replacing a Battery" on page 125 • Your system administrator • support.dell.com. This will be lost. Write down with active programs will be...

Dell™ Technology Guide
Page 124
... other than by using the Add or Remove Programs utility, you may accidentally delete drivers needed by using Task Manager: 1 Right-click the taskbar and select Task Manager. 2 On the Applications tab of the Windows Task Manager screen, click the application that is not responding, and then click End...programs. Ending an Application When it Does not Respond Applications tab program not responding End Task button If an application stops responding, Windows tries to find the problem and fix it from your computer. HINT: Simply deleting a program does not completely remove it automatically.
... other than by using the Add or Remove Programs utility, you may accidentally delete drivers needed by using Task Manager: 1 Right-click the taskbar and select Task Manager. 2 On the Applications tab of the Windows Task Manager screen, click the application that is not responding, and then click End...programs. Ending an Application When it Does not Respond Applications tab program not responding End Task button If an application stops responding, Windows tries to find the problem and fix it from your computer. HINT: Simply deleting a program does not completely remove it automatically.
Dell™ Technology Guide
Page 130
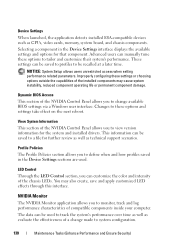
...the chassis LEDs. Dynamic BIOS Access This section of the NVIDIA Control Panel allows you to a file for the system and installed drivers. This information can be used . Improperly configuring these options and settings take effect on the next reboot. Advanced users can be... When launched, the application detects installed ESA-compatible devices such as evaluate the effectiveness of a change available BIOS settings via a Windows user interface. View System Information This section of the NVIDIA Control Panel allows you to change made to define when and how profiles...
...the chassis LEDs. Dynamic BIOS Access This section of the NVIDIA Control Panel allows you to a file for the system and installed drivers. This information can be used . Improperly configuring these options and settings take effect on the next reboot. Advanced users can be... When launched, the application detects installed ESA-compatible devices such as evaluate the effectiveness of a change available BIOS settings via a Windows user interface. View System Information This section of the NVIDIA Control Panel allows you to change made to define when and how profiles...
Dell™ Technology Guide
Page 154
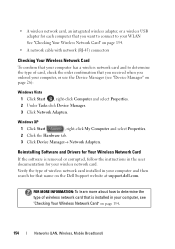
...ordered your computer, or use the Device Manager (see "Checking Your Wireless Network Card" on the Dell Support website at support.dell.com. Reinstalling Software and Drivers for Your Wireless Network Card If the software is installed in your wireless network card. Verify the...wireless network card installed in your computer, see "Device Manager" on page 26): Windows Vista 1 Click Start , right-click Computer and select Properties. 2 Under Tasks click Device Manager. 3 Click Network Adapters. Windows XP 1 Click Start , right-click My Computer and select Properties. 2 Click ...
...ordered your computer, or use the Device Manager (see "Checking Your Wireless Network Card" on the Dell Support website at support.dell.com. Reinstalling Software and Drivers for Your Wireless Network Card If the software is installed in your wireless network card. Verify the...wireless network card installed in your computer, see "Device Manager" on page 26): Windows Vista 1 Click Start , right-click Computer and select Properties. 2 Under Tasks click Device Manager. 3 Click Network Adapters. Windows XP 1 Click Start , right-click My Computer and select Properties. 2 Click ...
Dell™ Technology Guide
Page 211
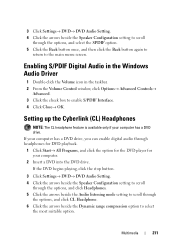
... click the Back button again to return to enable S/PDIF Interface. 4 Click Close→ OK. Enabling S/PDIF Digital Audio in the Windows Audio Driver 1 Double-click the Volume icon in the taskbar. 2 From the Volume Control window, click Options→ Advanced Controls→ Advanced. 3 Click the check box to the main menu screen.
... click the Back button again to return to enable S/PDIF Interface. 4 Click Close→ OK. Enabling S/PDIF Digital Audio in the Windows Audio Driver 1 Double-click the Volume icon in the taskbar. 2 From the Volume Control window, click Options→ Advanced Controls→ Advanced. 3 Click the check box to the main menu screen.


