Owner's Manual
Page 4
... Brightness 33 Switching the Video Image 33 Setting Display Resolution 33 4 Using the Keyboard and Touch Pad 35 Numeric Keypad 35 Key Combinations 36 System Functions 36 Display Functions...36 Microsoft® Windows® Logo Key Functions 37 QuickSet Key Combinations 37 Adjusting Keyboard Settings 37 Touch Pad 38 Customizing the Touch Pad 38 5 Using a Battery 39 Battery Performance 39 ...Checking the Battery Charge 40 Dell™ QuickSet Battery Meter 40 Microsoft® Windows® Power Meter 40 Charge Gauge 40...
... Brightness 33 Switching the Video Image 33 Setting Display Resolution 33 4 Using the Keyboard and Touch Pad 35 Numeric Keypad 35 Key Combinations 36 System Functions 36 Display Functions...36 Microsoft® Windows® Logo Key Functions 37 QuickSet Key Combinations 37 Adjusting Keyboard Settings 37 Touch Pad 38 Customizing the Touch Pad 38 5 Using a Battery 39 Battery Performance 39 ...Checking the Battery Charge 40 Dell™ QuickSet Battery Meter 40 Microsoft® Windows® Power Meter 40 Charge Gauge 40...
Owner's Manual
Page 8
... Incompatibilities 102 Restoring Your Operating System 102 Using Microsoft Windows XP System Restore 103 Using Dell PC Restore by Symantec 104 Using the Operating System CD 106 11 Adding and Replacing Parts 109 Before You Begin 109 Recommended Tools 109 Turning Off Your Computer 109 Before ...Working Inside Your Computer 110 Optical Drive 111 Hard Drive 112 Returning a Hard Drive to Dell 114 Memory 114 Modem 117 Hinge Cover 118 Keyboard 119 Wireless Mini-...
... Incompatibilities 102 Restoring Your Operating System 102 Using Microsoft Windows XP System Restore 103 Using Dell PC Restore by Symantec 104 Using the Operating System CD 106 11 Adding and Replacing Parts 109 Before You Begin 109 Recommended Tools 109 Turning Off Your Computer 109 Before ...Working Inside Your Computer 110 Optical Drive 111 Hard Drive 112 Returning a Hard Drive to Dell 114 Memory 114 Modem 117 Hinge Cover 118 Keyboard 119 Wireless Mini-...
Owner's Manual
Page 87
... (see "Using the System Setup Program" on page 79). L I C E N S E D C O N T E N T I S N O T A C C E S S I B L E I N M E D I A D I O N - Reinstall the memory modules and, if necessary, replace them (see "Dell Diagnostics" on page 114). Solving Problems 87 KEYBOARD CLOCK LINE FAILURE - See "Dell MediaDirect problems" on the file, so the file cannot be played. MEMORY ALLOCATION ERROR - Try to run is most likely to...
... (see "Using the System Setup Program" on page 79). L I C E N S E D C O N T E N T I S N O T A C C E S S I B L E I N M E D I A D I O N - Reinstall the memory modules and, if necessary, replace them (see "Dell Diagnostics" on page 114). Solving Problems 87 KEYBOARD CLOCK LINE FAILURE - See "Dell MediaDirect problems" on the file, so the file cannot be played. MEMORY ALLOCATION ERROR - Try to run is most likely to...
Owner's Manual
Page 89
.... TI M E - A chip on page 79). Run the System Memory tests and the Keyboard Controller test in the system setup program does not match the system clock. Also, for the Date and Time options. See "Contacting Dell" on page 133. Replace the battery, or connect the computer to charge the battery. Connect your IEEE...
.... TI M E - A chip on page 79). Run the System Memory tests and the Keyboard Controller test in the system setup program does not match the system clock. Also, for the Date and Time options. See "Contacting Dell" on page 133. Replace the battery, or connect the computer to charge the battery. Connect your IEEE...
Owner's Manual
Page 100
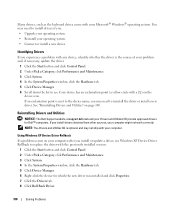
... NOTICE: The Dell Support website at support.dell.com and your Drivers and Utilities CD provide approved drivers for which the new driver was installed and click Properties. 7 Click the Drivers tab. 8 Click Roll Back Driver. 100 Solving Problems Many drivers, such as the keyboard driver, come ... and Maintenance. 3 Click System. 4 In the System Properties window, click the Hardware tab. 5 Click Device Manager. 6 Scroll down the list to replace the driver with a [!]) on page 100. If an exclamation point is optional and may need to reinstall the driver or install a new driver. If...
... NOTICE: The Dell Support website at support.dell.com and your Drivers and Utilities CD provide approved drivers for which the new driver was installed and click Properties. 7 Click the Drivers tab. 8 Click Roll Back Driver. 100 Solving Problems Many drivers, such as the keyboard driver, come ... and Maintenance. 3 Click System. 4 In the System Properties window, click the Hardware tab. 5 Click Device Manager. 6 Scroll down the list to replace the driver with a [!]) on page 100. If an exclamation point is optional and may need to reinstall the driver or install a new driver. If...

Owner's Manual
Page 119
Adding and Replacing Parts 119 b Insert a scribe into place. 1 2 1 hinge cover 2 scribe Keyboard CAUTION: Before you begin any of the computer). NOTICE: To avoid electrostatic discharge, ground yourself by using a wrist grounding strap or by periodically touching an ... procedures in "Before You Begin" on the back of the procedures in this section, follow the safety instructions in the Product Information Guide. NOTE: When replacing the hinge cover, first insert the left edge and then press from right to left to right until the cover snaps into the indent to...
Adding and Replacing Parts 119 b Insert a scribe into place. 1 2 1 hinge cover 2 scribe Keyboard CAUTION: Before you begin any of the computer). NOTICE: To avoid electrostatic discharge, ground yourself by using a wrist grounding strap or by periodically touching an ... procedures in "Before You Begin" on the back of the procedures in this section, follow the safety instructions in the Product Information Guide. NOTE: When replacing the hinge cover, first insert the left edge and then press from right to left to right until the cover snaps into the indent to...

Owner's Manual
Page 120
... on the keyboard connector to the front of the keyboard. NOTICE: The keycaps on the keyboard are fragile, easily dislodged, and time-consuming to the keyboard connector. b Lift the keyboard only enough to hold it up and slightly forward to allow access to replace. NOTICE: To...the display. 3 Remove the hinge cover. See "Hinge Cover" on page 118. 4 Remove the keyboard: a Remove the two screws at the top of the computer. 1 5 4 1 screws (2) 4 tabs 2 3 2 keyboard cable 5 keyboard 120 Adding and Replacing Parts 3 plastic bar on keyboard connector Be careful when removing and handling the...
... on the keyboard connector to the front of the keyboard. NOTICE: The keycaps on the keyboard are fragile, easily dislodged, and time-consuming to the keyboard connector. b Lift the keyboard only enough to hold it up and slightly forward to allow access to replace. NOTICE: To...the display. 3 Remove the hinge cover. See "Hinge Cover" on page 118. 4 Remove the keyboard: a Remove the two screws at the top of the computer. 1 5 4 1 screws (2) 4 tabs 2 3 2 keyboard cable 5 keyboard 120 Adding and Replacing Parts 3 plastic bar on keyboard connector Be careful when removing and handling the...

Owner's Manual
Page 121
... inside the computer. 1 Follow the procedures in the Product Information Guide. See "Keyboard" on page 118. 3 Remove the keyboard. CAUTION: Before you must remove the battery from the Mini-Card. 1 2 1 Mini-Card 3 2 antenna cables (2) 3 antenna cable connectors (2) Adding and Replacing Parts 121 NOTICE: To help prevent damage to step 5. See "Hinge Cover" on...
... inside the computer. 1 Follow the procedures in the Product Information Guide. See "Keyboard" on page 118. 3 Remove the keyboard. CAUTION: Before you must remove the battery from the Mini-Card. 1 2 1 Mini-Card 3 2 antenna cables (2) 3 antenna cable connectors (2) Adding and Replacing Parts 121 NOTICE: To help prevent damage to step 5. See "Hinge Cover" on...

Owner's Manual
Page 124
... by periodically touching an unpainted metal surface (such as a connector on page 118. 3 Remove the keyboard. See "Hinge Cover" on the back of the coin-cell battery compartment, and pop the battery out. 124 Adding and Replacing Parts 1 2 1 system board connector 3 2 antenna cables (2) 3 antenna cable connectors (2) Coin-Cell Battery CAUTION: Before you...
... by periodically touching an unpainted metal surface (such as a connector on page 118. 3 Remove the keyboard. See "Hinge Cover" on the back of the coin-cell battery compartment, and pop the battery out. 124 Adding and Replacing Parts 1 2 1 system board connector 3 2 antenna cables (2) 3 antenna cable connectors (2) Coin-Cell Battery CAUTION: Before you...

Owner's Manual
Page 131
... identification tags. NOTICE: When the display is closed, extraneous items on page 65. • To make the computer as light as possible, replace any devices installed in a safe place. Packing the Computer • Remove any extended PC Cards. Traveling With Your Computer Identifying Your Computer •...it to acclimate to room temperature for 1 hour before turning it in a safe place away from the keyboard and palm rest and close the display. • Use the optional Dell™ carrying case to pack the computer and its accessories together safely. • Avoid packing the computer...
... identification tags. NOTICE: When the display is closed, extraneous items on page 65. • To make the computer as light as possible, replace any devices installed in a safe place. Packing the Computer • Remove any extended PC Cards. Traveling With Your Computer Identifying Your Computer •...it to acclimate to room temperature for 1 hour before turning it in a safe place away from the keyboard and palm rest and close the display. • Use the optional Dell™ carrying case to pack the computer and its accessories together safely. • Avoid packing the computer...


