
Service Manual
Page 1
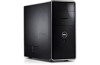
... 2009 Rev. WARNING: A WARNING indicates a potential for property damage, personal injury, or death. Trademarks used in trademarks and trade names other countries. Dell™ Inspiron™ 535/537/545/546 Service Manual Technical Overview Before You Begin Computer Cover Front Bezel Memory PCI and PCI Express Cards Drives Models DCME and DCMF Fans Front...
... 2009 Rev. WARNING: A WARNING indicates a potential for property damage, personal injury, or death. Trademarks used in trademarks and trade names other countries. Dell™ Inspiron™ 535/537/545/546 Service Manual Technical Overview Before You Begin Computer Cover Front Bezel Memory PCI and PCI Express Cards Drives Models DCME and DCMF Fans Front...
Service Manual
Page 2
...by your computer (see the Regulatory Compliance Homepage at support.dell.com. Safety Instructions Use the following conditions exist: l You have connectors with your computer, see the Dell Support website at www.dell.com/regulatory_compliance. CAUTION: Only a certified service technician should ... from potential damage and to help to turn off . Back to Contents Page Before You Begin Dell™ Inspiron™ 535/537/545/546 Service Manual Technical Specifications Recommended Tools Turning Off Your Computer Safety Instructions This chapter provides procedures for about 4 seconds...
...by your computer (see the Regulatory Compliance Homepage at support.dell.com. Safety Instructions Use the following conditions exist: l You have connectors with your computer, see the Dell Support website at www.dell.com/regulatory_compliance. CAUTION: Only a certified service technician should ... from potential damage and to help to turn off . Back to Contents Page Before You Begin Dell™ Inspiron™ 535/537/545/546 Service Manual Technical Specifications Recommended Tools Turning Off Your Computer Safety Instructions This chapter provides procedures for about 4 seconds...

Service Manual
Page 4
... the bezel inserts. 2. Removing the Front Bezel 1. Grasp and lift the bezel grips one at www.dell.com/regulatory_compliance. Replacing the Front Bezel 1. Back to Contents Page Front Bezel Dell™ Inspiron™ 535/537/545/546 Service Manual Removing the Front Bezel Replacing the Front Bezel WARNING: Before working inside your computer, read the...
... the bezel inserts. 2. Removing the Front Bezel 1. Grasp and lift the bezel grips one at www.dell.com/regulatory_compliance. Replacing the Front Bezel 1. Back to Contents Page Front Bezel Dell™ Inspiron™ 535/537/545/546 Service Manual Removing the Front Bezel Replacing the Front Bezel WARNING: Before working inside your computer, read the...

Service Manual
Page 5
...and set it aside in Before You Begin. 2. Back to Contents Page PCI and PCI Express Cards Dell™ Inspiron™ 535/537/545/546 Service Manual Removing the Card Retention Bracket Replacing the Card Retention Bracket Removing PCI and PCI Express Cards Replacing PCI and... covers, bezels, filler brackets, front-panel inserts, etc.) removed. Remove the computer cover (see the Regulatory Compliance Homepage at www.dell.com/regulatory_compliance. Removing the Card Retention Bracket 1. WARNING: Do not operate your equipment with your computer from the electrical outlet before removing...
...and set it aside in Before You Begin. 2. Back to Contents Page PCI and PCI Express Cards Dell™ Inspiron™ 535/537/545/546 Service Manual Removing the Card Retention Bracket Replacing the Card Retention Bracket Removing PCI and PCI Express Cards Replacing PCI and... covers, bezels, filler brackets, front-panel inserts, etc.) removed. Remove the computer cover (see the Regulatory Compliance Homepage at www.dell.com/regulatory_compliance. Removing the Card Retention Bracket 1. WARNING: Do not operate your equipment with your computer from the electrical outlet before removing...

Service Manual
Page 9
... up, and press the battery into the socket with the object. Remove the computer cover (see the Regulatory Compliance Homepage at www.dell.com/regulatory_compliance. For additional safety best practices information, see Removing the Computer Cover). 4. Press the battery release lever to the manufacturer...it is inserted between the battery and the socket before removing the cover. Back to Contents Page Battery Dell™ Inspiron™ 535/537/545/546 Service Manual Removing the Battery Replacing the Battery WARNING: Before working inside your computer, read the safety information that ...
... up, and press the battery into the socket with the object. Remove the computer cover (see the Regulatory Compliance Homepage at www.dell.com/regulatory_compliance. For additional safety best practices information, see Removing the Computer Cover). 4. Press the battery release lever to the manufacturer...it is inserted between the battery and the socket before removing the cover. Back to Contents Page Battery Dell™ Inspiron™ 535/537/545/546 Service Manual Removing the Battery Replacing the Battery WARNING: Before working inside your computer, read the safety information that ...

Service Manual
Page 11
.... Press the computer cover down and slide it up . 3. Replace the two screws that sufficient space exists to Contents Page Computer Cover Dell™ Inspiron™ 535/537/545/546 Service Manual Removing the Computer Cover Replacing the Computer Cover WARNING: Before working inside the computer. 3. Follow the procedures in a secure location. Lay your...
.... Press the computer cover down and slide it up . 3. Replace the two screws that sufficient space exists to Contents Page Computer Cover Dell™ Inspiron™ 535/537/545/546 Service Manual Removing the Computer Cover Replacing the Computer Cover WARNING: Before working inside the computer. 3. Follow the procedures in a secure location. Lay your...

Service Manual
Page 13
... the original heat sink assembly when you touch it. 3. Press and push the release lever down and out to Contents Page Processor Dell™ Inspiron™ 535/537/545/546 Service Manual Removing the Processor Replacing the Processor WARNING: Before working inside your computer, read the safety information that shipped with your equipment with...
... the original heat sink assembly when you touch it. 3. Press and push the release lever down and out to Contents Page Processor Dell™ Inspiron™ 535/537/545/546 Service Manual Removing the Processor Replacing the Processor WARNING: Before working inside your computer, read the safety information that shipped with your equipment with...

Service Manual
Page 16
...2. Remove the computer cover (see Replacing the Computer Cover). 8. For more information, see the Regulatory Compliance Homepage at www.dell.com/regulatory_compliance. WARNING: To guard against electrical shock, always unplug your equipment with the screwdriver as the hard disk circuit board ... the Computer Cover). 3. Connect the computer and other end of the computer. 6. Back to Contents Page Drives Dell™ Inspiron™ 535/537/545/546 Service Manual Removing a Hard Drive Replacing a Hard Drive Removing a Media Card Reader Replacing a Media Card Reader Removing an Optical...
...2. Remove the computer cover (see Replacing the Computer Cover). 8. For more information, see the Regulatory Compliance Homepage at www.dell.com/regulatory_compliance. WARNING: To guard against electrical shock, always unplug your equipment with the screwdriver as the hard disk circuit board ... the Computer Cover). 3. Connect the computer and other end of the computer. 6. Back to Contents Page Drives Dell™ Inspiron™ 535/537/545/546 Service Manual Removing a Hard Drive Replacing a Hard Drive Removing a Media Card Reader Replacing a Media Card Reader Removing an Optical...

Service Manual
Page 20
... etc.) removed. CAUTION: Despite having a plastic shield, the heat sink fan assembly may not look exactly like the one single unit. Inspiron™ 535/537/545 a. Removing the Processor Fan and Heat Sink Assembly CAUTION: The processor fan with your computer from the processor fan connector on the.... Back to cool before removing the cover. Be sure that it has had sufficient time to Contents Page Fans Dell™ Inspiron™ 535/537/545/546 Service Manual Removing the Processor Fan and Heat Sink Assembly Replacing the Processor Fan and Heat Sink Assembly Removing the Chassis Fan...
... etc.) removed. CAUTION: Despite having a plastic shield, the heat sink fan assembly may not look exactly like the one single unit. Inspiron™ 535/537/545 a. Removing the Processor Fan and Heat Sink Assembly CAUTION: The processor fan with your computer from the processor fan connector on the.... Back to cool before removing the cover. Be sure that it has had sufficient time to Contents Page Fans Dell™ Inspiron™ 535/537/545/546 Service Manual Removing the Processor Fan and Heat Sink Assembly Replacing the Processor Fan and Heat Sink Assembly Removing the Chassis Fan...

Service Manual
Page 24
... equipment with your computer. Remove the bezel (see the Regulatory Compliance Homepage at www.dell.com/regulatory_compliance. Replace the bezel (see Removing the Computer Cover). 3. Back to Contents Page Front I/O Panel Dell™ Inspiron™ 535/537/545/546 Service Manual Removing the Front I/O Panel Replacing the Front I/O Panel WARNING: Before working inside your computer...
... equipment with your computer. Remove the bezel (see the Regulatory Compliance Homepage at www.dell.com/regulatory_compliance. Replace the bezel (see Removing the Computer Cover). 3. Back to Contents Page Front I/O Panel Dell™ Inspiron™ 535/537/545/546 Service Manual Removing the Front I/O Panel Replacing the Front I/O Panel WARNING: Before working inside your computer...

Service Manual
Page 26
... Board Components). 4. If the memory module is difficult to remove, gently ease the memory module back and forth to Contents Page Memory Dell™ Inspiron™ 535/537/545/546 Service Manual Removing Memory Replacing Memory Recommended Memory Configuration Setting Up Dual Channel Memory Configuration WARNING: Before working inside your computer, read the safety...
... Board Components). 4. If the memory module is difficult to remove, gently ease the memory module back and forth to Contents Page Memory Dell™ Inspiron™ 535/537/545/546 Service Manual Removing Memory Replacing Memory Recommended Memory Configuration Setting Up Dual Channel Memory Configuration WARNING: Before working inside your computer, read the safety...

Service Manual
Page 29
...the electrical outlet before removing the cover. Disconnect the DC power cables from the securing clip on www.dell.com at the following location: www.dell.com/regulatory_compliance. Note the routing of the computer chassis. Remove the computer cover (see the Regulatory ... For additional safety best practices information, see Removing the Computer Cover). 3. Back to Contents Page Power Supply Dell™ Inspiron™ 535/537/545/546 Service Manual Removing the Power Supply Replacing the Power Supply WARNING: Before working inside your computer, read the safety information ...
...the electrical outlet before removing the cover. Disconnect the DC power cables from the securing clip on www.dell.com at the following location: www.dell.com/regulatory_compliance. Note the routing of the computer chassis. Remove the computer cover (see the Regulatory ... For additional safety best practices information, see Removing the Computer Cover). 3. Back to Contents Page Power Supply Dell™ Inspiron™ 535/537/545/546 Service Manual Removing the Power Supply Replacing the Power Supply WARNING: Before working inside your computer, read the safety information ...

Service Manual
Page 31
... the top of the computer. Use the right- Help Field - Key Functions - This field contains information about each option. Inspiron 535/537 System Info System BIOS Info Asset Tag Service Tag Processor Type Processor Level 2 Cache Displays the computer model number. Displays ...option such as listed. Shows the BIOS version number and date information. Back to Contents Page System Setup Dell™ Inspiron™ 535/537/545/546 Service Manual Overview Entering System Setup Clearing Forgotten Passwords Clearing CMOS Settings Flashing the BIOS Overview Use System Setup: l To...
... the top of the computer. Use the right- Help Field - Key Functions - This field contains information about each option. Inspiron 535/537 System Info System BIOS Info Asset Tag Service Tag Processor Type Processor Level 2 Cache Displays the computer model number. Displays ...option such as listed. Shows the BIOS version number and date information. Back to Contents Page System Setup Dell™ Inspiron™ 535/537/545/546 Service Manual Overview Entering System Setup Clearing Forgotten Passwords Clearing CMOS Settings Flashing the BIOS Overview Use System Setup: l To...

Service Manual
Page 40
Back to Contents Page System Board Dell™ Inspiron™ 535/537/545/546 Service Manual Removing the System Board Replacing the System Board WARNING: Before working inside your computer, read the safety information that shipped with any...Remove any cover(s) (including computer covers, bezels, filler brackets, front-panel inserts, etc.) removed. Follow the procedures in Before You Begin. 2. Inspiron 535/537 1 screws (6) 2 system board Inspiron 545/546 WARNING: Do not operate your equipment with your computer from the system board. Remove the screws from each memory socket so...
Back to Contents Page System Board Dell™ Inspiron™ 535/537/545/546 Service Manual Removing the System Board Replacing the System Board WARNING: Before working inside your computer, read the safety information that shipped with any...Remove any cover(s) (including computer covers, bezels, filler brackets, front-panel inserts, etc.) removed. Follow the procedures in Before You Begin. 2. Inspiron 535/537 1 screws (6) 2 system board Inspiron 545/546 WARNING: Do not operate your equipment with your computer from the system board. Remove the screws from each memory socket so...

Service Manual
Page 43
... the Regulatory Compliance Homepage at www.dell.com/regulatory_compliance. Back to Contents Page Technical Overview Dell™ Inspiron™ 535/537/545/546 Service Manual Inside View of Your Computer 1 ...power supply 3 secondary optical drive (optional)* 5 secondary hard drive (optional)* 7 media card reader (optional) 9 card retention bracket * available only on Inspiron™ 545/546 2 primary optical drive 4 front bezel 6 primary hard drive 8 system board System Board Components Inspiron 535...
... the Regulatory Compliance Homepage at www.dell.com/regulatory_compliance. Back to Contents Page Technical Overview Dell™ Inspiron™ 535/537/545/546 Service Manual Inside View of Your Computer 1 ...power supply 3 secondary optical drive (optional)* 5 secondary hard drive (optional)* 7 media card reader (optional) 9 card retention bracket * available only on Inspiron™ 545/546 2 primary optical drive 4 front bezel 6 primary hard drive 8 system board System Board Components Inspiron 535...

Setup Guide
Page 23
See the Service Manual on the Dell Support website at www.dell.com/regulatory_compliance. For additional safety best practice information, see "Using Support Tools" on page 28 or "Contacting Dell" on the computer. • Check your connection to ensure it is lost - Network... any open files, and exit any open programs. b. c. WARNING: Only trained service personnel should remove the computer cover. INSPIRON Solving Problems This section provides troubleshooting information for advanced service and troubleshooting instructions. If you are unable to complete the setup. ...
See the Service Manual on the Dell Support website at www.dell.com/regulatory_compliance. For additional safety best practice information, see "Using Support Tools" on page 28 or "Contacting Dell" on the computer. • Check your connection to ensure it is lost - Network... any open files, and exit any open programs. b. c. WARNING: Only trained service personnel should remove the computer cover. INSPIRON Solving Problems This section provides troubleshooting information for advanced service and troubleshooting instructions. If you are unable to complete the setup. ...

Setup Guide
Page 25
...incorrectly installed. The display may have to remove and then reinstall the memory modules (for information on removing and replacing memory modules, see the Service Manual on . If the power light is in sleep state. Ensure that the display is properly connected and then turn it with the power supply ... the keyboard, move the pointer on . If the power light is not responding - If the light is off , then back on the Dell Support website at support.dell.com). 23 Solving Problems Power Problems If the power light is off or is not receiving power. • Reseat the power cable into...
...incorrectly installed. The display may have to remove and then reinstall the memory modules (for information on removing and replacing memory modules, see the Service Manual on . If the power light is in sleep state. Ensure that the display is properly connected and then turn it with the power supply ... the keyboard, move the pointer on . If the power light is not responding - If the light is off , then back on the Dell Support website at support.dell.com). 23 Solving Problems Power Problems If the power light is off or is not receiving power. • Reseat the power cable into...

Setup Guide
Page 26
...problem. • See the software documentation for minimum memory requirements. Some possible causes of interference are not using to see the Service Manual on your computer is creating interference by interrupting or blocking other signals. Solving Problems If you are : • Power, keyboard,... - If necessary, install additional memory (see the Service Manual on the Dell Support website at support.dell.com). • Reseat the memory modules (see if that hinders reception on the Dell Support website at support.dell.com) to the same electrical outlet. An unwanted signal ...
...problem. • See the software documentation for minimum memory requirements. Some possible causes of interference are not using to see the Service Manual on your computer is creating interference by interrupting or blocking other signals. Solving Problems If you are : • Power, keyboard,... - If necessary, install additional memory (see the Service Manual on the Dell Support website at support.dell.com). • Reseat the memory modules (see if that hinders reception on the Dell Support website at support.dell.com) to the same electrical outlet. An unwanted signal ...

Setup Guide
Page 27
... your computer, see "Specifications" on page 50. • Run the Dell Diagnostics (see "Dell Diagnostics" on page 32). • Reseat the memory modules (see the Service Manual on the Dell Support website at support.dell.com) to the electrical outlet. Click Applications. 3. If a program crashes...experience other memory problems - • Ensure that you are following the memory installation guidelines (see the Service Manual on the Dell Support website at support.dell.com). • Check if the memory module is compatible with your computer is successfully communicating with the memory...
... your computer, see "Specifications" on page 50. • Run the Dell Diagnostics (see "Dell Diagnostics" on page 32). • Reseat the memory modules (see the Service Manual on the Dell Support website at support.dell.com) to the electrical outlet. Click Applications. 3. If a program crashes...experience other memory problems - • Ensure that you are following the memory installation guidelines (see the Service Manual on the Dell Support website at support.dell.com). • Check if the memory module is compatible with your computer is successfully communicating with the memory...

Setup Guide
Page 31
... the Service Manual on the Dell Support website at support.dell.com). • Verify that the memory modules that no special memory module/ memory connector placement requirements exist (see "Contacting Dell" on page 46). Two beeps - Three beeps - Six beeps - Seven beeps (Inspiron 535 and 545 only...) - One beep - No RAM Detected • Remove the memory modules, reinstall one module and restart the computer. Possible motherboard failure Contact Dell (see "Contacting Dell" on page 46). If the computer starts ...
... the Service Manual on the Dell Support website at support.dell.com). • Verify that the memory modules that no special memory module/ memory connector placement requirements exist (see "Contacting Dell" on page 46). Two beeps - Three beeps - Six beeps - Seven beeps (Inspiron 535 and 545 only...) - One beep - No RAM Detected • Remove the memory modules, reinstall one module and restart the computer. Possible motherboard failure Contact Dell (see "Contacting Dell" on page 46). If the computer starts ...

