Inspiron 17 70002-in-1 Service Manual
Page 3
Contents Before working inside your computer 13 Before you begin 13 Safety instructions 13 Recommended tools 14 Screw list...15 After working inside your computer 17 Removing the base cover 18 Procedure...18 Replacing the base cover 20 Procedure...20 Removing the battery 21 Prerequisites...21 Procedure...21 Replacing the battery 23 Procedure...23 Post-requisites 23 Removing the memory modules 24 Prerequisites...24 Procedure...25 Replacing the memory modules 27 Procedure...27 Post-requisites 28 3
Contents Before working inside your computer 13 Before you begin 13 Safety instructions 13 Recommended tools 14 Screw list...15 After working inside your computer 17 Removing the base cover 18 Procedure...18 Replacing the base cover 20 Procedure...20 Removing the battery 21 Prerequisites...21 Procedure...21 Replacing the battery 23 Procedure...23 Post-requisites 23 Removing the memory modules 24 Prerequisites...24 Procedure...25 Replacing the memory modules 27 Procedure...27 Post-requisites 28 3
Inspiron 17 70002-in-1 Service Manual
Page 10
... the audio settings 120 Camera...120 Identifying the webcam in device manager 120 Starting the camera application 120 Getting the Dell Webcam Central 121 Display...122 Adjusting the brightness 122 Changing the screen resolution 122 Rotating the display 123 Cleaning the display 123 HDMI...124 Connecting to external display devices 124 Graphics...125 Downloading the graphics driver 126 Identifying the display adapter 126 Changing the display settings in Intel HD Graphics Control Panel....... 127 USB...127 Downloading the USB 3.0 driver 127 Enabling or disabling the USB in BIOS setup...
... the audio settings 120 Camera...120 Identifying the webcam in device manager 120 Starting the camera application 120 Getting the Dell Webcam Central 121 Display...122 Adjusting the brightness 122 Changing the screen resolution 122 Rotating the display 123 Cleaning the display 123 HDMI...124 Connecting to external display devices 124 Graphics...125 Downloading the graphics driver 126 Identifying the display adapter 126 Changing the display settings in Intel HD Graphics Control Panel....... 127 USB...127 Downloading the USB 3.0 driver 127 Enabling or disabling the USB in BIOS setup...
Inspiron 17 70002-in-1 Service Manual
Page 38
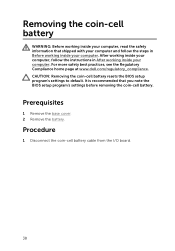
... After working inside your computer. It is recommended that shipped with your computer and follow the instructions in Before working inside your computer. For more safety best practices, see the Regulatory Compliance home page at www.dell.com/regulatory_compliance. Procedure 1 Disconnect the coin-cell battery cable from the I/O board. 38 CAUTION: Removing the coin-cell battery resets the BIOS setup program's settings to default.
... After working inside your computer. It is recommended that shipped with your computer and follow the instructions in Before working inside your computer. For more safety best practices, see the Regulatory Compliance home page at www.dell.com/regulatory_compliance. Procedure 1 Disconnect the coin-cell battery cable from the I/O board. 38 CAUTION: Removing the coin-cell battery resets the BIOS setup program's settings to default.
Inspiron 17 70002-in-1 Service Manual
Page 84
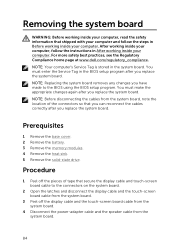
...: Replacing the system board removes any changes you have made to the connectors on the system board. 2 Open the latches and disconnect the display cable and the touch-screen board cable from the system board. 3 Peel off the display cable and the touch-screen board cable from the system board. 4 Disconnect the power-adapter cable and the speaker cable from the system board, note the location of tape that secure the display cable and touch-screen board cable to the BIOS using the BIOS setup program. Removing...
...: Replacing the system board removes any changes you have made to the connectors on the system board. 2 Open the latches and disconnect the display cable and the touch-screen board cable from the system board. 3 Peel off the display cable and the touch-screen board cable from the system board. 4 Disconnect the power-adapter cable and the speaker cable from the system board, note the location of tape that secure the display cable and touch-screen board cable to the BIOS using the BIOS setup program. Removing...
Inspiron 17 70002-in-1 Service Manual
Page 91
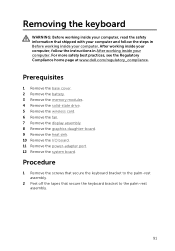
... the steps in After working inside your computer. Prerequisites 1 Remove the base cover. 2 Remove the battery. 3 Remove the memory modules. 4 Remove the solid-state drive. 5 Remove the wireless card. 6 Remove the fan. 7 Remove the display assembly. 8 Remove the graphics daughter-board. 9 Remove the heat sink. 10 Remove the I/O board. 11 Remove the power-adapter port. 12 Remove the system board. Removing the keyboard WARNING: Before working inside your computer, read the safety information that secure the keyboard bracket to the palm-rest...
... the steps in After working inside your computer. Prerequisites 1 Remove the base cover. 2 Remove the battery. 3 Remove the memory modules. 4 Remove the solid-state drive. 5 Remove the wireless card. 6 Remove the fan. 7 Remove the display assembly. 8 Remove the graphics daughter-board. 9 Remove the heat sink. 10 Remove the I/O board. 11 Remove the power-adapter port. 12 Remove the system board. Removing the keyboard WARNING: Before working inside your computer, read the safety information that secure the keyboard bracket to the palm-rest...
Inspiron 17 70002-in-1 Service Manual
Page 96
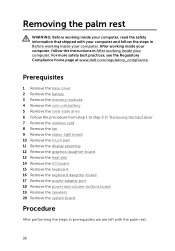
... follow the instructions in After working inside your computer. Procedure After performing the steps in "Removing the hard drive". 7 Remove the wireless card. 8 Remove the fan. 9 Remove the status-light board. 10 Remove the touch pad. 11 Remove the display assembly. 12 Remove the graphics daughter-board. 13 Remove the heat sink. 14 Remove the I/O board. 15 Remove the keyboard. 16 Remove the keyboard daughter-board. 17 Remove the power-adapter port. 18 Remove the power and volume-buttons board. 19 Remove the speakers. 20 Remove the system board. For more...
... follow the instructions in After working inside your computer. Procedure After performing the steps in "Removing the hard drive". 7 Remove the wireless card. 8 Remove the fan. 9 Remove the status-light board. 10 Remove the touch pad. 11 Remove the display assembly. 12 Remove the graphics daughter-board. 13 Remove the heat sink. 14 Remove the I/O board. 15 Remove the keyboard. 16 Remove the keyboard daughter-board. 17 Remove the power-adapter port. 18 Remove the power and volume-buttons board. 19 Remove the speakers. 20 Remove the system board. For more...
Inspiron 17 70002-in-1 Service Manual
Page 119
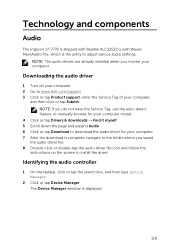
... audio driver for your computer. 7 After the download is complete, navigate to www.dell.com/support. 3 Click or tap Product support, enter the Service Tag of your computer. Identifying the audio controller 1 On the taskbar, click or tap the search box, and then type Device Manager. 2 Click or tap Device Manager. Technology and components Audio The Inspiron 17-7779 is shipped with Realtek ALC3253CG with Waves MaxxAudio Pro, which is displayed...
... audio driver for your computer. 7 After the download is complete, navigate to www.dell.com/support. 3 Click or tap Product support, enter the Service Tag of your computer. Identifying the audio controller 1 On the taskbar, click or tap the search box, and then type Device Manager. 2 Click or tap Device Manager. Technology and components Audio The Inspiron 17-7779 is shipped with Realtek ALC3253CG with Waves MaxxAudio Pro, which is displayed...
Inspiron 17 70002-in-1 Service Manual
Page 120
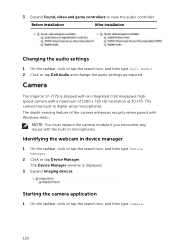
... box, and then type Camera. 120 3 Expand Sound, video and game controllers to view the audio controller. Before installation After installation Changing the audio settings 1 On the taskbar, click or tap the search box, and then type Dell Audio. 2 Click or tap Dell Audio and change the audio settings as required. Identifying the webcam in microphones. NOTE: You must replace the camera module if you encounter any issues with the built-in device manager 1 On the taskbar...
... box, and then type Camera. 120 3 Expand Sound, video and game controllers to view the audio controller. Before installation After installation Changing the audio settings 1 On the taskbar, click or tap the search box, and then type Dell Audio. 2 Click or tap Dell Audio and change the audio settings as required. Identifying the webcam in microphones. NOTE: You must replace the camera module if you encounter any issues with the built-in device manager 1 On the taskbar...
Inspiron 17 70002-in-1 Service Manual
Page 124
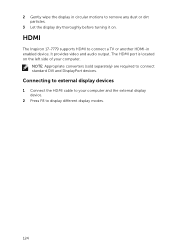
... enabled device. It provides video and audio output. NOTE: Appropriate converters (sold separately) are required to your computer. The HDMI port is located on . HDMI The Inspiron 17-7779 supports HDMI to connect a TV or another HDMI-in circular motions to remove any dust or dirt particles. 3 Let the display dry thoroughly before turning it on the left side of your computer and the external display device. 2 Press F8 to display different display modes...
... enabled device. It provides video and audio output. NOTE: Appropriate converters (sold separately) are required to your computer. The HDMI port is located on . HDMI The Inspiron 17-7779 supports HDMI to connect a TV or another HDMI-in circular motions to remove any dust or dirt particles. 3 Let the display dry thoroughly before turning it on the left side of your computer and the external display device. 2 Press F8 to display different display modes...

Inspiron 17 70002-in-1 Service Manual
Page 126
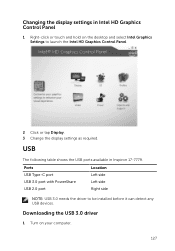
... the Service Tag, use the auto-detect feature or manually browse for your computer model. 4 Click or tap Drivers & downloads → Find it myself. 5 Scroll down the page and expand Video. 6 Click or tap Download to download the graphics driver for your computer. 7 After the download is displayed. 3 Expand Display adapters. 126 The Device Manager window is complete, navigate to www.dell.com/support. 3 Click or tap Product support enter the Service Tag...
... the Service Tag, use the auto-detect feature or manually browse for your computer model. 4 Click or tap Drivers & downloads → Find it myself. 5 Scroll down the page and expand Video. 6 Click or tap Download to download the graphics driver for your computer. 7 After the download is displayed. 3 Expand Display adapters. 126 The Device Manager window is complete, navigate to www.dell.com/support. 3 Click or tap Product support enter the Service Tag...
Inspiron 17 70002-in-1 Service Manual
Page 127
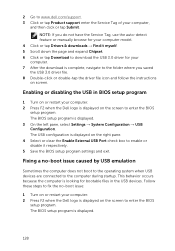
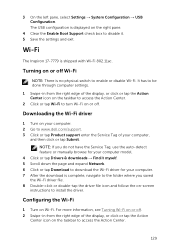
Downloading the USB 3.0 driver 1 Turn on the desktop and select Intel Graphics Settings to be installed before it can detect any USB devices. Changing the display settings in Inspiron 17-7779. Ports USB Type-C port USB 3.0 port with PowerShare USB 2.0 port Location Left side Left side Right side NOTE: USB 3.0 needs the driver to launch the Intel HD Graphics Control Panel. 2 Click or tap Display. 3 Change the display settings as required. USB The following table shows the USB ports available in Intel HD Graphics Control Panel 1 Right-click...
Downloading the USB 3.0 driver 1 Turn on the desktop and select Intel Graphics Settings to be installed before it can detect any USB devices. Changing the display settings in Inspiron 17-7779. Ports USB Type-C port USB 3.0 port with PowerShare USB 2.0 port Location Left side Left side Right side NOTE: USB 3.0 needs the driver to launch the Intel HD Graphics Control Panel. 2 Click or tap Display. 3 Change the display settings as required. USB The following table shows the USB ports available in Intel HD Graphics Control Panel 1 Right-click...
Inspiron 17 70002-in-1 Service Manual
Page 128
... model. 4 Click or tap Drivers & downloads → Find it respectively. 5 Save the BIOS setup program settings and exit. The USB configuration is displayed on the right pane. 4 Select or clear the Enable External USB Port check box to enable or disable it myself. 5 Scroll down the page and expand Chipset. 6 Click or tap Download to download the USB 3.0 driver for your computer. 2 Press F2 when the Dell logo is displayed on the screen to enter...
... model. 4 Click or tap Drivers & downloads → Find it respectively. 5 Save the BIOS setup program settings and exit. The USB configuration is displayed on the right pane. 4 Select or clear the Enable External USB Port check box to enable or disable it myself. 5 Scroll down the page and expand Chipset. 6 Click or tap Download to download the USB 3.0 driver for your computer. 2 Press F2 when the Dell logo is displayed on the screen to enter...
Inspiron 17 70002-in-1 Service Manual
Page 129
... the download is displayed on the right pane. 4 Clear the Enable Boot Support check box to install the driver. The USB configuration is complete, navigate to the folder where you do not have the Service Tag, use the auto-detect feature or manually browse for your computer model. 4 Click or tap Drivers & downloads → Find it myself. 5 Scroll down the page and expand Network. 6 Click or tap Download to access...
... the download is displayed on the right pane. 4 Clear the Enable Boot Support check box to install the driver. The USB configuration is complete, navigate to the folder where you do not have the Service Tag, use the auto-detect feature or manually browse for your computer model. 4 Click or tap Drivers & downloads → Find it myself. 5 Scroll down the page and expand Network. 6 Click or tap Download to access...
Inspiron 17 70002-in-1 Service Manual
Page 133
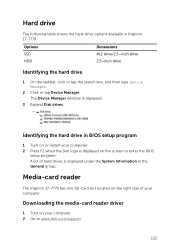
...Information in Inspiron 17-7779. A list of your computer. 2 Go to enter the BIOS setup program. Media-card reader The Inspiron 17-7779 has one SD-card slot located on the right side of hard drives is displayed on your computer. Hard drive The following table shows the hard-drive options available in the General group. Downloading the media-card reader driver 1 Turn on the screen to www.dell.com/support. 133 The Device Manager window is displayed. 3 Expand Disk drives. Options SSD HDD Dimensions M.2 drive/2.5-inch drive 2.5-inch drive Identifying the hard drive 1 On the...
...Information in Inspiron 17-7779. A list of your computer. 2 Go to enter the BIOS setup program. Media-card reader The Inspiron 17-7779 has one SD-card slot located on the right side of hard drives is displayed on your computer. Hard drive The following table shows the hard-drive options available in the General group. Downloading the media-card reader driver 1 Turn on the screen to www.dell.com/support. 133 The Device Manager window is displayed. 3 Expand Disk drives. Options SSD HDD Dimensions M.2 drive/2.5-inch drive 2.5-inch drive Identifying the hard drive 1 On the...
Inspiron 17 70002-in-1 Service Manual
Page 134
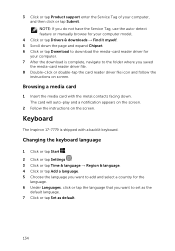
... tap Set as default. 134 Browsing a media card 1 Insert the media card with a backlit keyboard. Keyboard The Inspiron 17-7779 is complete, navigate to the folder where you do not have the Service Tag, use the auto-detect feature or manually browse for your computer, and then click or tap Submit. The card will auto-play and a notification appears on the screen. 2 Follow the instructions on screen. NOTE...
... tap Set as default. 134 Browsing a media card 1 Insert the media card with a backlit keyboard. Keyboard The Inspiron 17-7779 is complete, navigate to the folder where you do not have the Service Tag, use the auto-detect feature or manually browse for your computer, and then click or tap Submit. The card will auto-play and a notification appears on the screen. 2 Follow the instructions on screen. NOTE...
Inspiron 17 70002-in-1 Service Manual
Page 138
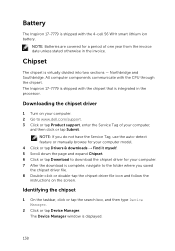
..., and then type Device Manager. 2 Click or tap Device Manager. The Inspiron 17-7779 is shipped with the CPU through the chipset. Battery The Inspiron 17-7779 is displayed. 138 Downloading the chipset driver 1 Turn on your computer. 2 Go to the folder where you do not have the Service Tag, use the auto-detect feature or manually browse for your computer model. 4 Click or tap Drivers & downloads → Find it myself. 5 Scroll down the...
..., and then type Device Manager. 2 Click or tap Device Manager. The Inspiron 17-7779 is shipped with the CPU through the chipset. Battery The Inspiron 17-7779 is displayed. 138 Downloading the chipset driver 1 Turn on your computer. 2 Go to the folder where you do not have the Service Tag, use the auto-detect feature or manually browse for your computer model. 4 Click or tap Drivers & downloads → Find it myself. 5 Scroll down the...
Inspiron 17 70002-in-1 Service Manual
Page 140
2 Select Settings . 3 Click or tap System → About. Testing memory using ePSA 1 Turn on or restart your computer. 2 Press F12 after the Dell logo is displayed on the screen to access the boot menu. 3 Use the arrow keys to highlight the Diagnostics menu option and press Enter. 4 Follow the instructions on or restart your computer and try again. The memory information is shipped with the following processor options: •...
2 Select Settings . 3 Click or tap System → About. Testing memory using ePSA 1 Turn on or restart your computer. 2 Press F12 after the Dell logo is displayed on the screen to access the boot menu. 3 Use the arrow keys to highlight the Diagnostics menu option and press Enter. 4 Follow the instructions on or restart your computer and try again. The memory information is shipped with the following processor options: •...

Inspiron 17 70002-in-1 Service Manual
Page 143
Intel Serial IO driver In the Device Manager, check if the Intel Serial IO driver is installed. Video drivers In the Device Manager, check if the video driver is installed. 143 Install the video driver update from www.dell.com/support.
Intel Serial IO driver In the Device Manager, check if the Intel Serial IO driver is installed. Video drivers In the Device Manager, check if the video driver is installed. 143 Install the video driver update from www.dell.com/support.
Inspiron 17 70002-in-1 Service Manual
Page 148
... a keystroke too early, the keyboard is not the first device initialized by Setup. You can change the user-defined settings in BIOS setup program. Timing key sequences The keyboard is locked out. Boot menu The Inspiron 17-7779 includes a one-time boot menu. BIOS overview The BIOS manages data flow between the computer's operating system and attached devices such as follows: • Easier Access - The user is displayed on the BIOS screen. • Diagnostics Options - As a result, if you...
... a keystroke too early, the keyboard is not the first device initialized by Setup. You can change the user-defined settings in BIOS setup program. Timing key sequences The keyboard is locked out. Boot menu The Inspiron 17-7779 includes a one-time boot menu. BIOS overview The BIOS manages data flow between the computer's operating system and attached devices such as follows: • Easier Access - The user is displayed on the BIOS screen. • Diagnostics Options - As a result, if you...
Inspiron 17 70002-in-1 Service Manual
Page 150
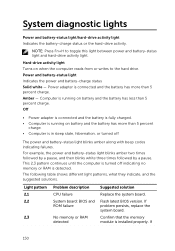
... board: BIOS and ROM failure No memory or RAM detected Suggested solution Replace the system board. If problem persists, replace the system board. Computer is turned off The power and battery-status light blinks amber along with beep codes indicating failures. Hard-drive activity light Turns on battery and the battery has more than 5 percent charge. • Computer is in sleep state, hibernation, or turned off indicating no memory or RAM is installed properly. System diagnostic lights Power and battery-status light/hard-drive activity light Indicates the battery-charge...
... board: BIOS and ROM failure No memory or RAM detected Suggested solution Replace the system board. If problem persists, replace the system board. Computer is turned off The power and battery-status light blinks amber along with beep codes indicating failures. Hard-drive activity light Turns on battery and the battery has more than 5 percent charge. • Computer is in sleep state, hibernation, or turned off indicating no memory or RAM is installed properly. System diagnostic lights Power and battery-status light/hard-drive activity light Indicates the battery-charge...


