
Handling swollen Lithium-ion batteries
Page 1
... or internal components leading to customer preferences for handling and replacing Lithium-ion batteries ● Exercise caution when handling Lithium-ion batteries. ● Discharge the battery before removing it by Dell), to work with your Dell computer. Do not use a battery from Dell that is the potential for assistance and further instructions. ● Using a non-Dell or incompatible battery may impact the performance of their respective owners...
... or internal components leading to customer preferences for handling and replacing Lithium-ion batteries ● Exercise caution when handling Lithium-ion batteries. ● Discharge the battery before removing it by Dell), to work with your Dell computer. Do not use a battery from Dell that is the potential for assistance and further instructions. ● Using a non-Dell or incompatible battery may impact the performance of their respective owners...

Inspiron 17 5000 Service Manual
Page 4
Replacing the battery 28 Procedure 28 Post-requisites 28 Removing the hard drive 29 Prerequisites 29 Procedure 29 Replacing the hard drive 32 Procedure 32 Post-requisites 32 Removing the memory modules 33 Prerequisites 33 Procedure 33 Replacing the memory modules 35 Procedure 35 Post-requisites 37 Removing the wireless card 38 Prerequisites 38 Procedure 38 Replacing the wireless card 40 Procedure 40 Post-requisites 42 Removing the coin-cell battery 43 Prerequisites 43 Procedure 43 4
Replacing the battery 28 Procedure 28 Post-requisites 28 Removing the hard drive 29 Prerequisites 29 Procedure 29 Replacing the hard drive 32 Procedure 32 Post-requisites 32 Removing the memory modules 33 Prerequisites 33 Procedure 33 Replacing the memory modules 35 Procedure 35 Post-requisites 37 Removing the wireless card 38 Prerequisites 38 Procedure 38 Replacing the wireless card 40 Procedure 40 Post-requisites 42 Removing the coin-cell battery 43 Prerequisites 43 Procedure 43 4
Inspiron 17 5000 Service Manual
Page 10
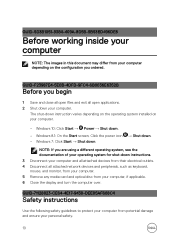
... are using a different operating system, see the documentation of your operating system for shut-down instruction varies depending on the operating system installed on the configuration you begin 1 Save and close all open files and exit all attached network devices and peripherals, such as keyboard, mouse, and monitor, from your computer. 5 Remove any media card and optical disc from your computer, if applicable. 6 Close the display and turn the...
... are using a different operating system, see the documentation of your operating system for shut-down instruction varies depending on the operating system installed on the configuration you begin 1 Save and close all open files and exit all attached network devices and peripherals, such as keyboard, mouse, and monitor, from your computer. 5 Remove any media card and optical disc from your computer, if applicable. 6 Close the display and turn the...
Inspiron 17 5000 Service Manual
Page 11
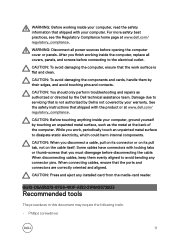
... at the back of the computer. WARNING: Disconnect all covers, panels, and screws before connecting to avoid bending any installed card from the media-card reader. WARNING: Before working inside the computer, replace all power sources before opening the computer cover or panels. See the safety instructions that the ports and connectors are correctly oriented and aligned. When connecting cables, ensure that shipped with your computer. CAUTION: To...
... at the back of the computer. WARNING: Disconnect all covers, panels, and screws before connecting to avoid bending any installed card from the media-card reader. WARNING: Before working inside the computer, replace all power sources before opening the computer cover or panels. See the safety instructions that the ports and connectors are correctly oriented and aligned. When connecting cables, ensure that shipped with your computer. CAUTION: To...
Inspiron 17 5000 Service Manual
Page 14
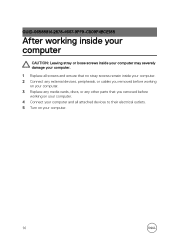
GUID-06588814-2678-4667-9FF9-C009F4BCE185 After working inside your computer CAUTION: Leaving stray or loose screws inside your computer may severely damage your computer. 1 Replace all screws and ensure that no stray screws remain inside your computer. 2 Connect any external devices, peripherals, or cables you removed before working on your computer. 3 Replace any media cards, discs, or any other parts that you removed before working on your computer. 4 Connect your computer and all attached devices to their electrical outlets. 5 Turn on your computer. 14
GUID-06588814-2678-4667-9FF9-C009F4BCE185 After working inside your computer CAUTION: Leaving stray or loose screws inside your computer may severely damage your computer. 1 Replace all screws and ensure that no stray screws remain inside your computer. 2 Connect any external devices, peripherals, or cables you removed before working on your computer. 3 Replace any media cards, discs, or any other parts that you removed before working on your computer. 4 Connect your computer and all attached devices to their electrical outlets. 5 Turn on your computer. 14
Inspiron 17 5000 Service Manual
Page 30
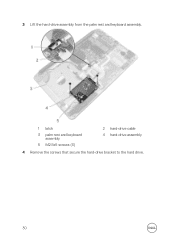
3 Lift the hard-drive assembly from the palm rest and keyboard assembly. 1 latch 3 palm rest and keyboard assembly 5 M2.5x5 screws (3) 2 hard-drive cable 4 hard-drive assembly 4 Remove the screws that secure the hard-drive bracket to the hard drive. 30
3 Lift the hard-drive assembly from the palm rest and keyboard assembly. 1 latch 3 palm rest and keyboard assembly 5 M2.5x5 screws (3) 2 hard-drive cable 4 hard-drive assembly 4 Remove the screws that secure the hard-drive bracket to the hard drive. 30

Inspiron 17 5000 Service Manual
Page 33
... instructions in Before working inside your computer. After working inside your computer, follow the steps in After working inside your fingertips to carefully spread apart the securing clips on each end of the memory-module slot until the memory module pops up. 33 GUID-E6939559-9400-415A-AA4D-54149352BDF7 Prerequisites 1 Remove the optical drive. 2 Remove the base cover. 3 Remove the battery. GUID-A8ADE689-019C-4D70-9963-7590D4A2003A Procedure 1 Use...
... instructions in Before working inside your computer. After working inside your computer, follow the steps in After working inside your fingertips to carefully spread apart the securing clips on each end of the memory-module slot until the memory module pops up. 33 GUID-E6939559-9400-415A-AA4D-54149352BDF7 Prerequisites 1 Remove the optical drive. 2 Remove the base cover. 3 Remove the battery. GUID-A8ADE689-019C-4D70-9963-7590D4A2003A Procedure 1 Use...
Inspiron 17 5000 Service Manual
Page 43
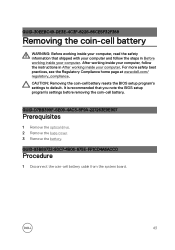
... battery cable from the system board. 43 GUID-D7BB399F-6E09-4AC3-8F9A-227263E9E907 Prerequisites 1 Remove the optical drive. 2 Remove the base cover. 3 Remove the battery. After working inside your computer, follow the steps in After working inside your computer. GUID-30EEBC49-DE3E-4C3F-8226-86CE5F32F388 Removing the coin-cell battery WARNING: Before working inside your computer, read the safety information that you note the BIOS setup program's settings before removing...
... battery cable from the system board. 43 GUID-D7BB399F-6E09-4AC3-8F9A-227263E9E907 Prerequisites 1 Remove the optical drive. 2 Remove the base cover. 3 Remove the battery. After working inside your computer, follow the steps in After working inside your computer. GUID-30EEBC49-DE3E-4C3F-8226-86CE5F32F388 Removing the coin-cell battery WARNING: Before working inside your computer, read the safety information that you note the BIOS setup program's settings before removing...
Inspiron 17 5000 Service Manual
Page 54
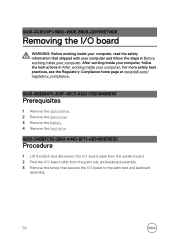
... optical drive. 2 Remove the base cover. 3 Remove the battery. 4 Remove the hard drive. GUID-D4BBFC1B-2BA9-4A4D-8F71-AB3460E51E5D Procedure 1 Lift the latch and disconnect the I/O-board cable from the system board. 2 Peel the I/O-board cable from the palm rest and keyboard assembly. 3 Remove the screw that secures the I /O board WARNING: Before working inside your computer, read the safety information that shipped with your computer and follow the instructions...
... optical drive. 2 Remove the base cover. 3 Remove the battery. 4 Remove the hard drive. GUID-D4BBFC1B-2BA9-4A4D-8F71-AB3460E51E5D Procedure 1 Lift the latch and disconnect the I/O-board cable from the system board. 2 Peel the I/O-board cable from the palm rest and keyboard assembly. 3 Remove the screw that secures the I /O board WARNING: Before working inside your computer, read the safety information that shipped with your computer and follow the instructions...

Inspiron 17 5000 Service Manual
Page 69
...-BC1D-2EB7212493E0 Prerequisites 1 Remove the optical drive. 2 Remove the base cover. 3 Remove the battery. 4 Remove the wireless card. 5 Remove the memory modules. 6 Remove the display assembly. 69 NOTE: Your computer's Service Tag is stored in After working inside your computer. After working inside your computer, follow the steps in the BIOS setup program after you replace the system board. NOTE: Before disconnecting the cables from the system board, note the location of the connectors...
...-BC1D-2EB7212493E0 Prerequisites 1 Remove the optical drive. 2 Remove the base cover. 3 Remove the battery. 4 Remove the wireless card. 5 Remove the memory modules. 6 Remove the display assembly. 69 NOTE: Your computer's Service Tag is stored in After working inside your computer. After working inside your computer, follow the steps in the BIOS setup program after you replace the system board. NOTE: Before disconnecting the cables from the system board, note the location of the connectors...
Inspiron 17 5000 Service Manual
Page 75
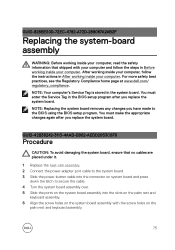
... cables are placed under it. 1 Replace the heat-sink assembly. 2 Connect the power-adapter port cable to the system board. 3 Slide the power-button cable into the connector on system board and press down the latch to the BIOS using the BIOS setup program. NOTE: Replacing the system board removes any changes you replace the system board. After working inside your computer, follow the steps in After working inside your computer. You must enter the Service...
... cables are placed under it. 1 Replace the heat-sink assembly. 2 Connect the power-adapter port cable to the system board. 3 Slide the power-button cable into the connector on system board and press down the latch to the BIOS using the BIOS setup program. NOTE: Replacing the system board removes any changes you replace the system board. After working inside your computer, follow the steps in After working inside your computer. You must enter the Service...

Inspiron 17 5000 Service Manual
Page 83
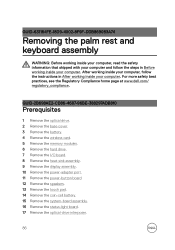
... drive. 2 Remove the base cover. 3 Remove the battery. 4 Remove the wireless card. 5 Remove the memory modules. 6 Remove the heat-sink assembly. 7 Remove the system-board assembly. GUID-35D5032D-9652-403C-9A8A-F98FFABA8776 Removing the power-adapter port WARNING: Before working inside your computer, read the safety information that secures the power-adapter port to the palm rest and keyboard assembly. 83 For more safety best practices, see the Regulatory Compliance home page at www.dell...
... drive. 2 Remove the base cover. 3 Remove the battery. 4 Remove the wireless card. 5 Remove the memory modules. 6 Remove the heat-sink assembly. 7 Remove the system-board assembly. GUID-35D5032D-9652-403C-9A8A-F98FFABA8776 Removing the power-adapter port WARNING: Before working inside your computer, read the safety information that secures the power-adapter port to the palm rest and keyboard assembly. 83 For more safety best practices, see the Regulatory Compliance home page at www.dell...
Inspiron 17 5000 Service Manual
Page 86
... drive. 2 Remove the base cover. 3 Remove the battery. 4 Remove the wireless card. 5 Remove the memory modules. 6 Remove the hard drive. 7 Remove the I/O board. 8 Remove the heat-sink assembly. 9 Remove the display assembly. 10 Remove the power-adapter port. 11 Remove the power-button board. 12 Remove the speakers. 13 Remove the touch pad. 14 Remove the coin-cell battery. 15 Remove the system-board assembly. 16 Remove the status-light board. 17 Remove the optical-drive interposer. 86 For more safety best practices, see the Regulatory Compliance home page at www.dell...
... drive. 2 Remove the base cover. 3 Remove the battery. 4 Remove the wireless card. 5 Remove the memory modules. 6 Remove the hard drive. 7 Remove the I/O board. 8 Remove the heat-sink assembly. 9 Remove the display assembly. 10 Remove the power-adapter port. 11 Remove the power-button board. 12 Remove the speakers. 13 Remove the touch pad. 14 Remove the coin-cell battery. 15 Remove the system-board assembly. 16 Remove the status-light board. 17 Remove the optical-drive interposer. 86 For more safety best practices, see the Regulatory Compliance home page at www.dell...
Inspiron 17 5000 Service Manual
Page 93
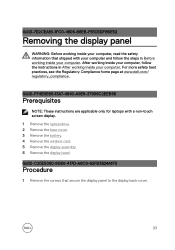
... shipped with a non-touch screen display. 1 Remove the optical drive. 2 Remove the base cover. 3 Remove the battery. 4 Remove the wireless card. 5 Remove the display assembly. 6 Remove the display bezel. GUID-7D2CEA1B-1FC0-4606-86EB-F51C5DFB6E52 Removing the display panel WARNING: Before working inside your computer, read the safety information that secure the display panel to the display back-cover. 93 GUID-FF4B3E86-13A7-4840-A9E8-37906C2EEB66 Prerequisites NOTE: These instructions are applicable only for laptops with your computer...
... shipped with a non-touch screen display. 1 Remove the optical drive. 2 Remove the base cover. 3 Remove the battery. 4 Remove the wireless card. 5 Remove the display assembly. 6 Remove the display bezel. GUID-7D2CEA1B-1FC0-4606-86EB-F51C5DFB6E52 Removing the display panel WARNING: Before working inside your computer, read the safety information that secure the display panel to the display back-cover. 93 GUID-FF4B3E86-13A7-4840-A9E8-37906C2EEB66 Prerequisites NOTE: These instructions are applicable only for laptops with your computer...
Inspiron 17 5000 Service Manual
Page 111
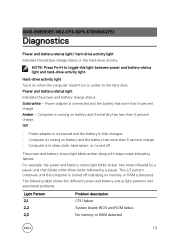
... in sleep state, hibernation, or turned off indicating no memory or RAM is connected and the battery has more than 5 percent charge. • Computer is running on when the computer reads from or writes to toggle this light between power and battery-status light and hard-drive activity light. The power and battery-status light blinks amber along with beep codes indicating failures. GUID-6E8EB3EE-1462-4719-82F6-6728469D27E2 Diagnostics Power and battery-status light/ hard-drive activity light Indicates the battery-charge...
... in sleep state, hibernation, or turned off indicating no memory or RAM is connected and the battery has more than 5 percent charge. • Computer is running on when the computer reads from or writes to toggle this light between power and battery-status light and hard-drive activity light. The power and battery-status light blinks amber along with beep codes indicating failures. GUID-6E8EB3EE-1462-4719-82F6-6728469D27E2 Diagnostics Power and battery-status light/ hard-drive activity light Indicates the battery-charge...
Inspiron 17 5000 Service Manual
Page 112
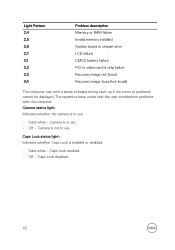
... use . • Solid white - Caps Lock enabled. • Off - Camera is enabled or disabled. • Solid white - Caps Lock disabled. 112 The repetitive beep codes help the user troubleshoot problems with the computer. Light Pattern 2,4 2,5 2,6 2,7 3,1 3,2 3,3 3,4 Problem description Memory or RAM failure Invalid memory installed System board or chipset error LCD failure CMOS battery failure PCI or video card or chip failure Recovery image not found Recovery image found but invalid The computer may emit a series of beeps during start...
... use . • Solid white - Caps Lock enabled. • Off - Camera is enabled or disabled. • Solid white - Caps Lock disabled. 112 The repetitive beep codes help the user troubleshoot problems with the computer. Light Pattern 2,4 2,5 2,6 2,7 3,1 3,2 3,3 3,4 Problem description Memory or RAM failure Invalid memory installed System board or chipset error LCD failure CMOS battery failure PCI or video card or chip failure Recovery image not found Recovery image found but invalid The computer may emit a series of beeps during start...
Inspiron 17 5000 Setup and Specifications
Page 8
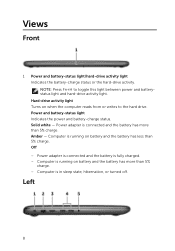
... 5% charge. Power adapter is connected and the battery is in sleep state, hibernation, or turned off. Left 8 Computer is running on when the computer reads from or writes to toggle this light between power and batterystatus light and hard-drive activity light. NOTE: Press Fn+H to the hard drive. Hard-drive activity light Turns on battery and the battery has more than 5% charge. Power and battery-status light Indicates the power and battery-charge status. Views Front 1 Power and battery-status light/hard-drive activity light Indicates the battery-charge status...
... 5% charge. Power adapter is connected and the battery is in sleep state, hibernation, or turned off. Left 8 Computer is running on when the computer reads from or writes to toggle this light between power and batterystatus light and hard-drive activity light. NOTE: Press Fn+H to the hard drive. Hard-drive activity light Turns on battery and the battery has more than 5% charge. Power and battery-status light Indicates the power and battery-charge status. Views Front 1 Power and battery-status light/hard-drive activity light Indicates the battery-charge status...
Inspiron 17 5000 Setup and Specifications
Page 12
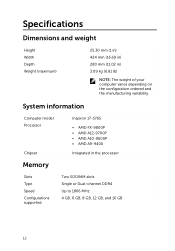
System information Computer model Processor Chipset Memory Inspiron 17-5765 • AMD FX-9800P • AMD A12-9700P • AMD A10-9600P • AMD A9-9400 Integrated in ) 3.09 kg (6.81 lb) NOTE: The weight of your computer varies depending on the configuration ordered and the manufacturing variability. Specifications Dimensions and weight Height Width Depth Weight (maximum) 25.30 mm (1 in) 424 mm (16.69 in) 280 mm (11.02 in the processor Slots Type Speed Configurations supported Two SODIMM slots Single or Dual-channel DDR4 Up to 1866 MHz 4 GB, 6 GB, 8 GB, 12 GB, and 16 GB 12
System information Computer model Processor Chipset Memory Inspiron 17-5765 • AMD FX-9800P • AMD A12-9700P • AMD A10-9600P • AMD A9-9400 Integrated in ) 3.09 kg (6.81 lb) NOTE: The weight of your computer varies depending on the configuration ordered and the manufacturing variability. Specifications Dimensions and weight Height Width Depth Weight (maximum) 25.30 mm (1 in) 424 mm (16.69 in) 280 mm (11.02 in the processor Slots Type Speed Configurations supported Two SODIMM slots Single or Dual-channel DDR4 Up to 1866 MHz 4 GB, 6 GB, 8 GB, 12 GB, and 16 GB 12
Inspiron 17 5000 Setup and Specifications
Page 19
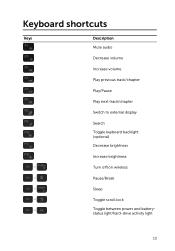
Keyboard shortcuts Keys Description Mute audio Decrease volume Increase volume Play previous track/chapter Play/Pause Play next track/chapter Switch to external display Search Toggle keyboard backlight (optional) Decrease brightness Increase brightness Turn off/on wireless Pause/Break Sleep Toggle scroll lock Toggle between power and batterystatus light/hard-drive activity light 19
Keyboard shortcuts Keys Description Mute audio Decrease volume Increase volume Play previous track/chapter Play/Pause Play next track/chapter Switch to external display Search Toggle keyboard backlight (optional) Decrease brightness Increase brightness Turn off/on wireless Pause/Break Sleep Toggle scroll lock Toggle between power and batterystatus light/hard-drive activity light 19
Inspiron 17 5000 Setup and Specifications
Page 21
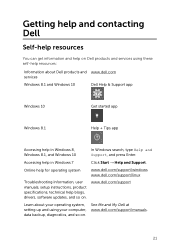
... www.dell.com/support/windows www.dell.com/support/linux Troubleshooting information, user manuals, setup instructions, product specifications, technical help in Windows 8, Windows 8.1, and Windows 10 In Windows search, type Help and Support, and press Enter. www.dell.com/support Learn about your operating system, setting up and using these self-help resources: Information about Dell products and www.dell.com services Windows 8.1 and Windows 10 Dell Help & Support app Windows 10 Get started app Windows 8.1 Help + Tips app Accessing help in Windows 7 Click Start →...
... www.dell.com/support/windows www.dell.com/support/linux Troubleshooting information, user manuals, setup instructions, product specifications, technical help in Windows 8, Windows 8.1, and Windows 10 In Windows search, type Help and Support, and press Enter. www.dell.com/support Learn about your operating system, setting up and using these self-help resources: Information about Dell products and www.dell.com services Windows 8.1 and Windows 10 Dell Help & Support app Windows 10 Get started app Windows 8.1 Help + Tips app Accessing help in Windows 7 Click Start →...


