Owners Manual
Page 4
Removing the Hard Drive 20 Prerequisites...20 Procedure...20 Replacing the Hard Drive 23 Procedure...23 Post-requisites 23 Removing the Memory Module 24 Prerequisites...24 Procedure...25 Replacing the Memory Module 26 Procedure...27 Post-requisites 27 Removing the Wireless Card 28 Prerequisites...28 Procedure...28 Replacing the Wireless Card 30 Procedure...30 Post-requisites 30 Removing the Keyboard 31 Prerequisites...31 Procedure...31 Replacing the Keyboard 34 Procedure...34 Folding the Keyboard Cables 34 Post-requisites 37
Removing the Hard Drive 20 Prerequisites...20 Procedure...20 Replacing the Hard Drive 23 Procedure...23 Post-requisites 23 Removing the Memory Module 24 Prerequisites...24 Procedure...25 Replacing the Memory Module 26 Procedure...27 Post-requisites 27 Removing the Wireless Card 28 Prerequisites...28 Procedure...28 Replacing the Wireless Card 30 Procedure...30 Post-requisites 30 Removing the Keyboard 31 Prerequisites...31 Procedure...31 Replacing the Keyboard 34 Procedure...34 Folding the Keyboard Cables 34 Post-requisites 37
Owners Manual
Page 9
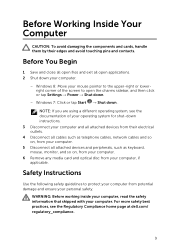
... . Before Working Inside Your Computer CAUTION: To avoid damaging the components and cards, handle them by their electrical outlets. 4 Disconnect all cables such as telephone cables, network cables and so on, from your computer. 5 Disconnect all open files and exit all attached devices and peripherals, such as keyboard, mouse, monitor, and so on, from your computer. 6 Remove any media card and optical disc from potential...
... . Before Working Inside Your Computer CAUTION: To avoid damaging the components and cards, handle them by their electrical outlets. 4 Disconnect all cables such as telephone cables, network cables and so on, from your computer. 5 Disconnect all open files and exit all attached devices and peripherals, such as keyboard, mouse, monitor, and so on, from your computer. 6 Remove any media card and optical disc from potential...

Owners Manual
Page 10
... unplug the cable from the media-card reader. When disconnecting cables, keep them by touching an unpainted metal surface, such as the metal at the back of the components inside the computer, replace all power sources before opening the computer cover or panels. CAUTION: To disconnect a network cable, first unplug the cable from your computer, and protecting against electrostatic discharge. See the safety instructions for...
... unplug the cable from the media-card reader. When disconnecting cables, keep them by touching an unpainted metal surface, such as the metal at the back of the components inside the computer, replace all power sources before opening the computer cover or panels. CAUTION: To disconnect a network cable, first unplug the cable from your computer, and protecting against electrostatic discharge. See the safety instructions for...
Owners Manual
Page 11
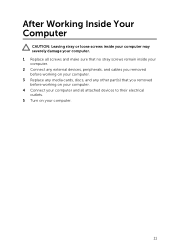
After Working Inside Your Computer CAUTION: Leaving stray or loose screws inside your computer may severely damage your computer. 1 Replace all screws and make sure that no stray screws remain inside your computer. 2 Connect any external devices, peripherals, and cables you removed before working on your computer. 3 Replace any media cards, discs, and any other part(s) that you removed before working on your computer. 4 Connect your computer and all attached devices to their electrical outlets. 5 Turn on your computer. 11
After Working Inside Your Computer CAUTION: Leaving stray or loose screws inside your computer may severely damage your computer. 1 Replace all screws and make sure that no stray screws remain inside your computer. 2 Connect any external devices, peripherals, and cables you removed before working on your computer. 3 Replace any media cards, discs, and any other part(s) that you removed before working on your computer. 4 Connect your computer and all attached devices to their electrical outlets. 5 Turn on your computer. 11
Owners Manual
Page 59
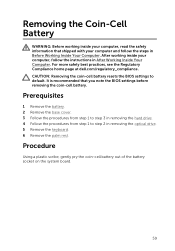
Prerequisites 1 Remove the battery. 2 Remove the base cover. 3 Follow the procedures from step 1 to step 3 in removing the hard drive. 4 Follow the procedures from step 1 to default. CAUTION: Removing the coin-cell battery resets the BIOS settings to step 2 in removing the optical drive. 5 Remove the keyboard. 6 Remove the palm rest. Removing the Coin-Cell Battery WARNING: Before working inside your computer, read the safety information that you note the BIOS settings before removing the...
Prerequisites 1 Remove the battery. 2 Remove the base cover. 3 Follow the procedures from step 1 to step 3 in removing the hard drive. 4 Follow the procedures from step 1 to default. CAUTION: Removing the coin-cell battery resets the BIOS settings to step 2 in removing the optical drive. 5 Remove the keyboard. 6 Remove the palm rest. Removing the Coin-Cell Battery WARNING: Before working inside your computer, read the safety information that you note the BIOS settings before removing the...

Owners Manual
Page 65
... in removing the optical drive. 6 Remove the wireless card. 7 Remove the keyboard. 8 Remove the palm rest. 9 Remove the battery-connector board. 10 Remove the optical-drive connector board. Prerequisites 1 Remove the battery. 2 Remove the base cover. 3 Remove the memory module. 4 Follow the procedure from step 1 to step 3 in removing the hard drive. 5 Follow the procedure from step 1 to the BIOS using System Setup. You must make the desired changes again after you replace the system board. NOTE: Before disconnecting the cables from...
... in removing the optical drive. 6 Remove the wireless card. 7 Remove the keyboard. 8 Remove the palm rest. 9 Remove the battery-connector board. 10 Remove the optical-drive connector board. Prerequisites 1 Remove the battery. 2 Remove the base cover. 3 Remove the memory module. 4 Follow the procedure from step 1 to step 3 in removing the hard drive. 5 Follow the procedure from step 1 to the BIOS using System Setup. You must make the desired changes again after you replace the system board. NOTE: Before disconnecting the cables from...
Owners Manual
Page 70
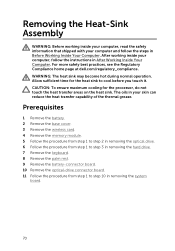
... cover. 3 Remove the wireless card. 4 Remove the memory module. 5 Follow the procedure from step 1 to step 2 in removing the optical drive. 6 Follow the procedure from step 1 to step 3 in removing the hard drive. 7 Remove the keyboard. 8 Remove the palm rest. 9 Remove the battery-connector board. 10 Remove the optical-drive connector board. 11 Follow the procedure from step 1 to cool before you touch it. WARNING: The heat sink may become hot during normal operation...
... cover. 3 Remove the wireless card. 4 Remove the memory module. 5 Follow the procedure from step 1 to step 2 in removing the optical drive. 6 Follow the procedure from step 1 to step 3 in removing the hard drive. 7 Remove the keyboard. 8 Remove the palm rest. 9 Remove the battery-connector board. 10 Remove the optical-drive connector board. 11 Follow the procedure from step 1 to cool before you touch it. WARNING: The heat sink may become hot during normal operation...
Specifications
Page 17
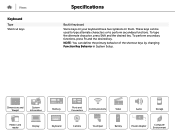
.... To type the alternate character, press Shift and the desired key. Dimensions and Weight System Information Memory Ports and Connectors Communications Video Audio Storage Media-card reader Display Keyboard Camera Touchpad Battery Power Adapter Computer Environment To perform secondary functions, press Fn and the desired key. NOTE: You can be used to type alternate characters or to perform secondary functions. These keys can define the primary behavior of the shortcut keys by changing Function Key Behavior...
.... To type the alternate character, press Shift and the desired key. Dimensions and Weight System Information Memory Ports and Connectors Communications Video Audio Storage Media-card reader Display Keyboard Camera Touchpad Battery Power Adapter Computer Environment To perform secondary functions, press Fn and the desired key. NOTE: You can be used to type alternate characters or to perform secondary functions. These keys can define the primary behavior of the shortcut keys by changing Function Key Behavior...
Quick Start Guide - Windows 8
Page 1
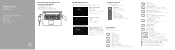
Inspiron 17 5000 Series Quick Start Guide 1 Connect the power adapter and press the power button 2 Finish Windows setup 完成 Windows Windows 設定 Windows Windows Enable security and updates Connect to your network 3 Explore resources Help and Tips My Dell 我的 Dell | 我的 Dell Register your computer Sign in to your Microsoft account or create a local account Microsoft Microsoft Microsoft Microsoft Shortcut keys Mute audio Decrease volume Increase volume Play previous track/chapter Play/Pause Play...
Inspiron 17 5000 Series Quick Start Guide 1 Connect the power adapter and press the power button 2 Finish Windows setup 完成 Windows Windows 設定 Windows Windows Enable security and updates Connect to your network 3 Explore resources Help and Tips My Dell 我的 Dell | 我的 Dell Register your computer Sign in to your Microsoft account or create a local account Microsoft Microsoft Microsoft Microsoft Shortcut keys Mute audio Decrease volume Increase volume Play previous track/chapter Play/Pause Play...
Me and My Dell
Page 12
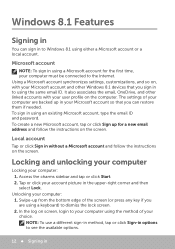
...-in options to the Internet. Using a Microsoft account synchronizes settings, customizations, and so on the screen. The settings of your computer are using a keyboard) to your computer using either a Microsoft account or a local account. In the log on the computer. Windows 8.1 Features Signing in You can restore them if needed. Locking and unlocking your computer Locking your computer: 1. Access the charms sidebar and tap or click Start...
...-in options to the Internet. Using a Microsoft account synchronizes settings, customizations, and so on the screen. The settings of your computer are using a keyboard) to your computer using either a Microsoft account or a local account. In the log on the computer. Windows 8.1 Features Signing in You can restore them if needed. Locking and unlocking your computer Locking your computer: 1. Access the charms sidebar and tap or click Start...
Me and My Dell
Page 13
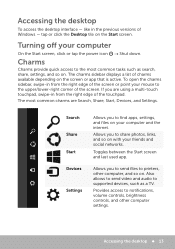
... using a multi-touch touchpad, swipe-in from the right edge of Windows - Accessing the desktop To access the desktop interface - Accessing the desktop 13 The charms sidebar displays a list of the screen. Allows you are Search, Share, Start, Devices, and Settings. Charms Charms provide quick access to notifications, volume controls, brightness controls, and other computer, and so on your mouse to find apps, settings, and files on . If you to supported devices...
... using a multi-touch touchpad, swipe-in from the right edge of Windows - Accessing the desktop To access the desktop interface - Accessing the desktop 13 The charms sidebar displays a list of the screen. Allows you are Search, Share, Start, Devices, and Settings. Charms Charms provide quick access to notifications, volume controls, brightness controls, and other computer, and so on your mouse to find apps, settings, and files on . If you to supported devices...
Me and My Dell
Page 17
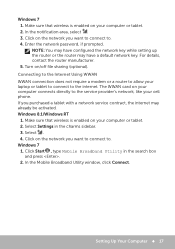
...; 17 Enter the network password, if prompted. The WWAN card on your cell phone. Windows 7 1. Make sure that wireless is enabled on your computer connects directly to the service provider's network, like your computer or tablet. 2. In the notification area, select . 3. Click on the network you want to connect to . Windows 8.1/Windows RT 1. Click on the network you purchased a tablet with a network service contract, the internet may have a default network key. Click Start , type Mobile...
...; 17 Enter the network password, if prompted. The WWAN card on your cell phone. Windows 7 1. Make sure that wireless is enabled on your computer connects directly to the service provider's network, like your computer or tablet. 2. In the notification area, select . 3. Click on the network you want to connect to . Windows 8.1/Windows RT 1. Click on the network you purchased a tablet with a network service contract, the internet may have a default network key. Click Start , type Mobile...
Me and My Dell
Page 18
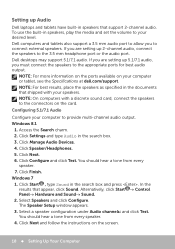
... press . Click Finish. Alternatively, click Start → Control Panel→ Hardware and Sound→ Sound. 2. The Speaker Setup window appears. 3. Configuring 5.1/7.1 Audio Configure your computer or tablet, see the Specifications at dell.com/support. Click Start , type Sound in the search box. 3. Setting up 5.1/7.1 audio, you must connect the speakers to the appropriate ports for best audio output. If you are setting up 2‑channel audio, connect the speakers to connect external speakers. You should hear a tone...
... press . Click Finish. Alternatively, click Start → Control Panel→ Hardware and Sound→ Sound. 2. The Speaker Setup window appears. 3. Configuring 5.1/7.1 Audio Configure your computer or tablet, see the Specifications at dell.com/support. Click Start , type Sound in the search box. 3. Setting up 5.1/7.1 audio, you must connect the speakers to the appropriate ports for best audio output. If you are setting up 2‑channel audio, connect the speakers to connect external speakers. You should hear a tone...
Me and My Dell
Page 21
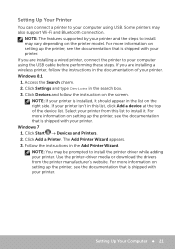
... printer model. Click Settings and type Devices in the documentation of the device list. Click Start → Devices and Printers. 2. Setting Up Your Computer 21 NOTE: The features supported by your printer and the steps to your printer. Windows 7 1. Access the Search charm. 2. Click Add a Printer. Use the printer-driver media or download the drivers from this list, click Add a device at the top of your computer using the USB cable...
... printer model. Click Settings and type Devices in the documentation of the device list. Click Start → Devices and Printers. 2. Setting Up Your Computer 21 NOTE: The features supported by your printer and the steps to your printer. Windows 7 1. Access the Search charm. 2. Click Add a Printer. Use the printer-driver media or download the drivers from this list, click Add a device at the top of your computer using the USB cable...
Me and My Dell
Page 26
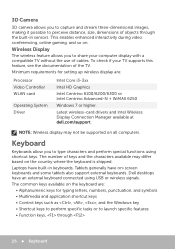
... Intel Centrino Advanced-N + WiMAX 6250 Windows 7 or higher. Latest wireless-card drivers and Intel Wireless Display Connection Manager available at dell.com/support. Keyboard Keyboards allow you to capture and stream three-dimensional images, making it possible to perceive distance, size, dimensions of the TV. 3D Camera 3D camera allows you to type characters and perform special functions using USB or wireless signals. Wireless Display The wireless feature allows you to share your...
... Intel Centrino Advanced-N + WiMAX 6250 Windows 7 or higher. Latest wireless-card drivers and Intel Wireless Display Connection Manager available at dell.com/support. Keyboard Keyboards allow you to capture and stream three-dimensional images, making it possible to perceive distance, size, dimensions of the TV. 3D Camera 3D camera allows you to type characters and perform special functions using USB or wireless signals. Wireless Display The wireless feature allows you to share your...
Me and My Dell
Page 69
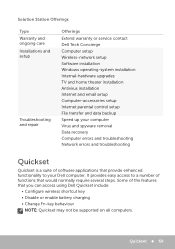
... Extend warranty or service contact Dell Tech Concierge Computer setup Wireless‑network setup Software installation Windows operating‑system installation Internal‑hardware upgrades TV and home theater installation Antivirus installation Internet and email setup Computer‑accessories setup Internet parental control setup File transfer and data backup Speed up your Dell computer. Some of the features that you can access using Dell Quickset include: • Configure wireless shortcut key • Disable or enable battery charging • Change Fn‑key behaviour NOTE...
... Extend warranty or service contact Dell Tech Concierge Computer setup Wireless‑network setup Software installation Windows operating‑system installation Internal‑hardware upgrades TV and home theater installation Antivirus installation Internet and email setup Computer‑accessories setup Internet parental control setup File transfer and data backup Speed up your Dell computer. Some of the features that you can access using Dell Quickset include: • Configure wireless shortcut key • Disable or enable battery charging • Change Fn‑key behaviour NOTE...
Me and My Dell
Page 72
DellConnect DellConnect is initiated by a technical support agent when required during troubleshooting. A DellConnect request is an online tool that allows a Dell agent to access your computer (under your supervision) to interact with your computer with your computer. NOTE: To access DellConnect and terms of usage, see dell.com/DellConnect. 72 DellConnect It allows an technical support representative to remotely diagnose and resolve issues on your permission.
DellConnect DellConnect is initiated by a technical support agent when required during troubleshooting. A DellConnect request is an online tool that allows a Dell agent to access your computer (under your supervision) to interact with your computer with your computer. NOTE: To access DellConnect and terms of usage, see dell.com/DellConnect. 72 DellConnect It allows an technical support representative to remotely diagnose and resolve issues on your permission.
Me and My Dell
Page 85
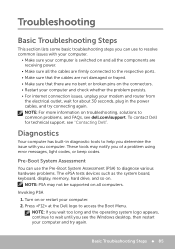
... see the Windows desktop, then restart your computer and try connecting again. Diagnostics Your computer has built-in the power cables, and try again. Invoking PSA 1. see dell.com/support. NOTE: PSA may notify you of a problem using error messages, light codes, or beep codes. Troubleshooting Basic Troubleshooting Steps This section lists some basic troubleshooting steps you can use to common problems, and FAQs, see "Contacting Dell". Pre-Boot System...
... see the Windows desktop, then restart your computer and try connecting again. Diagnostics Your computer has built-in the power cables, and try again. Invoking PSA 1. see dell.com/support. NOTE: PSA may notify you of a problem using error messages, light codes, or beep codes. Troubleshooting Basic Troubleshooting Steps This section lists some basic troubleshooting steps you can use to common problems, and FAQs, see "Contacting Dell". Pre-Boot System...

Me and My Dell
Page 91
... boards on . Look for a password when booting or when entering BIOS setup program. Remove the jumper and join the centre pin to either the left or right pin. Almost all data from the CMOS. The location of the coin‑cell battery and instruction on removing and replacing it, see the Service Manual at dell.com/support. CAUTION: Resetting the BIOS password involves clearing all motherboards use a coin‑cell battery that helps retain BIOS settings...
... boards on . Look for a password when booting or when entering BIOS setup program. Remove the jumper and join the centre pin to either the left or right pin. Almost all data from the CMOS. The location of the coin‑cell battery and instruction on removing and replacing it, see the Service Manual at dell.com/support. CAUTION: Resetting the BIOS password involves clearing all motherboards use a coin‑cell battery that helps retain BIOS settings...
Me and My Dell
Page 99
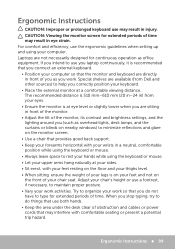
.... Ergonomic Instructions 99 Adjust your chair's height or use a footrest, if necessary, to minimize reflections and glare on the monitor screen. • Use a chair that you (such as office equipment. CAUTION: Viewing the monitor screen for continuous operation as overhead lights, desk lamps, and the curtains or blinds on nearby windows) to maintain proper posture. • Vary your work activities. Laptops are sitting...
.... Ergonomic Instructions 99 Adjust your chair's height or use a footrest, if necessary, to minimize reflections and glare on the monitor screen. • Use a chair that you (such as office equipment. CAUTION: Viewing the monitor screen for continuous operation as overhead lights, desk lamps, and the curtains or blinds on nearby windows) to maintain proper posture. • Vary your work activities. Laptops are sitting...


