Dell™ Technology Guide
Page 10
... Software Based Performance Tuning 129 NVIDIA Performance 129 NVIDIA Monitor 130 Cleaning Up Your Hard Drive 131 Defragmenting Your Hard Drive 132 Detecting and Repairing Disk Errors 133 Scanning for Viruses and Spyware 133 10 Contents
... Software Based Performance Tuning 129 NVIDIA Performance 129 NVIDIA Monitor 130 Cleaning Up Your Hard Drive 131 Defragmenting Your Hard Drive 132 Detecting and Repairing Disk Errors 133 Scanning for Viruses and Spyware 133 10 Contents
Dell™ Technology Guide
Page 78
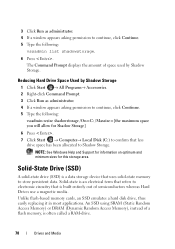
... to electronic circuitry that is built entirely out of semiconductors whereas Hard Drives use a magnetic media. Unlike flash-based memory cards, an SSD emulates a hard disk drive, thus easily replacing it in most applications. An SSD using SRAM (Static Random Access Memory) or DRAM (Dynamic Random Access Memory), instead of space... Shadow Storage. NOTE: See Windows Help and Support for information on optimum and minimum sizes for Shadow Storage] 6 Press . 7 Click Start → Computer→ Local Disk (C:) to confirm that refers to store persistent data.
... to electronic circuitry that is built entirely out of semiconductors whereas Hard Drives use a magnetic media. Unlike flash-based memory cards, an SSD emulates a hard disk drive, thus easily replacing it in most applications. An SSD using SRAM (Static Random Access Memory) or DRAM (Dynamic Random Access Memory), instead of space... Shadow Storage. NOTE: See Windows Help and Support for information on optimum and minimum sizes for Shadow Storage] 6 Press . 7 Click Start → Computer→ Local Disk (C:) to confirm that refers to store persistent data.
Dell™ Technology Guide
Page 81
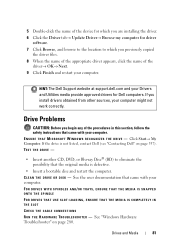
.... 7 Click Browse, and browse to the location to eliminate the possibility that the original media is not listed, contact Dell (see "Contacting Dell" on page 280. CLEAN THE DRIVE OR DISK - 5 Double-click the name of the device for which you are installing the driver. 6 Click the Driver tab→...; Update Driver→ Browse my computer for Dell computers. Drive Problems CAUTION: Before you begin any of the driver→ OK→ Next. ...
.... 7 Click Browse, and browse to the location to eliminate the possibility that the original media is not listed, contact Dell (see "Contacting Dell" on page 280. CLEAN THE DRIVE OR DISK - 5 Double-click the name of the device for which you are installing the driver. 6 Click the Driver tab→...; Update Driver→ Browse my computer for Dell computers. Drive Problems CAUTION: Before you begin any of the driver→ OK→ Next. ...
Dell™ Technology Guide
Page 82
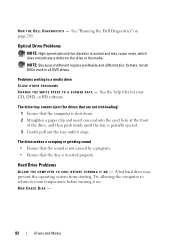
... or grinding sound • Ensure that the sound is not caused by a program. • Ensure that the computer is inserted properly. RUN CHECK DISK - 82 Drives and Media R U N THE DELL D I A G N O S T I T O N - See the help files for drives that are not slot-loading) 1 Ensure that the disc...or BD software. A hot hard drive may cause noise, which does not indicate a defect in all DVD drives. See "Running the Dell Diagnostics" on . Problems writing to room temperature before turning it stops. Optical Drive Problems NOTE: High-speed optical drive vibration is partially ...
... or grinding sound • Ensure that the sound is not caused by a program. • Ensure that the computer is inserted properly. RUN CHECK DISK - 82 Drives and Media R U N THE DELL D I A G N O S T I T O N - See the help files for drives that are not slot-loading) 1 Ensure that the disc...or BD software. A hot hard drive may cause noise, which does not indicate a defect in all DVD drives. See "Running the Dell Diagnostics" on . Problems writing to room temperature before turning it stops. Optical Drive Problems NOTE: High-speed optical drive vibration is partially ...

Dell™ Technology Guide
Page 83
... 50). NOTE: RAID requires multiple hard drives. For information about these levels, see support.dell.com. For Windows® XP: Click Start → My Computer. 2 Right-click Local Disk (C:). 3 Click Properties→ Tools→ Check Now. The number of hard drives required... the RAID configuration. • RAID level 0 is recommended for higher performance (faster throughput). • RAID level 1 is a disk storage configuration that increases performance or data redundancy. Drives and Media 83 otherwise, contact your administrator to continue the desired action. 4 ...
... 50). NOTE: RAID requires multiple hard drives. For information about these levels, see support.dell.com. For Windows® XP: Click Start → My Computer. 2 Right-click Local Disk (C:). 3 Click Properties→ Tools→ Check Now. The number of hard drives required... the RAID configuration. • RAID level 0 is recommended for higher performance (faster throughput). • RAID level 1 is a disk storage configuration that increases performance or data redundancy. Drives and Media 83 otherwise, contact your administrator to continue the desired action. 4 ...
Dell™ Technology Guide
Page 89
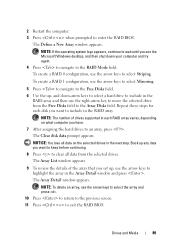
... BIOS. NOTE: The number of the array that you set up - The Array List window appears. 9 To review the details of drives supported in each disk you want to select Striping. NOTE: To delete an array, use the arrow keys to include in the RAID array. Drives and Media 89 2 Restart... 1 configuration, use the arrow keys to select Mirroring. 5 Press to navigate to the Free Disks field. 6 Use the up , use the right-arrow key to the Array Disks field. NOTICE: You lose all data from the Free Disks field to move the selected drive from the selected drives. and down your computer and...
... BIOS. NOTE: The number of the array that you set up - The Array List window appears. 9 To review the details of drives supported in each disk you want to select Striping. NOTE: To delete an array, use the arrow keys to include in the RAID array. Drives and Media 89 2 Restart... 1 configuration, use the arrow keys to select Mirroring. 5 Press to navigate to the Free Disks field. 6 Use the up , use the right-arrow key to the Array Disks field. NOTICE: You lose all data from the Free Disks field to move the selected drive from the selected drives. and down your computer and...
Dell™ Technology Guide
Page 90
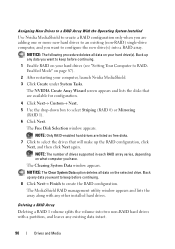
...and lists the array along with a partition, and leaves any other installed hard drives. NOTE: Only RAID-enabled hard drives are listed as free disks. 7 Click to select the drives that are adding one or more new hard drives to an existing (non-RAID) single-drive computer, and .... 4 Click Next→ Custom→ Next. 5 Use the drop-down box to select Striping (RAID 0) or Mirroring (RAID 1). 6 Click Next. The Free Disk Selection window appears. NOTICE: The Clear System Data option deletes all data on what computer you have. Deleting a RAID Array Deleting a RAID 1 volume splits the...
...and lists the array along with a partition, and leaves any other installed hard drives. NOTE: Only RAID-enabled hard drives are listed as free disks. 7 Click to select the drives that are adding one or more new hard drives to an existing (non-RAID) single-drive computer, and .... 4 Click Next→ Custom→ Next. 5 Use the drop-down box to select Striping (RAID 0) or Mirroring (RAID 1). 6 Click Next. The Free Disk Selection window appears. NOTICE: The Clear System Data option deletes all data on what computer you have. Deleting a RAID Array Deleting a RAID 1 volume splits the...

Dell™ Technology Guide
Page 91
... installed hard drives. The time to convert an array depends on several factors, such as the speed of the processor, the type and size of a disk or array - Back up any of the array that all data on the volume. Also, you can change the current state of the hard drive...
... installed hard drives. The time to convert an array depends on several factors, such as the speed of the processor, the type and size of a disk or array - Back up any of the array that all data on the volume. Also, you can change the current state of the hard drive...
Dell™ Technology Guide
Page 92
... management utility window appears and displays the status of the upgrade/migration process along with any data you want to keep before continuing. 8 Under Free Disk Selection, click the check box next to the hard drive(s) you want to select your system, see the following sections for information about using the...
... management utility window appears and displays the status of the upgrade/migration process along with any data you want to keep before continuing. 8 Under Free Disk Selection, click the check box next to the hard drive(s) you want to select your system, see the following sections for information about using the...

Dell™ Technology Guide
Page 95
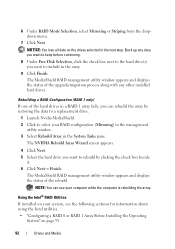
... to enter the Intel RAID Option ROM utility. 3 Under DEGRADED VOLUME DETECTED, confirm that the new (non-RAID) drive is listed and then press . 4 Under Disk/Volume Information, confirm that the volume status is lost. 1 Set your computer to RAID-enabled mode. 3 On the Actions menu, select Create RAID Volume to...
... to enter the Intel RAID Option ROM utility. 3 Under DEGRADED VOLUME DETECTED, confirm that the new (non-RAID) drive is listed and then press . 4 Under Disk/Volume Information, confirm that the volume status is lost. 1 Set your computer to RAID-enabled mode. 3 On the Actions menu, select Create RAID Volume to...
Dell™ Technology Guide
Page 101
...174; Windows Vista® Sleep Shut Down Sleep is restored exactly as you left it. This action shuts down to save your desktop state to disk, a power failure while on your computer, for example, when you want to use the computer again, it comes out of unsaved information. Sleep... saves all open documents and programs, and allows the computer to your hard disk. Because standby does not save power but first saves everything in which the display and hard disks turn off the power to use the computer for an extended time while working again.
...174; Windows Vista® Sleep Shut Down Sleep is restored exactly as you left it. This action shuts down to save your desktop state to disk, a power failure while on your computer, for example, when you want to use the computer again, it comes out of unsaved information. Sleep... saves all open documents and programs, and allows the computer to your hard disk. Because standby does not save power but first saves everything in which the display and hard disks turn off the power to use the computer for an extended time while working again.
Dell™ Technology Guide
Page 121
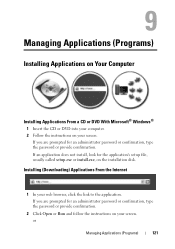
... Installing Applications From a CD or DVD With Microsoft® Windows® 1 Insert the CD or DVD into your computer. 2 Follow the instructions on the installation disk. If you are prompted for the application's setup file, usually called setup.exe or install.exe, on your screen.
... Installing Applications From a CD or DVD With Microsoft® Windows® 1 Insert the CD or DVD into your computer. 2 Follow the instructions on the installation disk. If you are prompted for the application's setup file, usually called setup.exe or install.exe, on your screen.
Dell™ Technology Guide
Page 125
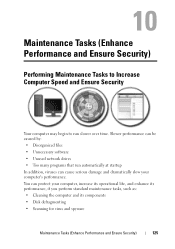
... computer, increase its operational life, and enhance its performance, if you perform standard maintenance tasks, such as: • Cleaning the computer and its components • Disk defragmenting • Scanning for virus and spyware Maintenance Tasks (Enhance Performance and Ensure Security) 125
... computer, increase its operational life, and enhance its performance, if you perform standard maintenance tasks, such as: • Cleaning the computer and its components • Disk defragmenting • Scanning for virus and spyware Maintenance Tasks (Enhance Performance and Ensure Security) 125
Dell™ Technology Guide
Page 128
... - Local Security Policy - Adjust visual effects - Computer Management - delete unnecessary or temporary files on your hard disk to increase the storage space on your computer. access advanced system tools, such as Device Manager, Disk Defragmenter, Disk Management, and other processes running on your computer's performance: Manage startup programs - provides access to system tools...
... - Local Security Policy - Adjust visual effects - Computer Management - delete unnecessary or temporary files on your hard disk to increase the storage space on your computer. access advanced system tools, such as Device Manager, Disk Defragmenter, Disk Management, and other processes running on your computer's performance: Manage startup programs - provides access to system tools...
Dell™ Technology Guide
Page 131
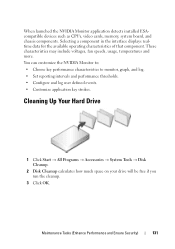
... include voltages, fan speeds, usage, temperatures and more. Cleaning Up Your Hard Drive 1 Click Start → All Programs → Accessories → System Tools → Disk Cleanup. 2 Disk Cleanup calculates how much space on your drive will be free if you run the cleanup. 3 Click OK. Selecting a component in the interface displays realtime...
... include voltages, fan speeds, usage, temperatures and more. Cleaning Up Your Hard Drive 1 Click Start → All Programs → Accessories → System Tools → Disk Cleanup. 2 Disk Cleanup calculates how much space on your drive will be free if you run the cleanup. 3 Click OK. Selecting a component in the interface displays realtime...
Dell™ Technology Guide
Page 132
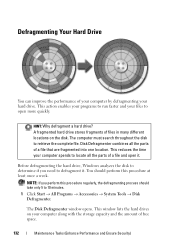
.... HINT: Why defragment a hard drive? You should take only 5 to open it . Before defragmenting the hard drive, Windows analyzes the disk to locate all the parts of a file that are fragmented into one location. This window lists the hard drives on the... 10 minutes. 1 Click Start → All Programs → Accessories → System Tools → Disk Defragmenter. The computer must search throughout the disk to defragment it . The Disk Defragmenter window opens. Disk Defragmenter combines all the parts of a file and open more quickly. Defragmenting Your Hard Drive You can ...
.... HINT: Why defragment a hard drive? You should take only 5 to open it . Before defragmenting the hard drive, Windows analyzes the disk to locate all the parts of a file that are fragmented into one location. This window lists the hard drives on the... 10 minutes. 1 Click Start → All Programs → Accessories → System Tools → Disk Defragmenter. The computer must search throughout the disk to defragment it . The Disk Defragmenter window opens. Disk Defragmenter combines all the parts of a file and open more quickly. Defragmenting Your Hard Drive You can ...
Dell™ Technology Guide
Page 133
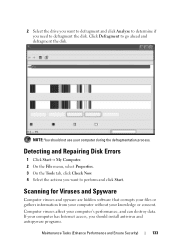
... gathers information from your computer without your computer has Internet access, you should not use your computer's performance, and can destroy data. Detecting and Repairing Disk Errors 1 Click Start→ My Computer. 2 On the File menu, select Properties. 3 On the Tools tab, click Check Now. 4 Select the actions you need to...
... gathers information from your computer without your computer has Internet access, you should not use your computer's performance, and can destroy data. Detecting and Repairing Disk Errors 1 Click Start→ My Computer. 2 On the File menu, select Properties. 3 On the Tools tab, click Check Now. 4 Select the actions you need to...

Dell™ Technology Guide
Page 134
... about Windows Defender, search for "Using Windows Defender" on the Microsoft website (www.microsoft.com). FOR MORE INFORMATION: To learn more about protecting your hard disk for spyware • Checks all files on your computer from viruses, see "Viruses" on the Internet. 134 Maintenance Tasks (Enhance Performance and Ensure Security) Windows...
... about Windows Defender, search for "Using Windows Defender" on the Microsoft website (www.microsoft.com). FOR MORE INFORMATION: To learn more about protecting your hard disk for spyware • Checks all files on your computer from viruses, see "Viruses" on the Internet. 134 Maintenance Tasks (Enhance Performance and Ensure Security) Windows...
Dell™ Technology Guide
Page 200
Backing Up E-mail Messages You can back up ) your disk space. After finding and selecting an address, it to a backup folder, optical media, or network drive. Outlook Express e-mail folders have a .dbx extension (for an ...
Backing Up E-mail Messages You can back up ) your disk space. After finding and selecting an address, it to a backup folder, optical media, or network drive. Outlook Express e-mail folders have a .dbx extension (for an ...
Dell™ Technology Guide
Page 205
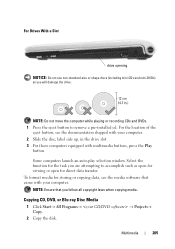
... copyright laws when copying media. Copying CD, DVD, or Blu-ray Disc Media 1 Click Start→ All Programs→ → Projects→ Copy. 2 Copy the disk. For the location of the eject button, see the media software that you will damage the drive.
... copyright laws when copying media. Copying CD, DVD, or Blu-ray Disc Media 1 Click Start→ All Programs→ → Projects→ Copy. 2 Copy the disk. For the location of the eject button, see the media software that you will damage the drive.


