Me and My Dell
Page 4
Touchscreen Gestures 30 Zoom 30 Dwell 31 Flick 31 Scroll 31 Rotate 32 Keyboard 33 Backlit Keyboard 34 Keyboard Connection Types 35 Locating the Service Tag and Express-Service Code 36 Locating the Label on Your Computer 36 Using Dell's Online System Profiler 36 Storage 36 About Storage Devices 36 Internal Storage Devices 37 Hard Drives 37 Solid-State Drives 37 Removable Storage Devices 37 Optical Discs 38 Memory Cards 38 Memory Module 39 System Board 40 Processor 42 Computer Fan 43 Heat Sink 43 Thermal Grease 44 4 Contents
Touchscreen Gestures 30 Zoom 30 Dwell 31 Flick 31 Scroll 31 Rotate 32 Keyboard 33 Backlit Keyboard 34 Keyboard Connection Types 35 Locating the Service Tag and Express-Service Code 36 Locating the Label on Your Computer 36 Using Dell's Online System Profiler 36 Storage 36 About Storage Devices 36 Internal Storage Devices 37 Hard Drives 37 Solid-State Drives 37 Removable Storage Devices 37 Optical Discs 38 Memory Cards 38 Memory Module 39 System Board 40 Processor 42 Computer Fan 43 Heat Sink 43 Thermal Grease 44 4 Contents
Me and My Dell
Page 37
..., and are coated with a shallow layer of magnetic material, with most existing computers. Commonly used removable storage devices include: • Optical discs • Memory cards • Magnetic tapes Storage 37 The hard disk drive is recorded. Hard Drives An HDD contains magnetically coated platters that rotate on internal storage devices is a data storage device...
..., and are coated with a shallow layer of magnetic material, with most existing computers. Commonly used removable storage devices include: • Optical discs • Memory cards • Magnetic tapes Storage 37 The hard disk drive is recorded. Hard Drives An HDD contains magnetically coated platters that rotate on internal storage devices is a data storage device...
Me and My Dell
Page 94
eSATA ports can be standalone or can be added and removed while the device and computer are two kinds of an eSATA/USB combo port. With IEEE 1394-compatible products and systems, you to set -ups. &#... by optical fiber with RCA connectors IEEE 1394 The IEEE 1394 interface is a bus technology designed to connect external mass storage devices, such as hard drives and optical drives, to your computer. Set up by coaxial cable with TOSLINK connectors • Coaxial - You can be extended to 100 meters or more over CAT5...
eSATA ports can be standalone or can be added and removed while the device and computer are two kinds of an eSATA/USB combo port. With IEEE 1394-compatible products and systems, you to set -ups. &#... by optical fiber with RCA connectors IEEE 1394 The IEEE 1394 interface is a bus technology designed to connect external mass storage devices, such as hard drives and optical drives, to your computer. Set up by coaxial cable with TOSLINK connectors • Coaxial - You can be extended to 100 meters or more over CAT5...
Me and My Dell
Page 114
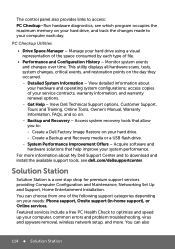
... see which program occupies the maximum memory on your hard drive, and track the changes made to optimize and speed up your computer, common errors and problem troubleshooting, virus and spyware removal, wireless network setup, and more information about your ...- For more . System Performance Improvement Offers - Detailed System Information - Create a Dell Factory Image Restore on the day they occurred. -- Access system recovery tools that help improve your hard drive. -- View Dell Technical Support options, Customer Support, Tours and Training, Online Tools, Owner's Manual,...
... see which program occupies the maximum memory on your hard drive, and track the changes made to optimize and speed up your computer, common errors and problem troubleshooting, virus and spyware removal, wireless network setup, and more information about your ...- For more . System Performance Improvement Offers - Detailed System Information - Create a Dell Factory Image Restore on the day they occurred. -- Access system recovery tools that help improve your hard drive. -- View Dell Technical Support options, Customer Support, Tours and Training, Online Tools, Owner's Manual,...
Me and My Dell
Page 123
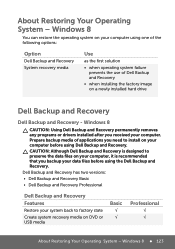
... your computer before using Dell Backup and Recovery. Windows 8 CAUTION: Using Dell Backup and Recovery permanently removes any programs or drivers installed after you backup your data files before using the Dell Backup and Recovery. CAUTION: Although Dell Backup and Recovery is designed to install on a newly installed hard drive Dell Backup and Recovery Dell Backup and Recovery - About...
... your computer before using Dell Backup and Recovery. Windows 8 CAUTION: Using Dell Backup and Recovery permanently removes any programs or drivers installed after you backup your data files before using the Dell Backup and Recovery. CAUTION: Although Dell Backup and Recovery is designed to install on a newly installed hard drive Dell Backup and Recovery Dell Backup and Recovery - About...
Me and My Dell
Page 132
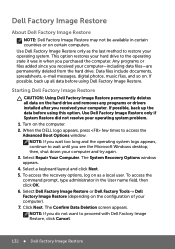
... option restores your computer). 7. Turn on . NOTE: If you purchased the computer. Select Dell Factory Image Restore or Dell Factory Tools→ Dell Factory Image Restore (depending on the hard drive and removes any programs or drivers installed after you do not want to restore your computer and try again... Restore did not resolve your computer-including data files-are permanently deleted from the hard drive. Select Repair Your Computer. To access the recovery options, log on certain computers. Use Dell Factory Image Restore only as a local user. If possible, back up the data...
... option restores your computer). 7. Turn on . NOTE: If you purchased the computer. Select Dell Factory Image Restore or Dell Factory Tools→ Dell Factory Image Restore (depending on the hard drive and removes any programs or drivers installed after you do not want to restore your computer and try again... Restore did not resolve your computer-including data files-are permanently deleted from the hard drive. Select Repair Your Computer. To access the recovery options, log on certain computers. Use Dell Factory Image Restore only as a local user. If possible, back up the data...
Me and My Dell
Page 147
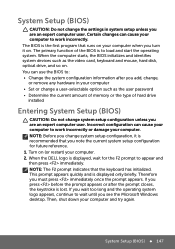
...it is the first program that the keyboard has initialized. The primary function of hard drive installed Entering System Setup (BIOS) CAUTION: Do not change system setup configuration unless you add, change, or remove any hardware in system setup unless you press before the prompt appears or after you...once the prompt appears. You can cause your computer and try again. NOTE: Before you change system setup configuration, it on . When the DELL logo is to appear and then press immediately. If you wait too long and the operating system logo appears, continue to : • ...
...it is the first program that the keyboard has initialized. The primary function of hard drive installed Entering System Setup (BIOS) CAUTION: Do not change system setup configuration unless you add, change, or remove any hardware in system setup unless you press before the prompt appears or after you...once the prompt appears. You can cause your computer and try again. NOTE: Before you change system setup configuration, it on . When the DELL logo is to appear and then press immediately. If you wait too long and the operating system logo appears, continue to : • ...

Owner's Manual
Page 3
... 11 4 Replacing the Battery 13 Procedure 13 Postrequisites 13 5 Removing the Memory Module(s 15 Prerequisites 15 Procedure 15 6 Replacing the Memory Module(s 17 Procedure 17 Postrequisites 17 7 Removing the Optical-Drive Assembly . . . . . 19 Prerequisites 19 Procedure 19 8 Replacing the Optical-Drive Assembly . . . . . 21 Procedure 21 Postrequisites 21 9 Removing the Hard-Drive Assembly 23 Prerequisites 23 Procedure 23 10 Replacing the...
... 11 4 Replacing the Battery 13 Procedure 13 Postrequisites 13 5 Removing the Memory Module(s 15 Prerequisites 15 Procedure 15 6 Replacing the Memory Module(s 17 Procedure 17 Postrequisites 17 7 Removing the Optical-Drive Assembly . . . . . 19 Prerequisites 19 Procedure 19 8 Replacing the Optical-Drive Assembly . . . . . 21 Procedure 21 Postrequisites 21 9 Removing the Hard-Drive Assembly 23 Prerequisites 23 Procedure 23 10 Replacing the...
Owner's Manual
Page 23
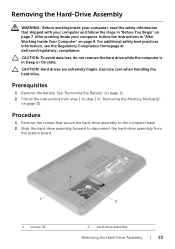
... page 15. Removing the Hard-Drive Assembly WARNING: Before working inside your computer, read the safety information that secure the hard-drive assembly to the computer base. 2 Slide the hard-drive assembly forward to step 2 in "Removing the Memory Module(s)" on page 11. 2 Follow the instructions from step 1 to disconnect the hard-drive assembly from the system board. 1 1 screws (2) 2 2 hard-drive assembly Removing the Hard-Drive...
... page 15. Removing the Hard-Drive Assembly WARNING: Before working inside your computer, read the safety information that secure the hard-drive assembly to the computer base. 2 Slide the hard-drive assembly forward to step 2 in "Removing the Memory Module(s)" on page 11. 2 Follow the instructions from step 1 to disconnect the hard-drive assembly from the system board. 1 1 screws (2) 2 2 hard-drive assembly Removing the Hard-Drive...

Owner's Manual
Page 24
3 Using the pull-tab, lift the hard-drive assembly out of the computer base. 2 1 1 hard-drive assembly 2 pull-tab 4 Remove the screws that secure the hard-drive bracket to the hard drive. 5 Lift the hard-drive bracket off the hard drive. 1 2 1 screws (2) 2 hard-drive bracket 24 | Removing the Hard-Drive Assembly
3 Using the pull-tab, lift the hard-drive assembly out of the computer base. 2 1 1 hard-drive assembly 2 pull-tab 4 Remove the screws that secure the hard-drive bracket to the hard drive. 5 Lift the hard-drive bracket off the hard drive. 1 2 1 screws (2) 2 hard-drive bracket 24 | Removing the Hard-Drive Assembly
Owner's Manual
Page 45
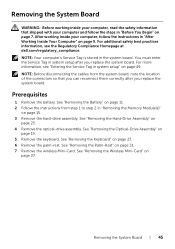
...system board. NOTE: Your computer's Service Tag is stored in system setup after you replace the system board. See "Removing the Hard-Drive Assembly" on page 9. For additional safety best practices information, see "Entering the Service Tag in "After Working Inside Your...inside your computer and follow the instructions in system setup" on page 15. 3 Remove the hard-drive assembly. Removing the System Board | 45 For more information, see the Regulatory Compliance Homepage at dell.com/regulatory_compliance. See "Removing the Battery" on page 11. 2 Follow the instructions from the ...
...system board. NOTE: Your computer's Service Tag is stored in system setup after you replace the system board. See "Removing the Hard-Drive Assembly" on page 9. For additional safety best practices information, see "Entering the Service Tag in "After Working Inside Your...inside your computer and follow the instructions in system setup" on page 15. 3 Remove the hard-drive assembly. Removing the System Board | 45 For more information, see the Regulatory Compliance Homepage at dell.com/regulatory_compliance. See "Removing the Battery" on page 11. 2 Follow the instructions from the ...
Owner's Manual
Page 51
... "Before You Begin" on page 15. 3 Remove the hard-drive assembly. Replace the coin-cell battery only with your computer and follow the instructions in "Removing the Memory Module(s)" on page 7. See "Removing the Hard-Drive Assembly" on page 19. 5 Remove the keyboard. See "Removing the Optical-Drive Assembly" on page 23. 4 Remove the optical-drive assembly. See "Removing the System Board" on page...
... "Before You Begin" on page 15. 3 Remove the hard-drive assembly. Replace the coin-cell battery only with your computer and follow the instructions in "Removing the Memory Module(s)" on page 7. See "Removing the Hard-Drive Assembly" on page 19. 5 Remove the keyboard. See "Removing the Optical-Drive Assembly" on page 23. 4 Remove the optical-drive assembly. See "Removing the System Board" on page...
Owner's Manual
Page 55
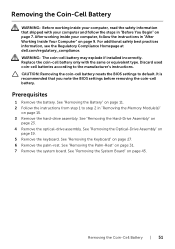
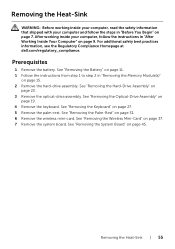
...Regulatory Compliance Homepage at dell.com/regulatory_compliance. See "Removing the Optical-Drive Assembly" on page 31. 6 Remove the wireless mini-card. See "Removing the Wireless Mini-Card" on page 27. 5 Remove the palm-rest. Removing the Heat-Sink |...Remove the system board. See "Removing the System Board" on page 15. 2 Remove the hard-drive assembly. See "Removing the Battery" on page 11. 1 Follow the instructions from step 1 to step 2 in "Removing the Memory Module(s)" on page 45. See "Removing the Hard-Drive Assembly" on page 23. 3 Remove the optical-drive assembly. Removing...
...Regulatory Compliance Homepage at dell.com/regulatory_compliance. See "Removing the Optical-Drive Assembly" on page 31. 6 Remove the wireless mini-card. See "Removing the Wireless Mini-Card" on page 27. 5 Remove the palm-rest. Removing the Heat-Sink |...Remove the system board. See "Removing the System Board" on page 15. 2 Remove the hard-drive assembly. See "Removing the Battery" on page 11. 1 Follow the instructions from step 1 to step 2 in "Removing the Memory Module(s)" on page 45. See "Removing the Hard-Drive Assembly" on page 23. 3 Remove the optical-drive assembly. Removing...
Owner's Manual
Page 59
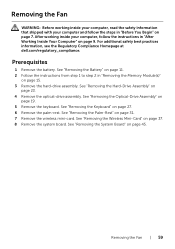
... your computer, follow the steps in "Removing the Memory Module(s)" on page 15. 3 Remove the hard-drive assembly. See "Removing the Palm-Rest" on page 27. 6 Remove the palm-rest. See "Removing the Keyboard" on page 31. 7 Remove the wireless mini-card. See "Removing the Wireless Mini-Card" on page 45. Removing the Fan | 59 See "Removing the Battery" on page 11...
... your computer, follow the steps in "Removing the Memory Module(s)" on page 15. 3 Remove the hard-drive assembly. See "Removing the Palm-Rest" on page 27. 6 Remove the palm-rest. See "Removing the Keyboard" on page 31. 7 Remove the wireless mini-card. See "Removing the Wireless Mini-Card" on page 45. Removing the Fan | 59 See "Removing the Battery" on page 11...

Owner's Manual
Page 63
...(s)" on page 15. 3 Remove the hard-drive assembly. Prerequisites 1 Remove the battery. See "Removing the Palm-Rest" on page 27. 6 Remove the palm-rest. See "Removing the Keyboard" on page 31. 7 Remove the wireless mini-card. See "Removing the System Board" on page 19. 5 Remove the keyboard. For additional safety best practices information, see the Regulatory Compliance Homepage at dell.com/regulatory_compliance...
...(s)" on page 15. 3 Remove the hard-drive assembly. Prerequisites 1 Remove the battery. See "Removing the Palm-Rest" on page 27. 6 Remove the palm-rest. See "Removing the Keyboard" on page 31. 7 Remove the wireless mini-card. See "Removing the System Board" on page 19. 5 Remove the keyboard. For additional safety best practices information, see the Regulatory Compliance Homepage at dell.com/regulatory_compliance...
Owner's Manual
Page 69
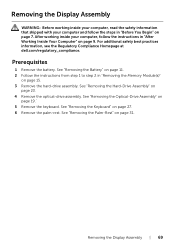
... Keyboard" on page 15. 3 Remove the hard-drive assembly. See "Removing the Hard-Drive Assembly" on page 31. After working inside your computer and follow the instructions in "Removing the Memory Module(s)" on page 27. 6 Remove the palm-rest. See "Removing the Palm-Rest" on page 23. 4 Remove the optical-drive assembly. See "Removing the Optical-Drive Assembly" on page 7. Prerequisites 1 Remove the battery. For...
... Keyboard" on page 15. 3 Remove the hard-drive assembly. See "Removing the Hard-Drive Assembly" on page 31. After working inside your computer and follow the instructions in "Removing the Memory Module(s)" on page 27. 6 Remove the palm-rest. See "Removing the Palm-Rest" on page 23. 4 Remove the optical-drive assembly. See "Removing the Optical-Drive Assembly" on page 7. Prerequisites 1 Remove the battery. For...
Owner's Manual
Page 75
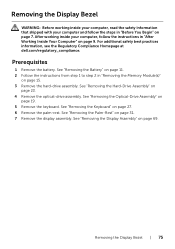
... Regulatory Compliance Homepage at dell.com/regulatory_compliance. See "Removing the Keyboard" on page 7. See "Removing the Battery" on page 11. 2 Follow the instructions from step 1 to step 2 in "After Working Inside Your Computer" on page 19. 5 Remove the keyboard. See "Removing the Palm-Rest" on page 15. 3 Remove the hard-drive assembly. See "Removing the Optical-Drive Assembly" on page 9. After...
... Regulatory Compliance Homepage at dell.com/regulatory_compliance. See "Removing the Keyboard" on page 7. See "Removing the Battery" on page 11. 2 Follow the instructions from step 1 to step 2 in "After Working Inside Your Computer" on page 19. 5 Remove the keyboard. See "Removing the Palm-Rest" on page 15. 3 Remove the hard-drive assembly. See "Removing the Optical-Drive Assembly" on page 9. After...

Owner's Manual
Page 79
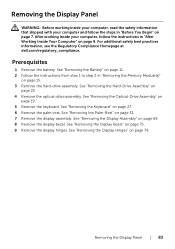
... Module(s)" on page 75. See "Removing the Display Bezel" on page 15. 3 Remove the hard-drive assembly. Removing the Display Hinges | 79 Prerequisites 1 Remove the battery. See "Removing the Keyboard" on page 19. 5 Remove the keyboard. See "Removing the Optical-Drive Assembly" on page 27. 6 Remove the palm-rest. See "Removing the Palm-Rest" on page 31. 7 Remove the display assembly. After working inside...
... Module(s)" on page 75. See "Removing the Display Bezel" on page 15. 3 Remove the hard-drive assembly. Removing the Display Hinges | 79 Prerequisites 1 Remove the battery. See "Removing the Keyboard" on page 19. 5 Remove the keyboard. See "Removing the Optical-Drive Assembly" on page 27. 6 Remove the palm-rest. See "Removing the Palm-Rest" on page 31. 7 Remove the display assembly. After working inside...
Owner's Manual
Page 83
... Module(s)" on page 75. 9 Remove the display hinges. See "Removing the Display Assembly" on page 23. 4 Remove the optical-drive assembly. See "Removing the Hard-Drive Assembly" on page 69. 8 Remove the display bezel. For additional safety best practices information, see the Regulatory Compliance Homepage at dell.com/regulatory_compliance. See "Removing the Keyboard" on page 31. 7 Remove the display assembly. See...
... Module(s)" on page 75. 9 Remove the display hinges. See "Removing the Display Assembly" on page 23. 4 Remove the optical-drive assembly. See "Removing the Hard-Drive Assembly" on page 69. 8 Remove the display bezel. For additional safety best practices information, see the Regulatory Compliance Homepage at dell.com/regulatory_compliance. See "Removing the Keyboard" on page 31. 7 Remove the display assembly. See...
Owner's Manual
Page 89
... and follow the instructions in "Removing the Memory Module(s)" on page 15. 3 Remove the hard-drive assembly. See "Removing the Hard-Drive Assembly" on page 69. 8 Remove the display bezel. See "Removing the Display Assembly" on page 23. 4 Remove the optical-drive assembly. See "Removing the Display Bezel" on page 31. 7 Remove the display assembly. Prerequisites 1 Remove the battery. See "Removing the Palm-Rest" on page...
... and follow the instructions in "Removing the Memory Module(s)" on page 15. 3 Remove the hard-drive assembly. See "Removing the Hard-Drive Assembly" on page 69. 8 Remove the display bezel. See "Removing the Display Assembly" on page 23. 4 Remove the optical-drive assembly. See "Removing the Display Bezel" on page 31. 7 Remove the display assembly. Prerequisites 1 Remove the battery. See "Removing the Palm-Rest" on page...


