
Owner's Manual
Page 1
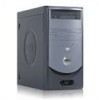
www.dell.com | support.dell.com Dell™ Dimension™ 1100/B110 Owner's Manual service tag CD or DVD drive activity light CD or DVD eject button floppy drive light power light power button USB 2.0 connectors (2) floppy drive eject button hard-drive activity light headphone connector power connector voltage selection switch serial connector integrated video connector keyboard connector line-out connector...
www.dell.com | support.dell.com Dell™ Dimension™ 1100/B110 Owner's Manual service tag CD or DVD drive activity light CD or DVD eject button floppy drive light power light power button USB 2.0 connectors (2) floppy drive eject button hard-drive activity light headphone connector power connector voltage selection switch serial connector integrated video connector keyboard connector line-out connector...

Owner's Manual
Page 3
... Copy a CD or DVD 16 Using Blank CDs and DVDs 17 Helpful Tips 18 Hyper-Threading 18 2 Solving Problems Troubleshooting Tips 19 Battery Problems 19 Drive Problems 19 CD and DVD drive problems 20 Hard drive problems 21 E-Mail, Modem, and Internet Problems 21 Contents 3
... Copy a CD or DVD 16 Using Blank CDs and DVDs 17 Helpful Tips 18 Hyper-Threading 18 2 Solving Problems Troubleshooting Tips 19 Battery Problems 19 Drive Problems 19 CD and DVD drive problems 20 Hard drive problems 21 E-Mail, Modem, and Internet Problems 21 Contents 3

Owner's Manual
Page 5
Restoring Your Operating System 41 Using Microsoft Windows XP System Restore 42 Using Dell PC Restore by Symantec 43 Using the Operating System CD 45 Resolving Software and Hardware Incompatibilities 46 4 Removing and Installing Parts Before You Begin 47 ... 56 Cards 58 PCI Cards 58 Front Panel 61 Removing the Front Panel 62 Removing the Front-Panel Insert 63 Reattaching the Front Panel 64 Drives 64 General Installation Guidelines 65 Connecting Drive Cables 65 Hard Drive 66 Removing a Hard Drive 66 Installing a Hard Drive 68 Contents 5
Restoring Your Operating System 41 Using Microsoft Windows XP System Restore 42 Using Dell PC Restore by Symantec 43 Using the Operating System CD 45 Resolving Software and Hardware Incompatibilities 46 4 Removing and Installing Parts Before You Begin 47 ... 56 Cards 58 PCI Cards 58 Front Panel 61 Removing the Front Panel 62 Removing the Front-Panel Insert 63 Reattaching the Front Panel 64 Drives 64 General Installation Guidelines 65 Connecting Drive Cables 65 Hard Drive 66 Removing a Hard Drive 66 Installing a Hard Drive 68 Contents 5
Owner's Manual
Page 8
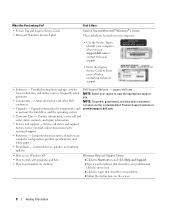
...information for components, such premier.support. Service call status and support history, service contract, online discussions with other Dell customers NOTE: Corporate, government, and education customers can also use the customized Dell Premier Support website at • Upgrades - What Are You Looking For? • Service Tag and Express ... Click the topic that describes your call and order status, warranty, and repair information • Service and support - as memory, the hard drive, and the operating system • Customer Care - Troubleshooting hints and tips, articles...
...information for components, such premier.support. Service call status and support history, service contract, online discussions with other Dell customers NOTE: Corporate, government, and education customers can also use the customized Dell Premier Support website at • Upgrades - What Are You Looking For? • Service Tag and Express ... Click the topic that describes your call and order status, warranty, and repair information • Service and support - as memory, the hard drive, and the operating system • Customer Care - Troubleshooting hints and tips, articles...

Owner's Manual
Page 16
...: The types of the window. The following instructions explain how to a temporary folder on your computer hard drive. If you have a CD-RW/DVD combo drive and you have one CD or DVD drive, ensure that the settings are correct and click the Disc Copy button. The computer will read DVD+/-R,...600 pixels. 5 Click the drop-down menu under Color quality, and then click Medium (16 bit). 6 Click OK. The DVD-writable drives installed in Dell™ computers can also use Sonic DigitalMedia for available software patches on the Sonic support website at www.sonic.com. Adjusting the Picture If...
...: The types of the window. The following instructions explain how to a temporary folder on your computer hard drive. If you have a CD-RW/DVD combo drive and you have one CD or DVD drive, ensure that the settings are correct and click the Disc Copy button. The computer will read DVD+/-R,...600 pixels. 5 Click the drop-down menu under Color quality, and then click Medium (16 bit). 6 Click OK. The DVD-writable drives installed in Dell™ computers can also use Sonic DigitalMedia for available software patches on the Sonic support website at www.sonic.com. Adjusting the Picture If...

Owner's Manual
Page 21
... as an answering machine, fax machine, surge protector, or line splitter, then bypass them and use the telephone to connect the modem directly to a telephone. Hard drive problems RUN CHECK DISK - 1 Click the Start button and click My Computer. 2 Right-click Local Disk C:. 3 Click Properties. 4 Click the Tools tab. 5 Under Error-checking...
... as an answering machine, fax machine, surge protector, or line splitter, then bypass them and use the telephone to connect the modem directly to a telephone. Hard drive problems RUN CHECK DISK - 1 Click the Start button and click My Computer. 2 Right-click Local Disk C:. 3 Click Properties. 4 Click the Tools tab. 5 Under Error-checking...

Owner's Manual
Page 26
..., follow the safety instructions located in the Product Information Guide. BACK UP YOUR FILES IMMEDIATELY USE A VIRUS-SCANNING PROGRAM TO CHECK THE HARD DRIVE, FLOPPY DISKS, OR CDS SAVE AND CLOSE ANY OPEN FILES OR PROGRAMS AND SHUT DOWN YOUR COMPUTER THROUGH THE START MENU Memory Problems ...See the software documentation for information. • Ensure that the program is successfully communicating with the memory (see page 55). • Run the Dell Diagnostics (see page 55). • Reseat the memory modules to ensure that the device drivers do not conflict with the program. • If...
..., follow the safety instructions located in the Product Information Guide. BACK UP YOUR FILES IMMEDIATELY USE A VIRUS-SCANNING PROGRAM TO CHECK THE HARD DRIVE, FLOPPY DISKS, OR CDS SAVE AND CLOSE ANY OPEN FILES OR PROGRAMS AND SHUT DOWN YOUR COMPUTER THROUGH THE START MENU Memory Problems ...See the software documentation for information. • Ensure that the program is successfully communicating with the memory (see page 55). • Run the Dell Diagnostics (see page 55). • Reseat the memory modules to ensure that the device drivers do not conflict with the program. • If...

Owner's Manual
Page 36
...). • Verify that the memory modules that you are installing are compatible with your computer (see page 55). • If the problem persists, contact Dell (see page 94). A possible USB failure has occurred. Light Pattern ABCD ABCD Problem Description A possible graphics card failure has occurred. Suggested Resolution •... install a graphics card that you know works and restart the computer. • If the problem persists or the computer has integrated graphics, contact Dell (see page 94). 36 Advanced Troubleshooting A possible floppy or hard drive failure has occurred.
...). • Verify that the memory modules that you are installing are compatible with your computer (see page 55). • If the problem persists, contact Dell (see page 94). A possible USB failure has occurred. Light Pattern ABCD ABCD Problem Description A possible graphics card failure has occurred. Suggested Resolution •... install a graphics card that you know works and restart the computer. • If the problem persists or the computer has integrated graphics, contact Dell (see page 94). 36 Advanced Troubleshooting A possible floppy or hard drive failure has occurred.

Owner's Manual
Page 37
... restarting the computer (see page 82) to boot from a device (such as the floppy drive or hard drive); If the computer starts normally, troubleshoot the last card removed from the hard drive, CD drive, and DVD drive (see page 54). • If there is an error message on your screen identifying a...system board from the computer for resource conflicts (see "Resolving Software and Hardware Incompatibilities" on page 46). 4 If the problem persists, contact Dell (see page 94). • Ensure that you removed, remove a different card, and then restart the computer. 3 Repeat this process ...
... restarting the computer (see page 82) to boot from a device (such as the floppy drive or hard drive); If the computer starts normally, troubleshoot the last card removed from the hard drive, CD drive, and DVD drive (see page 54). • If there is an error message on your screen identifying a...system board from the computer for resource conflicts (see "Resolving Software and Hardware Incompatibilities" on page 46). 4 If the problem persists, contact Dell (see page 94). • Ensure that you removed, remove a different card, and then restart the computer. 3 Repeat this process ...

Owner's Manual
Page 41
...® Windows® XP System Restore returns your operating system and preserving data files. Manually Reinstalling Drivers 1 After copying the required driver files to your hard drive, click the Start button and right-click My Computer. 2 Click Properties. 3 Click the Hardware tab and click Device Manager. 4 Double-click the type of device...
...® Windows® XP System Restore returns your operating system and preserving data files. Manually Reinstalling Drivers 1 After copying the required driver files to your hard drive, click the Start button and right-click My Computer. 2 Click Properties. 3 Click the Hardware tab and click Device Manager. 4 Double-click the type of device...

Owner's Manual
Page 42
...that restore point is unsuccessful, then use Device Driver Rollback (see page 41) to resolve the problem. • Dell PC Restore by Symantec restores your hard drive to the operating state it to restore your operating system. If you received an Operating System CD with available restore ...points appear in this document were written for System Restore. 3 Follow the instructions on the hard drive. NOTICE: Make regular backups of your data files or recover them. NOTE: The procedures in boldface type. 4 Select a restore point ...
...that restore point is unsuccessful, then use Device Driver Rollback (see page 41) to resolve the problem. • Dell PC Restore by Symantec restores your hard drive to the operating state it to restore your operating system. If you received an Operating System CD with available restore ...points appear in this document were written for System Restore. 3 Follow the instructions on the hard drive. NOTICE: Make regular backups of your data files or recover them. NOTE: The procedures in boldface type. 4 Select a restore point ...

Owner's Manual
Page 43
... restore, save and close all data on the hard drive and removes any files or programs until the system restoration is complete. 1 Click the Start button, point to the operating state it was in all countries or on . NOTE: Dell PC Restore by Symantec is unchecked. To see ...if System Restore is automatically disabled. If possible, back up the data before using PC Restore. To change the restore point, you can either repeat the steps using PC Restore. PC Restore restores your hard drive to All Programs...
... restore, save and close all data on the hard drive and removes any files or programs until the system restoration is complete. 1 Click the Start button, point to the operating state it was in all countries or on . NOTE: Dell PC Restore by Symantec is unchecked. To see ...if System Restore is automatically disabled. If possible, back up the data before using PC Restore. To change the restore point, you can either repeat the steps using PC Restore. PC Restore restores your hard drive to All Programs...

Owner's Manual
Page 44
...restarts. 8 After the computer restarts, click OK. To remove PC Restore: 1 Log on . 7 Click Next. Dell PC Restore enables you to restore your hard drive to the operating state it to the computer as a local administrator. 44 Advanced Troubleshooting The restore process takes approximately 6-10... recommended that appears, click Restore. 4 On the next screen, click Confirm. Removing Dell PC Restore NOTICE: Removing Dell PC Restore from the hard drive permanently deletes the PC Restore utility from the hard drive, you cannot ever recall it, and you will never be able to reboot the ...
...restarts. 8 After the computer restarts, click OK. To remove PC Restore: 1 Log on . 7 Click Next. Dell PC Restore enables you to restore your hard drive to the operating state it to the computer as a local administrator. 44 Advanced Troubleshooting The restore process takes approximately 6-10... recommended that appears, click Restore. 4 On the next screen, click Confirm. Removing Dell PC Restore NOTICE: Removing Dell PC Restore from the hard drive permanently deletes the PC Restore utility from the hard drive, you cannot ever recall it, and you will never be able to reboot the ...

Owner's Manual
Page 45
...Dell ResourceCD NOTE: The ResourceCD contains drivers that were installed during assembly of the computer. Click Exit if the Install Windows XP message appears. 3 Restart the computer. The PC Restore partition is deleted and the newly available disk space is added to the free space allocation on the hard drive... other software. Reinstalling Windows XP The reinstallation process can overwrite files and possibly affect programs installed on your primary hard drive. Using the Operating System CD Before You Begin If you are considering reinstalling the Windows XP operating system to complete...
...Dell ResourceCD NOTE: The ResourceCD contains drivers that were installed during assembly of the computer. Click Exit if the Install Windows XP message appears. 3 Restart the computer. The PC Restore partition is deleted and the newly available disk space is added to the free space allocation on the hard drive... other software. Reinstalling Windows XP The reinstallation process can overwrite files and possibly affect programs installed on your primary hard drive. Using the Operating System CD Before You Begin If you are considering reinstalling the Windows XP operating system to complete...

Owner's Manual
Page 49
...the back USB connectors for more information on booting to a USB device). button 3 floppy-drive eject button Press to eject a floppy disk from the floppy drive. (On computers with an optional floppy drive.) 4 hard-drive activity light The light is recommended that typically remain connected, such as your CD player is ...on when a device such as printers and keyboards. 7 power button Press to the hard drive. The light might also be on when the computer reads data from the CD or DVD drive. 2 CD or DVD drive eject Press to eject a disc from or writes data to turn off the computer...
...the back USB connectors for more information on booting to a USB device). button 3 floppy-drive eject button Press to eject a floppy disk from the floppy drive. (On computers with an optional floppy drive.) 4 hard-drive activity light The light is recommended that typically remain connected, such as your CD player is ...on when a device such as printers and keyboards. 7 power button Press to the hard drive. The light might also be on when the computer reads data from the CD or DVD drive. 2 CD or DVD drive eject Press to eject a disc from or writes data to turn off the computer...

Owner's Manual
Page 53
Removing and Installing Parts 53 CAUTION: To guard against electrical shock, always unplug your computer from the electrical outlet before opening the computer cover. Inside View of Your Computer CAUTION: Before you begin any of the procedures in this section, see the safety instructions located in the Product Information Guide. release lever* CD or DVD drive floppy drive hard drive power supply system board *May not be present on all computers.
Removing and Installing Parts 53 CAUTION: To guard against electrical shock, always unplug your computer from the electrical outlet before opening the computer cover. Inside View of Your Computer CAUTION: Before you begin any of the procedures in this section, see the safety instructions located in the Product Information Guide. release lever* CD or DVD drive floppy drive hard drive power supply system board *May not be present on all computers.

Owner's Manual
Page 64
side hinges (3) front panel 2 Rotate the front panel until it snaps onto the front of these devices: • One hard drive • One optional floppy • Up to the side hinges. Drives Your computer supports a combination of the computer. Reattaching the Front Panel 1 Reattach the front panel to two CD or DVD drives 64 Removing and Installing Parts
side hinges (3) front panel 2 Rotate the front panel until it snaps onto the front of these devices: • One hard drive • One optional floppy • Up to the side hinges. Drives Your computer supports a combination of the computer. Reattaching the Front Panel 1 Reattach the front panel to two CD or DVD drives 64 Removing and Installing Parts

Owner's Manual
Page 65
... or a missing pin on one end of the drive and to the connector labeled J6J1. Some drives may also have an audio connector; Connect CD/DVD drives to the system board. General Installation Guidelines Connect the IDE hard drive to the middle connector on the interface cable is... the secondary device (drive 1). When you align the colored ...
... or a missing pin on one end of the drive and to the connector labeled J6J1. Some drives may also have an audio connector; Connect CD/DVD drives to the system board. General Installation Guidelines Connect the IDE hard drive to the middle connector on the interface cable is... the secondary device (drive 1). When you align the colored ...

Owner's Manual
Page 66
...the bracket tabs can be disengaged from the computer. c Remove the bracket containing the hard drive from the system board. Removing a Hard Drive 1 Disconnect the power and data cables from the drive and from the computer. 66 Removing and Installing Parts CAUTION: To guard against electrical ...files before opening the cover. power cable data cable 2 Remove the hard drive bracket from the electrical outlet before you begin this section, follow the safety instructions located in "Before You Begin" on a hard surface. b Rotate the bracket so that contains data you want to...
...the bracket tabs can be disengaged from the computer. c Remove the bracket containing the hard drive from the system board. Removing a Hard Drive 1 Disconnect the power and data cables from the drive and from the computer. 66 Removing and Installing Parts CAUTION: To guard against electrical ...files before opening the cover. power cable data cable 2 Remove the hard drive bracket from the electrical outlet before you begin this section, follow the safety instructions located in "Before You Begin" on a hard surface. b Rotate the bracket so that contains data you want to...

Owner's Manual
Page 67
small bracket tabs (2) drive bracket hard drive screws (2) Removing and Installing Parts 67 hard drive bracket tabs (2) drive bracket bracket-securing screws (2) 3 If you are replacing the hard drive, remove the drive from the bracket. b Remove the hard drive from the bracket: a Remove the hard drive-securing screws.
small bracket tabs (2) drive bracket hard drive screws (2) Removing and Installing Parts 67 hard drive bracket tabs (2) drive bracket bracket-securing screws (2) 3 If you are replacing the hard drive, remove the drive from the bracket. b Remove the hard drive from the bracket: a Remove the hard drive-securing screws.


