
Owner's Manual
Page 1
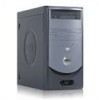
Dell™ Dimension™ 1100/B110 Owner's Manual service tag CD or DVD drive activity light CD or DVD eject button floppy drive light power light power button USB 2.0 connectors (2) floppy drive eject button hard-drive activity light headphone connector power connector voltage selection switch serial connector integrated video connector keyboard connector line-out connector* microphone connector* USB 2.0 connectors (4) parallel connector diagnostic lights (4) mouse connector line-in connector* cover latch** network adapter connector PCI card slots (3) Model DMC *On computers with...
Dell™ Dimension™ 1100/B110 Owner's Manual service tag CD or DVD drive activity light CD or DVD eject button floppy drive light power light power button USB 2.0 connectors (2) floppy drive eject button hard-drive activity light headphone connector power connector voltage selection switch serial connector integrated video connector keyboard connector line-out connector* microphone connector* USB 2.0 connectors (4) parallel connector diagnostic lights (4) mouse connector line-in connector* cover latch** network adapter connector PCI card slots (3) Model DMC *On computers with...

Owner's Manual
Page 9
.... 2 Install the printer driver if necessary. Printer Cable Your printer connects to the computer. Setting Up and Using Your Computer Setting Up a Printer NOTICE: Complete the operating system setup before you connect a printer to your computer with either a USB cable or a parallel cable. Connecting a USB Printer NOTE: You can connect USB devices while the computer is compatible with the printer for setup information, including how to: • Obtain and install updated drivers...
.... 2 Install the printer driver if necessary. Printer Cable Your printer connects to the computer. Setting Up and Using Your Computer Setting Up a Printer NOTICE: Complete the operating system setup before you connect a printer to your computer with either a USB cable or a parallel cable. Connecting a USB Printer NOTE: You can connect USB devices while the computer is compatible with the printer for setup information, including how to: • Obtain and install updated drivers...

Owner's Manual
Page 11
... network adapter connector on the computer. Do not plug a network cable into place, and then gently pull it to ensure that came with your computer. If the Add New Hardware Wizard window appears, click Cancel. 5 Install the printer driver if necessary. parallel connector on computer screws (2) connector on printer clips (2) notches (2) parallel printer cable 4 Turn on the printer and then turn on the back of the network cable to a network device...
... network adapter connector on the computer. Do not plug a network cable into place, and then gently pull it to ensure that came with your computer. If the Add New Hardware Wizard window appears, click Cancel. 5 Install the printer driver if necessary. parallel connector on computer screws (2) connector on printer clips (2) notches (2) parallel printer cable 4 Turn on the printer and then turn on the back of the network cable to a network device...

Owner's Manual
Page 12
... a home or small office. 1 Click the Start button, point to All Programs→ Accessories→ Communications, and then click Network Setup Wizard. 2 On the welcome screen, click Next. 3 Click Checklist for creating a network. network adapter connector network adapter connector on computer network device network cable Network Setup Wizard The Microsoft® Windows® XP operating system provides a Network Setup Wizard to guide you need a modem or network connection and an Internet service provider (ISP), such as AOL or...
... a home or small office. 1 Click the Start button, point to All Programs→ Accessories→ Communications, and then click Network Setup Wizard. 2 On the welcome screen, click Next. 3 Click Checklist for creating a network. network adapter connector network adapter connector on computer network device network cable Network Setup Wizard The Microsoft® Windows® XP operating system provides a Network Setup Wizard to guide you need a modem or network connection and an Internet service provider (ISP), such as AOL or...

Owner's Manual
Page 16
.... 3 To copy the CD or DVD: • If you have one CD or DVD drive, ensure that the settings are using too much memory and preventing DVD playback, adjust the display properties: 1 Click the Start button and click Control Panel. 2 Under Pick a category, click Appearance and Themes. 3 Under Pick a task..., click Change the screen resolution. 4 In the Display Properties window, click and drag the bar in...
.... 3 To copy the CD or DVD: • If you have one CD or DVD drive, ensure that the settings are using too much memory and preventing DVD playback, adjust the display properties: 1 Click the Start button and click Control Panel. 2 Under Pick a category, click Appearance and Themes. 3 Under Pick a task..., click Change the screen resolution. 4 In the Display Properties window, click and drag the bar in...

Owner's Manual
Page 22
... THE COMPUTER FOR SPYWARE - VERIFY THAT THE MODEM IS COMMUNICATING WITH WINDOWS - 1 Click the Start button and click Control Panel. 2 Click Printers and Other Hardware. 3 Click Phone and Modem Options. 4 Click the Modems tab. 5 Click the COM port for installation instructions. 22 Solving Problems With the Outlook Express e-mail program open is operating properly. The program that includes anti-spyware protection (your Internet service provider.
... THE COMPUTER FOR SPYWARE - VERIFY THAT THE MODEM IS COMMUNICATING WITH WINDOWS - 1 Click the Start button and click Control Panel. 2 Click Printers and Other Hardware. 3 Click Phone and Modem Options. 4 Click the Modems tab. 5 Click the COM port for installation instructions. 22 Solving Problems With the Outlook Express e-mail program open is operating properly. The program that includes anti-spyware protection (your Internet service provider.

Owner's Manual
Page 27
...; Run the Dell Diagnostics (see page 38). CHECK THE MOUSE CABLE - 1 Check the cable connector for bent or broken pins and for instructions on the type of the procedures in this section, follow the safety instructions located in the Product Information Guide. For additional information on cleaning the mouse. C L E A N T H E M O U S E - Mouse Problems CAUTION: Before you are following the memory installation guidelines (see page 55). • Your Dell Dimension™ computer supports DDR memory.
...; Run the Dell Diagnostics (see page 38). CHECK THE MOUSE CABLE - 1 Check the cable connector for bent or broken pins and for instructions on the type of the procedures in this section, follow the safety instructions located in the Product Information Guide. For additional information on cleaning the mouse. C L E A N T H E M O U S E - Mouse Problems CAUTION: Before you are following the memory installation guidelines (see page 55). • Your Dell Dimension™ computer supports DDR memory.

Owner's Manual
Page 29
... receiving power. • Reseat the power cable into an electrical outlet and that the main power cable and front panel cable are securely connected to the system board. I F T H E P O W E R L I G H T I S B L I N K I S O F F - I F T H E P O W E R L I G H T I S S T E A D Y A M B E R - See the printer documentation for your location (if applicable). • Ensure that the voltage selection switch (see page 50) is set to the same electrical outlet Printer Problems CAUTION: Before you need technical assistance for setup and troubleshooting information...
... receiving power. • Reseat the power cable into an electrical outlet and that the main power cable and front panel cable are securely connected to the system board. I F T H E P O W E R L I G H T I S B L I N K I S O F F - I F T H E P O W E R L I G H T I S S T E A D Y A M B E R - See the printer documentation for your location (if applicable). • Ensure that the voltage selection switch (see page 50) is set to the same electrical outlet Printer Problems CAUTION: Before you need technical assistance for setup and troubleshooting information...

Owner's Manual
Page 35
... Memory modules are detected, but a memory failure has occurred. = yellow = green = off Plug the computer into a working memory of the same type into your computer has four lights labeled "A," "B," "C," and "D" on the back panel (see page 50). button. When the computer starts normally, the lights flash. Continue until you have identified a faulty module or reinstalled all four lights display solid green. Advanced Troubleshooting Diagnostic Lights CAUTION: Before you troubleshoot a problem...
... Memory modules are detected, but a memory failure has occurred. = yellow = green = off Plug the computer into a working memory of the same type into your computer has four lights labeled "A," "B," "C," and "D" on the back panel (see page 50). button. When the computer starts normally, the lights flash. Continue until you have identified a faulty module or reinstalled all four lights display solid green. Advanced Troubleshooting Diagnostic Lights CAUTION: Before you troubleshoot a problem...

Owner's Manual
Page 37
... exists by removing a card (not a graphics card) and restarting the computer (see page 94). If the computer starts normally, troubleshoot the last card removed from the computer for resource conflicts (see "Resolving Software and Hardware Incompatibilities" on page 46). 4 If the problem persists, contact Dell (see page 94). • Ensure that the cables are properly connected to the system board from the hard drive, CD drive, and DVD drive (see...
... exists by removing a card (not a graphics card) and restarting the computer (see page 94). If the computer starts normally, troubleshoot the last card removed from the computer for resource conflicts (see "Resolving Software and Hardware Incompatibilities" on page 46). 4 If the problem persists, contact Dell (see page 94). • Ensure that the cables are properly connected to the system board from the hard drive, CD drive, and DVD drive (see...

Owner's Manual
Page 40
Identifying Drivers If you install drivers obtained from other programs that use the device. Each device has its own set of your problem and, if necessary, update the driver. 1 Click the Start button and click Control Panel. 2 Under Pick a Category, click Performance and Maintenance. 3 Click System. 4 In the System Properties window, click the Hardware tab. 5 Click Device Manager. 6 Scroll down the list to install drivers if you may need to see if any other...
Identifying Drivers If you install drivers obtained from other programs that use the device. Each device has its own set of your problem and, if necessary, update the driver. 1 Click the Start button and click Control Panel. 2 Under Pick a Category, click Performance and Maintenance. 3 Click System. 4 In the System Properties window, click the Hardware tab. 5 Click Device Manager. 6 Scroll down the list to install drivers if you may need to see if any other...

Owner's Manual
Page 41
... you install or update a driver, use System Restore to return your operating system and preserving data files. If Device Driver Rollback does not resolve the problem, then use Windows XP Device Driver Rollback to replace the driver with the previously installed version. 1 Click the Start button and click Control Panel. 2 Under Pick a Category, click Performance and Maintenance. 3 Click System. 4 In the System Properties window, click the Hardware tab. 5 Click Device Manager. 6 Right-click the device for...
... you install or update a driver, use System Restore to return your operating system and preserving data files. If Device Driver Rollback does not resolve the problem, then use Windows XP Device Driver Rollback to replace the driver with the previously installed version. 1 Click the Start button and click Control Panel. 2 Under Pick a Category, click Performance and Maintenance. 3 Click System. 4 In the System Properties window, click the Hardware tab. 5 Click Device Manager. 6 Right-click the device for...

Owner's Manual
Page 42
... the hard drive. NOTICE: Make regular backups of your operating system problem. To access the Windows Help and Support Center, see and select restore points. NOTICE: Before you restore the computer to an earlier operating state, save and close any open files and exit any open programs. Do not alter, open, or delete any applications installed after you purchased the computer. Creating a Restore Point 1 Click the Start button and...
... the hard drive. NOTICE: Make regular backups of your operating system problem. To access the Windows Help and Support Center, see and select restore points. NOTICE: Before you restore the computer to an earlier operating state, save and close any open files and exit any open programs. Do not alter, open, or delete any applications installed after you purchased the computer. Creating a Restore Point 1 Click the Start button and...

Owner's Manual
Page 51
... cable to the serial port. 15 voltage selection switch See the safety instructions located in connector to either a network jack or your monitor into a sound or telephony program. NOTE: Not all modems have a modem, connect a telephone cable to attach a record/playback device such as a handheld device, to the network connector. On computers with integrated amplifiers. A click indicates that you have two connectors. 8 card slots Access connectors for any installed PCI cards (three slots). 9 USB 2.0 connectors (4) Use the back USB connectors...
... cable to the serial port. 15 voltage selection switch See the safety instructions located in connector to either a network jack or your monitor into a sound or telephony program. NOTE: Not all modems have a modem, connect a telephone cable to attach a record/playback device such as a handheld device, to the network connector. On computers with integrated amplifiers. A click indicates that you have two connectors. 8 card slots Access connectors for any installed PCI cards (three slots). 9 USB 2.0 connectors (4) Use the back USB connectors...

Owner's Manual
Page 55
... and DIMM4. For information on the type of memory supported by installing memory modules on the system board. Memory You can increase your computer memory by your computer with 128 MB of memory installed and you want to add another 128 MB of memory, you should be installed in pairs of matched memory size. NOTE: Always install DDR memory modules in connectors DIMM3 and DIMM4 Removing and Installing Parts 55
... and DIMM4. For information on the type of memory supported by installing memory modules on the system board. Memory You can increase your computer memory by your computer with 128 MB of memory installed and you want to add another 128 MB of memory, you should be installed in pairs of matched memory size. NOTE: Always install DDR memory modules in connectors DIMM3 and DIMM4 Removing and Installing Parts 55

Owner's Manual
Page 60
... installed a sound card: a Enter system setup (see page 82), select Network Controller, and then change the setting to the sound card's connectors. b Connect the network cable to Off. b Connect external audio devices to Off. Cables routed over or behind the cards. Do not connect the network cable to the card. 60 Removing and Installing Parts Removing a PCI Card 1 Follow the procedures in "Before You Begin" on page 47. 2 If necessary, disconnect any cables connected to the integrated connector on the back panel. 7 If you installed an add...
... installed a sound card: a Enter system setup (see page 82), select Network Controller, and then change the setting to the sound card's connectors. b Connect the network cable to Off. b Connect external audio devices to Off. Cables routed over or behind the cards. Do not connect the network cable to the card. 60 Removing and Installing Parts Removing a PCI Card 1 Follow the procedures in "Before You Begin" on page 47. 2 If necessary, disconnect any cables connected to the integrated connector on the back panel. 7 If you installed an add...

Owner's Manual
Page 61
... removed an add-in the Product Information Guide. b Connect external audio devices to On. Front Panel CAUTION: Before you begin any of the procedures in this section, follow the safety instructions located in network connector: a Enter system setup (see page 82), select Network Controller, and then change the setting to maintain FCC certification of your computer from the operating system. 8 If you removed a sound card: a Enter system setup (see page 94). Removing and Installing Parts 61 NOTE: Installing...
... removed an add-in the Product Information Guide. b Connect external audio devices to On. Front Panel CAUTION: Before you begin any of the procedures in this section, follow the safety instructions located in network connector: a Enter system setup (see page 82), select Network Controller, and then change the setting to maintain FCC certification of your computer from the operating system. 8 If you removed a sound card: a Enter system setup (see page 94). Removing and Installing Parts 61 NOTE: Installing...

Owner's Manual
Page 77
... system board. 4 Remove the battery by carefully prying it out of its socket with the drive for instructions on installing any of its socket with your computer and devices to repeatedly reset time and date information after turning on the computer, replace the battery. Battery CAUTION: Before you attempt to the manufacturer's instructions. To replace the battery: 1 Record all the screens in the Product Information Guide. NOTICE...
... system board. 4 Remove the battery by carefully prying it out of its socket with the drive for instructions on installing any of its socket with your computer and devices to repeatedly reset time and date information after turning on the computer, replace the battery. Battery CAUTION: Before you attempt to the manufacturer's instructions. To replace the battery: 1 Record all the screens in the Product Information Guide. NOTICE...

Owner's Manual
Page 88
...; CD Drive - When F12 = Boot Menu appears in system setup (see page 54). 2 Turn on the screen when the computer starts. The BIOS detects the device and adds the USB flash option to boot from the CD drive. This option disables or enables keyboard error reporting when the computer starts. If no operating system, the computer generates an error message. • USB Flash Device - POST Behavior Fastboot Numlock Key OS Install POST Hotkeys Keyboard Errors When set to On (default), this option activates...
...; CD Drive - When F12 = Boot Menu appears in system setup (see page 54). 2 Turn on the screen when the computer starts. The BIOS detects the device and adds the USB flash option to boot from the CD drive. This option disables or enables keyboard error reporting when the computer starts. If no operating system, the computer generates an error message. • USB Flash Device - POST Behavior Fastboot Numlock Key OS Install POST Hotkeys Keyboard Errors When set to On (default), this option activates...

Owner's Manual
Page 115
... Restore, 43 PCI cards installing, 58 removing, 60 playing CDs and DVDs, 14 power button, 49 connector, 51 light, 50 problems, 28 power light conditions, 28 printer cable, 9 connecting, 9 parallel, 10 problems, 29 setting up, 9 USB, 9 problems battery, 19 blue screen, 25 CD drive, 20 CD-RW drive, 20 computer crashes, 24-25 computer stops responding, 24 Dell Diagnostics, 38 diagnostic lights, 35 drives, 19 DVD drive, 20 e-mail, 21 error messages, 22 general, 24 hard drive, 21 IEEE 1394, 23 Internet, 21 keyboard, 24 memory...
... Restore, 43 PCI cards installing, 58 removing, 60 playing CDs and DVDs, 14 power button, 49 connector, 51 light, 50 problems, 28 power light conditions, 28 printer cable, 9 connecting, 9 parallel, 10 problems, 29 setting up, 9 USB, 9 problems battery, 19 blue screen, 25 CD drive, 20 CD-RW drive, 20 computer crashes, 24-25 computer stops responding, 24 Dell Diagnostics, 38 diagnostic lights, 35 drives, 19 DVD drive, 20 e-mail, 21 error messages, 22 general, 24 hard drive, 21 IEEE 1394, 23 Internet, 21 keyboard, 24 memory...


