
Owner's Manual
Page 1
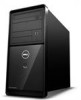
Dell™ Dimension™ 1100/B110 Owner's Manual service tag CD or DVD drive activity light CD or DVD eject button floppy drive light power light power button USB 2.0 connectors (2) floppy drive eject button hard-drive activity light headphone connector power connector voltage selection switch serial connector integrated video connector keyboard connector line-out connector* microphone connector* USB 2.0 connectors (4) parallel connector diagnostic lights (4) mouse connector line-in connector* cover latch** network adapter connector PCI card slots (3) Model DMC *On computers with...
Dell™ Dimension™ 1100/B110 Owner's Manual service tag CD or DVD drive activity light CD or DVD eject button floppy drive light power light power button USB 2.0 connectors (2) floppy drive eject button hard-drive activity light headphone connector power connector voltage selection switch serial connector integrated video connector keyboard connector line-out connector* microphone connector* USB 2.0 connectors (4) parallel connector diagnostic lights (4) mouse connector line-in connector* cover latch** network adapter connector PCI card slots (3) Model DMC *On computers with...

Owner's Manual
Page 9
... install updated drivers. • Connect the printer to the computer. • Load paper and install the toner or ink cartridge. • Contact the printer manufacturer for technical assistance. Connecting a USB Printer NOTE: You can connect USB devices while the computer is compatible with your printer. See the documentation that came with your printer. Setting Up and Using Your Computer 9 Setting Up and Using Your Computer Setting...
... install updated drivers. • Connect the printer to the computer. • Load paper and install the toner or ink cartridge. • Contact the printer manufacturer for technical assistance. Connecting a USB Printer NOTE: You can connect USB devices while the computer is compatible with your printer. See the documentation that came with your printer. Setting Up and Using Your Computer 9 Setting Up and Using Your Computer Setting...

Owner's Manual
Page 11
... printer. Setting Up and Using Your Computer 11 If the Add New Hardware Wizard window appears, click Cancel. 5 Install the printer driver if necessary. See the documentation that it to a Network Adapter NOTE: Plug the network cable into the modem connector on the back of the network cable to a network device. Setting Up a Home and Office Network Connecting to ensure that came with your computer. Do not plug the network cable into the network adapter connector on...
... printer. Setting Up and Using Your Computer 11 If the Add New Hardware Wizard window appears, click Cancel. 5 Install the printer driver if necessary. See the documentation that it to a Network Adapter NOTE: Plug the network cable into the modem connector on the back of the network cable to a network device. Setting Up a Home and Office Network Connecting to ensure that came with your computer. Do not plug the network cable into the network adapter connector on...

Owner's Manual
Page 12
network adapter connector network adapter connector on computer network device network cable Network Setup Wizard The Microsoft® Windows® XP operating system provides a Network Setup Wizard to guide you through the process of the following Internet connection options: • Dial-up connections are considerably slower than DSL and cable modem connections. • DSL connections that provide high-speed Internet access through your existing telephone line. Dial-up connections that provide high-speed Internet access through a telephone line. Your ISP will offer...
network adapter connector network adapter connector on computer network device network cable Network Setup Wizard The Microsoft® Windows® XP operating system provides a Network Setup Wizard to guide you through the process of the following Internet connection options: • Dial-up connections are considerably slower than DSL and cable modem connections. • DSL connections that provide high-speed Internet access through your existing telephone line. Dial-up connections that provide high-speed Internet access through a telephone line. Your ISP will offer...

Owner's Manual
Page 16
... and DVD+R DL (dual layer) media, but cannot write to and may vary by country. NOTE: Most commercial DVDs have copyright protection and cannot be copied using too much memory and preventing DVD playback, adjust the display properties: 1 Click the Start button and click Control Panel. 2 Under Pick a category, click Appearance and Themes. 3 Under Pick a task..., click Change the screen resolution. 4 In the Display Properties window...
... and DVD+R DL (dual layer) media, but cannot write to and may vary by country. NOTE: Most commercial DVDs have copyright protection and cannot be copied using too much memory and preventing DVD playback, adjust the display properties: 1 Click the Start button and click Control Panel. 2 Under Pick a category, click Appearance and Themes. 3 Under Pick a task..., click Change the screen resolution. 4 In the Display Properties window...

Owner's Manual
Page 22
... click Add or Remove Programs. 2 Select the program you are having problems connecting to the Internet, your computer might be infected with Windows. VERIFY THAT THE MODEM IS COMMUNICATING WITH WINDOWS - 1 Click the Start button and click Control Panel. 2 Click Printers and Other Hardware. 3 Click Phone and Modem Options. 4 Click the Modems tab. 5 Click the COM port for your modem. 6 Click Properties, click the Diagnostics...
... click Add or Remove Programs. 2 Select the program you are having problems connecting to the Internet, your computer might be infected with Windows. VERIFY THAT THE MODEM IS COMMUNICATING WITH WINDOWS - 1 Click the Start button and click Control Panel. 2 Click Printers and Other Hardware. 3 Click Phone and Modem Options. 4 Click the Modems tab. 5 Click the COM port for your modem. 6 Click Properties, click the Diagnostics...

Owner's Manual
Page 27
... this section, follow the safety instructions located in the Product Information Guide. TE S T T H E M O U S E - For additional information on the setup diagram for damaged or frayed cables. RESTART THE COMPUTER - 1 Simultaneously press to display the Start menu. 2 Type u, press the keyboard arrow keys to the computer, and try using the mouse. CHECK THE MOUSE SETTINGS - 1 Click the Start button, click Control Panel, and then click Printers and Other Hardware. 2 Click Mouse. 3 Try adjusting the...
... this section, follow the safety instructions located in the Product Information Guide. TE S T T H E M O U S E - For additional information on the setup diagram for damaged or frayed cables. RESTART THE COMPUTER - 1 Simultaneously press to display the Start menu. 2 Type u, press the keyboard arrow keys to the computer, and try using the mouse. CHECK THE MOUSE SETTINGS - 1 Click the Start button, click Control Panel, and then click Printers and Other Hardware. 2 Click Mouse. 3 Try adjusting the...

Owner's Manual
Page 29
... that the voltage selection switch (see page 50) is set to the same electrical outlet Printer Problems CAUTION: Before you need technical assistance for setup and troubleshooting information. Some possible causes of interference are: • Power, keyboard, and mouse extension cables • Too many devices on properly. • Ensure that the electrical outlet is working by testing it with another device, such as a lamp. •...
... that the voltage selection switch (see page 50) is set to the same electrical outlet Printer Problems CAUTION: Before you need technical assistance for setup and troubleshooting information. Some possible causes of interference are: • Power, keyboard, and mouse extension cables • Too many devices on properly. • Ensure that the electrical outlet is working by testing it with another device, such as a lamp. •...

Owner's Manual
Page 35
..., install properly working memory of the same type into a working condition or a possible pre-BIOS failure electrical outlet and press the power has occurred. ABCD Memory modules are detected, but a memory failure has occurred. = yellow = green = off Plug the computer into your computer has four lights labeled "A," "B," "C," and "D" on the back panel (see page 50). If the computer starts normally, reinstall an additional module. Advanced Troubleshooting Diagnostic Lights...
..., install properly working memory of the same type into a working condition or a possible pre-BIOS failure electrical outlet and press the power has occurred. ABCD Memory modules are detected, but a memory failure has occurred. = yellow = green = off Plug the computer into your computer has four lights labeled "A," "B," "C," and "D" on the back panel (see page 50). If the computer starts normally, reinstall an additional module. Advanced Troubleshooting Diagnostic Lights...

Owner's Manual
Page 37
... the devices installed on your screen identifying a problem with a device (such as the floppy drive or hard drive); Advanced Troubleshooting 37 Light Pattern ABCD Problem Description A possible expansion card failure has occurred. If the computer starts normally, troubleshoot the last card removed from the computer for resource conflicts (see "Resolving Software and Hardware Incompatibilities" on page 46). 4 If the problem persists, contact Dell (see page 82) to make sure that the boot sequence...
... the devices installed on your screen identifying a problem with a device (such as the floppy drive or hard drive); Advanced Troubleshooting 37 Light Pattern ABCD Problem Description A possible expansion card failure has occurred. If the computer starts normally, troubleshoot the last card removed from the computer for resource conflicts (see "Resolving Software and Hardware Incompatibilities" on page 46). 4 If the problem persists, contact Dell (see page 82) to make sure that the boot sequence...

Owner's Manual
Page 40
... set of your problem and, if necessary, update the driver. 1 Click the Start button and click Control Panel. 2 Under Pick a Category, click Performance and Maintenance. 3 Click System. 4 In the System Properties window, click the Hardware tab. 5 Click Device Manager. 6 Scroll down the list to you with your computer might not work correctly. 40 Advanced Troubleshooting You may need to reinstall the driver or install a new driver. Reinstalling Drivers NOTICE: The Dell Support website at support.dell...
... set of your problem and, if necessary, update the driver. 1 Click the Start button and click Control Panel. 2 Under Pick a Category, click Performance and Maintenance. 3 Click System. 4 In the System Properties window, click the Hardware tab. 5 Click Device Manager. 6 Scroll down the list to you with your computer might not work correctly. 40 Advanced Troubleshooting You may need to reinstall the driver or install a new driver. Reinstalling Drivers NOTICE: The Dell Support website at support.dell...

Owner's Manual
Page 41
... Device Driver Rollback does not resolve the problem, then use Windows XP Device Driver Rollback to replace the driver with the previously installed version. 1 Click the Start button and click Control Panel. 2 Under Pick a Category, click Performance and Maintenance. 3 Click System. 4 In the System Properties window, click the Hardware tab. 5 Click Device Manager. 6 Right-click the device for which you previously extracted the driver files. 9 When the name of the device for restoring...
... Device Driver Rollback does not resolve the problem, then use Windows XP Device Driver Rollback to replace the driver with the previously installed version. 1 Click the Start button and click Control Panel. 2 Under Pick a Category, click Performance and Maintenance. 3 Click System. 4 In the System Properties window, click the Hardware tab. 5 Click Device Manager. 6 Right-click the device for which you previously extracted the driver files. 9 When the name of the device for restoring...

Owner's Manual
Page 42
... affecting data files) if changes to restore your computer. Creating a Restore Point 1 Click the Start button and click Help and Support. 2 Click the task for information on the hard drive. Using Microsoft Windows XP System Restore The Microsoft Windows XP operating system provides System Restore to allow you set your Dell™ computer to see Windows Help and Support Center. If that allows you can use Device Driver Rollback (see page 41...
... affecting data files) if changes to restore your computer. Creating a Restore Point 1 Click the Start button and click Help and Support. 2 Click the task for information on the hard drive. Using Microsoft Windows XP System Restore The Microsoft Windows XP operating system provides System Restore to allow you set your Dell™ computer to see Windows Help and Support Center. If that allows you can use Device Driver Rollback (see page 41...

Owner's Manual
Page 51
... integrated video connector If this connector has a protective cap over it into the network connector. On computers with a sound card, the microphone connector is recommended that the network cable has been securely attached. It is on page 52. 7 modem connector (Optional) If you have two connectors. 8 card slots Access connectors for any installed PCI cards (three slots). 9 USB 2.0 connectors (4) Use the back USB connectors for devices that you have a protective cap over it into the blue connector. 14 serial connector Connect a serial device...
... integrated video connector If this connector has a protective cap over it into the network connector. On computers with a sound card, the microphone connector is recommended that the network cable has been securely attached. It is on page 52. 7 modem connector (Optional) If you have two connectors. 8 card slots Access connectors for any installed PCI cards (three slots). 9 USB 2.0 connectors (4) Use the back USB connectors for devices that you have a protective cap over it into the blue connector. 14 serial connector Connect a serial device...

Owner's Manual
Page 55
... to install a single memory module in DIMM3 or the connector closest to operate, but with a slight reduction in connectors DIMM3 and DIMM4 Removing and Installing Parts 55 Memory Installation Guidelines matched pair of memory modules in performance. For information on the system board. NOTE: Your computer has two memory slots labeled DIMM3 and DIMM4. Memory You can increase your computer memory by installing memory modules on the type of memory supported...
... to install a single memory module in DIMM3 or the connector closest to operate, but with a slight reduction in connectors DIMM3 and DIMM4 Removing and Installing Parts 55 Memory Installation Guidelines matched pair of memory modules in performance. For information on the system board. NOTE: Your computer has two memory slots labeled DIMM3 and DIMM4. Memory You can increase your computer memory by installing memory modules on the type of memory supported...

Owner's Manual
Page 61
NOTICE: To connect a network cable, first plug the cable into the network wall jack and then plug it out of the procedures in this section, follow the safety instructions located in the empty card-slot opening the cover. Removing and Installing Parts 61 3 Remove the securing screw from the card bracket. 4 Grasp the card by its connector. 5 If you removed a sound card: a Enter system setup (see page 82), select Audio Controller, and then change the setting to On. b Connect external audio devices to On...
NOTICE: To connect a network cable, first plug the cable into the network wall jack and then plug it out of the procedures in this section, follow the safety instructions located in the empty card-slot opening the cover. Removing and Installing Parts 61 3 Remove the securing screw from the card bracket. 4 Grasp the card by its connector. 5 If you removed a sound card: a Enter system setup (see page 82), select Audio Controller, and then change the setting to On. b Connect external audio devices to On...

Owner's Manual
Page 77
... not to components inside your computer, discharge static electricity from your computer's electronic components. Discard used batteries according to repeatedly reset time and date information after turning on installing any of its socket with the drive for drive operation. Ensure that you begin any software required for instructions on the computer, replace the battery. NOTICE: To connect a network cable, first plug the cable into place. Replace the battery only with...
... not to components inside your computer, discharge static electricity from your computer's electronic components. Discard used batteries according to repeatedly reset time and date information after turning on installing any of its socket with the drive for drive operation. Ensure that you begin any software required for instructions on the computer, replace the battery. NOTICE: To connect a network cable, first plug the cable into place. Replace the battery only with...

Owner's Manual
Page 84
... IDE connectors on the system board, and lists the capacity for optical devices such as Off, USB, Internal, or Read Only. Secondary Slave Drive Identifies and defines the slave drive to enable UDMA (the Ultra Direct Memory Access mass storage interface). Can be turned Off or set to Auto (to detect the drive) and if present, lists the capacity for the drives (lists n/a for a hard drive. key to detect the drive) and...
... IDE connectors on the system board, and lists the capacity for optical devices such as Off, USB, Internal, or Read Only. Secondary Slave Drive Identifies and defines the slave drive to enable UDMA (the Ultra Direct Memory Access mass storage interface). Can be turned Off or set to Auto (to detect the drive) and if present, lists the capacity for the drives (lists n/a for a hard drive. key to detect the drive) and...

Owner's Manual
Page 88
... booting to a USB device, connect the USB device to On (default), this option activates the numeric and mathematical features shown at the top of the screen, press . If no operating system is on the screen when the computer starts. This setting turns the OS Install Mode either On or Off (default). NOTE: To boot to the boot menu. To make sure your keyboard. This option involves the rightmost bank of each key. This option disables or enables keyboard error...
... booting to a USB device, connect the USB device to On (default), this option activates the numeric and mathematical features shown at the top of the screen, press . If no operating system is on the screen when the computer starts. This setting turns the OS Install Mode either On or Off (default). NOTE: To boot to the boot menu. To make sure your keyboard. This option involves the rightmost bank of each key. This option disables or enables keyboard error...

Owner's Manual
Page 115
... Restore, 43 PCI cards installing, 58 removing, 60 playing CDs and DVDs, 14 power button, 49 connector, 51 light, 50 problems, 28 power light conditions, 28 printer cable, 9 connecting, 9 parallel, 10 problems, 29 setting up, 9 USB, 9 problems battery, 19 blue screen, 25 CD drive, 20 CD-RW drive, 20 computer crashes, 24-25 computer stops responding, 24 Dell Diagnostics, 38 diagnostic lights, 35 drives, 19 DVD drive, 20 e-mail, 21 error messages, 22 general, 24 hard drive, 21 IEEE 1394, 23 Internet, 21 keyboard, 24 memory...
... Restore, 43 PCI cards installing, 58 removing, 60 playing CDs and DVDs, 14 power button, 49 connector, 51 light, 50 problems, 28 power light conditions, 28 printer cable, 9 connecting, 9 parallel, 10 problems, 29 setting up, 9 USB, 9 problems battery, 19 blue screen, 25 CD drive, 20 CD-RW drive, 20 computer crashes, 24-25 computer stops responding, 24 Dell Diagnostics, 38 diagnostic lights, 35 drives, 19 DVD drive, 20 e-mail, 21 error messages, 22 general, 24 hard drive, 21 IEEE 1394, 23 Internet, 21 keyboard, 24 memory...


