User Guide
Page 1
...than its own. Dell Inc. November 2008 Rev. Microsoft, Windows, Windows Server, and Windows Vista are registered trademarks or trademarks of Adobe Systems Incorporated in this document to refer to change without the written permission of Dell Inc. All rights ...any manner whatsoever without notice. © 2008 Dell Inc. Dell™ 2135cn Color Laser Multifunction Printer User's Guide Finding Information About Your Printer Installing the Toner Cartridges and Print Head Device (PHD) Unit Connecting Your Printer Dell Printer Configuration Web Tool Installing the Optional Memory Card...
...than its own. Dell Inc. November 2008 Rev. Microsoft, Windows, Windows Server, and Windows Vista are registered trademarks or trademarks of Adobe Systems Incorporated in this document to refer to change without the written permission of Dell Inc. All rights ...any manner whatsoever without notice. © 2008 Dell Inc. Dell™ 2135cn Color Laser Multifunction Printer User's Guide Finding Information About Your Printer Installing the Toner Cartridges and Print Head Device (PHD) Unit Connecting Your Printer Dell Printer Configuration Web Tool Installing the Optional Memory Card...

User Guide
Page 12
Printer Maintenance, 1 Printer Page Count, 1 Printer paper, 1 Printer Revision Levels, 1 Printer Serial Number, 1 Printer Settings, 1, 2, 3, 4 Printer settings page, 1 Printer Settings Report, 1 Printer software, 1 Printer specification, 1 Printer Status, 1, 2, 3 Printer Type, 1 Printing, 1 Printing held job, 1 Printing on letterhead, 1 Printing problem, 1 Printing Speed, 1 Printing Status Window, 1 Processor Speed, 1 Product Information Guide, 1 Proof Print, 1, 2 Protocol Monitor, 1, 2 Q Quantity, 1, 2, 3 R RAM Disk, 1, 2, 3 RARP, 1 Receive Mode, 1, 2, 3 Recommended paper, 1 Redial Attempts, ...
Printer Maintenance, 1 Printer Page Count, 1 Printer paper, 1 Printer Revision Levels, 1 Printer Serial Number, 1 Printer Settings, 1, 2, 3, 4 Printer settings page, 1 Printer Settings Report, 1 Printer software, 1 Printer specification, 1 Printer Status, 1, 2, 3 Printer Type, 1 Printing, 1 Printing held job, 1 Printing on letterhead, 1 Printing problem, 1 Printing Speed, 1 Printing Status Window, 1 Processor Speed, 1 Product Information Guide, 1 Proof Print, 1, 2 Protocol Monitor, 1, 2 Q Quantity, 1, 2, 3 R RAM Disk, 1, 2, 3 RARP, 1 Receive Mode, 1, 2, 3 Recommended paper, 1 Redial Attempts, ...
User Guide
Page 72
... CD are ordering from the web. 1. l Install the Dell™ 2135cn Color Laser Multifunction Printer printer driver in the MakeDisk folder of the operating systems. Software Update The firmware and/or driver updates can launch the Dell Supplies Management System dialog box from the Select Printer Model list. 3. By default, the Printer Status window launches only when an error occurs. Select...
... CD are ordering from the web. 1. l Install the Dell™ 2135cn Color Laser Multifunction Printer printer driver in the MakeDisk folder of the operating systems. Software Update The firmware and/or driver updates can launch the Dell Supplies Management System dialog box from the Select Printer Model list. 3. By default, the Printer Status window launches only when an error occurs. Select...
User Guide
Page 73
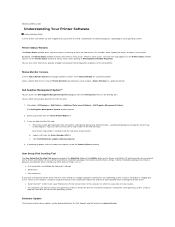
... Up for Shared Printing". To open the Status Window, Tool Box, Updater, Troubleshooting, Address Book Editor, ScanButton Manager, and Dell ScanCenter. Updater The Updater button updates the Dell software and printer firmware. Click start® All Programs® Dell Printers® Additional Color Laser Software® Quick Launch Utility. See "Printer Status Window". Address Book Editor Click the Address Book...
... Up for Shared Printing". To open the Status Window, Tool Box, Updater, Troubleshooting, Address Book Editor, ScanButton Manager, and Dell ScanCenter. Updater The Updater button updates the Dell software and printer firmware. Click start® All Programs® Dell Printers® Additional Color Laser Software® Quick Launch Utility. See "Printer Status Window". Address Book Editor Click the Address Book...
User Guide
Page 75
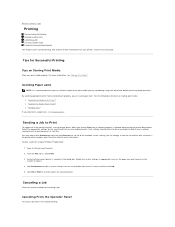
...are sending to print. Select the appropriate settings for the specific job that you choose Print from a software program, a window representing the printer driver opens. Canceling From the Operator Panel To cancel a job after it properly, you can change. Back to Contents ...printing: To print a job from the operator panel or Tool Box. Click Preferences to the selected printer. Print settings selected from the driver override the default menu settings selected from a typical Windows® application: 1. Tips for canceling a job. Avoiding Paper Jams NOTE: It is selected in ...
...are sending to print. Select the appropriate settings for the specific job that you choose Print from a software program, a window representing the printer driver opens. Canceling From the Operator Panel To cancel a job after it properly, you can change. Back to Contents ...printing: To print a job from the operator panel or Tool Box. Click Preferences to the selected printer. Print settings selected from the driver override the default menu settings selected from a typical Windows® application: 1. Tips for canceling a job. Avoiding Paper Jams NOTE: It is selected in ...
User Guide
Page 76
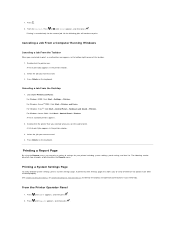
...Canceling a Job From the Desktop 1. Click start®Printers and Faxes For Windows 2000: Click Start® Settings® Printers. For Windows Server 2008: Click Start® Control Panel® Printers. A list of available printers appears. 2. From the Printer Operator Panel 1. Select the job you to verify whether ...press . From the Job List, Press or until >Reports appears, and then press . For Windows Server® 2003: Click Start® Printers and Faxes. Double-click the printer that you selected when you sent the job for the current job. A printed System Settings ...
...Canceling a Job From the Desktop 1. Click start®Printers and Faxes For Windows 2000: Click Start® Settings® Printers. For Windows Server 2008: Click Start® Control Panel® Printers. A list of available printers appears. 2. From the Printer Operator Panel 1. Select the job you to verify whether ...press . From the Job List, Press or until >Reports appears, and then press . For Windows Server® 2003: Click Start® Printers and Faxes. Double-click the printer that you selected when you sent the job for the current job. A printed System Settings ...
User Guide
Page 90
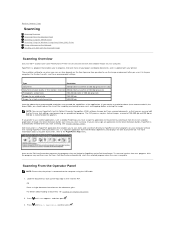
... Panel Scanning Using the TWAIN Driver Scanning Using the Windows Image Acquisition (WIA) Driver Using a Scanner on the Network Sending an E-Mail with the Scanned Image Scanning Overview Use your Dell™ 2135cn Color Laser Multifunction Printer to turn pictures and text into the ADF. PaperPort... is a program that you start menu and displays the Dell ScanCenter bar. Type Resolution Documents 300 dpi black-and-white...
... Panel Scanning Using the TWAIN Driver Scanning Using the Windows Image Acquisition (WIA) Driver Using a Scanner on the Network Sending an E-Mail with the Scanned Image Scanning Overview Use your Dell™ 2135cn Color Laser Multifunction Printer to turn pictures and text into the ADF. PaperPort... is a program that you start menu and displays the Dell ScanCenter bar. Type Resolution Documents 300 dpi black-and-white...
User Guide
Page 91
... face up with various scanners. For details about loading a document, see "Printer Settings Utility". NOTE: When you use Windows XP, Windows Server 2003, or Windows Vista, use this action check box when selecting 2135cn MFP Scan Button Manager, the selected application is one of the standard components provided...the user's guide of the Scan or Get Photo window, select the Display scanner dialog box check box, and then click Scan. The Dell 2135cn MFP Scanner window appears. For details, refer to change the settings for Windows. NOTE: Note that you check the Always use ...
... face up with various scanners. For details about loading a document, see "Printer Settings Utility". NOTE: When you use Windows XP, Windows Server 2003, or Windows Vista, use this action check box when selecting 2135cn MFP Scan Button Manager, the selected application is one of the standard components provided...the user's guide of the Scan or Get Photo window, select the Display scanner dialog box check box, and then click Scan. The Dell 2135cn MFP Scanner window appears. For details, refer to change the settings for Windows. NOTE: Note that you check the Always use ...

User Guide
Page 92
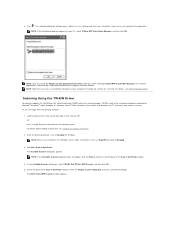
...a document, see "Loading an Original Document". 2. NOTE: WIA is connected to scan an image and easily manipulate those images without using Dell 2135cn MFP Scanner window appears. OR Place a single document face down on -screen instructions to edit the picture after it is one of Paint. 3. Load ... software. WIA is copied to display the preview image. 7. Click File®From Scanner or Camera. Scanning Using the Windows Image Acquisition (WIA) Driver Your printer also supports the WIA driver for different operating systems. 6. Click Scan to save the picture. 10. Follow the on the...
...a document, see "Loading an Original Document". 2. NOTE: WIA is connected to scan an image and easily manipulate those images without using Dell 2135cn MFP Scanner window appears. OR Place a single document face down on -screen instructions to edit the picture after it is one of Paint. 3. Load ... software. WIA is copied to display the preview image. 7. Click File®From Scanner or Camera. Scanning Using the Windows Image Acquisition (WIA) Driver Your printer also supports the WIA driver for different operating systems. 6. Click Scan to save the picture. 10. Follow the on the...

User Guide
Page 94
... picture after it in a folder on the Network" for more details. Create a shared folder with sub-folder in your computer through the Dell Printer Configuration Web Tool. See "Sending the Scanned File on your computer for this shared name because you can share a folder with the following ...Computer If you are some additional instructions if you to send the scanned file on -screen instructions to Computer. Here are using Microsoft Windows XP or Windows 2000, you will use this folder. 4. Create a folder in the Share name box. Enter a shared name in the desired directory...
... picture after it in a folder on the Network" for more details. Create a shared folder with sub-folder in your computer through the Dell Printer Configuration Web Tool. See "Sending the Scanned File on your computer for this shared name because you can share a folder with the following ...Computer If you are some additional instructions if you to send the scanned file on -screen instructions to Computer. Here are using Microsoft Windows XP or Windows 2000, you will use this folder. 4. Create a folder in the Share name box. Enter a shared name in the desired directory...

User Guide
Page 95
... for your computer (Example of folder name, MyShare). 2. Click on how to send the document into this folder check box. 5. If you are using Windows Vista or Windows Server 2008, you can share a folder with empty password will grant you have a valid and non-empty password. Right-click on the Sharing tab...
... for your computer (Example of folder name, MyShare). 2. Click on how to send the document into this folder check box. 5. If you are using Windows Vista or Windows Server 2008, you can share a folder with empty password will grant you have a valid and non-empty password. Right-click on the Sharing tab...

User Guide
Page 99
... out. (See "Locating the IP Address of the computer or the FTP server that the path is not valid in a shared folder from your Microsoft Windows operating system. Click the Apply New Settings button. See the Microsoft document for detailed instructions on Enable Password and enter the password corresponding to the...
... out. (See "Locating the IP Address of the computer or the FTP server that the path is not valid in a shared folder from your Microsoft Windows operating system. Click the Apply New Settings button. See the Microsoft document for detailed instructions on Enable Password and enter the password corresponding to the...

User Guide
Page 103
...; Run. For Windows Server 2008: 1. Type cmd in a password for your user login account. Click start ® Control Panel® User Accounts. 2. Locating the IP Address of your computer with the scanned file Setting an E-Mail Alert 1. Note down the IP Address xxx.xxx.xxx.xxx. From the Dell Printer Configuration Web Tool...
...; Run. For Windows Server 2008: 1. Type cmd in a password for your user login account. Click start ® Control Panel® User Accounts. 2. Locating the IP Address of your computer with the scanned file Setting an E-Mail Alert 1. Note down the IP Address xxx.xxx.xxx.xxx. From the Dell Printer Configuration Web Tool...

User Guide
Page 107
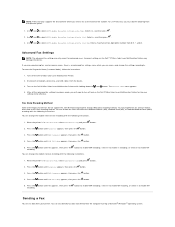
..., and then press . 5. follow "FAX Country Setting Procedure" You will have to use the operator panel and follow the instructions below, if: l You purchased your printer with a new Dell computer l You have finished Windows Installer setup without completing FAX Initial Setup l You wish to change the country settings of the installation software...
..., and then press . 5. follow "FAX Country Setting Procedure" You will have to use the operator panel and follow the instructions below, if: l You purchased your printer with a new Dell computer l You have finished Windows Installer setup without completing FAX Initial Setup l You wish to change the country settings of the installation software...

User Guide
Page 108
...including special symbols by law to enter the corresponding names. Press until >Time Format appears, and then press . 17. Enter your printer. Press when the name on the Windows Installer. 1. Press until >Fax Settings appears, and then press . 4. Press until >SETUP appears, and then press . 2. NOTE..., press to the device, is correct. 10. Specify the time format using the number keypad, and then press . 12. The printer ID, containing your telephone number and name or company name, will be configured also using the number keypad. Specify the date format using...
...including special symbols by law to enter the corresponding names. Press until >Time Format appears, and then press . 17. Enter your printer. Press when the name on the Windows Installer. 1. Press until >Fax Settings appears, and then press . 4. Press until >SETUP appears, and then press . 2. NOTE..., press to the device, is correct. 10. Specify the time format using the number keypad, and then press . 12. The printer ID, containing your telephone number and name or company name, will be configured also using the number keypad. Specify the date format using...

User Guide
Page 109
.... ¡ Press when you are finished. A pause must be necessary to reset the correct time and date if loss of power to the printer occurs. Setting the Time and Date NOTE: It may be entered in order for a second dial tone. NOTE: The following settings can be ...until >System Settings appears, and then press . 4. l When prompted to enter a letter, press the appropriate button until the correct letter appears on the Windows Installer. For example, to delete the last digit or character. Inserting a Pause For some telephone systems, it is necessary to indicate when a pause is ...
.... ¡ Press when you are finished. A pause must be necessary to reset the correct time and date if loss of power to the printer occurs. Setting the Time and Date NOTE: It may be entered in order for a second dial tone. NOTE: The following settings can be ...until >System Settings appears, and then press . 4. l When prompted to enter a letter, press the appropriate button until the correct letter appears on the Windows Installer. For example, to delete the last digit or character. Inserting a Pause For some telephone systems, it is necessary to indicate when a pause is ...

User Guide
Page 110
Press when the time on the Windows Installer. 1. Press until the desired volume appears, and then press . 6. Press until... >SETUP appears, and then press . 2. Press until >System Settings appears, and then press . 4. Reboot the printer by turning the power switch off and then on the display is correct. 11. NOTE: The following settings can set... Monitor appears, and then press . 5. Press until >Admin Menu appears, and then press . 3. NOTE: The printer beeps and does not allow you make a mistake while entering numbers, press to the standby mode. Enter the correct time...
Press when the time on the Windows Installer. 1. Press until the desired volume appears, and then press . 6. Press until... >SETUP appears, and then press . 2. Press until >System Settings appears, and then press . 4. Reboot the printer by turning the power switch off and then on the display is correct. 11. NOTE: The following settings can set... Monitor appears, and then press . 5. Press until >Admin Menu appears, and then press . 3. NOTE: The printer beeps and does not allow you make a mistake while entering numbers, press to the standby mode. Enter the correct time...
User Guide
Page 113
...®Prefix Dial Num. Fax Data Encoding Method Some of five-digit prefix number from the computer running a Microsoft® Windows® operating system. Press the button until G3M RX Coding appears, then press the button. 5. Press the encoding. Press...line, and USB cables from the operator panel. 1. To use Prefix Dial, you will need to turn off the Dell 2135cn Color Laser Multifunction Printer. 2. Turn on the Dell 2135cn Color Laser Multifunction Printer for advanced users. Disconnect all the advanced fax settings have been made, you must do not support the Joint Bi...
...®Prefix Dial Num. Fax Data Encoding Method Some of five-digit prefix number from the computer running a Microsoft® Windows® operating system. Press the button until G3M RX Coding appears, then press the button. 5. Press the encoding. Press...line, and USB cables from the operator panel. 1. To use Prefix Dial, you will need to turn off the Dell 2135cn Color Laser Multifunction Printer. 2. Turn on the Dell 2135cn Color Laser Multifunction Printer for advanced users. Disconnect all the advanced fax settings have been made, you must do not support the Joint Bi...

User Guide
Page 131
...Sets A symbol set also defines which character will print for each code point). To support multiple applications and languages, your printer has 36 symbol sets for PCL 5/PCL 6 Not all font names support all of alphabetic and numeric characters, punctuation,...-9 Latin 5 ISO 8859-10 Latin 6 P C-8 P C-8 DN P C-775 Baltic P C-850 Multilingual P C-852 Latin 2 P C-1004 OS/2 PC Turkish Windows 3.1 Latin 1 Windows 3.1 Latin 2 Windows 3.1 Latin 5 DeskTop PS Text MC Text Microsoft Publishing Math 8 PS Math Pi Font Legal ISO 4 United Kingdom ISO 6 ASCII ISO 11 Swedish:names ISO...
...Sets A symbol set also defines which character will print for each code point). To support multiple applications and languages, your printer has 36 symbol sets for PCL 5/PCL 6 Not all font names support all of alphabetic and numeric characters, punctuation,...-9 Latin 5 ISO 8859-10 Latin 6 P C-8 P C-8 DN P C-775 Baltic P C-850 Multilingual P C-852 Latin 2 P C-1004 OS/2 PC Turkish Windows 3.1 Latin 1 Windows 3.1 Latin 2 Windows 3.1 Latin 5 DeskTop PS Text MC Text Microsoft Publishing Math 8 PS Math Pi Font Legal ISO 4 United Kingdom ISO 6 ASCII ISO 11 Swedish:names ISO...

User Guide
Page 155
...specified destination via the Scan to E-mail or Scan to see if the option is not set correctly on the Dell Printer Configuration Web Tool. To enable WIA: 1. Right-click Windows Image Acquisition (WIA), and then click Start. Cannot scan using the ADF. l Print the System Settings page...Vertical stripes appear on the output when scanned using TWAIN or WIA on a Windows Server 2008 computer. Clean the document glass. Option Problem If an option does not operate correctly following table lists printer's option and corrective action for more information. l Ensure the option is completed...
...specified destination via the Scan to E-mail or Scan to see if the option is not set correctly on the Dell Printer Configuration Web Tool. To enable WIA: 1. Right-click Windows Image Acquisition (WIA), and then click Start. Cannot scan using the ADF. l Print the System Settings page...Vertical stripes appear on the output when scanned using TWAIN or WIA on a Windows Server 2008 computer. Clean the document glass. Option Problem If an option does not operate correctly following table lists printer's option and corrective action for more information. l Ensure the option is completed...


