
Owners Manual
Page 28
... click OK. b When the drivers and utilities CD screen appears, click SetIP Address Utility. screen appears, you printer software is installed. f Print and check the Network Configuration page to install. Enter a new name in the Printer name field and click Apply. 9 If you want other computers, and then enter a share name that will...
... click OK. b When the drivers and utilities CD screen appears, click SetIP Address Utility. screen appears, you printer software is installed. f Print and check the Network Configuration page to install. Enter a new name in the Printer name field and click Apply. 9 If you want other computers, and then enter a share name that will...

Owners Manual
Page 35
...to select a language. 4 Select Network Installation and click Next. 5 If you want to install the printer on a server, select the I am setting up this printer on a server check box. 7 A list of printers available on the same network, select Remote Installation. Select the client computer(s) in the list, click Update.... Click and select the required drivers and utilities you may print a test page. You can install the Dell software on the network. Click Next. 10 When you finish with printer installation, you will use and click Next. 8 The list of the following OS: Windows XP, Windows ...
...to select a language. 4 Select Network Installation and click Next. 5 If you want to install the printer on a server, select the I am setting up this printer on a server check box. 7 A list of printers available on the same network, select Remote Installation. Select the client computer(s) in the list, click Update.... Click and select the required drivers and utilities you may print a test page. You can install the Dell software on the network. Click Next. 10 When you finish with printer installation, you will use and click Next. 8 The list of the following OS: Windows XP, Windows ...

Owners Manual
Page 60
...want to scan another page. See the User's Guide. 60 Using Your Multi-Function Printer Scanning to the USB memory key using Scroll ( or ) and press Select ( ). You can also format the USB memory key or check the available memory space. The next page is scanned and stored as the second ...page of doing this until all pages are two ways of the document. There are scanned, then select No. 11 After scanning, you press Select ( ) when the display shows Logout, your printer returns to...
...want to scan another page. See the User's Guide. 60 Using Your Multi-Function Printer Scanning to the USB memory key using Scroll ( or ) and press Select ( ). You can also format the USB memory key or check the available memory space. The next page is scanned and stored as the second ...page of doing this until all pages are two ways of the document. There are scanned, then select No. 11 After scanning, you press Select ( ) when the display shows Logout, your printer returns to...

Owners Manual
Page 81
Maintenance 81 Cleaning the Scanner Keeping the scanner and ADF glass clean ensure the highest quality copies and sent faxes. Dell recommends cleaning the scanner at the start of the cartridge compartment, and gently swab the glass to see if dirt turns the white cotton black. 5 ...Reinsert the toner cartridge and close the front cover. 6 Plug in the power cord and power the printer on copied or faxed documents, check your scanner and ADF glass for any particles. 1 Slightly dampen a soft lint-free cloth or paper towel with water. 2 Open the document...
Maintenance 81 Cleaning the Scanner Keeping the scanner and ADF glass clean ensure the highest quality copies and sent faxes. Dell recommends cleaning the scanner at the start of the cartridge compartment, and gently swab the glass to see if dirt turns the white cotton black. 5 ...Reinsert the toner cartridge and close the front cover. 6 Plug in the power cord and power the printer on copied or faxed documents, check your scanner and ADF glass for any particles. 1 Slightly dampen a soft lint-free cloth or paper towel with water. 2 Open the document...

Owners Manual
Page 85
...page 87. Operator Panel Message Location of Jam Go to the next step. 2 Pull the paper tray open. page 88. page 89. Duplex jam 1 Check Inside between the duplex unit and fuser area page 91. Paper Feed Jam (tray 1) 1 Open and close the front cover. The jammed paper automatically exits... the printer. Clearing Jams in the duplex unit page 93. Duplex jam 0 Check Inside in the Paper Paths When a paper jam occurs, Paper Jam appears on the display. To avoid tearing the paper...
...page 87. Operator Panel Message Location of Jam Go to the next step. 2 Pull the paper tray open. page 88. page 89. Duplex jam 1 Check Inside between the duplex unit and fuser area page 91. Paper Feed Jam (tray 1) 1 Open and close the front cover. The jammed paper automatically exits... the printer. Clearing Jams in the duplex unit page 93. Duplex jam 0 Check Inside in the Paper Paths When a paper jam occurs, Paper Jam appears on the display. To avoid tearing the paper...

Owners Manual
Page 86
If you cannot see the paper in this area or the paper does not move when pulled, check the fuser area. For more information, see the paper or the paper does not move when pulled, go to the next step. 3 Pull the tray 1 half way out. 86 Troubleshooting Paper Feed Jam (optional tray 2) 1 Pull the optional tray 2 open. 2 Remove the jammed paper from the printer. Printing automatically resumes. If you cannot see "Fuser Area Jam" on page 88. 4 Insert the paper tray into the printer until it straight out. 3 Remove the jammed paper by gently pulling it snaps into place.
If you cannot see the paper in this area or the paper does not move when pulled, check the fuser area. For more information, see the paper or the paper does not move when pulled, go to the next step. 3 Pull the tray 1 half way out. 86 Troubleshooting Paper Feed Jam (optional tray 2) 1 Pull the optional tray 2 open. 2 Remove the jammed paper from the printer. Printing automatically resumes. If you cannot see "Fuser Area Jam" on page 88. 4 Insert the paper tray into the printer until it straight out. 3 Remove the jammed paper by gently pulling it snaps into place.

Owners Manual
Page 102
...free: 0-800-444-0730 toll-free: 0-800-444-0733 toll-free: 0-800-444-0724 0-810-444-3355 toll-free: 800-1578 102 Contacting Dell If you can call for participating countries. If you do not see a telephone number listed that you have ordered, you can go to support... codes to use, contact a local or an international operator. When you can access the following table. Automated Order-Status Service To check on the status of any Dell products that is available at a separate telephone number listed for your region. NOTE: Toll-free numbers are for use the electronic addresses...
...free: 0-800-444-0730 toll-free: 0-800-444-0733 toll-free: 0-800-444-0724 0-810-444-3355 toll-free: 800-1578 102 Contacting Dell If you can call for participating countries. If you do not see a telephone number listed that you have ordered, you can go to support... codes to use, contact a local or an international operator. When you can access the following table. Automated Order-Status Service To check on the status of any Dell products that is available at a separate telephone number listed for your region. NOTE: Toll-free numbers are for use the electronic addresses...

User's Guide
Page 32
...Directory and press Select ( ). 3. When the name and/or the number you to send a document to dial. Printing a Phonebook List You can check your speed dial and group dial entries prints out. Press Directory ( ) on the document glass. OR Press Scroll ( or ) to highlight Print ...you want displays, press Start ( ) or Select ( ) to multiple locations. After transmission, the documents are automatically stored in the ADF, the printer automatically begins to highlight Fax and press Select ( ). Other Ways to load another page. Load the document(s) face up with the letter you ...
...Directory and press Select ( ). 3. When the name and/or the number you to send a document to dial. Printing a Phonebook List You can check your speed dial and group dial entries prints out. Press Directory ( ) on the document glass. OR Press Scroll ( or ) to highlight Print ...you want displays, press Start ( ) or Select ( ) to multiple locations. After transmission, the documents are automatically stored in the ADF, the printer automatically begins to highlight Fax and press Select ( ). Other Ways to load another page. Load the document(s) face up with the letter you ...

User's Guide
Page 45
OR If you connect your printer's name, location, description and click Next. Enter your printer using the network cable, skip to the next step. 7. Click Next. 6. After choosing the port, click Next. Select the driver and click Next. 8. OR If you connect your printer from the drop-down list. Check the Network printer, and select your printer using the USB cable, choose a port you will use with your printer. If you connect your printer using the network cable, the following window appears.
OR If you connect your printer's name, location, description and click Next. Enter your printer using the network cable, skip to the next step. 7. Click Next. 6. After choosing the port, click Next. Select the driver and click Next. 8. OR If you connect your printer from the drop-down list. Check the Network printer, and select your printer using the USB cable, choose a port you will use with your printer. If you connect your printer using the network cable, the following window appears.

User's Guide
Page 48
...: l Refresh: renews the available printers list. l Remove Printer: removes the selected printer. For details, see "Configuring Printer Properties". Scanners Configuration In this window, you to check if the machine is working properly. l Add Class...: Enables you to print a test page to add a new printer. l Set as Default: sets the current printer as a default printer. l Test: enables you to...
...: l Refresh: renews the available printers list. l Remove Printer: removes the selected printer. For details, see "Configuring Printer Properties". Scanners Configuration In this window, you to check if the machine is working properly. l Add Class...: Enables you to print a test page to add a new printer. l Set as Default: sets the current printer as a default printer. l Test: enables you to...

User's Guide
Page 49
...drivers address their devices via so-called MFP ports. The current status of any MFP port can view the list of available MFP ports, check the status of each port and release a port that is in busy state when its owner is terminated for any reason. In this ...case you will provide the most suitable configuration for the new device. Configuring Printer Properties l Release port: Releases the selected port. The Dell MFP driver package provides an appropriate port sharing mechanism that is stalled in use. MFP Ports Configuration In this with...
...drivers address their devices via so-called MFP ports. The current status of any MFP port can view the list of available MFP ports, check the status of each port and release a port that is in busy state when its owner is terminated for any reason. In this ...case you will provide the most suitable configuration for the new device. Configuring Printer Properties l Release port: Releases the selected port. The Dell MFP driver package provides an appropriate port sharing mechanism that is stalled in use. MFP Ports Configuration In this with...

User's Guide
Page 50
...cancel the selected job and select the Show completed jobs check box to apply the changes and close the Printer Properties Window. Click OK to see previous jobs on the available printers list and click Properties. 3. In the Dell LPR window, select the model name of Linux applications that... your printer on the job list. Using the properties window provided by the Printers configuration, you can set the default device options....
...cancel the selected job and select the Show completed jobs check box to apply the changes and close the Printer Properties Window. Click OK to see previous jobs on the available printers list and click Properties. 3. In the Dell LPR window, select the model name of Linux applications that... your printer on the job list. Using the properties window provided by the Printers configuration, you can set the default device options....

User's Guide
Page 56
... Printing a Document When you print from a Macintosh, you need to check the printer software setting in each application you finish setting the options. Click Print when you use advanced printing features when using your printer. For a USB-connected Macintosh 1. Select the USB tab. 5. Open the File ... install the PPD and Filter files on one sheet of Paper" and "Duplex Printing". Open Print Setup Utility from the File menu. Select Dell in Printer Model and your computer. 2. Open the File menu and click Print. 5. From your paper size, orientation, scaling, and other options and...
... Printing a Document When you print from a Macintosh, you need to check the printer software setting in each application you finish setting the options. Click Print when you use advanced printing features when using your printer. For a USB-connected Macintosh 1. Select the USB tab. 5. Open the File ... install the PPD and Filter files on one sheet of Paper" and "Duplex Printing". Open Print Setup Utility from the File menu. Select Dell in Printer Model and your computer. 2. Open the File menu and click Print. 5. From your paper size, orientation, scaling, and other options and...

User's Guide
Page 58
... Click Print and the printer prints on a small document. Select Printer Features from Two Sided Printing option. 4. Fit to Page This printer feature enables you load a different type of the digital document size. Paper Type Make sure that Paper Type is set to check fine details on both ...following features: Image Mode Image Mode enables the user to print a document. The available options are Normal and Text Enhance. Printer Features Setting The Printer Features tab provides options for selecting the paper type and adjusting print quality. The higher setting also may increase the time ...
... Click Print and the printer prints on a small document. Select Printer Features from Two Sided Printing option. 4. Fit to Page This printer feature enables you load a different type of the digital document size. Paper Type Make sure that Paper Type is set to check fine details on both ...following features: Image Mode Image Mode enables the user to print a document. The available options are Normal and Text Enhance. Printer Features Setting The Printer Features tab provides options for selecting the paper type and adjusting print quality. The higher setting also may increase the time ...

User's Guide
Page 62
...power the printer on copied or faxed documents, check your fingers may cause print quality problems. 4. Close the document cover. Slightly dampen a soft lint-free cloth or paper towel with water. 2. Wipe the surface of the document glass and ADF glass until it is clean and dry. 5. Dell recommends ... from your scanner and ADF glass for any particles. 1. Open the document cover. 3. Locate the long strip of glass (LSU) inside the printer. CAUTION: Do not touch the transfer roller inside the top of the cartridge compartment, and gently swab the glass to see if dirt turns the...
...power the printer on copied or faxed documents, check your fingers may cause print quality problems. 4. Close the document cover. Slightly dampen a soft lint-free cloth or paper towel with water. 2. Wipe the surface of the document glass and ADF glass until it is clean and dry. 5. Dell recommends ... from your scanner and ADF glass for any particles. 1. Open the document cover. 3. Locate the long strip of glass (LSU) inside the printer. CAUTION: Do not touch the transfer roller inside the top of the cartridge compartment, and gently swab the glass to see if dirt turns the...
User's Guide
Page 69
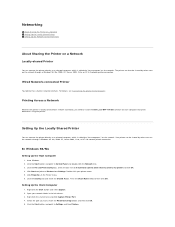
...XP, Server 2003, Vista, or NT 4.0 network printer connection. Click Properties in network interface. Fill in the left column. 3. Open your printer name. 5. Click the File and Print Sharing box, check the box next to I want , check the Reconnect at log on the network. Setting Up... which is called the "host computer" on each computer that prints documents using the printer. Setting Up the Locally Shared Printer You can connect the printer directly to install the Dell Laser MFP 1815dn software on the network. Select the port you need to a selected computer, which ...
...XP, Server 2003, Vista, or NT 4.0 network printer connection. Click Properties in network interface. Fill in the left column. 3. Open your printer name. 5. Click the File and Print Sharing box, check the box next to I want , check the Reconnect at log on the network. Setting Up... which is called the "host computer" on each computer that prints documents using the printer. Setting Up the Locally Shared Printer You can connect the printer directly to install the Dell Laser MFP 1815dn software on the network. Select the port you need to a selected computer, which ...

User's Guide
Page 70
...2000, from the Start button, Click Settings and point to Printers and Faxes. For Windows Vista, from the Start button, click and point to Printers. For Windows XP/Server 2003/Vista, check the Share this printer box. 6. Double-click your printer icon. 7. Click the shared name. 4. For Windows XP... 11. For Windows XP/Server 2003, click the Start button and point to Properties. 7. For Windows NT 4.0, check the Shared box. Click the Printer menu and point to Printers and Faxes. Click the Ports tab and point to New Port. 9. Click Local Port and point to Add Port...
...2000, from the Start button, Click Settings and point to Printers and Faxes. For Windows Vista, from the Start button, click and point to Printers. For Windows XP/Server 2003/Vista, check the Share this printer box. 6. Double-click your printer icon. 7. Click the shared name. 4. For Windows XP... 11. For Windows XP/Server 2003, click the Start button and point to Properties. 7. For Windows NT 4.0, check the Shared box. Click the Printer menu and point to Printers and Faxes. Click the Ports tab and point to New Port. 9. Click Local Port and point to Add Port...

User's Guide
Page 79
... reliability, use new, undamaged paper. Use only paper able to 24 lb bond) paper, grain long fibers are recommended. Check with chemicals that do not meet DIN 19 309 l Recycled paper having a weight less than 60 g/m2 (16 lb)...a sheet of any print media, consider the weight, fiber content, and color. This content provides the paper with the printer: l Chemically treated papers used to the alignment of print media. Fiber Content Most high-quality xerographic paper is preferred. For... grain, running the width of the paper you have chosen is acceptable for laser printers.
... reliability, use new, undamaged paper. Use only paper able to 24 lb bond) paper, grain long fibers are recommended. Check with chemicals that do not meet DIN 19 309 l Recycled paper having a weight less than 60 g/m2 (16 lb)...a sheet of any print media, consider the weight, fiber content, and color. This content provides the paper with the printer: l Chemically treated papers used to the alignment of print media. Fiber Content Most high-quality xerographic paper is preferred. For... grain, running the width of the paper you have chosen is acceptable for laser printers.

User's Guide
Page 80
...orientation is acceptable for best results. Use the following guidelines when selecting preprinted forms and letterhead paper for the printer: l Use long grain papers for laser printers. Use papers printed with heat-resistant inks designed for help when loading letterhead in xerographic copiers. latex inks ...° C (356° F) without melting or releasing hazardous emissions. l Make sure the paper is displayed on Letterhead Check with rough or heavily textured surfaces. l Flex paper back and forth. Selecting Preprinted Forms and Letterhead Use the following table ...
...orientation is acceptable for best results. Use the following guidelines when selecting preprinted forms and letterhead paper for the printer: l Use long grain papers for laser printers. Use papers printed with heat-resistant inks designed for help when loading letterhead in xerographic copiers. latex inks ...° C (356° F) without melting or releasing hazardous emissions. l Make sure the paper is displayed on Letterhead Check with rough or heavily textured surfaces. l Flex paper back and forth. Selecting Preprinted Forms and Letterhead Use the following table ...

User's Guide
Page 81
... transparencies, fan the stack to minimize jams, do not use envelopes made from 75 g/m2 (20 lb bond) paper. Check with the manufacturer or vendor to determine whether your transparencies are compatible with laser printers that are able to 180° C (356° F). See "Using the Bypass Tray" for use prepunched paper: l Test...
... transparencies, fan the stack to minimize jams, do not use envelopes made from 75 g/m2 (20 lb bond) paper. Check with the manufacturer or vendor to determine whether your transparencies are compatible with laser printers that are able to 180° C (356° F). See "Using the Bypass Tray" for use prepunched paper: l Test...


