
Product Manual
Page 3
... ...15 HOME > WAN > Other>PPTP 16 HOME > WAN > Other>L2TP 17 HOME > WAN > Other>BigPond Cable 18 HOME > LAN ...19 HOME > DHCP...20 ADVANCED > VIRTUAL SERVER 21 ADVANCED > APPLICATIONS 23 ADVANCED > FILTERS > IP FILTERS 25 ADVANCED > FILTERS > MAC FILTERS 26 ADVANCED > Parental Control > URL BLOCKING 27 ADVANCED > Parental Control > DOMAIN BLOCKING... ...40 TOOLS > SYSTEM...41 TOOLS > FIRMWARE...42 TOOLS > MISC...43 TOOLS > Cable Test ...44 STATUS > DEVICE INFORMATION 45 STATUS > LOG ...46 STATUS > Statistics ...47 STATUS > Printer Info ...48 STATUS > Active Session 49 2
... ...15 HOME > WAN > Other>PPTP 16 HOME > WAN > Other>L2TP 17 HOME > WAN > Other>BigPond Cable 18 HOME > LAN ...19 HOME > DHCP...20 ADVANCED > VIRTUAL SERVER 21 ADVANCED > APPLICATIONS 23 ADVANCED > FILTERS > IP FILTERS 25 ADVANCED > FILTERS > MAC FILTERS 26 ADVANCED > Parental Control > URL BLOCKING 27 ADVANCED > Parental Control > DOMAIN BLOCKING... ...40 TOOLS > SYSTEM...41 TOOLS > FIRMWARE...42 TOOLS > MISC...43 TOOLS > Cable Test ...44 STATUS > DEVICE INFORMATION 45 STATUS > LOG ...46 STATUS > Statistics ...47 STATUS > Printer Info ...48 STATUS > Active Session 49 2

Product Manual
Page 5
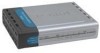
... D-Link DI-604UP enables users to share the Internet connection. After completing the steps outlined in the Quick Installation Guide (included in more securely. The print server is a 4-port Ethernet Broadband Router. It also comes equipped with multiple computers and devices. The DI-604UP is designed to help you will have the ability to a USB printer and includes a Windows -based print server software...
... D-Link DI-604UP enables users to share the Internet connection. After completing the steps outlined in the Quick Installation Guide (included in more securely. The print server is a 4-port Ethernet Broadband Router. It also comes equipped with multiple computers and devices. The DI-604UP is designed to help you will have the ability to a USB printer and includes a Windows -based print server software...
Product Manual
Page 8
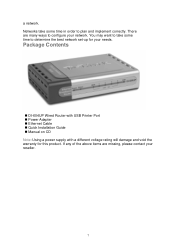
a network. You may want to take some time to configure your network. If any of the above items are many ways to determine the best network set-up for this product. There are missing, please contact your needs. Package Contents „ DI-604UP Wired Router with USB Printer Port „ Power Adapter „ Ethernet Cable „ Quick Installation Guide „ Manual on CD Note: Using a power supply with a different voltage rating will damage and void the warranty for your reseller. 7 Networks take some time in order to plan and implement correctly.
a network. You may want to take some time to configure your network. If any of the above items are many ways to determine the best network set-up for this product. There are missing, please contact your needs. Package Contents „ DI-604UP Wired Router with USB Printer Port „ Power Adapter „ Ethernet Cable „ Quick Installation Guide „ Manual on CD Note: Using a power supply with a different voltage rating will damage and void the warranty for your reseller. 7 Networks take some time in order to plan and implement correctly.

Product Manual
Page 10
....) WAN port socket (CAT5 Ethernet RJ-45 cable). Hardware Description Rear Panel WAN Port Reset Button USB Port LAN Ports Power Adapter Reset Used to restore the DI-604UP back to share the printer on , do not disconnect the power 2. This is where you will then automatically reboot itself. ...9 This feature is connected to the printer using a USB cable. USB Port Connect to a hub, switch or network -...
....) WAN port socket (CAT5 Ethernet RJ-45 cable). Hardware Description Rear Panel WAN Port Reset Button USB Port LAN Ports Power Adapter Reset Used to restore the DI-604UP back to share the printer on , do not disconnect the power 2. This is where you will then automatically reboot itself. ...9 This feature is connected to the printer using a USB cable. USB Port Connect to a hub, switch or network -...

Product Manual
Page 49
These printers are using the DI-604UP as a print server. The status of Printers that are defined by their Queue Name and Printer Name. STATUS > Printer Info Printer Info The Printer Info window displays a list of these printers is located to the right under the heading Printer Server Status. 48
These printers are using the DI-604UP as a print server. The status of Printers that are defined by their Queue Name and Printer Name. STATUS > Printer Info Printer Info The Printer Info window displays a list of these printers is located to the right under the heading Printer Server Status. 48

Product Manual
Page 53
Go to do this. The following explanation will not function properly. Click Next. 52 Remember to enter the same Queue Name on the PC as well. Click on your LAN. Appendix Installing a Printer on your DI-604UP for Windows XP The DI-604UP can be used as a print server for the printer as your router displays or the printer will guide you have installed the USB printer through the steps needed to Start > Printer s and Faxes. Once you through the router, the user must set up the computer on the LAN for devices on Add a printer.
Go to do this. The following explanation will not function properly. Click Next. 52 Remember to enter the same Queue Name on the PC as well. Click on your LAN. Appendix Installing a Printer on your DI-604UP for Windows XP The DI-604UP can be used as a print server for the printer as your router displays or the printer will guide you have installed the USB printer through the steps needed to Start > Printer s and Faxes. Once you through the router, the user must set up the computer on the LAN for devices on Add a printer.

Product Manual
Page 54
Click Next. 53 Select Local printer attached to select Standard TCP/IP Port, as shown in the illustration.) Click Next. The Add Standard TCP/IP Printer Port Wizard window opens. Select Create a port: and from the pull-down menu select the correct port for your printer. (Most users will want to the computer. (Deselect Automatically detect and install my Plug and Play printer if it has been selected.) Click Next.
Click Next. 53 Select Local printer attached to select Standard TCP/IP Port, as shown in the illustration.) Click Next. The Add Standard TCP/IP Printer Port Wizard window opens. Select Create a port: and from the pull-down menu select the correct port for your printer. (Most users will want to the computer. (Deselect Automatically detect and install my Plug and Play printer if it has been selected.) Click Next.

Product Manual
Page 55
Next, add a Queue Name, such as "lp1." The Wizard requires additional information to differentiate it from other devices in the Protocol section. Click OK. 54 In the Configure Standard TCP/IP Port Monitor window, first select the LPR radio dial in the Port Name field. Add a name to the router IP address to complete the process. In the Additional Port Information Required window, select the Custom radio dial and click the Settings button. Enter the IP Address of the DI-604UP (default: 192.168.0.1) in the Printer Name or IP Address field.
Next, add a Queue Name, such as "lp1." The Wizard requires additional information to differentiate it from other devices in the Protocol section. Click OK. 54 In the Configure Standard TCP/IP Port Monitor window, first select the LPR radio dial in the Port Name field. Add a name to the router IP address to complete the process. In the Additional Port Information Required window, select the Custom radio dial and click the Settings button. Enter the IP Address of the DI-604UP (default: 192.168.0.1) in the Printer Name or IP Address field.

Product Manual
Page 56
Select and highlight the correct driver for your printer. (If the correct driver is not displayed, insert the CD or floppy disk that came with your printer and click Have Disk.) Click Next. 55 Please confirm the printer port information. Click Finish. . The Wizard will return to the Additional Port Information Required window after the settings have been entered in the Port Settings tab on the Configure Standard TCP/IP Port Monitor window.
Select and highlight the correct driver for your printer. (If the correct driver is not displayed, insert the CD or floppy disk that came with your printer and click Have Disk.) Click Next. 55 Please confirm the printer port information. Click Finish. . The Wizard will return to the Additional Port Information Required window after the settings have been entered in the Port Settings tab on the Configure Standard TCP/IP Port Monitor window.

Product Manual
Page 57
At this screen, you can change the name of your printer. Click Next. At this screen, you must enter a share name if you have the option of entering a location and description of the printer (optional). At this screen, you want to share the printer with other network users. Click Next. Click Next. 56
At this screen, you can change the name of your printer. Click Next. At this screen, you must enter a share name if you have the option of entering a location and description of the printer (optional). At this screen, you want to share the printer with other network users. Click Next. Click Next. 56

Product Manual
Page 58
A successful printing will display the printer icon as You have chosen the correct driver. Click Next. When the test page has printed, click Go to print a test page. Click Finish. This screen gives you have successfully added a printer. 57 A successful installation will confirm that you information about your printer. Select Yes, to Start > Printers and Faxes.
A successful printing will display the printer icon as You have chosen the correct driver. Click Next. When the test page has printed, click Go to print a test page. Click Finish. This screen gives you have successfully added a printer. 57 A successful installation will confirm that you information about your printer. Select Yes, to Start > Printers and Faxes.

Product Manual
Page 59
... to the Add Printer Wizard. The following explanation will open the Welcome to enter the same Queue Name on the PC as well. Click Next. 58 Installing a Printer on your DI-604UP for Windows 2000 The DI-604UP can be used as a print server for devices on the LAN for the printer as your router displays or the printer will not...
... to the Add Printer Wizard. The following explanation will open the Welcome to enter the same Queue Name on the PC as well. Click Next. 58 Installing a Printer on your DI-604UP for Windows 2000 The DI-604UP can be used as a print server for devices on the LAN for the printer as your router displays or the printer will not...

Product Manual
Page 60
Click Next. Make sure that the printer is turned on and the network is the Welcome to appear is properly configured. Click Next. Click Next. 59 Then the user must choose the type of installation for the wizard. The next window to the Add Standard TCP/IP Printer Port Wizard. In the Local or Network Printer window, choose "Local printer attached to select "Standard TCP/IP Port". Choose "Create a new port" and use the pull-down menu to this computer."
Click Next. Make sure that the printer is turned on and the network is the Welcome to appear is properly configured. Click Next. Click Next. 59 Then the user must choose the type of installation for the wizard. The next window to the Add Standard TCP/IP Printer Port Wizard. In the Local or Network Printer window, choose "Local printer attached to select "Standard TCP/IP Port". Choose "Create a new port" and use the pull-down menu to this computer."

Product Manual
Page 61
... to the router IP address to continue. 60 Click Next. Enter the IP address (default: 192.168.0.1) of the DI-604UP to complete the process. Next, add the Queue Name that was automatically generated for you by your DI-604UP (in the Protocol section. After clicking Next, the Wizard requires additional information to the "Printer Name...
... to the router IP address to continue. 60 Click Next. Enter the IP address (default: 192.168.0.1) of the DI-604UP to complete the process. Next, add the Queue Name that was automatically generated for you by your DI-604UP (in the Protocol section. After clicking Next, the Wizard requires additional information to the "Printer Name...

Product Manual
Page 62
The final window will be the Completing the Add Standard TCP/IP Printer Port Wizard window, as shown to complete the wizard. 61 Here you can view the properties of the added printer, including the IP address, protocol and queue name. Click Finish to the left.
The final window will be the Completing the Add Standard TCP/IP Printer Port Wizard window, as shown to complete the wizard. 61 Here you can view the properties of the added printer, including the IP address, protocol and queue name. Click Finish to the left.
