
User Manual
Page 38
Domain Name: The Administrator may enter the name of the DNS Server to be assigned to enable DHCP support. - 38 - Step 4. Client IP Address Range 2: Enter the starting and the ending IP address dynamically assigning to DHCP clients. (Optional) Step 6. Step 5. Client... IP Address Range 1: Enter the starting and the ending IP address dynamically assigning to DHCP clients. Click OK to the Internal network. Enabling DHCP Support: Step 1. Domain Name Server: Enter in the IP address of the Internal network domain if preferred. Step 3. In the Dynamic IP Address window, ...
Domain Name: The Administrator may enter the name of the DNS Server to be assigned to enable DHCP support. - 38 - Step 4. Client IP Address Range 2: Enter the starting and the ending IP address dynamically assigning to DHCP clients. (Optional) Step 6. Step 5. Client... IP Address Range 1: Enter the starting and the ending IP address dynamically assigning to DHCP clients. Click OK to the Internal network. Enabling DHCP Support: Step 1. Domain Name Server: Enter in the IP address of the Internal network domain if preferred. Step 3. In the Dynamic IP Address window, ...
User Manual
Page 74
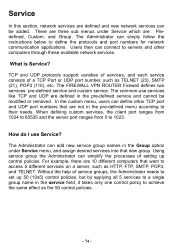
... network services can be modified or removed. For example, there are defined in the pre-defined service and cannot be added. TCP and UDP protocols support varieties of services, and each service consists of service groups, the Administrator needs to set up control policies. How do I use services like TCP and...
... network services can be modified or removed. For example, there are defined in the pre-defined service and cannot be added. TCP and UDP protocols support varieties of services, and each service consists of service groups, the Administrator needs to set up control policies. How do I use services like TCP and...

User Manual
Page 97
... server network addresses created in the External section of the Incoming window are: Source: source networks which are specified in Virtual Server menu. Service: services supported by Virtual Servers (or Mapped IP). Step 2: The fields of the Address menu, or all the external network addresses. Enter Incoming window: Step 1: Click Incoming...
... server network addresses created in the External section of the Incoming window are: Source: source networks which are specified in Virtual Server menu. Service: services supported by Virtual Servers (or Mapped IP). Step 2: The fields of the Address menu, or all the external network addresses. Enter Incoming window: Step 1: Click Incoming...

User Manual
Page 103
... DMZ under Policy menu to enter the External To DMZ window. The External To DMZ table will show up displaying currently defined policies. Service: services supported by servers in DMZ section of the Address menu and Mapped IP addresses of the Address menu, or all the external network addresses.
... DMZ under Policy menu to enter the External To DMZ window. The External To DMZ table will show up displaying currently defined policies. Service: services supported by servers in DMZ section of the Address menu and Mapped IP addresses of the Address menu, or all the external network addresses.

User Manual
Page 109
... external networks travelling through the FIREWALL VPN - 109 - Destination: destination networks, which are : Source: source network addresses which is the external network address Service: services supported by Servers of the Address window. Action: control actions, to permit or deny packets from DMZ networks to External (WAN) networks. Entering the DMZ To...
... external networks travelling through the FIREWALL VPN - 109 - Destination: destination networks, which are : Source: source network addresses which is the external network address Service: services supported by Servers of the Address window. Action: control actions, to permit or deny packets from DMZ networks to External (WAN) networks. Entering the DMZ To...

User Manual
Page 137
Therefore users from the external network can access servers of the physical server that supports the services. virtual server to the private internal IP address of the internal network by requesting the service from the IP address provided by Virtual Server. - 137 -
Therefore users from the external network can access servers of the physical server that supports the services. virtual server to the private internal IP address of the internal network by requesting the service from the IP address provided by Virtual Server. - 137 -
User Manual
Page 150
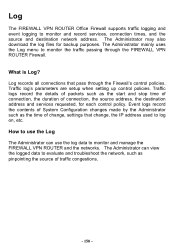
... to use the log data to monitor the traffic passing through the Firewall's control policies. What is Log? Log The FIREWALL VPN ROUTER Office Firewall supports traffic logging and event logging to monitor and record services, connection times, and the source and destination network address.
... to use the log data to monitor the traffic passing through the Firewall's control policies. What is Log? Log The FIREWALL VPN ROUTER Office Firewall supports traffic logging and event logging to monitor and record services, connection times, and the source and destination network address.

User Manual
Page 157
Log Report The Log Report Step 1. Step 2. Log Mail Configuration:When the Log Mail files accumulated up to 300Kbytes, router will notify administrator by email with the traffic log and event log.。 Note: Before enabling this function, system will transmit the Traffic Log and the Event Log simultaneously to enable E-mail Alarm in Administrator. Click Log Log Report. Syslog Settings:If you enable this function, you have to the server which supports Syslog function. - 157 -
Log Report The Log Report Step 1. Step 2. Log Mail Configuration:When the Log Mail files accumulated up to 300Kbytes, router will notify administrator by email with the traffic log and event log.。 Note: Before enabling this function, system will transmit the Traffic Log and the Event Log simultaneously to enable E-mail Alarm in Administrator. Click Log Log Report. Syslog Settings:If you enable this function, you have to the server which supports Syslog function. - 157 -

User Manual
Page 158
Enable Log Mail Support & Syslog Message Log Mail Configuration /Enable Log Mail Support Step 1. Check to Admin -Select Enable E-mail Alert Notification under E-Mail Settings. Firstly, go to enable Syslog Message. Click OK. - 158 - Step 2. Go to receive the Syslog message. Enter the Host IP Address and Host Port number to LOG Log Report. Enter the e-mail address to enable Log Mail Support. Click OK. Step 4. Click OK. Check to receive the alarm notification. System Settings/Enable Syslog Message Step 3.
Enable Log Mail Support & Syslog Message Log Mail Configuration /Enable Log Mail Support Step 1. Check to Admin -Select Enable E-mail Alert Notification under E-Mail Settings. Firstly, go to enable Syslog Message. Click OK. - 158 - Step 2. Go to receive the Syslog message. Enter the Host IP Address and Host Port number to LOG Log Report. Enter the e-mail address to enable Log Mail Support. Click OK. Step 4. Click OK. Check to receive the alarm notification. System Settings/Enable Syslog Message Step 3.


