
Product Manual
Page 4
...1.2.3. The Default Administrator Account 29 2.1.3. Logging to Factory Defaults 74 3. Overview 60 2.3.2. Activating RADIUS Accounting... Advanced Log Settings 59 2.3. RADIUS Accounting Security 62 2.3.6. RADIUS Accounting and High Availability 62 2.3.7. Accounting and System Shutdowns 63 2.3.9. The Web Interface 29 2.1.4. Secure Copy 45 2.1.7. Log Messages 55 2.2.3. ... 2.5.1. Interim Accounting Messages 62 2.3.4. IP Addresses 77 3.1.3. Auto-Generated Address Objects 81 3.1.6. NetDefendOS State Engine Packet Flow 23 2. RADIUS Accounting 60...
...1.2.3. The Default Administrator Account 29 2.1.3. Logging to Factory Defaults 74 3. Overview 60 2.3.2. Activating RADIUS Accounting... Advanced Log Settings 59 2.3. RADIUS Accounting Security 62 2.3.6. RADIUS Accounting and High Availability 62 2.3.7. Accounting and System Shutdowns 63 2.3.9. The Web Interface 29 2.1.4. Secure Copy 45 2.1.7. Log Messages 55 2.2.3. ... 2.5.1. Interim Accounting Messages 62 2.3.4. IP Addresses 77 3.1.3. Auto-Generated Address Objects 81 3.1.6. NetDefendOS State Engine Packet Flow 23 2. RADIUS Accounting 60...
Product Manual
Page 12
...RLB 169 4.7. Add OSPF Interface Objects 192 4.10. Listing Modified Configuration Objects 53 2.10. Enabling the D-Link NTP Server 136 3.28. Creating a Policy-based Routing Table 162 4.4. Adding a Configuration Object 52 2.7. ...IP Rule 121 3.17. Setting the Current Date and Time 132 3.21. Manually Triggering a Time Synchronization 135 3.25. Exporting the Default Route into the Main Routing Table 192 4.11. Address Translation 198 12 Enabling remote management via HTTPS 33 2.2. Undeleting a Configuration Object 53 2.9. Sending SNMP Traps to Factory...
...RLB 169 4.7. Add OSPF Interface Objects 192 4.10. Listing Modified Configuration Objects 53 2.10. Enabling the D-Link NTP Server 136 3.28. Creating a Policy-based Routing Table 162 4.4. Adding a Configuration Object 52 2.7. ...IP Rule 121 3.17. Setting the Current Date and Time 132 3.21. Manually Triggering a Time Synchronization 135 3.25. Exporting the Default Route into the Main Routing Table 192 4.11. Address Translation 198 12 Enabling remote management via HTTPS 33 2.2. Undeleting a Configuration Object 53 2.9. Sending SNMP Traps to Factory...
Product Manual
Page 30
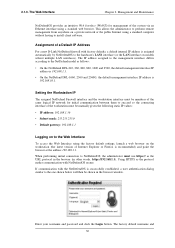
... 2.1.3. The factory default username and 30 Using HTTPS as follows: • On the NetDefend DFL-210, 260, 800, 860, 1600 and 2500, the default management interface IP address is 192.168.1.1. • On the NetDefend DFL-1660, 2560 and 2560G, the default management interface IP address is ...the following static IP values: • IP address: 192.168.1.30 • Subnet mask: 255.255.255.0 • Default gateway: 192.168.1.1 Logging on to succeed so the connecting interface of a Default IP Address For a new D-Link NetDefend firewall with NetDefendOS secure. When performing ...
... 2.1.3. The factory default username and 30 Using HTTPS as follows: • On the NetDefend DFL-210, 260, 800, 860, 1600 and 2500, the default management interface IP address is 192.168.1.1. • On the NetDefend DFL-1660, 2560 and 2560G, the default management interface IP address is ...the following static IP values: • IP address: 192.168.1.30 • Subnet mask: 255.255.255.0 • Default gateway: 192.168.1.1 Logging on to succeed so the connecting interface of a Default IP Address For a new D-Link NetDefend firewall with NetDefendOS secure. When performing ...
Product Manual
Page 75
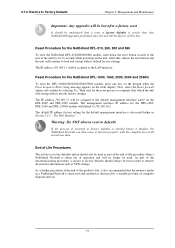
... rear of resetting to 192.168.10.1. Any NetDefendOS upgrades performed since the unit left the factory will be assigned to factory defaults is taken out of computer disposal services. 75 The IP address 192.168.1.1 will be understood that a reset to the default management interface LAN1 on...1660/2500/2560/2560G models, press any key on the keypad when the Press keypad to Factory Defaults Chapter 2. After that . Reset Procedure for the NetDefend DFL-210, 260, 800 and 860 To reset the NetDefend DFL-210/260/800/860 models, hold down the reset button located at the end of the ...
... rear of resetting to 192.168.10.1. Any NetDefendOS upgrades performed since the unit left the factory will be assigned to factory defaults is taken out of computer disposal services. 75 The IP address 192.168.1.1 will be understood that a reset to the default management interface LAN1 on...1660/2500/2560/2560G models, press any key on the keypad when the Press keypad to Factory Defaults Chapter 2. After that . Reset Procedure for the NetDefend DFL-210, 260, 800 and 860 To reset the NetDefend DFL-210/260/800/860 models, hold down the reset button located at the end of the ...

Product Manual
Page 543
...Limit setting, 522 Reassembly Timeout setting, 522 Reconf Failover Time (HA) setting, 495 Reject IP rule, 119 Relay MPLS setting, 221 Relay Spanning-tree BPDUs setting, 218, 220 restore to factory defaults, 74 restoring configuration backups, 73 reverse path forwarding (see multicast) reverse route lookup..., 143 routes added at startup, 149 static, 143 the all-nets route, 150 S SA (see security association) Alphabetical Index SafeStream, 311 SAT, 343 all-to-1 mapping, 350 IP rules, 119 multiple address translation, 348 multiplex rule, 195 port forwarding, 343 second rule destination, 343 ...
...Limit setting, 522 Reassembly Timeout setting, 522 Reconf Failover Time (HA) setting, 495 Reject IP rule, 119 Relay MPLS setting, 221 Relay Spanning-tree BPDUs setting, 218, 220 restore to factory defaults, 74 restoring configuration backups, 73 reverse path forwarding (see multicast) reverse route lookup..., 143 routes added at startup, 149 static, 143 the all-nets route, 150 S SA (see security association) Alphabetical Index SafeStream, 311 SAT, 343 all-to-1 mapping, 350 IP rules, 119 multiple address translation, 348 multiplex rule, 195 port forwarding, 343 second rule destination, 343 ...


