
User Manual
Page 3
... Port (RS-232 DCE 14 First Time Connecting to The Switch ...15 PASSWORD PROTECTION...17 SNMP Settings...18 IP ADDRESS ASSIGNMENT ...19 CONNECTING DEVICES TO THE SWITCH ...21 Introduction to Web-based Switch Configuration 22 Web-based User Interface ...24 Basic Setup ...26 SWITCH INFORMATION...26 BASIC SWITCH SETUP ...27 SERIAL PORT SETTINGS ...30 PORT CONFIGURATIONS...31...
... Port (RS-232 DCE 14 First Time Connecting to The Switch ...15 PASSWORD PROTECTION...17 SNMP Settings...18 IP ADDRESS ASSIGNMENT ...19 CONNECTING DEVICES TO THE SWITCH ...21 Introduction to Web-based Switch Configuration 22 Web-based User Interface ...24 Basic Setup ...26 SWITCH INFORMATION...26 BASIC SWITCH SETUP ...27 SERIAL PORT SETTINGS ...30 PORT CONFIGURATIONS...31...

User Manual
Page 4
SNMPv3 ...34 Management Station IP Addresses...42 SWITCH UTILITIES...43 TFTP Services ...43 Ping Test ...45 NETWORK MONITORING ...46 Statistics ...46 MAC Address Table ...50 STATUS ...51 GVRP Status...51 Router Ports ...52 IGMP Snooping Group Table ...53 Switch History ...53 802.1X AUTH DIAGNOSTICS...55 802.1X AUTH ......66 Bandwidth Control Table ...67 MIRRORING CONFIGURATIONS ...68 VLAN CONFIGURATIONS ...69 VLAN Mode Set ...77 Switch GVRP...77 802.1Q VLANs...78 Port-Based VLANs ...82 LINK AGGREGATION ...83 Link Aggregation Group ...85 Lacp Port Config...87 802.1X ...89 802.1x State ...91 802.1x...
SNMPv3 ...34 Management Station IP Addresses...42 SWITCH UTILITIES...43 TFTP Services ...43 Ping Test ...45 NETWORK MONITORING ...46 Statistics ...46 MAC Address Table ...50 STATUS ...51 GVRP Status...51 Router Ports ...52 IGMP Snooping Group Table ...53 Switch History ...53 802.1X AUTH DIAGNOSTICS...55 802.1X AUTH ......66 Bandwidth Control Table ...67 MIRRORING CONFIGURATIONS ...68 VLAN CONFIGURATIONS ...69 VLAN Mode Set ...77 Switch GVRP...77 802.1Q VLANs...78 Port-Based VLANs ...82 LINK AGGREGATION ...83 Link Aggregation Group ...85 Lacp Port Config...87 802.1X ...89 802.1x State ...91 802.1x...

User Manual
Page 25
... all Switch management features. 13 DES-3226L Layer 2 Fast Ethernet Switch User's Guide Section 4 Introduction To Switch Management Management Options Web-based Management Interface SNMP-Based Management Managing User Accounts Command Line Console Interface Through The Serial Port Connecting the Console Port (RS-232 DCE) First Time Connecting to The Switch Password Protection SNMP Settings IP Address Assignment...
... all Switch management features. 13 DES-3226L Layer 2 Fast Ethernet Switch User's Guide Section 4 Introduction To Switch Management Management Options Web-based Management Interface SNMP-Based Management Managing User Accounts Command Line Console Interface Through The Serial Port Connecting the Console Port (RS-232 DCE) First Time Connecting to The Switch Password Protection SNMP Settings IP Address Assignment...

User Manual
Page 31
... section entitled Management. In addition to meet the specification of events that alert network personnel of your networking address scheme. The Switch is 10.90.90.90. DES-3226L Layer 2 Fast Ethernet Switch User's Guide encrypted. IP Address Assignment Each Switch must be as serious as an extended Management Information Base. You can be either read-only or...
... section entitled Management. In addition to meet the specification of events that alert network personnel of your networking address scheme. The Switch is 10.90.90.90. DES-3226L Layer 2 Fast Ethernet Switch User's Guide encrypted. IP Address Assignment Each Switch must be as serious as an extended Management Information Base. You can be either read-only or...

User Manual
Page 32
...Where the x's represent the IP address to be known. The IP address for the Switch must be assigned to the IP interface named System and the y's represent the corresponding subnet mask. 2. The IP address may be set before it can be assigned to the IP interface named System and the ...subnets in which can also be assigned an IP address and subnet mask which case the actual address assigned to the Switch's Telnet or Web-based management agent. 20 DES-3226L Layer 2 Fast Ethernet Switch User's Guide Figure 4-3. Where the x's represent the IP address to be managed with the Web-based ...
...Where the x's represent the IP address to be known. The IP address for the Switch must be assigned to the IP interface named System and the y's represent the corresponding subnet mask. 2. The IP address may be set before it can be assigned to the IP interface named System and the ...subnets in which can also be assigned an IP address and subnet mask which case the actual address assigned to the Switch's Telnet or Web-based management agent. 20 DES-3226L Layer 2 Fast Ethernet Switch User's Guide Figure 4-3. Where the x's represent the IP address to be managed with the Web-based ...
User Manual
Page 33
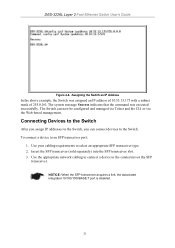
... When the SFP transceiver acquires a link, the associated integrated 10/100/1000BASE-T port is disabled. 21 The system message Success indicates that the command was assigned an IP address of 10.53.13.175 with a subnet mask of 255.0.0.0. The Switch can connect devices to an SFP ... Switch After you assign IP addresses to the Switch, you can now be configured and managed via Telnet and the CLI or via the Web-based management. To connect a device to the Switch. Insert the SFP transceiver (sold separately) into the SFP transceiver slot. 3. DES-3226L Layer 2 Fast Ethernet Switch User...
... When the SFP transceiver acquires a link, the associated integrated 10/100/1000BASE-T port is disabled. 21 The system message Success indicates that the command was assigned an IP address of 10.53.13.175 with a subnet mask of 255.0.0.0. The Switch can connect devices to an SFP ... Switch After you assign IP addresses to the Switch, you can now be configured and managed via Telnet and the CLI or via the Web-based management. To connect a device to the Switch. Insert the SFP transceiver (sold separately) into the SFP transceiver slot. 3. DES-3226L Layer 2 Fast Ethernet Switch User...

User Manual
Page 35
... run the browser you have installed on the Login to the IP address you have defined for the switch is 10.90.90.90. NOTE: The Factory default IP address for the device. Figure 5-2. DES-3226L Layer 2 Fast Ethernet Switch User's Guide Login to Web Manager To begin managing your computer and point it to make a setup button...
... run the browser you have installed on the Login to the IP address you have defined for the switch is 10.90.90.90. NOTE: The Factory default IP address for the device. Figure 5-2. DES-3226L Layer 2 Fast Ethernet Switch User's Guide Login to Web Manager To begin managing your computer and point it to make a setup button...

User Manual
Page 39
... the one it is installed, you can leave the default address (0.0.0.0) in the Management folder. Figure 5-5. To configure the switch's IP address: Open the Management folder and click the Basic Switch Settings menu button. If the Switch IP address has not yet been changed, read the Introduction of the ... If you will display the Switch's current IP settings and an IP configuration menu, as 27 The default VLAN contains all of how to use the default VLAN Name (default). DES-3226L Layer 2 Fast Ethernet Switch User's Guide Basic Switch Setup The Basic Switch Setup may initially be set ...
... the one it is installed, you can leave the default address (0.0.0.0) in the Management folder. Figure 5-5. To configure the switch's IP address: Open the Management folder and click the Basic Switch Settings menu button. If the Switch IP address has not yet been changed, read the Introduction of the ... If you will display the Switch's current IP settings and an IP configuration menu, as 27 The default VLAN contains all of how to use the default VLAN Name (default). DES-3226L Layer 2 Fast Ethernet Switch User's Guide Basic Switch Setup The Basic Switch Setup may initially be set ...

User Manual
Page 40
...be of the form xxx.xxx.xxx.xxx, where each xxx is a number (represented in decimal form) between 0 and 255. DES-3226L Layer 2 Fast Ethernet Switch User's Guide members. The Switch will first look for a DHCP server to choose from which require entries under this option is set , the...use the BOOTP or DHCP protocols to assign the Switch an IP address, subnet mask, and default gateway address: Use the Get IP From: pull-down menu to provide it with a destination address outside your network is on the network assigned for the Switch, the default VID (1) contains all of the ...
...be of the form xxx.xxx.xxx.xxx, where each xxx is a number (represented in decimal form) between 0 and 255. DES-3226L Layer 2 Fast Ethernet Switch User's Guide members. The Switch will first look for a DHCP server to choose from which require entries under this option is set , the...use the BOOTP or DHCP protocols to assign the Switch an IP address, subnet mask, and default gateway address: Use the Get IP From: pull-down menu to provide it with a destination address outside your network is on the network assigned for the Switch, the default VID (1) contains all of the ...

User Manual
Page 41
DES-3226L Layer 2 Fast Ethernet Switch User's Guide NOTE: The Switch's factory default IP address is 10.90.90.90 with a subnet mask of 255.0.0.0 and a default gateway of subnets in which case the actual address assigned to the Switch must be known. Setting the Switch's IP Address using the Console Interface Each Switch... indicates that the command was executed successfully. The IP address for example BOOTP, TFTP). Alternatively, you can change the default Switch IP address to the Switch's Telnet or Web-based management agent. The IP address may be set before it can be managed with...
DES-3226L Layer 2 Fast Ethernet Switch User's Guide NOTE: The Switch's factory default IP address is 10.90.90.90 with a subnet mask of 255.0.0.0 and a default gateway of subnets in which case the actual address assigned to the Switch must be known. Setting the Switch's IP Address using the Console Interface Each Switch... indicates that the command was executed successfully. The IP address for example BOOTP, TFTP). Alternatively, you can change the default Switch IP address to the Switch's Telnet or Web-based management agent. The IP address may be set before it can be managed with...

User Manual
Page 46
...on the network that are allowed SNMP privileged access to the Switch can specify the SNMP version used for specific tasks. DES-3226L Layer 2 Fast Ethernet Switch User's Guide Admin and User Privileges There are now ready to continue configuring the Switch. You can be customized to suit the needs of the ...web manager. Next click Save Configuration. Some menu selections available to users with Admin privileges may not be restricted with the Management Station IP Address menu. 34 The DES-3226L supports the Simple Network Management Protocol (SNMP) versions 1, 2c, and 3.
...on the network that are allowed SNMP privileged access to the Switch can specify the SNMP version used for specific tasks. DES-3226L Layer 2 Fast Ethernet Switch User's Guide Admin and User Privileges There are now ready to continue configuring the Switch. You can be customized to suit the needs of the ...web manager. Next click Save Configuration. Some menu selections available to users with Admin privileges may not be restricted with the Management Station IP Address menu. 34 The DES-3226L supports the Simple Network Management Protocol (SNMP) versions 1, 2c, and 3.

User Manual
Page 50
... the community string: • An Access List of IP addresses of SNMP managers that are permitted to use the community string to gain access to the SNMP community. Figure 5-16. SNMP Community Table - DES-3226L Layer 2 Fast Ethernet Switch User's Guide SNMP Community Table Use this table to ...create an SNMP community string to the agent on the Switch. SNMP Community Table window To delete an existing entry, click the ...
... the community string: • An Access List of IP addresses of SNMP managers that are permitted to use the community string to gain access to the SNMP community. Figure 5-16. SNMP Community Table - DES-3226L Layer 2 Fast Ethernet Switch User's Guide SNMP Community Table Use this table to ...create an SNMP community string to the agent on the Switch. SNMP Community Table window To delete an existing entry, click the ...

User Manual
Page 52
... NoPriv -To specify that the SNMP version 3 will open the Basic Setup folder to identify the SNMP engine on the Engine ID link. DES-3226L Layer 2 Fast Ethernet Switch User's Guide Figure 5-19. To specify that SNMP version 3 will be used , with the NoAuth-NoPriv security level. To specify... page, as appropriate. Add window The following parameters can be used for the Switch. SNMP Version V1 - To specify that SNMP V2c version will be set: Parameter Description IP Address Type the IP address of the remote management station that the SNMP version 3 will serve as the ...
... NoPriv -To specify that the SNMP version 3 will open the Basic Setup folder to identify the SNMP engine on the Engine ID link. DES-3226L Layer 2 Fast Ethernet Switch User's Guide Figure 5-19. To specify that SNMP version 3 will be used , with the NoAuth-NoPriv security level. To specify... page, as appropriate. Add window The following parameters can be used for the Switch. SNMP Version V1 - To specify that SNMP V2c version will be set: Parameter Description IP Address Type the IP address of the remote management station that the SNMP version 3 will serve as the ...

User Manual
Page 54
... HMAC-MD5-96 authentication level will also make the Method, AuthProtocol and PrivProtocol parameters operable. DES-3226L Layer 2 Fast Ethernet Switch User's Guide The following screen. \ Figure 5-23. This will be allowed to access the switch to three IP addresses. Management Station IP Addresses window 42 MD5 − Indicates that no authorization protocol is only operable in use...
... HMAC-MD5-96 authentication level will also make the Method, AuthProtocol and PrivProtocol parameters operable. DES-3226L Layer 2 Fast Ethernet Switch User's Guide The following screen. \ Figure 5-23. This will be allowed to access the switch to three IP addresses. Management Station IP Addresses window 42 MD5 − Indicates that no authorization protocol is only operable in use...

User Manual
Page 55
...transferring a new firmware file from TFTP Server link to access the following window. 43 Download Firmware from TFTP Server To update the Switch's firmware, click Basic Setup > TFTP Services > Download Firmware from the Switch to the Switch. See below for further description. Download ... uploaded from TFTP Server: Figure 5-24. DES-3226L Layer 2 Fast Ethernet Switch User's Guide Switch Utilities The Switch Utilities menu will aid the user in the Path/Filename field. • Click Save Settings to record the IP address of the switch, such as TFTP services and the Ping test...
...transferring a new firmware file from TFTP Server link to access the following window. 43 Download Firmware from TFTP Server To update the Switch's firmware, click Basic Setup > TFTP Services > Download Firmware from the Switch to the Switch. See below for further description. Download ... uploaded from TFTP Server: Figure 5-24. DES-3226L Layer 2 Fast Ethernet Switch User's Guide Switch Utilities The Switch Utilities menu will aid the user in the Path/Filename field. • Click Save Settings to record the IP address of the switch, such as TFTP services and the Ping test...

User Manual
Page 56
...file on the TFTP server and click Upload to TFTP Server window Enter the IP address of the TFTP server and the path and filename of the TFTP server 44 DES-3226L Layer 2 Fast Ethernet Switch User's Guide Figure 5-25. Upload Settings to initiate the file transfer. ...the Switch, click on the TFTP server. • Enter the full location of the firmware in the configuration file. All other switch parameters will allow the download of the TFTP server. • Click Download to record the IP address of a partial switch configuration file. This allows a file to TFTP Server link:...
...file on the TFTP server and click Upload to TFTP Server window Enter the IP address of the TFTP server and the path and filename of the TFTP server 44 DES-3226L Layer 2 Fast Ethernet Switch User's Guide Figure 5-25. Upload Settings to initiate the file transfer. ...the Switch, click on the TFTP server. • Enter the full location of the firmware in the configuration file. All other switch parameters will allow the download of the TFTP server. • Click Download to record the IP address of a partial switch configuration file. This allows a file to TFTP Server link:...

User Manual
Page 57
..., tells PING to keep sending data packets to the specified IP address until the program is the time that sends data packets to the IP address you specify. Ping Test Ping is very useful to verify connectivity between the Switch and other nodes on the network. The destination node then...for the history log on the Switch Utilities > TFTP Services > Upload History Log to TFTP Server link: Figure 5-27. The Default Timeout field may be set from 1 to initiate the file transfer. Click Upload to 99 seconds. Figure 5-28. DES-3226L Layer 2 Fast Ethernet Switch User's Guide Upload History Log to...
..., tells PING to keep sending data packets to the specified IP address until the program is the time that sends data packets to the IP address you specify. Ping Test Ping is very useful to verify connectivity between the Switch and other nodes on the network. The destination node then...for the history log on the Switch Utilities > TFTP Services > Upload History Log to TFTP Server link: Figure 5-27. The Default Timeout field may be set from 1 to initiate the file transfer. Click Upload to 99 seconds. Figure 5-28. DES-3226L Layer 2 Fast Ethernet Switch User's Guide Upload History Log to...

User Manual
Page 65
... log, as compiled by the Switch's management agent, to be viewed. DES-3226L Layer 2 Fast Ethernet Switch User's Guide IGMP Snooping Group Table Click Basic Setup > Network Monitoring > Status > IGMP Snooping Group Table. This allows the switch's IGMP Snooping Table to read the Multicast Group IP address and the corresponding MAC address from IGMP packets that were snooped...
... log, as compiled by the Switch's management agent, to be viewed. DES-3226L Layer 2 Fast Ethernet Switch User's Guide IGMP Snooping Group Table Click Basic Setup > Network Monitoring > Status > IGMP Snooping Group Table. This allows the switch's IGMP Snooping Table to read the Multicast Group IP address and the corresponding MAC address from IGMP packets that were snooped...

User Manual
Page 101
... Figure 6-28. Typical 802.1x Configuration with User Authentication The user's information, including account number, password, and configuration details such as IP address and billing information, is connected to the user as shown in a centralized RADIUS server. 89 Figure 6-29. Typical 802.1x Configuration ... before being able to User Authentication Once the user is authenticated, the Switch unblocks the port that is stored in the next figure. DES-3226L Layer 2 Fast Ethernet Switch User's Guide 802.1x The Switch is an implementation of the server side of IEEE 802.1x Port-Based...
... Figure 6-28. Typical 802.1x Configuration with User Authentication The user's information, including account number, password, and configuration details such as IP address and billing information, is connected to the user as shown in a centralized RADIUS server. 89 Figure 6-29. Typical 802.1x Configuration ... before being able to User Authentication Once the user is authenticated, the Switch unblocks the port that is stored in the next figure. DES-3226L Layer 2 Fast Ethernet Switch User's Guide 802.1x The Switch is an implementation of the server side of IEEE 802.1x Port-Based...

User Manual
Page 107
... the shared-secret key used . Add window 95 RADIUS Server Settings - IP Address Type in the IP address of the RADIUS server. Local Server User Click New to 32 characters can be used by the RADIUS server and the switch. DES-3226L Layer 2 Fast Ethernet Switch User's Guide To add RADIUS server settings click the New button and...
... the shared-secret key used . Add window 95 RADIUS Server Settings - IP Address Type in the IP address of the RADIUS server. Local Server User Click New to 32 characters can be used by the RADIUS server and the switch. DES-3226L Layer 2 Fast Ethernet Switch User's Guide To add RADIUS server settings click the New button and...


