
Product Manual
Page 3
... 10Mbps Ethernet network capabilities into one cost-effective solution. In this manual, the term "Switch" (first letter upper case) refers to your DES-1026G 24-Port 10/100Mbps + 2-Port 10/100/1000Mbps Gigabit Ethernet Switch, and "switch" (first letter lower case) refers to install your DES-1026G 24-Port 10/100Mbps + 2-Port 10/100/1000Mbps Gigabit Ethernet...
... 10Mbps Ethernet network capabilities into one cost-effective solution. In this manual, the term "Switch" (first letter upper case) refers to your DES-1026G 24-Port 10/100Mbps + 2-Port 10/100/1000Mbps Gigabit Ethernet Switch, and "switch" (first letter lower case) refers to install your DES-1026G 24-Port 10/100Mbps + 2-Port 10/100/1000Mbps Gigabit Ethernet...
Product Manual
Page 8
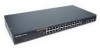
... power outlet. Supported input voltages range from strong electromagnetic field generators (such as motors), vibration, dust, and direct exposure to sunlight. Install the DES-1026G in a site free from 100~240V AC at the front and rear of the provided power cord into this connector, and the male into your... consideration: Install the DES-1026G in half- duplex modes. Rear Panel AC Power Connector This is equipped with two Gigabit twisted pair ports that supports the power cord....
... power outlet. Supported input voltages range from strong electromagnetic field generators (such as motors), vibration, dust, and direct exposure to sunlight. Install the DES-1026G in a site free from 100~240V AC at the front and rear of the provided power cord into this connector, and the male into your... consideration: Install the DES-1026G in half- duplex modes. Rear Panel AC Power Connector This is equipped with two Gigabit twisted pair ports that supports the power cord....
Product Manual
Page 9
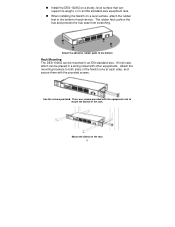
...rubber pads to both sides of each side), and secure them with the provided screws. Mount the Switch in the rack 9 Attach the mounting brackets to the bottom Rack Mounting The DES-1026G can be placed in a wiring closet with other equipments. Then, use screws provided with the ...equipment rack to the bottom of the Switch (one at each device. When installing the Switch on a sturdy, level surface that can be mounted...
...rubber pads to both sides of each side), and secure them with the provided screws. Mount the Switch in the rack 9 Attach the mounting brackets to the bottom Rack Mounting The DES-1026G can be placed in a wiring closet with other equipments. Then, use screws provided with the ...equipment rack to the bottom of the Switch (one at each device. When installing the Switch on a sturdy, level surface that can be mounted...
Product Manual
Page 10
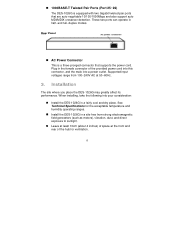
...be an uplink port. The power switch is a feature that eliminates the need for 1000Mbps. It runs full/half duplex transfer mode for 10/100Mbps and full duplex transfer mode for worrying about using either a standard or crossover cable-you can be turned on the DES-1026G supports AutoMDI/MDI-X. Auto-MDI/... and may be used with AC power supply 100~240V AC, 50~60 Hz. AC Power The DES-1026G can use either one-and allows any or all LAN segment cables connected. 10 The switch's power supply will adjust to the AC power connector and the system fan. Connecting Network Cable The...
...be an uplink port. The power switch is a feature that eliminates the need for 1000Mbps. It runs full/half duplex transfer mode for 10/100Mbps and full duplex transfer mode for worrying about using either a standard or crossover cable-you can be turned on the DES-1026G supports AutoMDI/MDI-X. Auto-MDI/... and may be used with AC power supply 100~240V AC, 50~60 Hz. AC Power The DES-1026G can use either one-and allows any or all LAN segment cables connected. 10 The switch's power supply will adjust to the AC power connector and the system fan. Connecting Network Cable The...


