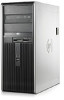
Service Reference Guide: HP Compaq dc7900 Business PC
Page 7
...53 Hard Drive Capacities ...53 6 Identifying the Chassis, Routine Care, and Disassembly Preparation Chassis Designations ...54 Convertible Minitower (CMT 54 Small Form Factor (SFF 55 Ultra-Slim Desktop (USDT 55 Electrostatic Discharge Information ...56 Generating Static ...56 Preventing Electrostatic Damage to Equipment 56 Personal Grounding ...Lock 64 External Security Devices ...66 Installing a Security Lock 66 Cable Lock ...66 Padlock ...67 HP Business PC Security Lock 68 Computer Access Panel ...70 Front Bezel ...71 Bezel Blanks ...72 Cable Management ...73 Cable Connections ...74 ...
Service Reference Guide: HP Compaq dc7900 Business PC
Page 9
... ...175 Using the Small Form Factor Computer in a Tower Orientation 176 9 Removal and Replacement Procedures Ultra-Slim Desktop (USDT) Chassis Preparation for Disassembly ...178 External Security Devices ...179 Installing a Security Lock 179 Cable Lock ...179 Padlock ...180 HP Business PC Security Lock 180 Computer Access Panel ...183 Front Bezel ...184 Bezel Blank ...185 Installing Additional...
Service Reference Guide: HP Compaq dc7900 Business PC
Page 192
Figure 9-4 Securing the Cable to a Fixed Object 180 Chapter 9 Removal and Replacement Procedures Ultra-Slim Desktop (USDT) Chassis Fasten the security cable by looping it around a stationary object. Padlock Figure 9-3 Installing a Padlock HP Business PC Security Lock 1.
Service Reference Guide: HP Compaq dc7900 Business PC
Page 207
... instructions. 4. Press in a carrier under the optical drive. 1. Remove the optical drive. Hard Drive NOTE: The Ultra-Slim Desktop supports only 2.5-inch Serial ATA (SATA) internal hard drives; Before you have this CD set, select Start > HP Backup and Recovery and create it now. Figure 9-20 Unlocking the Hard Drive Carrier Hard Drive 195...
Service Reference Guide: HP Compaq dc7900 Business PC
Page 218
... retaining screws should be found on page 186). 5. Remove the memory modules (Installing Additional Memory on the Web at: http://h18000.www1.hp.com/support/files. Figure 9-35 Removing the I /O panel cage: a. Secure the heatsink to the system board and system board tray...latest system BIOS can be tightened in place (1). Prepare the computer for disassembly (Preparation for reinstallation. 206 Chapter 9 Removal and Replacement Procedures Ultra-Slim Desktop (USDT) Chassis Remove the hard drive cage (Hard Drive Cage on page 183). 3. Position the heatsink atop the processor. 5. System ...
Service Reference Guide: HP Compaq dc7900 Business PC
Page 222
... (Front Bezel on page 178). 2. Replace the access panel. 210 Chapter 9 Removal and Replacement Procedures Ultra-Slim Desktop (USDT) Chassis Rotate the plate 90 degrees (2) then press the logo plate back into the bezel. Figure 9-39 Rotating the HP Logo Plate 6. Prepare the computer for disassembly (Preparation for Disassembly on page 184). 4. Remove the...