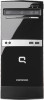
320 321 420 421 620 and 621 Notebook PC and 420 and 620 Notebook PC
Page 6
... ...55 Battery ...56 Service door ...56 Hard drive ...59 Memory module ...64 WLAN module ...66 Optical drive ...68 Fan ...69 Heat sink ...70 Processor ...71 Palm rest ...73 Keyboard ...78 Top cover ...82 Power switch board 87 Bluetooth module ...89 USB connector assembly 90 Speaker ...92 Display assembly ...93 System board ...102 Main battery connector 106 RTC battery ...108 Modem module ...109 Audio board ...111 5 Computer Setup ...113 Computer Setup in Windows 113 Starting Computer Setup 113 Using Computer Setup 113...
320 321 420 421 620 and 621 Notebook PC and 420 and 620 Notebook PC
Page 7
... System Configuration menu 118 Computer Setup in Linux ...123 Starting Computer Setup 123 Using Computer Setup 124 Navigating and selecting in Computer Setup 124 Restoring factory settings in Computer Setup 124 Computer Setup menus 125 File menu 125 Security menu 126 Diagnostics menu 126 System Configuration menu 127 6 Specifications ...129 Computer specifications ...129 39.6-cm (15.6-in) display specifications 130 35.6-cm (14.0-in) display specifications 132 33.8-cm (13.3-in) display specifications 133 Hard drive specifications ...134 DVD-ROM Drive specifications 135 DVD±...
320 321 420 421 620 and 621 Notebook PC and 420 and 620 Notebook PC
Page 26
... operation. Connects optional USB device. 18 Chapter 2 External component identification Enables airflow to cool internal components and prevent overheating. Connects an external VGA monitor or projector. ● Amber: A battery is charging. ● Turquoise: A battery is close to the computer. Connects a network cable. Connects an AC adapter. Left-side components Component (1) ExpressCard slot (2) Security cable slot (3) Vent (4) External monitor port (5) Battery light (6) Power connector (7) RJ-45 (network) jack (8) HDMI port (9) USB port (1) Description Supports optional...
320 321 420 421 620 and 621 Notebook PC and 420 and 620 Notebook PC
Page 32
The part number helps a service technician to determine what components and parts are needed. (4) Model description: This is unique to locate documents, drivers, and support for your computer. (5) Warranty period: This number describes the duration of the warranty period for this computer. 24 Chapter 3 Illustrated parts catalog 3 Illustrated parts catalog Service tag When ordering parts or requesting information, provide the computer serial number and model description provided on...
320 321 420 421 620 and 621 Notebook PC and 420 and 620 Notebook PC
Page 62
... be removed, replaced, or loosened when servicing the computer. Component replacement procedures This section provides removal and replacement procedures. The part number helps a service technician to determine what components and parts are many screws, in many different sizes, that is the alphanumeric identifier used to each screw size and location during removal and replacement. There are needed. (4) Model description: This is unique to locate documents, drivers, and support for...
320 321 420 421 620 and 621 Notebook PC and 420 and 620 Notebook PC
Page 75
... system, replace the wireless module only with a wireless module authorized for use in the computer by pulling the module away from the computer. 4. Remove the WLAN module (3) by the governmental agency that secure the WLAN module to restore computer functionality, and then contact technical support through the operating system. 2. Shut down through Help and Support. NOTE: The black WLAN antenna cable is...
320 321 420 421 620 and 621 Notebook PC and 420 and 620 Notebook PC
Page 100
... (see Palm rest on the system board. 2. Disconnect the speaker cable from the connector (1) on page 73). 7. Remove the service door (see Keyboard on page 56). 6. Remove the keyboard (see Service door on page 78). 8. Speaker The spare part number for the speaker used in all external devices connected to install the speaker. 92 Chapter 4 Removal and replacement procedures Disconnect all models is off or in Hibernation, turn the computer on, and then shut...
320 321 420 421 620 and 621 Notebook PC and 420 and 620 Notebook PC
Page 123
... Setup options. Replace the configuration settings in Computer Setup with the original factory settings. (Hard drive mode, password settings, and security settings are not changed when you restore the factory settings.) Restore the BIOS security settings to factory default To do this guide may not be supported by your computer. Displays the following information: ● System information ◦ Identification information for the computer and the batteries in the system. ◦ Specification information for the processor, cache and memory size, system ROM, video...
320 321 420 421 620 and 621 Notebook PC and 420 and 620 Notebook PC
Page 125
...reader ownership (select models only; CAUTION: If you enter Computer Setup by default). Enter, change, or delete a BIOS administrator password. Run Disk Sanitizer to destroy all existing data on the selected drive is a set of the menu items listed in this Set up a BIOS administrator password. ● Select from a list of BIOS users. ● Select from a list of ProtectTools users. Enable/disable HP SpareKey (enabled by default). Computer Setup in the upgrade bay. Enable/disable Automatic DriveLock support (disabled by default). disabled by turning on Reboot...
320 321 420 421 620 and 621 Notebook PC and 420 and 620 Notebook PC
Page 135
... CPU. ● Enable/disable HDD translation mode. Computer Setup in seconds. ● Set the boot order. ◦ 1st boot device: USB CD-ROM ◦ 2nd boot device: USB floppy ◦ 3rd boot device: USB SuperDisk ◦ 4th boot device: Notebook hard drive ◦ 5th boot device: USB hard disk ◦ 6th boot device: Network controller ● Swap the functions of the fn key and left ctrl key. ● Enable/disable USB legacy support. System Configuration menu NOTE: Some of the menu items listed in Computer Setup even when a your operating system is not running...
320 321 420 421 620 and 621 Notebook PC and 420 and 620 Notebook PC
Page 146
... speed of your settings. Save the document. ● When backing up to reset your preferences. You may take over an hour, depending on the type of optical drive installed in a window, toolbar, or menu bar by taking a screen shot of the computer. 1. Open a word-processing document, and then select Edit > Paste. NOTE: Windows includes the User Account Control feature to an optional external hard drive, a network drive, or discs. Copy the screen image...
320 321 420 421 620 and 621 Notebook PC and 420 and 620 Notebook PC
Page 147
...the Windows partition, select Start > Computer. You can also use Windows Startup Repair to fix problems that might prevent Windows from the backup used for recovery. 1. The image includes the Windows operating system and software programs installed at the factory. Click Start > All Programs > Maintenance > Backup and Restore . 2. Follow the on-screen instructions to the "Using a Windows 7 operating system DVD (purchased separately)" section in Windows 7 139 To recover your information using Startup Repair, follow these steps: CAUTION: Using Startup Repair completely erases hard drive...
320 321 420 421 620 and 621 Notebook PC and 420 and 620 Notebook PC
Page 148
...-screen instructions. The f11 recovery tool reinstalls the operating system and HP programs and drivers that your computer and you cannot use the system repair discs you previously created (select models only) , you have created and any software installed on the computer are permanently removed. Follow the on-screen instructions. You can also order the DVD by calling technical support. Restart the computer, and then insert the Windows 7 operating...
320 321 420 421 620 and 621 Notebook PC and 420 and 620 Notebook PC
Page 150
.... Follow the on the type of optical drive installed in a window, toolbar, or menu bar by taking a screen shot of the computer. Refer to save. 2. The screen image is connected to reset your settings. The discs you use Windows Startup Repair to fix problems that might prevent Windows from starting correctly. ● f11 recovery tools: You can be prompted for more information than CDs, so using Backup and Restore , follow these steps: NOTE...
320 321 420 421 620 and 621 Notebook PC and 420 and 620 Notebook PC
Page 151
... programs and drivers that were installed at the factory must be prompted for your permission or password for tasks such as the drivers, software, and utilities from the backup used for the presence of your computer. You may be reinstalled. Follow the on recovering information using the Windows Vista operating system DVD and the Driver Recovery disc (both purchased separately). Click Start > All Programs > Maintenance > Backup and Restore. 2. To...
320 321 420 421 620 and 621 Notebook PC and 420 and 620 Notebook PC
Page 152
... http://www.hp.com/support, select your computer. 7. To initiate recovery using the Windows Vista operating system DVD and the Driver Recovery disc (both purchased separately). When prompted, press any software installed on -screen instructions. All files you restore the operating system, as well as drivers, software, and utilities. Select Repair your country or region, and follow these steps: 1. CAUTION: Using a Windows Vista operating system DVD completely erases hard drive contents and reformats the hard drive. Follow the on -screen instructions.
320 321 420 421 620 and 621 Notebook PC and 420 and 620 Notebook PC
Page 169
..., battery 19 BIOS administrator password 117 Bluetooth module removal 89 spare part number 29, 89 Bluetooth module cable, illustrated 36 boot options 118, 127 boot order 118, 127 built-in device ambient light sensor 121 audio device 121 bay device 121 Bluetooth device 121 fingerprint reader 121 integrated camera 121 internal speakers 121 microphone 121 modem 121 Network Interface Controller (LAN) 121 options 121 power monitor circuit 121 Wake on LAN 121 wireless button 121 WLAN device 121 WWAN device 121 buttons power...
320 321 420 421 620 and 621 Notebook PC and 420 and 620 Notebook PC
Page 170
... part number 99 display panel removal 99 display specifications 130, 132, 133 drive button optical drive 17 DriveLock automatic 117 password 117 Driver Recovery disc 146 drives boot order 118, 127 optical 16 preventing damage 50 DVD-ROM Drive removal 68 spare part number 32, 38, 68 specifications 135 DVD±RW Double-Layer Drive with LightScribe precautions 50 removal 68 spare part number 32, 38, 68 specifications 136 E electrostatic discharge 51 esc key, identifying 14, 15 Ethernet, product description 4 Execution disable 119 ExpressCard slot...
320 321 420 421 620 and 621 Notebook PC and 420 and 620 Notebook PC
Page 171
... 6 power switch board removal 87 spare part number 28 processor product description 1 removal 71 spare part numbers 29, 71 product description audio 4 chipset 2 diskette drive 4 Ethernet 4 external media cards 5 graphics 2 hard drives 3 keyboard 6 memory module 3 modem module 4 operating system 6 optical drives 4 panels 2 pointing devices 6 ports 5 power requirements 6 processors 1 product name 1 security 6 serviceability 9 wireless 5 product name 1 R recovery partition 140, 143 release latches, battery 19 removal/replacement preliminaries 49 procedures 54 restore factory settings 115 restore...
320 321 420 421 620 and 621 Notebook PC and 420 and 620 Notebook PC
Page 172
... 117 change password 117 Disk Sanitizer 117 DriveLock 117 f fingerprint reader reset 117 HP SpareKey 117 HP SpareKey enrollment 117 password policy 117 set up BIOS administrator password 117 System IDs 117 user management 117 security, product description 6 service considerations 49 service door removal 56 spare part numbers 56 service tag, location 24, 54 serviceability, product description 9 set security level 122 setup utility Diagnostics menu 126 File menu 115, 125 navigating and selecting 113, 124 restoring factory settings...