User Manual
Page 1
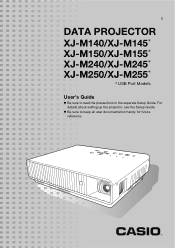
E DATA PROJECTOR XJ-M140/XJ-M145* XJ-M150/XJ-M155* XJ-M240/XJ-M245* XJ-M250/XJ-M255* * USB Port Models User's Guide z Be sure to keep all user documentation handy for future reference. z Be sure to read the precautions in the separate Setup Guide. For details about setting up the projector, see the Setup Guide.
E DATA PROJECTOR XJ-M140/XJ-M145* XJ-M150/XJ-M155* XJ-M240/XJ-M245* XJ-M250/XJ-M255* * USB Port Models User's Guide z Be sure to keep all user documentation handy for future reference. z Be sure to read the precautions in the separate Setup Guide. For details about setting up the projector, see the Setup Guide.
User Manual
Page 3
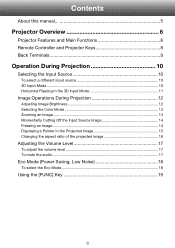
Contents About this manual 5 Projector Overview 6 Projector Features and Main Functions 6 Remote Controller and Projector Keys 8 Back Terminals 9 Operation During Projection 10 Selecting the Input Source 10 To select a different input source 10 3D Input Mode ...10 Horizontal Flipping in ...
Contents About this manual 5 Projector Overview 6 Projector Features and Main Functions 6 Remote Controller and Projector Keys 8 Back Terminals 9 Operation During Projection 10 Selecting the Input Source 10 To select a different input source 10 3D Input Mode ...10 Horizontal Flipping in ...
User Manual
Page 4
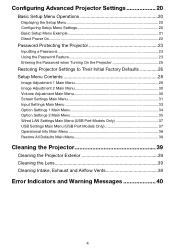
...Settings 20 Basic Setup Menu Example 21 Direct Power On...22 Password Protecting the Projector 23 Inputting a Password 23 Using the Password Feature 23 Entering the Password when Turning On the Projector 25 Restoring Projector Settings to Their Initial Factory Defaults 26 Setup Menu Contents 28 Image Adjustment 1... Main Menu (USB Port Models Only 37 Operational Info Main Menu 38 Restore All Defaults Main Menu 38 Cleaning the Projector 39 Cleaning the Projector Exterior 39 Cleaning the Lens 39 Cleaning Intake, Exhaust and Airflow Vents 39 Error Indicators and Warning Messages 40 4
...Settings 20 Basic Setup Menu Example 21 Direct Power On...22 Password Protecting the Projector 23 Inputting a Password 23 Using the Password Feature 23 Entering the Password when Turning On the Projector 25 Restoring Projector Settings to Their Initial Factory Defaults 26 Setup Menu Contents 28 Image Adjustment 1... Main Menu (USB Port Models Only 37 Operational Info Main Menu 38 Restore All Defaults Main Menu 38 Cleaning the Projector 39 Cleaning the Projector Exterior 39 Cleaning the Lens 39 Cleaning Intake, Exhaust and Airflow Vents 39 Error Indicators and Warning Messages 40 4
User Manual
Page 5
... Ratio Setting and Projection Image 48 Supported Signals 52 Using Wired LAN to Control the Projector (XJ-M145, XJ-M155, XJ-M245, XJ-M255 55 Supported External Devices 55 Controlling the Projector from a Computer 55 Projector RS-232C Control 60 Connecting the Projector to a Computer 60 Specifications 62 About this manual are explained using the remote controller that...
... Ratio Setting and Projection Image 48 Supported Signals 52 Using Wired LAN to Control the Projector (XJ-M145, XJ-M155, XJ-M245, XJ-M255 55 Supported External Devices 55 Controlling the Projector from a Computer 55 Projector RS-232C Control 60 Connecting the Projector to a Computer 60 Specifications 62 About this manual are explained using the remote controller that...
User Manual
Page 6
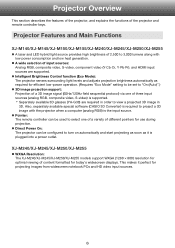
... it is supported. * Separately available 3D glasses (YA-G30) are supported. Projector Features and Main Functions XJ-M140/XJ-M145/XJ-M150/XJ-M155/XJ-M240/XJ-M245/XJ-M250/XJ-M255 z A laser and LED hybrid light source provides high brightness of different ...pointers for use during projection. Also, separately available special software (CASIO 3D Converter) is the input source. Projector Overview This section describes the features of the projector...
... it is supported. * Separately available 3D glasses (YA-G30) are supported. Projector Features and Main Functions XJ-M140/XJ-M145/XJ-M150/XJ-M155/XJ-M240/XJ-M245/XJ-M250/XJ-M255 z A laser and LED hybrid light source provides high brightness of different ...pointers for use during projection. Also, separately available special software (CASIO 3D Converter) is the input source. Projector Overview This section describes the features of the projector...
User Manual
Page 7
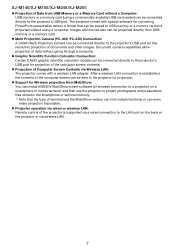
... projected directly from USB memory or a memory card. z Graphic Scientific Function Calculator Connection: Certain CASIO graphic scientific calculator models can even make projection impossible. The projector comes with a wireless LAN adapter. z Support for Wireless projection from MobiShow: You can install ...or can be connected directly to USB memory or a memory card and projected without going through a computer. z Projector operation via wireless LAN. 7 XJ-M145/XJ-M155/XJ-M245/XJ-M255 z Projection of Data from USB Memory or a Memory Card without a Computer: USB memory or a ...
... projected directly from USB memory or a memory card. z Graphic Scientific Function Calculator Connection: Certain CASIO graphic scientific calculator models can even make projection impossible. The projector comes with a wireless LAN adapter. z Support for Wireless projection from MobiShow: You can install ...or can be connected directly to USB memory or a memory card and projected without going through a computer. z Projector operation via wireless LAN. 7 XJ-M145/XJ-M155/XJ-M245/XJ-M255 z Projection of Data from USB Memory or a Memory Card without a Computer: USB memory or a ...
User Manual
Page 8
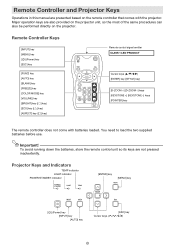
... [D-ZOOM -] keys [KEYSTONE +] [KEYSTONE -] keys [POINTER] key The remote controller does not come with the projector. Major operation keys are also provided on the projector unit, so the most of the same procedures can also be performed directly on the remote controller that comes with ...unit so its keys are not pressed inadvertently. Remote Controller and Projector Keys Operations in this manual are presented based on the projector. You need to load the two supplied batteries before use. Projector Keys and Indicators TEMP indicator LIGHT indicator POWER/STANDBY indicator [ENTER]...
... [D-ZOOM -] keys [KEYSTONE +] [KEYSTONE -] keys [POINTER] key The remote controller does not come with the projector. Major operation keys are also provided on the projector unit, so the most of the same procedures can also be performed directly on the remote controller that comes with ...unit so its keys are not pressed inadvertently. Remote Controller and Projector Keys Operations in this manual are presented based on the projector. You need to load the two supplied batteries before use. Projector Keys and Indicators TEMP indicator LIGHT indicator POWER/STANDBY indicator [ENTER]...
User Manual
Page 9
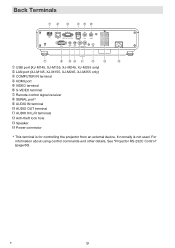
...-232C Control" (page 60). B 9 It normally is for controlling the projector from an external device. Back Terminals 1 2 3 456 7 8 9 bk bl bm bn bo 1 USB port (XJ-M145, XJ-M155, XJ-M245, XJ-M255 only) 2 LAN port (XJ-M145, XJ-M155, XJ-M245, XJ-M255 only) 3 COMPUTER IN terminal 4 HDMI port 5 VIDEO terminal 6 S-VIDEO terminal 7 Remote control signal receiver 8 SERIAL...
...-232C Control" (page 60). B 9 It normally is for controlling the projector from an external device. Back Terminals 1 2 3 456 7 8 9 bk bl bm bn bo 1 USB port (XJ-M145, XJ-M155, XJ-M245, XJ-M255 only) 2 LAN port (XJ-M145, XJ-M155, XJ-M245, XJ-M255 only) 3 COMPUTER IN terminal 4 HDMI port 5 VIDEO terminal 6 S-VIDEO terminal 7 Remote control signal receiver 8 SERIAL...
User Manual
Page 10
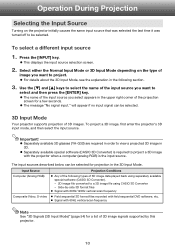
...image signals supported by -side 3D format files z Signal with 60Hz/120Hz vertical scan frequency z Field sequential 3D format files recorded with the projector when a computer (analog RGB) is the input source. z This displays the input source selection screen. 2. Select either the Normal Input ... in the following types of 3D image data played back using separately available special software (CASIO 3D Converter). - 2D image file converted to a 3D image file using CASIO 3D Converter - Side-by this projector. 10 To select a different input source 1. z For details about the 3D Input ...
...image signals supported by -side 3D format files z Signal with 60Hz/120Hz vertical scan frequency z Field sequential 3D format files recorded with the projector when a computer (analog RGB) is the input source. z This displays the input source selection screen. 2. Select either the Normal Input ... in the following types of 3D image data played back using separately available special software (CASIO 3D Converter). - 2D image file converted to a 3D image file using CASIO 3D Converter - Side-by this projector. 10 To select a different input source 1. z For details about the 3D Input ...
User Manual
Page 11
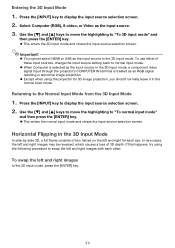
...source in abnormal image projection. z When Computer is selected as the input source in the 3D input mode, a component video signal input through the projector's COMPUTER IN terminal is treated as the input source. 3. Returning to display the input source selection screen. 2. Horizontal Flipping in the normal input mode... rare cases, the left and right images In the 3D input mode, press the [ENTER] key. 11 If this happens, try using the projector for each other. Entering the 3D Input Mode 1. Press the [INPUT] key to "To normal input mode" and then press the [ENTER] key.
...source in abnormal image projection. z When Computer is selected as the input source in the 3D input mode, a component video signal input through the projector's COMPUTER IN terminal is treated as the input source. 3. Returning to display the input source selection screen. 2. Horizontal Flipping in the normal input mode... rare cases, the left and right images In the 3D input mode, press the [ENTER] key. 11 If this happens, try using the projector for each other. Entering the 3D Input Mode 1. Press the [INPUT] key to "To normal input mode" and then press the [ENTER] key.
User Manual
Page 13
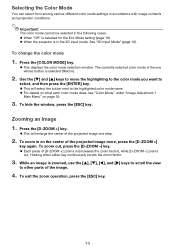
.... 13 The color mode cannot be selected in the 3D input mode. z When "Off" is selected for the Eco Mode setting (page 18) z When the projector is zoomed, use the [S], [T], [W], and [X] keys to scroll the view to other parts of the projected image more, press the [D-ZOOM +] key again. To change...
.... 13 The color mode cannot be selected in the 3D input mode. z When "Off" is selected for the Eco Mode setting (page 18) z When the projector is zoomed, use the [S], [T], [W], and [X] keys to scroll the view to other parts of the projected image more, press the [D-ZOOM +] key again. To change...
User Manual
Page 14
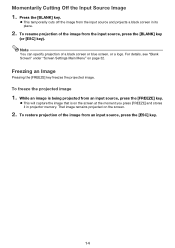
... the projected image. To freeze the projected image 1. Note You can specify projection of the image from the input source and projects a black screen in projector memory. Momentarily Cutting Off the Input Source Image 1.
... the projected image. To freeze the projected image 1. Note You can specify projection of the image from the input source and projects a black screen in projector memory. Momentarily Cutting Off the Input Source Image 1.
User Manual
Page 16
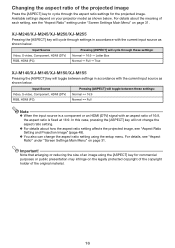
... (PC) Pressing [ASPECT] will toggle between these settings: Normal J 16:9 J Letter Box Normal J Full J True XJ-M140/XJ-M145/XJ-M150/XJ-M155 Pressing the [ASPECT] key will not change the aspect ratio setting using the [ASPECT] key for the projected image...page 48). Note that enlarging or reducing the size of an image using the setup menu. Important! XJ-M240/XJ-M245/XJ-M250/XJ-M255 Pressing the [ASPECT] key will cycle through the aspect ratio settings for commercial purposes or public..."Aspect Ratio" setting under "Screen Settings Main Menu" on your projector model as shown below.
... (PC) Pressing [ASPECT] will toggle between these settings: Normal J 16:9 J Letter Box Normal J Full J True XJ-M140/XJ-M145/XJ-M150/XJ-M155 Pressing the [ASPECT] key will not change the aspect ratio setting using the [ASPECT] key for the projected image...page 48). Note that enlarging or reducing the size of an image using the setup menu. Important! XJ-M240/XJ-M245/XJ-M250/XJ-M255 Pressing the [ASPECT] key will cycle through the aspect ratio settings for commercial purposes or public..."Aspect Ratio" setting under "Screen Settings Main Menu" on your projector model as shown below.
User Manual
Page 17
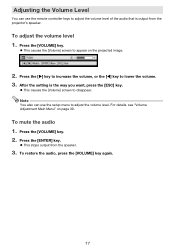
... the volume level of the audio that is the way you want, press the [ESC] key. To mute the audio 1. z This stops output from the projector's speaker. Adjusting the Volume Level You can use the remote controller keys to lower the volume. 3. z This causes the [Volume] screen to appear on page...
... the volume level of the audio that is the way you want, press the [ESC] key. To mute the audio 1. z This stops output from the projector's speaker. Adjusting the Volume Level You can use the remote controller keys to lower the volume. 3. z This causes the [Volume] screen to appear on page...
User Manual
Page 18
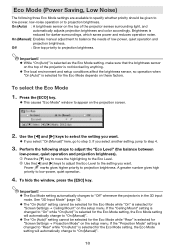
...sure that the brightness sensor on the projection screen. 2. On (Manual): Enables manual adjustment to balance the needs of the projector senses surrounding light, and automatically adjusts projection brightness and color accordingly. z The local environment and setup conditions affect the brightness sensor... Fewer marks gives higher priority to low-power, quiet operation. 4. z The Eco Mode setting automatically changes to "Off" whenever the projector is selected for the Eco Mode setting, the Eco Mode setting will automatically change to "On (Manual)". 18 Eco Mode (Power Saving...
...sure that the brightness sensor on the projection screen. 2. On (Manual): Enables manual adjustment to balance the needs of the projector senses surrounding light, and automatically adjusts projection brightness and color accordingly. z The local environment and setup conditions affect the brightness sensor... Fewer marks gives higher priority to low-power, quiet operation. 4. z The Eco Mode setting automatically changes to "Off" whenever the projector is selected for the Eco Mode setting, the Eco Mode setting will automatically change to "On (Manual)". 18 Eco Mode (Power Saving...
User Manual
Page 20
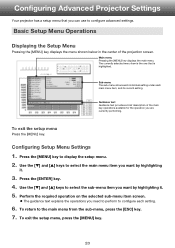
... under each setting. 6. Press the [MENU] key to select the main menu item you want by highlighting it . 5. Press the [ENTER] key. 4. Configuring Advanced Projector Settings Your projector has a setup menu that is the one that you can use to the main menu from the sub-menu, press the [ESC] key. 7. To...
... under each setting. 6. Press the [MENU] key to select the main menu item you want by highlighting it . 5. Press the [ENTER] key. 4. Configuring Advanced Projector Settings Your projector has a setup menu that is the one that you can use to the main menu from the sub-menu, press the [ESC] key. 7. To...
User Manual
Page 21
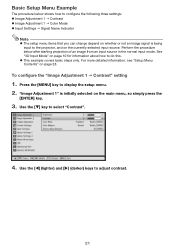
... this. To configure the "Image Adjustment 1 J Contrast" setting 1. For more detailed information, see "Setup Menu Contents" on page 10 for information about how to the projector, and on the currently selected input source. Use the [W] (lighter) and [X] (darker) keys to display the setup menu. 2. See "3D Input Mode" on page 28...
... this. To configure the "Image Adjustment 1 J Contrast" setting 1. For more detailed information, see "Setup Menu Contents" on page 10 for information about how to the projector, and on the currently selected input source. Use the [W] (lighter) and [X] (darker) keys to display the setup menu. 2. See "3D Input Mode" on page 28...
User Manual
Page 22
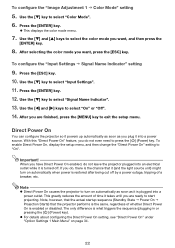
...keys to select "On" or "Off". 14. Use the [W] and [X] keys to select the color mode you do, there is the chance that the projector performs is the same, regardless of time it is restored after being cut off . Note, however, that the actual startup sequence (Standby State J Power ... Power On enabled, do not even need to select "Signal Name Indicator". 13. After selecting the color mode you do not leave the projector plugged into an electrical outlet while it into a power outlet. The only difference is enabled or disabled. To enable Direct Power On, display...
...keys to select "On" or "Off". 14. Use the [W] and [X] keys to select the color mode you do, there is the chance that the projector performs is the same, regardless of time it is restored after being cut off . Note, however, that the actual startup sequence (Standby State J Power ... Power On enabled, do not even need to select "Signal Name Indicator". 13. After selecting the color mode you do not leave the projector plugged into an electrical outlet while it into a power outlet. The only difference is enabled or disabled. To enable Direct Power On, display...
User Manual
Page 23
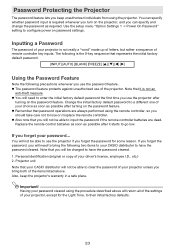
...use the password feature. Personal identification (original or copy of your CASIO distributor to their initial factory defaults. 23 Having your password cleared using the projector. z The password feature protects against unauthorized use the projector if you forget the password for the Light Time, to have ...the password cleared. 1. z You will not be able to clear the password of your projector, except for some reason. z Remember that your CASIO distributor will need to lose or misplace the remote controller. If you forget the password, you will not be ...
...use the password feature. Personal identification (original or copy of your CASIO distributor to their initial factory defaults. 23 Having your password cleared using the projector. z The password feature protects against unauthorized use the projector if you forget the password for the Light Time, to have ...the password cleared. 1. z You will not be able to clear the password of your projector, except for some reason. z Remember that your CASIO distributor will need to lose or misplace the remote controller. If you forget the password, you will not be ...
User Manual
Page 24
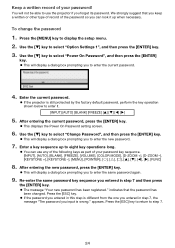
We strongly suggest that the password has been changed. Use the [T] key to eight key operations long. z If the projector is wrong." z This displays the Power On Password setting screen. 6. appears. To change the password 1. Enter the current password. After entering the new password,... menu. 2. z This will display a dialog box prompting you to use any of the following keys as part of the password so you can use the projector if you to enter it up to select "Option Settings 1", and then press the [ENTER] key. 3. Press the [ESC] key. Use the [T] key ...
We strongly suggest that the password has been changed. Use the [T] key to eight key operations long. z If the projector is wrong." z This displays the Power On Password setting screen. 6. appears. To change the password 1. Enter the current password. After entering the new password,... menu. 2. z This will display a dialog box prompting you to use any of the following keys as part of the password so you can use the projector if you to enter it up to select "Option Settings 1", and then press the [ENTER] key. 3. Press the [ESC] key. Use the [T] key ...


