
Owners Manual
Page 4
... Shooting Precautions 28 ❚ Auto Focus Restrictions 28 ❚❙ Snapshot Tutorial 29 Using the Control Panel 29 Changing the Image Size Size) . . 30 Using Flash Flash) . . 33 Using Face Detection Face Detection) . . 35 Reducing the Effects of Camera and Subject Movement . . . (Anti Shake) . . 36 Specifying ISO Sensitivity ISO) . . 37 Adjusting White Balance White Balance) . . 37 Correcting Image Brightness EV Shift) . . 39 Using the easy Mode 40 Changing the Control Panel Date/Time Style 42 Shooting with Zoom 42 ❚ Optical Zoom and Digital Zoom Switch...
... Shooting Precautions 28 ❚ Auto Focus Restrictions 28 ❚❙ Snapshot Tutorial 29 Using the Control Panel 29 Changing the Image Size Size) . . 30 Using Flash Flash) . . 33 Using Face Detection Face Detection) . . 35 Reducing the Effects of Camera and Subject Movement . . . (Anti Shake) . . 36 Specifying ISO Sensitivity ISO) . . 37 Adjusting White Balance White Balance) . . 37 Correcting Image Brightness EV Shift) . . 39 Using the easy Mode 40 Changing the Control Panel Date/Time Style 42 Shooting with Zoom 42 ❚ Optical Zoom and Digital Zoom Switch...

Owners Manual
Page 5
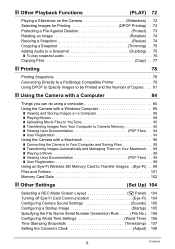
... Camera and Subject Movement . . . . (Anti Shake) . . . 60 ❚ Specifying the Auto Focus Area AF Area) . . . 60 ❚ Using the easy Mode easy Mode) . . . 61 ❚ Assigning Functions to the [4] and [6] Keys L/R Key) . . . 61 ❚ Displaying the On-screen Grid Grid) . . . 61 ❚ Turning Digital Zoom On or Off Digital Zoom) . . . 62 ❚ Turning on Image Review Review) . . . 62 ❚ Using Icon Help Icon Help) . . . 62 ❚ Configuring Power On Default Settings Memory) . . . 63 Image Quality Settings Quality) . . 64 ❚ Specifying Snapshot Size Size...
... Camera and Subject Movement . . . . (Anti Shake) . . . 60 ❚ Specifying the Auto Focus Area AF Area) . . . 60 ❚ Using the easy Mode easy Mode) . . . 61 ❚ Assigning Functions to the [4] and [6] Keys L/R Key) . . . 61 ❚ Displaying the On-screen Grid Grid) . . . 61 ❚ Turning Digital Zoom On or Off Digital Zoom) . . . 62 ❚ Turning on Image Review Review) . . . 62 ❚ Using Icon Help Icon Help) . . . 62 ❚ Configuring Power On Default Settings Memory) . . . 63 Image Quality Settings Quality) . . 64 ❚ Specifying Snapshot Size Size...
Owners Manual
Page 6
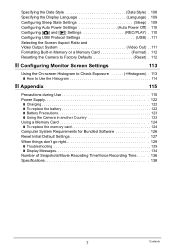
...10074; Viewing User Documentation PDF Files) . . . 99 ❚ User Registration 99 Using an Eye-Fi Wireless SD Memory Card to Transfer Images . (Eye-Fi) . . 99 Files and Folders 101 Memory Card Data 102 ❚❙ Other Settings (Set Up) 104 Selecting a REC Mode Screen Layout R Panel) . 104 Turning off Eye-Fi Card Communication Eye-Fi) . 104 Configuring Camera Sound Settings Sounds) . 105 Configuring a Startup Image Startup) . 105 Specifying the File Name Serial Number Generation Rule . . . . . (File No.) . 106 Configuring World Time Settings World Time) . 106 Time Stamping...
...10074; Viewing User Documentation PDF Files) . . . 99 ❚ User Registration 99 Using an Eye-Fi Wireless SD Memory Card to Transfer Images . (Eye-Fi) . . 99 Files and Folders 101 Memory Card Data 102 ❚❙ Other Settings (Set Up) 104 Selecting a REC Mode Screen Layout R Panel) . 104 Turning off Eye-Fi Card Communication Eye-Fi) . 104 Configuring Camera Sound Settings Sounds) . 105 Configuring a Startup Image Startup) . 105 Specifying the File Name Serial Number Generation Rule . . . . . (File No.) . 106 Configuring World Time Settings World Time) . 106 Time Stamping...
Owners Manual
Page 7
... 115 Precautions during Use 115 Power Supply 122 ❚ Charging 122 ❚ To replace the battery 122 ❚ Battery Precautions 123 ❚ Using the Camera in another Country 123 Using a Memory Card 124 ❚ To replace the memory card 124 Computer System Requirements for Bundled Software 126 Reset Initial Default Settings 127 When things don't go right 129 ❚ Troubleshooting 129 ❚ Display Messages 134 Number of Snapshots/Movie Recording Time/Voice Recording Time . . . . . 136 Specifications 138 7 Contents
... 115 Precautions during Use 115 Power Supply 122 ❚ Charging 122 ❚ To replace the battery 122 ❚ Battery Precautions 123 ❚ Using the Camera in another Country 123 Using a Memory Card 124 ❚ To replace the memory card 124 Computer System Requirements for Bundled Software 126 Reset Initial Default Settings 127 When things don't go right 129 ❚ Troubleshooting 129 ❚ Display Messages 134 Number of Snapshots/Movie Recording Time/Voice Recording Time . . . . . 136 Specifications 138 7 Contents
Owners Manual
Page 18
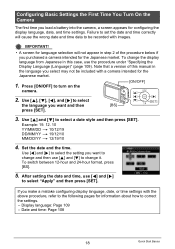
Use [8] and [2] to turn on the camera. [ON/OFF] 2. Set the date and the time. If you purchased a camera intended for the Japanese market. 1. IMPORTANT! • A screen for language selection will cause the wrong date and time data to change it. To change the display language from Japanese in this manual in step 2 of this case, use [4] and [6] to the following pages for configuring the display language, date, and time settings. After setting the date and time, use the...
Use [8] and [2] to turn on the camera. [ON/OFF] 2. Set the date and the time. If you purchased a camera intended for the Japanese market. 1. IMPORTANT! • A screen for language selection will cause the wrong date and time data to change it. To change the display language from Japanese in this manual in step 2 of this case, use [4] and [6] to the following pages for configuring the display language, date, and time settings. After setting the date and time, use the...
Owners Manual
Page 27
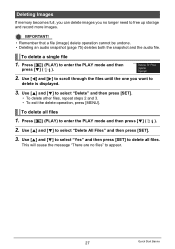
... [2] ( ). 2. Press [p] (PLAY) to enter the PLAY mode and then press [2] ( ). 2. This will cause the message "There are no longer need to free up storage and record more images. Use [8] and [2] to select "Delete All Files" and then press [SET]. 3. Use [8] and [2] to select "Yes" and then press [SET] to delete all files 1. Deleting Images If memory becomes full, you can delete images you want to delete is displayed. 3. IMPORTANT! • Remember that a file (image) delete operation cannot be...
... [2] ( ). 2. Press [p] (PLAY) to enter the PLAY mode and then press [2] ( ). 2. This will cause the message "There are no longer need to free up storage and record more images. Use [8] and [2] to select "Delete All Files" and then press [SET]. 3. Use [8] and [2] to select "Yes" and then press [SET] to delete all files 1. Deleting Images If memory becomes full, you can delete images you want to delete is displayed. 3. IMPORTANT! • Remember that a file (image) delete operation cannot be...
Owners Manual
Page 48
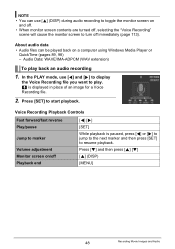
... marker Volume adjustment Monitor screen on/off immediately (page 113). In the PLAY mode, use [8] (DISP) during audio recording to toggle the monitor screen on and off. • When monitor screen contents are turned off, selecting the "Voice Recording" scene will cause the monitor screen to turn off Playback end [4] [6] [SET] While playback is displayed in place of an image for a Voice Recording file. 2. Press [2] and then press [8] [2] [8] (DISP) [MENU] 48 Recording Movie Images...
... marker Volume adjustment Monitor screen on/off immediately (page 113). In the PLAY mode, use [8] (DISP) during audio recording to toggle the monitor screen on and off. • When monitor screen contents are turned off, selecting the "Voice Recording" scene will cause the monitor screen to turn off Playback end [4] [6] [SET] While playback is displayed in place of an image for a Voice Recording file. 2. Press [2] and then press [8] [2] [8] (DISP) [MENU] 48 Recording Movie Images...
Owners Manual
Page 59
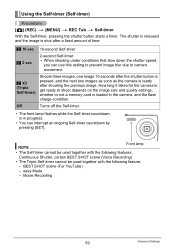
... takes for the camera to get ready to camera movement. Off Turns off the Self-timer. • The front lamp flashes while the Self-timer countdown is in the camera, and the flash charge condition. The shutter is released and the image is loaded in progress. • You can use this setting to prevent image blur due to shoot depends on the image size and quality settings, whether or not a memory card is shot...
... takes for the camera to get ready to camera movement. Off Turns off the Self-timer. • The front lamp flashes while the Self-timer countdown is in the camera, and the flash charge condition. The shutter is released and the image is loaded in progress. • You can use this setting to prevent image blur due to shoot depends on the image size and quality settings, whether or not a memory card is shot...
Owners Manual
Page 62
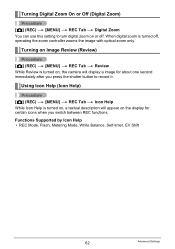
... Review While Review is turned on, a textual description will appear on , the camera will display a image for certain icons when you press the shutter button to turn digital zoom on or off , operating the zoom controller zooms the image with optical zoom only. Using Icon Help (Icon Help) Procedure [r] (REC) * [MENU] * REC Tab * Icon Help While Icon Help is turned on the display for about one second immediately after you switch between REC functions. Functions Supported by Icon Help • REC Mode, Flash, Metering Mode, White Balance, Self-timer, EV Shift 62 Advanced Settings
... Review While Review is turned on, a textual description will appear on , the camera will display a image for certain icons when you press the shutter button to turn digital zoom on or off , operating the zoom controller zooms the image with optical zoom only. Using Icon Help (Icon Help) Procedure [r] (REC) * [MENU] * REC Tab * Icon Help While Icon Help is turned on the display for about one second immediately after you switch between REC functions. Functions Supported by Icon Help • REC Mode, Flash, Metering Mode, White Balance, Self-timer, EV Shift 62 Advanced Settings

Owners Manual
Page 77
... built-in camera memory to a memory card. It cannot be copied from the camera's built-in memory to a memory card or from built-in memory whose name has the largest serial number. 1Use [4] and [6] to select the file you recorded with this camera. 77 Other Playback Functions (PLAY) Copying Files (Copy) Procedure [p] (PLAY) * Snapshot Screen * [MENU] * PLAY Tab * Copy Files can copy snapshots, movies, audio snapshots, or Voice Recording files you want to copy. 2Use [8] and [2] to select "Copy" and then press [SET].
... built-in camera memory to a memory card. It cannot be copied from the camera's built-in memory to a memory card or from built-in memory whose name has the largest serial number. 1Use [4] and [6] to select the file you recorded with this camera. 77 Other Playback Functions (PLAY) Copying Files (Copy) Procedure [p] (PLAY) * Snapshot Screen * [MENU] * PLAY Tab * Copy Files can copy snapshots, movies, audio snapshots, or Voice Recording files you want to copy. 2Use [8] and [2] to select "Copy" and then press [SET].

Owners Manual
Page 99
... and other settings for the first time, copy the Eye-Fi Manager install files to your computer in accordance with the instructions that comes with the Eye-Fi card. • Before formatting a new Eye-Fi card to use it possible to transfer image data automatically to a computer via wireless LAN. 1. After configuring settings, load the Eye-Fi card into the camera and record. On the CD-ROM, open the folder for English.) User Registration Internet...
... and other settings for the first time, copy the Eye-Fi Manager install files to your computer in accordance with the instructions that comes with the Eye-Fi card. • Before formatting a new Eye-Fi card to use it possible to transfer image data automatically to a computer via wireless LAN. 1. After configuring settings, load the Eye-Fi card into the camera and record. On the CD-ROM, open the folder for English.) User Registration Internet...
Owners Manual
Page 109
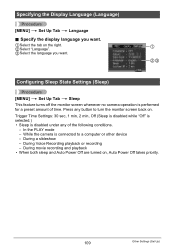
... monitor screen whenever no camera operation is performed for a preset amount of the following conditions. - During Voice Recording playback or recording - Specifying the Display Language (Language) Procedure [MENU] * Set Up Tab * Language . Trigger Time Settings: 30 sec, 1 min, 2 min, Off (Sleep is disabled while "Off" is selected.) • Sleep is connected to turn the monitor screen back on , Auto Power Off takes priority. 109 Other Settings (Set Up) While the camera is disabled under any button...
... monitor screen whenever no camera operation is performed for a preset amount of the following conditions. - During Voice Recording playback or recording - Specifying the Display Language (Language) Procedure [MENU] * Set Up Tab * Language . Trigger Time Settings: 30 sec, 1 min, 2 min, Off (Sleep is disabled while "Off" is selected.) • Sleep is connected to turn the monitor screen back on , Auto Power Off takes priority. 109 Other Settings (Set Up) While the camera is disabled under any button...
Owners Manual
Page 110
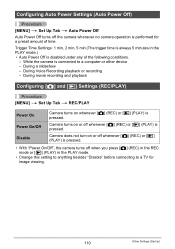
... - During Voice Recording playback or recording - Camera turns on whenever [r] (REC) or [p] (PLAY) is pressed. During movie recording and playback Configuring [r] and [p] Settings (REC/PLAY) Procedure [MENU] * Set Up Tab * REC/PLAY Power On Power On/Off Disable Camera turns on or off whenever [r] (REC) or [p] (PLAY) is pressed. Configuring Auto Power Settings (Auto Power Off) Procedure [MENU] * Set Up Tab * Auto Power Off Auto Power Off turns off the camera whenever no camera operation is performed for image viewing. 110 Other Settings (Set Up) While the camera is connected to...
... - During Voice Recording playback or recording - Camera turns on whenever [r] (REC) or [p] (PLAY) is pressed. During movie recording and playback Configuring [r] and [p] Settings (REC/PLAY) Procedure [MENU] * Set Up Tab * REC/PLAY Power On Power On/Off Disable Camera turns on or off whenever [r] (REC) or [p] (PLAY) is pressed. Configuring Auto Power Settings (Auto Power Off) Procedure [MENU] * Set Up Tab * Auto Power Off Auto Power Off turns off the camera whenever no camera operation is performed for image viewing. 110 Other Settings (Set Up) While the camera is connected to...
Owners Manual
Page 111
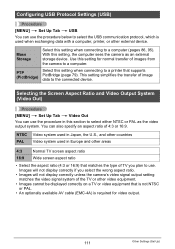
... Select this setting when connecting to a printer that is not NTSC or PAL. • An optionally available AV cable (EMC-4A) is used when exchanging data with a computer, printer, or other video equipment. • Images cannot be displayed correctly on a TV or video equipment that supports PictBridge (page 79). Selecting the Screen Aspect Ratio and Video Output System (Video Out) Procedure [MENU] * Set Up Tab * Video Out You...
... Select this setting when connecting to a printer that is not NTSC or PAL. • An optionally available AV cable (EMC-4A) is used when exchanging data with a computer, printer, or other video equipment. • Images cannot be displayed correctly on a TV or video equipment that supports PictBridge (page 79). Selecting the Screen Aspect Ratio and Video Output System (Video Out) Procedure [MENU] * Set Up Tab * Video Out You...
Owners Manual
Page 112
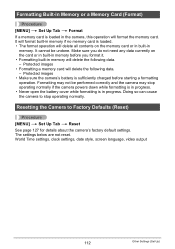
... the camera powers down while formatting is in progress. • Never open the battery cover while formatting is sufficiently charged before you do not need any data currently on the memory card or in built-in the camera, this operation will format the memory card. The settings below are not reset. Formatting Built-in Memory or a Memory Card (Format) Procedure [MENU] * Set Up Tab * Format If a memory card is loaded in memory. World Time settings, clock settings, date style, screen language, video output 112 Other Settings (Set Up...
... the camera powers down while formatting is in progress. • Never open the battery cover while formatting is sufficiently charged before you do not need any data currently on the memory card or in built-in the camera, this operation will format the memory card. The settings below are not reset. Formatting Built-in Memory or a Memory Card (Format) Procedure [MENU] * Set Up Tab * Format If a memory card is loaded in memory. World Time settings, clock settings, date style, screen language, video output 112 Other Settings (Set Up...
Owners Manual
Page 129
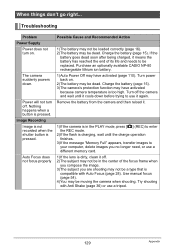
Troubleshooting Problem Power Supply Power does not turn off the camera and wait until the charge operation finishes. 3)If the message "Memory Full" appears, transfer images to your computer, delete images you no longer need, or use a different memory card. 1)If the lens is charging, wait until it cools down . Auto Focus does not focus properly Possible Cause and Recommended Action 1)The battery may not be loaded correctly (page 16). 2)The battery may not be dead...
Troubleshooting Problem Power Supply Power does not turn off the camera and wait until the charge operation finishes. 3)If the message "Memory Full" appears, transfer images to your computer, delete images you no longer need, or use a different memory card. 1)If the lens is charging, wait until it cools down . Auto Focus does not focus properly Possible Cause and Recommended Action 1)The battery may not be loaded correctly (page 16). 2)The battery may not be dead...

Owners Manual
Page 130
... a CASIO service center or your original retailer. The monitor screen image is out of focus. 1)You may be attempting to illuminate the subject. 2)You may be using Manual Focus and have been increased automatically for scenery or portraits. Use the ´ (Macro) for illumination. 130 Appendix The image may be focused properly. A red ? (Flash Off) icon appears on flash (page 33) or use lights for close -up shot. Camera powers down...
... a CASIO service center or your original retailer. The monitor screen image is out of focus. 1)You may be attempting to illuminate the subject. 2)You may be using Manual Focus and have been increased automatically for scenery or portraits. Use the ´ (Macro) for illumination. 130 Appendix The image may be focused properly. A red ? (Flash Off) icon appears on flash (page 33) or use lights for close -up shot. Camera powers down...
Owners Manual
Page 131
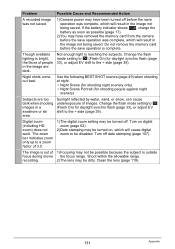
... not work. Night shots come out bad. The zoom bar indicates zoom only up to be turned off. Do not remove the memory card before the save operation is reaching the subjects. Change the flash mode setting to < (Flash On) for daylight synchro flash (page 33), or adjust EV shift to the + side (page 39). Clean the lens (page 119). 131 Appendix Problem Possible Cause and Recommended Action A recorded image was not saved. 1)Camera power...
... not work. Night shots come out bad. The zoom bar indicates zoom only up to be turned off. Do not remove the memory card before the save operation is reaching the subjects. Change the flash mode setting to < (Flash On) for daylight synchro flash (page 33), or adjust EV shift to the + side (page 39). Clean the lens (page 119). 131 Appendix Problem Possible Cause and Recommended Action A recorded image was not saved. 1)Camera power...
Owners Manual
Page 132
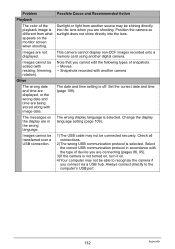
... camera cannot display non-DCF images recorded onto a memory card using another source may not be shining directly into the lens. The wrong display language is selected. Always connect directly to recognize the camera if you cannot edit the following types of snapshots. • Movies • Snapshots recorded with resizing, trimming, rotation). Check all connections. 2)The wrong USB communication protocol is selected. Note that you connect via a USB hub. Problem Playback The color...
... camera cannot display non-DCF images recorded onto a memory card using another source may not be shining directly into the lens. The wrong display language is selected. Always connect directly to recognize the camera if you cannot edit the following types of snapshots. • Movies • Snapshots recorded with resizing, trimming, rotation). Check all connections. 2)The wrong USB communication protocol is selected. Note that you connect via a USB hub. Problem Playback The color...
Owners Manual
Page 134
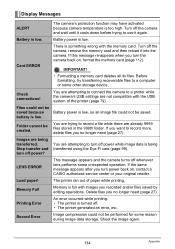
... unexpected operation. Battery power is something wrong with the memory card. Before formatting, try transferring recoverable files to use it into the camera. Record Error Image compression could not be created. Shoot the image again. 134 Appendix IMPORTANT! • Formatting a memory card deletes all its files. Images are not compatible with images you no longer need (page 27). Turn off whenever lens performs some other storage device. You are attempting to connect the camera to turn off the camera, remove the memory card and...
... unexpected operation. Battery power is something wrong with the memory card. Before formatting, try transferring recoverable files to use it into the camera. Record Error Image compression could not be created. Shoot the image again. 134 Appendix IMPORTANT! • Formatting a memory card deletes all its files. Images are not compatible with images you no longer need (page 27). Turn off whenever lens performs some other storage device. You are attempting to connect the camera to turn off the camera, remove the memory card and...


