
REALiS WUX10 User Manual
Page 2
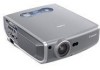
... a 100-inch image when placed 3 m (9.8') to -use Wireless Remote Control It comes with a high degree of WUX10 Multimedia Projector Thank you to as "the projector") is a high-performance projector that is capable of AISYS, Canon's unique optical engine, and the world's first 0.71-inch WUXGA (1920 x 1200 resolution) LCOS (Liquid Crystal On Silicon) panel achieves a high brightness, high...
... a 100-inch image when placed 3 m (9.8') to -use Wireless Remote Control It comes with a high degree of WUX10 Multimedia Projector Thank you to as "the projector") is a high-performance projector that is capable of AISYS, Canon's unique optical engine, and the world's first 0.71-inch WUXGA (1920 x 1200 resolution) LCOS (Liquid Crystal On Silicon) panel achieves a high brightness, high...

REALiS WUX10 User Manual
Page 3
...trademarks of Microsoft Corporation in this document) This is shown as the functions available for projecting images. The remote control allows you to use the projector. This manual provides detailed information on the legally protected copyright or the copyright holder of the original material.... Read this document, the buttons operation is a User's Manual for the WUX10 Multimedia Projector. Symbols of Button Operations The projector can be pressed Symbols Used in This Manual Meanings of the following symbols used in the United States and...
...trademarks of Microsoft Corporation in this document) This is shown as the functions available for projecting images. The remote control allows you to use the projector. This manual provides detailed information on the legally protected copyright or the copyright holder of the original material.... Read this document, the buttons operation is a User's Manual for the WUX10 Multimedia Projector. Symbols of Button Operations The projector can be pressed Symbols Used in This Manual Meanings of the following symbols used in the United States and...

REALiS WUX10 User Manual
Page 4
P41) Changing Remote Control Channel (P94) Projecting an Image Starting Projection (P42 - Connecting the Projector Connecting to AV Equipment (P38 - P60) Eliminating Flickers from behind Screen (P81) 4 P44) Selecting an Input Signal (P47 - P37) ... a Greenboard (P80) Selecting an Image Mode Suitable for the Projecting Image (P85) Making Fine Color Adjustments (P88) Removing Noise (P89) Resetting Projector Setting Resetting Password (P97) Initializing a Network Setting (P100) Resetting to the Default Setting (P100) Miscellaneous Functions Reducing the Lamp Brightness (P91)...
P41) Changing Remote Control Channel (P94) Projecting an Image Starting Projection (P42 - Connecting the Projector Connecting to AV Equipment (P38 - P60) Eliminating Flickers from behind Screen (P81) 4 P44) Selecting an Input Signal (P47 - P37) ... a Greenboard (P80) Selecting an Image Mode Suitable for the Projecting Image (P85) Making Fine Color Adjustments (P88) Removing Noise (P89) Resetting Projector Setting Resetting Password (P97) Initializing a Network Setting (P100) Resetting to the Default Setting (P100) Miscellaneous Functions Reducing the Lamp Brightness (P91)...

REALiS WUX10 User Manual
Page 5
...WUX10 Multimedia Projector 2 Quick Reference Guide 4 Safety Instructions ...10 Safety Precautions...11 ■ READ AND KEEP THIS OWNER'S MANUAL FOR LATER USE 12 AC Power Cord Requirement 14 Federal Communication Commission Notice 15 Canadian Radio Interference Regulations 15 Precautions on Handling the Batteries in the Remote... Controller 16 Lamp Handling Precautions...16 Carrying/Transporting the Projector 17 Installation Precautions...17 Before Use ...19 Supplied Accessories 20 ■ ...
...WUX10 Multimedia Projector 2 Quick Reference Guide 4 Safety Instructions ...10 Safety Precautions...11 ■ READ AND KEEP THIS OWNER'S MANUAL FOR LATER USE 12 AC Power Cord Requirement 14 Federal Communication Commission Notice 15 Canadian Radio Interference Regulations 15 Precautions on Handling the Batteries in the Remote... Controller 16 Lamp Handling Precautions...16 Carrying/Transporting the Projector 17 Installation Precautions...17 Before Use ...19 Supplied Accessories 20 ■ ...

REALiS WUX10 User Manual
Page 8
...92 Selecting the Power Management Mode 92 Skip the POWER Button Operation 93 Enabling/Disabling the Beep ...93 Prohibiting the Projector Operation 94 Setting up the Remote Control Channel 94 Selecting a Display Language 95 Showing/hiding the Guide Screen 95 Turning on/off LED Illumination 96 ...Turning On/Off the Network Function 99 Initializing network settings...100 Resetting to the Default Setting 100 Checking the Information of the Projector 101 Connecting the Projector to Network 103 Setting an IP Address 104 ■ Setting IP Address of the Computer 104 ■ Resetting the ...
...92 Selecting the Power Management Mode 92 Skip the POWER Button Operation 93 Enabling/Disabling the Beep ...93 Prohibiting the Projector Operation 94 Setting up the Remote Control Channel 94 Selecting a Display Language 95 Showing/hiding the Guide Screen 95 Turning on/off LED Illumination 96 ...Turning On/Off the Network Function 99 Initializing network settings...100 Resetting to the Default Setting 100 Checking the Information of the Projector 101 Connecting the Projector to Network 103 Setting an IP Address 104 ■ Setting IP Address of the Computer 104 ■ Resetting the ...

REALiS WUX10 User Manual
Page 9
Table of Contents Table of Contents Maintenance...121 Cleaning the Projector ...121 Cleaning and Replacing the Air Filter 122 ■ Cleaning the Air Filter ...122 ■ Replacing the Air Filter 122 Replacing the Lamp...123 ... an Image from Image Software 127 Supported Computer Signal Types 128 Relationship between Screen Size and Projecting Distance 129 Glossary ...130 Specifications ...134 ■ Projector ...134 ■ Remote Control...134 ■ External View ...135 ■ ANALOG PC-2/COMPONENT IN terminal 135 ■ Service Port (CONTROL 136 Index ...137 Menu Configuration...
Table of Contents Table of Contents Maintenance...121 Cleaning the Projector ...121 Cleaning and Replacing the Air Filter 122 ■ Cleaning the Air Filter ...122 ■ Replacing the Air Filter 122 Replacing the Lamp...123 ... an Image from Image Software 127 Supported Computer Signal Types 128 Relationship between Screen Size and Projecting Distance 129 Glossary ...130 Specifications ...134 ■ Projector ...134 ■ Remote Control...134 ■ External View ...135 ■ ANALOG PC-2/COMPONENT IN terminal 135 ■ Service Port (CONTROL 136 Index ...137 Menu Configuration...

REALiS WUX10 User Manual
Page 16
...handled carefully and correctly as possible. Some lamps may come out of the projector and replace the lamp. Ask the Canon service representative to replace both batteries at the same time. Caution If the projector indicates that all lamps will last for ventilation. • The gas contains ...the batteries. Always keep your face away from the exhaust vent when the projector is operating to avoid inhaling mercury vapors or to prevent it from a battery leaks and comes in the Remote Controller Caution Observe the following precautions when handling the batteries. Failure to do ...
...handled carefully and correctly as possible. Some lamps may come out of the projector and replace the lamp. Ask the Canon service representative to replace both batteries at the same time. Caution If the projector indicates that all lamps will last for ventilation. • The gas contains ...the batteries. Always keep your face away from the exhaust vent when the projector is operating to avoid inhaling mercury vapors or to prevent it from a battery leaks and comes in the Remote Controller Caution Observe the following precautions when handling the batteries. Failure to do ...

REALiS WUX10 User Manual
Page 20
...-ROM) z Warranty card z Important Infomation and Quick Start Guide 20 Supplied Accessories Check whether the following accessories are supplied with the projector. z Remote control z Batteries (type AAA, two) z Computer connection cable for remote control (DVI/Mini D-sub, 15-pin) (1.8 m/5.9') z Power cord (2 m/6.6') For Continental Europe z Component cable (RCA/Mini D-sub, 15-pin) (0.4 ... through the hole on the lens cap, and then through the lens cap strap insertion hole at the bottom of the projector. • When the projector is not in use, attach the lens cap to protect the lens.
...-ROM) z Warranty card z Important Infomation and Quick Start Guide 20 Supplied Accessories Check whether the following accessories are supplied with the projector. z Remote control z Batteries (type AAA, two) z Computer connection cable for remote control (DVI/Mini D-sub, 15-pin) (1.8 m/5.9') z Power cord (2 m/6.6') For Continental Europe z Component cable (RCA/Mini D-sub, 15-pin) (0.4 ... through the hole on the lens cap, and then through the lens cap strap insertion hole at the bottom of the projector. • When the projector is not in use, attach the lens cap to protect the lens.

REALiS WUX10 User Manual
Page 21
...accessories in the carrying bag as shown in the carrying bag, do not give a shock to protect the projector from external shocks. Replace the adjustable foot to protect it . The projector may be damaged due to the heat. • Attach the lens cap to the lens to prevent ... the carrying bag until the cooling fan stops before putting the projector in the carrying bag. The projector may be damaged or malfunctioned. 21 z User's Manual (CD-ROM) z Important Infomation and Quick Start Guide Before Use Cables Remote control • Wait until the cooling fan stops rotating. Do not...
...accessories in the carrying bag as shown in the carrying bag, do not give a shock to protect the projector from external shocks. Replace the adjustable foot to protect it . The projector may be damaged due to the heat. • Attach the lens cap to the lens to prevent ... the carrying bag until the cooling fan stops before putting the projector in the carrying bag. The projector may be damaged or malfunctioned. 21 z User's Manual (CD-ROM) z Important Infomation and Quick Start Guide Before Use Cables Remote control • Wait until the cooling fan stops rotating. Do not...

REALiS WUX10 User Manual
Page 22
Speaker Cooling fan exhaust vents Infrared remote receiver (P28) 22 Ranging window Do not place any obstacle between the projector and the screen, as the auto focusing function may fail to remove the lens cap during projection. Air intake vent Adjustable foot lock button (P33)... Lens cap (P20) Power cord connector (P42) Lens Infrared remote receiver (P28) Anti-theft lock hole An ...
Speaker Cooling fan exhaust vents Infrared remote receiver (P28) 22 Ranging window Do not place any obstacle between the projector and the screen, as the auto focusing function may fail to remove the lens cap during projection. Air intake vent Adjustable foot lock button (P33)... Lens cap (P20) Power cord connector (P42) Lens Infrared remote receiver (P28) Anti-theft lock hole An ...

REALiS WUX10 User Manual
Page 24
...projector. D. image shift] or [4:3 D. POWER button (P42, P62) Turns the projector on the main unit. FOCUS button (P52) Adjusts focusing. [ ] [ ]: For rough adjustment. []: For fine adjustment. < < < < Part Names Remote Control The projector can be operated using buttons on the remote... control or the top control on or off. D.SHIFT/KEYSTONE button (P53) Corrects keystone distortion. [ ] [ ]: For keystone adjustment. The remote control allows you to the desired position.
...projector. D. image shift] or [4:3 D. POWER button (P42, P62) Turns the projector on the main unit. FOCUS button (P52) Adjusts focusing. [ ] [ ]: For rough adjustment. []: For fine adjustment. < < < < Part Names Remote Control The projector can be operated using buttons on the remote... control or the top control on or off. D.SHIFT/KEYSTONE button (P53) Corrects keystone distortion. [ ] [ ]: For keystone adjustment. The remote control allows you to the desired position.

REALiS WUX10 User Manual
Page 28
...AAA-size batteries in front of the infrared remote receiver. • The remote control may be inoperative if there is an obstacle between the remote control and main unit or the infrared remote receiver on the front or rear of the projector whenever pressing any button. 30° 5m...176; 30° • Use the remote control within a distance of approximately 5 m (16.4') from the projector. • Use the remote control within an angle of lighting equipment. • When you use two projectors at the same time, you attempt to operate the projector, replace the batteries with new ones. ...
...AAA-size batteries in front of the infrared remote receiver. • The remote control may be inoperative if there is an obstacle between the remote control and main unit or the infrared remote receiver on the front or rear of the projector whenever pressing any button. 30° 5m...176; 30° • Use the remote control within a distance of approximately 5 m (16.4') from the projector. • Use the remote control within an angle of lighting equipment. • When you use two projectors at the same time, you attempt to operate the projector, replace the batteries with new ones. ...
REALiS WUX10 User Manual
Page 42
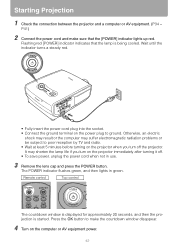
... reception by TV and radio. • Wait at least 5 minutes before turning on the projector when you turn off . • To save power, unplug the power cord when not in green. Remote control Top control The countdown window is displayed for approximately 20 seconds, and then the projection ...is being cooled. Otherwise, an electric shock may result or the computer may shorten the lamp life if you turn on the projector immediately after turning it ...
... reception by TV and radio. • Wait at least 5 minutes before turning on the projector when you turn off . • To save power, unplug the power cord when not in green. Remote control Top control The countdown window is displayed for approximately 20 seconds, and then the projection ...is being cooled. Otherwise, an electric shock may result or the computer may shorten the lamp life if you turn on the projector immediately after turning it ...
REALiS WUX10 User Manual
Page 43
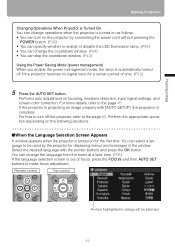
... following situations. ■When the Language Selection Screen Appears A window appears when the projector is turned on focusing, keystone distortion, input signal settings, and screen color correction. Remote control Top control An item highlighted in the window. Select the desired language with [AUTO...Mode (power management) When you enable the power management mode, the lamp is automatically turned off the projector, refer to turn on the projector by the projector for displaying menus and messages in orange will be selected. 43 For more details, refer to make focus...
... following situations. ■When the Language Selection Screen Appears A window appears when the projector is turned on focusing, keystone distortion, input signal settings, and screen color correction. Remote control Top control An item highlighted in the window. Select the desired language with [AUTO...Mode (power management) When you enable the power management mode, the lamp is automatically turned off the projector, refer to turn on the projector by the projector for displaying menus and messages in orange will be selected. 43 For more details, refer to make focus...

REALiS WUX10 User Manual
Page 46
Setting Up the Screen Automatically ■Performing the Auto Setup Press the AUTO SET button to perform the auto setup. Press the OK button. 46 Remote control Top control • After the auto setup is complete, the following window appears.
Setting Up the Screen Automatically ■Performing the Auto Setup Press the AUTO SET button to perform the auto setup. Press the OK button. 46 Remote control Top control • After the auto setup is complete, the following window appears.

REALiS WUX10 User Manual
Page 48
... displayed in gray even if they are ready for projection. 2 The selection is pressed in orange. If no signal is received, it is chosen. < < 48 Remote control Top control The currently active input signal is marked with Only the input signals displayed in white. Selecting an Input Signal (INPUT) ■Selecting...
... displayed in gray even if they are ready for projection. 2 The selection is pressed in orange. If no signal is received, it is chosen. < < 48 Remote control Top control The currently active input signal is marked with Only the input signals displayed in white. Selecting an Input Signal (INPUT) ■Selecting...

REALiS WUX10 User Manual
Page 50
Remote control Top control Perform the following if the project image has not been properly adjusted with the same settings as before simply by the projector, see the table on the resolution of the com- If you connect the projector to make projector adjustment. ing], [Horizontal position], [Vertical position... button if there is a shift in image display or flickering of screen with the [ANALOG PC-1] or [ANALOG PC-2] selected, the projector is still insufficient, from [Input signal settings] select [Total dots], [Track- The result of adjustment is recorded for each input signal ...
Remote control Top control Perform the following if the project image has not been properly adjusted with the same settings as before simply by the projector, see the table on the resolution of the com- If you connect the projector to make projector adjustment. ing], [Horizontal position], [Vertical position... button if there is a shift in image display or flickering of screen with the [ANALOG PC-1] or [ANALOG PC-2] selected, the projector is still insufficient, from [Input signal settings] select [Total dots], [Track- The result of adjustment is recorded for each input signal ...

REALiS WUX10 User Manual
Page 51
Remote control Top control 2 Press the pointer buttons to pop up a window shown at the lower right. Change the projector installation position if your desired image is determined, press the OK button or the ZOOM button. 51 Remote control Top control < [ ] / [ ]: Rough adjustment Fine adjustment. 3 When the image size is too large or too small to adjust it with the zoom function. (P31) 1 Press the ZOOM button to adjust the image size. Projecting an Image < Adjusting Image Adjusting the Image Size Use the ZOOM button to adjust the size of the projecting image.
Remote control Top control 2 Press the pointer buttons to pop up a window shown at the lower right. Change the projector installation position if your desired image is determined, press the OK button or the ZOOM button. 51 Remote control Top control < [ ] / [ ]: Rough adjustment Fine adjustment. 3 When the image size is too large or too small to adjust it with the zoom function. (P31) 1 Press the ZOOM button to adjust the image size. Projecting an Image < Adjusting Image Adjusting the Image Size Use the ZOOM button to adjust the size of the projecting image.

REALiS WUX10 User Manual
Page 52
Move the projector installation position if such is adjusted optimally, press the OK button or the FOCUS button. 52 Remote control Top control 2 Press the pointer buttons to 9.1 m (29.6'). image shift] or [4:3 D. Remote control Top control < < [ ] / [ ]: Rough adjustment Fine adjustment. 3 When the focus is the case. (P31) ■Auto focusing Press the FOCUS button...
Move the projector installation position if such is adjusted optimally, press the OK button or the FOCUS button. 52 Remote control Top control 2 Press the pointer buttons to 9.1 m (29.6'). image shift] or [4:3 D. Remote control Top control < < [ ] / [ ]: Rough adjustment Fine adjustment. 3 When the focus is the case. (P31) ■Auto focusing Press the FOCUS button...

REALiS WUX10 User Manual
Page 53
... shift] for [Screen aspect], the keystone adjustment will be smaller depending on type of input signal. • The result of keystone adjustment is memorized. Remote control Top control [ ]: Reduces the length of the upper edge. < [ ]: Reduces the length of ± 20 degrees. The image may be... may look different from the original one. If the keystone distortion is too large to adjust the focus. Remote control Top control 2 Press the pointer buttons to adjust, move the projector installation position. (P31) • The amount of the image may change. • If you place ...
... shift] for [Screen aspect], the keystone adjustment will be smaller depending on type of input signal. • The result of keystone adjustment is memorized. Remote control Top control [ ]: Reduces the length of the upper edge. < [ ]: Reduces the length of ± 20 degrees. The image may be... may look different from the original one. If the keystone distortion is too large to adjust the focus. Remote control Top control 2 Press the pointer buttons to adjust, move the projector installation position. (P31) • The amount of the image may change. • If you place ...


