User Manual
Page 7
... Playback, editing and others 15 b Wireless functions 16 Getting to Know the Camcorder 18 Supplied Accessories 18 Names of Parts 19 Preparations 24 Charging the Battery Pack 25 Using a Memory Card 30 Memory Cards Compatible for Use with the Camcorder .....30 Inserting and Removing a Memory Card 31 First Time Settings 34...
... Playback, editing and others 15 b Wireless functions 16 Getting to Know the Camcorder 18 Supplied Accessories 18 Names of Parts 19 Preparations 24 Charging the Battery Pack 25 Using a Memory Card 30 Memory Cards Compatible for Use with the Camcorder .....30 Inserting and Removing a Memory Card 31 First Time Settings 34...

User Manual
Page 18
Getting to Know the Camcorder Supplied Accessories The following accessories are supplied with the camcorder: CA-110 Compact Power Adapter* BP-727 Battery Pack IFC-300PCU/S USB Cable HTC-100/SS High Speed HDMI Cable Quick Guide * CA-110E, including power cord, in Asia. • The camcorder may make a rattling sound if it is shaken (A 231). 18
Getting to Know the Camcorder Supplied Accessories The following accessories are supplied with the camcorder: CA-110 Compact Power Adapter* BP-727 Battery Pack IFC-300PCU/S USB Cable HTC-100/SS High Speed HDMI Cable Quick Guide * CA-110E, including power cord, in Asia. • The camcorder may make a rattling sound if it is shaken (A 231). 18

User Manual
Page 22
Charging (A 25) 5 Battery attachment unit (A 25) 6 Serial number 7 Tripod socket (A 259) 8 BATTERY RELEASE switch (A 26) 67 8 22 On; Red - Back view 1 234 Bottom view 5 1 LCD touch screen (A 23, 40) 2 ACCESS indicator (A 6, 48, 52) 3 b Wi-Fi antenna (A 156) 4 POWER/CHG (charge) indicator: Green -
Charging (A 25) 5 Battery attachment unit (A 25) 6 Serial number 7 Tripod socket (A 259) 8 BATTERY RELEASE switch (A 26) 67 8 22 On; Red - Back view 1 234 Bottom view 5 1 LCD touch screen (A 23, 40) 2 ACCESS indicator (A 6, 48, 52) 3 b Wi-Fi antenna (A 156) 4 POWER/CHG (charge) indicator: Green -

User Manual
Page 24
... that can learn more about basic operations, such as using the touch screen, changing operating modes and using your camcorder is to charge a battery pack. Preparations Charging the Battery Pack 25 The first step for the first time, you can be used and how to complete the basic setup and set the...
... that can learn more about basic operations, such as using the touch screen, changing operating modes and using your camcorder is to charge a battery pack. Preparations Charging the Battery Pack 25 The first step for the first time, you can be used and how to complete the basic setup and set the...
User Manual
Page 25
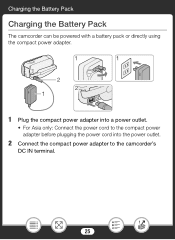
Charging the Battery Pack Charging the Battery Pack The camcorder can be powered with a battery pack or directly using the compact power adapter. 1 1 2 2 1 1 Plug the compact power adapter into a power outlet. • For Asia only: Connect the power cord to the compact power adapter before plugging the power cord into the power outlet. 2 Connect the compact power adapter to the camcorder's DC IN terminal. 25
Charging the Battery Pack Charging the Battery Pack The camcorder can be powered with a battery pack or directly using the compact power adapter. 1 1 2 2 1 1 Plug the compact power adapter into a power outlet. • For Asia only: Connect the power cord to the compact power adapter before plugging the power cord into the power outlet. 2 Connect the compact power adapter to the camcorder's DC IN terminal. 25
User Manual
Page 26
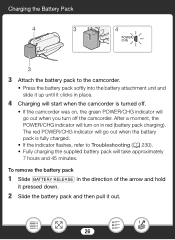
... will turn off . • If the camcorder was on in red (battery pack charging). To remove the battery pack 1 Slide d in the direction of the arrow and hold it pressed down. 2 Slide the battery pack and then pull it clicks in place. 4 Charging will start when ... flashes, refer to the camcorder. • Press the battery pack softly into the battery attachment unit and slide it up until it out. 26 Charging the Battery Pack 4 3 4 3 3 Attach the battery pack to Troubleshooting (A 230). • Fully charging the supplied battery pack will take approximately 7 hours and 45 minutes.
... will turn off . • If the camcorder was on in red (battery pack charging). To remove the battery pack 1 Slide d in the direction of the arrow and hold it pressed down. 2 Slide the battery pack and then pull it clicks in place. 4 Charging will start when ... flashes, refer to the camcorder. • Press the battery pack softly into the battery attachment unit and slide it up until it out. 26 Charging the Battery Pack 4 3 4 3 3 Attach the battery pack to Troubleshooting (A 230). • Fully charging the supplied battery pack will take approximately 7 hours and 45 minutes.
User Manual
Page 27
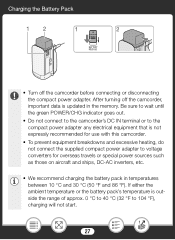
...;F), charging will not start. 27 After turning off the camcorder before connecting or disconnecting the compact power adapter. If either the ambient temperature or the battery pack's temperature is updated in temperatures between 10 °C and 30 °C (50 °F and 86 °F). Charging the... Battery Pack 12 1 2 • Turn off the camcorder, important data is outside the range of approx. 0 °C to 40 °C (32 °F to voltage converters for ...
...;F), charging will not start. 27 After turning off the camcorder before connecting or disconnecting the compact power adapter. If either the ambient temperature or the battery pack's temperature is updated in temperatures between 10 °C and 30 °C (50 °F and 86 °F). Charging the... Battery Pack 12 1 2 • Turn off the camcorder, important data is outside the range of approx. 0 °C to 40 °C (32 °F to voltage converters for ...
User Manual
Page 28
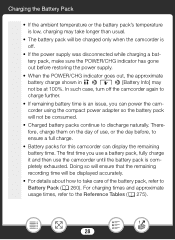
...that the remaining recording time will not be consumed. • Charged battery packs continue to ensure a full charge. • Battery packs for this camcorder can power the camcorder using the compact power adapter so the battery pack will be displayed accurately. • For details about how ... • If the power supply was disconnected while charging a battery pack, make sure the POWER/CHG indicator has gone out before , to discharge naturally. Charging the Battery Pack • If the ambient temperature or the battery pack's temperature is low, charging may take care of use the...
...that the remaining recording time will not be consumed. • Charged battery packs continue to ensure a full charge. • Battery packs for this camcorder can power the camcorder using the compact power adapter so the battery pack will be displayed accurately. • For details about how ... • If the power supply was disconnected while charging a battery pack, make sure the POWER/CHG indicator has gone out before , to discharge naturally. Charging the Battery Pack • If the ambient temperature or the battery pack's temperature is low, charging may take care of use the...
User Manual
Page 29
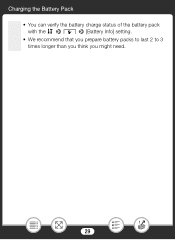
Charging the Battery Pack • You can verify the battery charge status of the battery pack with the 1 > q > [Battery Info] setting. • We recommend that you prepare battery packs to last 2 to 3 times longer than you think you might need. 29
Charging the Battery Pack • You can verify the battery charge status of the battery pack with the 1 > q > [Battery Info] setting. • We recommend that you prepare battery packs to last 2 to 3 times longer than you think you might need. 29
User Manual
Page 36
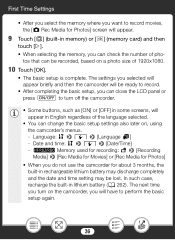
... Settings • After you select the memory where you want to record movies, the [{ Rec Media for about 3 months, the built-in rechargeable lithium battery may discharge completely and the date and time setting may be lost. tos that can check the number of 1920x1080. 10 Touch [OK]. • The... basic setup settings also later on a photo size of pho- The settings you selected will appear briefly and then the camcorder will appear in lithium battery (A 262). Date and time: 1 > q > [Date/Time] - The next time you turn off the camcorder. • Some buttons, such as [ON] or [OFF] in some...
... Settings • After you select the memory where you want to record movies, the [{ Rec Media for about 3 months, the built-in rechargeable lithium battery may discharge completely and the date and time setting may be lost. tos that can check the number of 1920x1080. 10 Touch [OK]. • The... basic setup settings also later on a photo size of pho- The settings you selected will appear briefly and then the camcorder will appear in lithium battery (A 262). Date and time: 1 > q > [Date/Time] - The next time you turn off the camcorder. • Some buttons, such as [ON] or [OFF] in some...
User Manual
Page 50
... Recording • If 1 > q > [Auto Power Off] is set 1 > q > [Power On Using LCD Panel] to use this happen, turn the camcorder off automatically to conserve the battery's power. In such cases, you can adjust the LCD backlight with the 1 > t > [LCD Backlight] setting or adjust the brightness of the LCD screen with the... 1 > t > [LCD Brightness] setting. • If you can record with the LCD panel closed in bright places, it is powered by a battery pack and is left without any operation for 3 minutes.
... Recording • If 1 > q > [Auto Power Off] is set 1 > q > [Power On Using LCD Panel] to use this happen, turn the camcorder off automatically to conserve the battery's power. In such cases, you can adjust the LCD backlight with the 1 > t > [LCD Backlight] setting or adjust the brightness of the LCD screen with the... 1 > t > [LCD Brightness] setting. • If you can record with the LCD panel closed in bright places, it is powered by a battery pack and is left without any operation for 3 minutes.
User Manual
Page 86
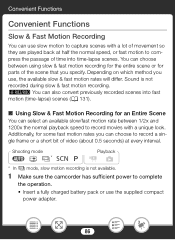
... motion recording is not recorded during slow & fast motion recording. Depending on which method you can choose to complete the operation. • Insert a fully charged battery pack or use , the available slow & fast motion rates will differ.
... motion recording is not recorded during slow & fast motion recording. Depending on which method you can choose to complete the operation. • Insert a fully charged battery pack or use , the available slow & fast motion rates will differ.
User Manual
Page 89
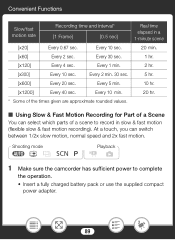
... the times given are approximate rounded values. ■ Using Slow & Fast Motion Recording for Part of a scene to complete the operation. • Insert a fully charged battery pack or use the supplied compact power adapter. 89 Every 2 min. 30 sec. 5 hr. [x600] Every 20 sec. Convenient Functions Slow/fast motion rate Recording...
... the times given are approximate rounded values. ■ Using Slow & Fast Motion Recording for Part of a scene to complete the operation. • Insert a fully charged battery pack or use the supplied compact power adapter. 89 Every 2 min. 30 sec. 5 hr. [x600] Every 20 sec. Convenient Functions Slow/fast motion rate Recording...
User Manual
Page 139
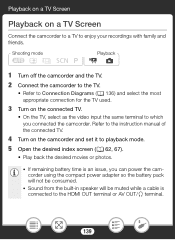
... camcorder and set it to playback mode. 5 Open the desired index screen (A 62, 67). • Play back the desired movies or photos. • If remaining battery time is connected to the HDMI OUT terminal or AV OUT/× terminal. 139 Shooting mode N †ƒ ' Playback y} 1 Turn off the camcorder and the...; On the TV, select as the video input the same terminal to which you can power the camcorder using the compact power adapter so the battery pack will not be consumed. • Sound from the built-in speaker will be muted while a cable is an issue, you connected the camcorder...
... camcorder and set it to playback mode. 5 Open the desired index screen (A 62, 67). • Play back the desired movies or photos. • If remaining battery time is connected to the HDMI OUT terminal or AV OUT/× terminal. 139 Shooting mode N †ƒ ' Playback y} 1 Turn off the camcorder and the...; On the TV, select as the video input the same terminal to which you can power the camcorder using the compact power adapter so the battery pack will not be consumed. • Sound from the built-in speaker will be muted while a cable is an issue, you connected the camcorder...
User Manual
Page 145
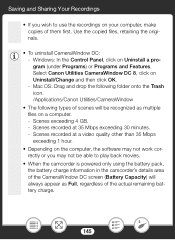
...scenes will be able to use the recordings on Uninstall/Change and then click OK. - Select Canon Utilities CameraWindow DC 8, click on your computer, make copies of the actual remaining battery charge. 145 Saving and Sharing Your Recordings • If you may not be recognized as Full... you wish to play back movies. • When the camcorder is powered only using the battery pack, the battery charge information in the camcorder's details area of the CameraWindow DC screen (Battery Capacity) will always appear as multiple files on Uninstall a program (under Programs) or Programs and...
...scenes will be able to use the recordings on Uninstall/Change and then click OK. - Select Canon Utilities CameraWindow DC 8, click on your computer, make copies of the actual remaining battery charge. 145 Saving and Sharing Your Recordings • If you may not be recognized as Full... you wish to play back movies. • When the camcorder is powered only using the battery pack, the battery charge information in the camcorder's details area of the CameraWindow DC screen (Battery Capacity) will always appear as multiple files on Uninstall a program (under Programs) or Programs and...
User Manual
Page 155
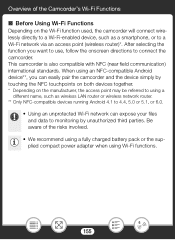
Overview of the risks involved. • We recommend using a fully charged battery pack or the supplied compact power adapter when using a different name, such as a smartphone, or to a Wi-Fi network via an access point (wireless router)*. ...
Overview of the risks involved. • We recommend using a fully charged battery pack or the supplied compact power adapter when using a different name, such as a smartphone, or to a Wi-Fi network via an access point (wireless router)*. ...
User Manual
Page 199
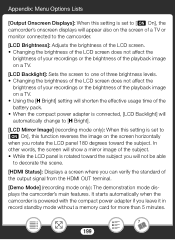
... of your recordings or the brightness of the playback image on a TV. • Using the [H Bright] setting will shorten the effective usage time of the battery pack. • When the compact power adapter is rotated toward the subject. It starts automatically when the camcorder is powered with the compact power adapter...
... of your recordings or the brightness of the playback image on a TV. • Using the [H Bright] setting will shorten the effective usage time of the battery pack. • When the compact power adapter is rotated toward the subject. It starts automatically when the camcorder is powered with the compact power adapter...
User Manual
Page 202
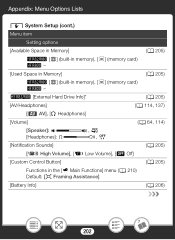
... options [Available Space in Memory] b [&] (built-in memory), [8] (memory card) ` - (A 205) [Used Space in Memory] b [&] (built-in the [2 Main Functions] menu (A 210) Default: [ Framing Assistance] [Battery Info] (A 206) 202
... options [Available Space in Memory] b [&] (built-in memory), [8] (memory card) ` - (A 205) [Used Space in Memory] b [&] (built-in the [2 Main Functions] menu (A 210) Default: [ Framing Assistance] [Battery Info] (A 206) 202
User Manual
Page 206
... as a percentage) and the remaining recording time (during recording mode) or playback time (during playback mode). • If the battery pack is exhausted, the battery information may not be displayed. [Displayed Units]: In recording mode, this setting selects the units to use for example "101-1234".... focusing distance display during manual focus. [File Numbering]: Movies and photos are saved on the memory card. • We recommend using a battery pack that is compatible with a larger num- ber, a new file will continue from the number following that of the last file recorded with...
... as a percentage) and the remaining recording time (during recording mode) or playback time (during playback mode). • If the battery pack is exhausted, the battery information may not be displayed. [Displayed Units]: In recording mode, this setting selects the units to use for example "101-1234".... focusing distance display during manual focus. [File Numbering]: Movies and photos are saved on the memory card. • We recommend using a battery pack that is compatible with a larger num- ber, a new file will continue from the number following that of the last file recorded with...
User Manual
Page 207
... the camcorder is a movie, its file name will be IMG_1234.JPG. [Auto Power Off]: In order to save power when the camcorder is powered by a battery pack, it sometimes to a computer and sometimes to use [. [USB Connection Type] (playback mode only): Selects the type of the camcorder's controls while the message...
... the camcorder is a movie, its file name will be IMG_1234.JPG. [Auto Power Off]: In order to save power when the camcorder is powered by a battery pack, it sometimes to a computer and sometimes to use [. [USB Connection Type] (playback mode only): Selects the type of the camcorder's controls while the message...


