User Manual
Page 2
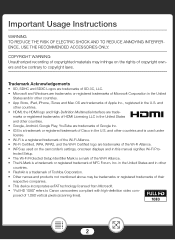
...a trademark or registered trademark of 1,080 vertical pixels (scanning lines). 2 COPYRIGHT WARNING: Unauthorized recording of copyrighted materials may infringe on the camcorder's settings, onscreen displays and in this manual signifies Wi-Fi Protected Setup. • The Wi-Fi Protected Setup Identifier Mark is a...the Wi-Fi Certified logo are trademarks of Toshiba Corporation. • Other names and products not mentioned above may be contrary to Canon camcorders compliant with high-definition video composed of Cisco in the United States and/or other countries. • App Store, iPad, ...
...a trademark or registered trademark of 1,080 vertical pixels (scanning lines). 2 COPYRIGHT WARNING: Unauthorized recording of copyrighted materials may infringe on the camcorder's settings, onscreen displays and in this manual signifies Wi-Fi Protected Setup. • The Wi-Fi Protected Setup Identifier Mark is a...the Wi-Fi Certified logo are trademarks of Toshiba Corporation. • Other names and products not mentioned above may be contrary to Canon camcorders compliant with high-definition video composed of Cisco in the United States and/or other countries. • App Store, iPad, ...
User Manual
Page 4
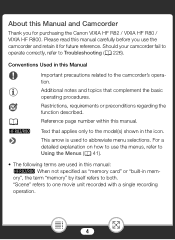
For a detailed explanation on how to use the camcorder and retain it for purchasing the Canon VIXIA HF R82 / VIXIA HF R80 / VIXIA HF R800. Additional notes and topics that applies only to Troubleshooting (A 226). Restrictions, requirements or preconditions regarding the function ...or "built-in memory", the term "memory" by itself refers to abbreviate menu selections. Text that complement the basic operating procedures. Should your camcorder fail to operate correctly, refer to the model(s) shown in this Manual A b > Important precautions related to one movie unit recorded with a ...
For a detailed explanation on how to use the camcorder and retain it for purchasing the Canon VIXIA HF R82 / VIXIA HF R80 / VIXIA HF R800. Additional notes and topics that applies only to Troubleshooting (A 226). Restrictions, requirements or preconditions regarding the function ...or "built-in memory", the term "memory" by itself refers to abbreviate menu selections. Text that complement the basic operating procedures. Should your camcorder fail to operate correctly, refer to the model(s) shown in this Manual A b > Important precautions related to one movie unit recorded with a ...
User Manual
Page 5
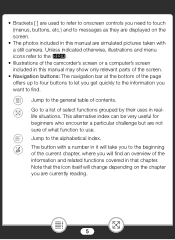
... the information and related functions covered in this manual are simulated pictures taken with a number in it will take you to the beginning of the camcorder's screen or a computer's screen included in reallife situations. Note that chapter. This alternative index can be very useful for beginners who encounter a particular challenge but...
... the information and related functions covered in this manual are simulated pictures taken with a number in it will take you to the beginning of the camcorder's screen or a computer's screen included in reallife situations. Note that chapter. This alternative index can be very useful for beginners who encounter a particular challenge but...
User Manual
Page 6
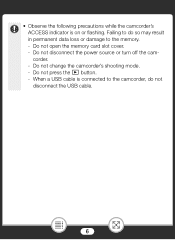
• Observe the following precautions while the camcorder's ACCESS indicator is connected to the camcorder, do so may result in permanent data loss or damage to do not disconnect the USB cable. 6 Do not disconnect the power source or turn off the camcorder. - Do not change the camcorder's shooting mode. - Do not open the memory card slot cover. - Do not press the ^ button. - When a USB cable is on or flashing. Failing to the memory. -
• Observe the following precautions while the camcorder's ACCESS indicator is connected to the camcorder, do so may result in permanent data loss or damage to do not disconnect the USB cable. 6 Do not disconnect the power source or turn off the camcorder. - Do not change the camcorder's shooting mode. - Do not open the memory card slot cover. - Do not press the ^ button. - When a USB cable is on or flashing. Failing to the memory. -
User Manual
Page 7
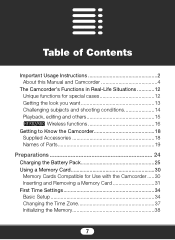
... 12 Getting the look you want 13 Challenging subjects and shooting conditions 14 Playback, editing and others 15 b Wireless functions 16 Getting to Know the Camcorder 18 Supplied Accessories 18 Names of Parts 19 Preparations 24 Charging the Battery Pack 25 Using a Memory Card 30 Memory Cards Compatible for Use with...
... 12 Getting the look you want 13 Challenging subjects and shooting conditions 14 Playback, editing and others 15 b Wireless functions 16 Getting to Know the Camcorder 18 Supplied Accessories 18 Names of Parts 19 Preparations 24 Charging the Battery Pack 25 Using a Memory Card 30 Memory Cards Compatible for Use with...
User Manual
Page 8
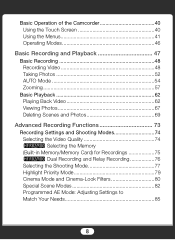
Basic Operation of the Camcorder 40 Using the Touch Screen 40 Using the Menus 41 Operating Modes 46 Basic Recording and Playback 47 Basic Recording 48 Recording Video 48 Taking ...
Basic Operation of the Camcorder 40 Using the Touch Screen 40 Using the Menus 41 Operating Modes 46 Basic Recording and Playback 47 Basic Recording 48 Recording Video 48 Taking ...
User Manual
Page 10
... 146 b Memory Save: Saving an Entire Memory onto an External Hard Drive 147 b Wi-Fi Functions 152 Overview of the Camcorder's Wi-Fi Functions 153 The Camcorder's Wi-Fi Functions 157 Using an iOS or Android Device as a Remote Control.......157 Saving Recordings Using an iOS/Android Device 169... Saving Recordings on the Optional CS100 Connect Station (NFC+Wi-Fi 172 Sharing Recordings with CANON iMAGE GATEWAY........174 Wi-Fi ...
... 146 b Memory Save: Saving an Entire Memory onto an External Hard Drive 147 b Wi-Fi Functions 152 Overview of the Camcorder's Wi-Fi Functions 153 The Camcorder's Wi-Fi Functions 157 Using an iOS or Android Device as a Remote Control.......157 Saving Recordings Using an iOS/Android Device 169... Saving Recordings on the Optional CS100 Connect Station (NFC+Wi-Fi 172 Sharing Recordings with CANON iMAGE GATEWAY........174 Wi-Fi ...
User Manual
Page 11
Trouble 226 Troubleshooting 226 List of Messages 237 Do's and Don'ts 255 Safety Instructions and Handling Precautions 255 Maintenance/Others 263 Cleaning 263 Condensation 263 Using the Camcorder Abroad 264 General Information 266 Optional Accessories 266 Specifications 270 Reference Tables 275 Index 279 11
Trouble 226 Troubleshooting 226 List of Messages 237 Do's and Don'ts 255 Safety Instructions and Handling Precautions 255 Maintenance/Others 263 Cleaning 263 Condensation 263 Using the Camcorder Abroad 264 General Information 266 Optional Accessories 266 Specifications 270 Reference Tables 275 Index 279 11
User Manual
Page 12
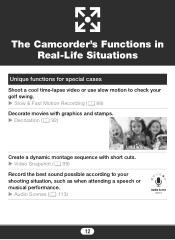
The Camcorder's Functions in Real-Life Situations Unique functions for special cases Shoot a cool time-lapse video or use slow motion to check your golf swing. Slow & Fast Motion Recording (A 86) Decorate movies with graphics and stamps. Decoration (A 92) Create a dynamic montage sequence with short cuts. Video Snapshot (A 99) Record the best sound possible according to your shooting situation, such as when attending a speech or musical performance. Audio Scenes (A 113) 12
The Camcorder's Functions in Real-Life Situations Unique functions for special cases Shoot a cool time-lapse video or use slow motion to check your golf swing. Slow & Fast Motion Recording (A 86) Decorate movies with graphics and stamps. Decoration (A 92) Create a dynamic montage sequence with short cuts. Video Snapshot (A 99) Record the best sound possible according to your shooting situation, such as when attending a speech or musical performance. Audio Scenes (A 113) 12
User Manual
Page 13
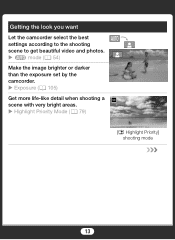
Getting the look you want Let the camcorder select the best settings according to the shooting scene to get beautiful video and photos. N mode (A 54) Make the image brighter or darker than the exposure set by the camcorder. Exposure (A 105) Get more life-like detail when shooting a scene with very bright areas. Highlight Priority Mode (A 79) [ Highlight Priority] shooting mode 13
Getting the look you want Let the camcorder select the best settings according to the shooting scene to get beautiful video and photos. N mode (A 54) Make the image brighter or darker than the exposure set by the camcorder. Exposure (A 105) Get more life-like detail when shooting a scene with very bright areas. Highlight Priority Mode (A 79) [ Highlight Priority] shooting mode 13
User Manual
Page 17
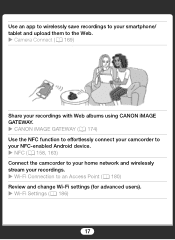
Use an app to wirelessly save recordings to your smartphone/ tablet and upload them to the Web. Camera Connect (A 169) Share your recordings with Web albums using CANON iMAGE GATEWAY. CANON iMAGE GATEWAY (A 174) Use the NFC function to effortlessly connect your camcorder to your NFC-enabled Android device. NFC (A 158, 163) Connect the camcorder to your home network and wirelessly stream your recordings. Wi-Fi Connection to an Access Point (A 180) Review and change Wi-Fi settings (for advanced users). Wi-Fi Settings (A 186) 17
Use an app to wirelessly save recordings to your smartphone/ tablet and upload them to the Web. Camera Connect (A 169) Share your recordings with Web albums using CANON iMAGE GATEWAY. CANON iMAGE GATEWAY (A 174) Use the NFC function to effortlessly connect your camcorder to your NFC-enabled Android device. NFC (A 158, 163) Connect the camcorder to your home network and wirelessly stream your recordings. Wi-Fi Connection to an Access Point (A 180) Review and change Wi-Fi settings (for advanced users). Wi-Fi Settings (A 186) 17

User Manual
Page 18
Getting to Know the Camcorder Supplied Accessories The following accessories are supplied with the camcorder: CA-110 Compact Power Adapter* BP-727 Battery Pack IFC-300PCU/S USB Cable HTC-100/SS High Speed HDMI Cable Quick Guide * CA-110E, including power cord, in Asia. • The camcorder may make a rattling sound if it is shaken (A 231). 18
Getting to Know the Camcorder Supplied Accessories The following accessories are supplied with the camcorder: CA-110 Compact Power Adapter* BP-727 Battery Pack IFC-300PCU/S USB Cable HTC-100/SS High Speed HDMI Cable Quick Guide * CA-110E, including power cord, in Asia. • The camcorder may make a rattling sound if it is shaken (A 231). 18
User Manual
Page 23
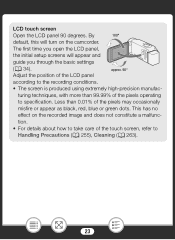
... according to take care of the pixels may occasionally misfire or appear as black, red, blue or green dots. This has no effect on the camcorder. The first time you open the LCD panel, the initial setup screens will turn on the recorded image and does not constitute a malfunc-
... according to take care of the pixels may occasionally misfire or appear as black, red, blue or green dots. This has no effect on the camcorder. The first time you open the LCD panel, the initial setup screens will turn on the recorded image and does not constitute a malfunc-

User Manual
Page 24
... can learn more about basic operations, such as using the touch screen, changing operating modes and using your camcorder is to charge a battery pack. First Time Settings 34 When you turn on the camcorder for using the menus. 24 Using a Memory Card 30 This section explains the types of the... Camcorder 40 In this section you will need to insert one into the camcorder. This section explains how to prepare the power supply. Preparations Charging the Battery Pack 25 The first step for the first...
... can learn more about basic operations, such as using the touch screen, changing operating modes and using your camcorder is to charge a battery pack. First Time Settings 34 When you turn on the camcorder for using the menus. 24 Using a Memory Card 30 This section explains the types of the... Camcorder 40 In this section you will need to insert one into the camcorder. This section explains how to prepare the power supply. Preparations Charging the Battery Pack 25 The first step for the first...
User Manual
Page 25
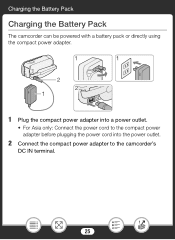
Charging the Battery Pack Charging the Battery Pack The camcorder can be powered with a battery pack or directly using the compact power adapter. 1 1 2 2 1 1 Plug the compact power adapter into a power outlet. • For Asia only: Connect the power cord to the compact power adapter before plugging the power cord into the power outlet. 2 Connect the compact power adapter to the camcorder's DC IN terminal. 25
Charging the Battery Pack Charging the Battery Pack The camcorder can be powered with a battery pack or directly using the compact power adapter. 1 1 2 2 1 1 Plug the compact power adapter into a power outlet. • For Asia only: Connect the power cord to the compact power adapter before plugging the power cord into the power outlet. 2 Connect the compact power adapter to the camcorder's DC IN terminal. 25
User Manual
Page 26
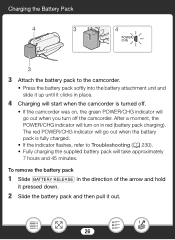
... (battery pack charging). After a moment, the POWER/CHG indicator will turn off . • If the camcorder was on, the green POWER/CHG indicator will go out when the battery pack is turned off the camcorder. The red POWER/CHG indicator will go out when you turn on in place. 4 Charging will... start when the camcorder is fully charged. • If the indicator flashes, refer to the camcorder. • Press the battery pack softly into the battery attachment unit and slide it up until it out. 26 Charging ...
... (battery pack charging). After a moment, the POWER/CHG indicator will turn off . • If the camcorder was on, the green POWER/CHG indicator will go out when the battery pack is turned off the camcorder. The red POWER/CHG indicator will go out when you turn on in place. 4 Charging will... start when the camcorder is fully charged. • If the indicator flashes, refer to the camcorder. • Press the battery pack softly into the battery attachment unit and slide it up until it out. 26 Charging ...
User Manual
Page 27
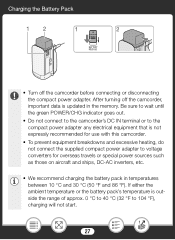
...any electrical equipment that is outside the range of approx. 0 °C to 40 °C (32 °F to voltage converters for use with this camcorder. • To prevent equipment breakdowns and excessive heating, do not connect the supplied compact power adapter to 104 °F), charging will not start. 27 If...DC-AC inverters, etc. • We recommend charging the battery pack in the memory. Charging the Battery Pack 12 1 2 • Turn off the camcorder, important data is updated in temperatures between 10 °C and 30 °C (50 °F and 86 °F). After turning off the...
...any electrical equipment that is outside the range of approx. 0 °C to 40 °C (32 °F to voltage converters for use with this camcorder. • To prevent equipment breakdowns and excessive heating, do not connect the supplied compact power adapter to 104 °F), charging will not start. 27 If...DC-AC inverters, etc. • We recommend charging the battery pack in the memory. Charging the Battery Pack 12 1 2 • Turn off the camcorder, important data is updated in temperatures between 10 °C and 30 °C (50 °F and 86 °F). After turning off the...
User Manual
Page 28
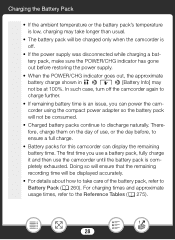
... charge shown in 1 > q > [Battery Info] may take longer than usual. • The battery pack will be charged only when the camcorder is off the camcorder again to charge further. • If remaining battery time is completely exhausted. In such case, turn off . • If the power supply ...battery pack, make sure the POWER/CHG indicator has gone out before , to ensure a full charge. • Battery packs for this camcorder can power the camcorder using the compact power adapter so the battery pack will not be consumed. • Charged battery packs continue to discharge naturally. For ...
... charge shown in 1 > q > [Battery Info] may take longer than usual. • The battery pack will be charged only when the camcorder is off the camcorder again to charge further. • If remaining battery time is completely exhausted. In such case, turn off . • If the power supply ...battery pack, make sure the POWER/CHG indicator has gone out before , to ensure a full charge. • Battery packs for this camcorder can power the camcorder using the compact power adapter so the battery pack will not be consumed. • Charged battery packs continue to discharge naturally. For ...
User Manual
Page 30
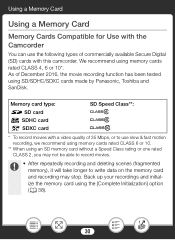
... recording function has been tested using memory cards rated CLASS 4, 6 or 10*. Using a Memory Card Using a Memory Card Memory Cards Compatible for Use with the Camcorder You can use slow & fast motion recording, we recommend using memory cards rated CLASS 6 or 10. ** When using the [Complete Initialization] option (A 38). 30 Back... to write data on the memory card and recording may stop. SD card / SDHC card 0 SDXC card SD Speed Class**: * To record movies with this camcorder.
... recording function has been tested using memory cards rated CLASS 4, 6 or 10*. Using a Memory Card Using a Memory Card Memory Cards Compatible for Use with the Camcorder You can use slow & fast motion recording, we recommend using memory cards rated CLASS 6 or 10. ** When using the [Complete Initialization] option (A 38). 30 Back... to write data on the memory card and recording may stop. SD card / SDHC card 0 SDXC card SD Speed Class**: * To record movies with this camcorder.
User Manual
Page 31
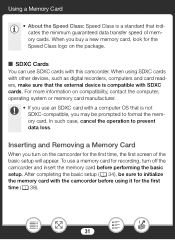
... you buy a new memory card, look for the first time (A 38). 31 Inserting and Removing a Memory Card When you turn off the camcorder and insert the memory card before using SDXC cards with other devices, such as digital recorders, computers and card readers, make sure that the external..., contact the computer, operating system or memory card manufacturer. • If you use SDXC cards with SDXC cards. For more information on the camcorder for the first time, the first screen of memory cards. After completing the basic setup (A 34), be prompted to format the memory card. ...
... you buy a new memory card, look for the first time (A 38). 31 Inserting and Removing a Memory Card When you turn off the camcorder and insert the memory card before using SDXC cards with other devices, such as digital recorders, computers and card readers, make sure that the external..., contact the computer, operating system or memory card manufacturer. • If you use SDXC cards with SDXC cards. For more information on the camcorder for the first time, the first screen of memory cards. After completing the basic setup (A 34), be prompted to format the memory card. ...


