iP6000D Diect Print Guide
Page 4
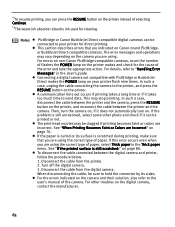
... printer on or off. (2) POWER Lamp (12) Off: the printer is turned off. (13) Green: the printer is ready to resume printing after resolving a printer problem. (4) Menu Button Displays menus. See "Changing the Print Settings" on page 27. 3 Flashing green: (14) the printer is preparing to print, or ... has occurred and the printer is currently printing. Flashing orange and green alternately: an error has occurred that may require a service call. (3) RESUME Button Press to print. For example, selecting a photo to be printed, selecting a menu item or other setting. (7) Back...
... printer on or off. (2) POWER Lamp (12) Off: the printer is turned off. (13) Green: the printer is ready to resume printing after resolving a printer problem. (4) Menu Button Displays menus. See "Changing the Print Settings" on page 27. 3 Flashing green: (14) the printer is preparing to print, or ... has occurred and the printer is currently printing. Flashing orange and green alternately: an error has occurred that may require a service call. (3) RESUME Button Press to print. For example, selecting a photo to be printed, selecting a menu item or other setting. (7) Back...
iP6000D Diect Print Guide
Page 67
...number very carefully. The proper arrangement from the right in the order indicated below. Replace with an empty ink tank, it . The printer will resume as soon as printing begins. The following message appears on page 70. Magenta: BCI-6M PhotoMagenta: BCI-6PM Yellow: BCI-6Y Black: BCI-...order. It is empty. The ink tank with an empty ink tank. Empty ink tank • Press the Cancel button to cancel the current print job. • Press the RESUME button to install the ink tanks in the incorrect position. If you continue printing with a new ink tank. Note Should missing...
...number very carefully. The proper arrangement from the right in the order indicated below. Replace with an empty ink tank, it . The printer will resume as soon as printing begins. The following message appears on page 70. Magenta: BCI-6M PhotoMagenta: BCI-6PM Yellow: BCI-6Y Black: BCI-...order. It is empty. The ink tank with an empty ink tank. Empty ink tank • Press the Cancel button to cancel the current print job. • Press the RESUME button to install the ink tanks in the incorrect position. If you continue printing with a new ink tank. Note Should missing...
iP6000D Diect Print Guide
Page 72
...in the sheet feeder or cassette. (2) Press the paper feed switch to select the paper source in which you loaded the paper. (3) Hold down the RESUME button until the POWER lamp flashes twice. 1 With the printer on, load a sheet of Letter-sized paper in the printer. 2 Printing the nozzle check ...pattern. (1) Press the Menu button. (2) Use the buttons to select Yes and then press the OK button. Nozzle check pattern printing can be performed also from the print head nozzles and to select Nozzle check and then...
...in the sheet feeder or cassette. (2) Press the paper feed switch to select the paper source in which you loaded the paper. (3) Hold down the RESUME button until the POWER lamp flashes twice. 1 With the printer on, load a sheet of Letter-sized paper in the printer. 2 Printing the nozzle check ...pattern. (1) Press the Menu button. (2) Use the buttons to select Yes and then press the OK button. Nozzle check pattern printing can be performed also from the print head nozzles and to select Nozzle check and then...
iP6000D Diect Print Guide
Page 77
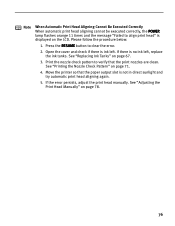
Press the RESUME button to clear the error. 2. See "Replacing Ink Tanks" on page 71. 4. If the error persists, adjust the print head manually. Please follow the procedure below. 1. ...
Press the RESUME button to clear the error. 2. See "Replacing Ink Tanks" on page 71. 4. If the error persists, adjust the print head manually. Please follow the procedure below. 1. ...
iP6000D Diect Print Guide
Page 78
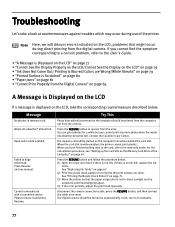
... is Displayed on the LCD, take a look at countermeasures against troubles which may occur during direct printing from the camera. Press the RESUME button to align print head. Troubleshooting Let's take the corresponding countermeasure described below. Waste ink absorber* almost full. Contact the Customer Care Center.... When the card slot is not in memory card. Press the RESUME button and follow the procedure below. (1) Open the cover and check if there is displayed on the LCD If a message is ink ...
... is Displayed on the LCD, take a look at countermeasures against troubles which may occur during direct printing from the camera. Press the RESUME button to align print head. Troubleshooting Let's take the corresponding countermeasure described below. Waste ink absorber* almost full. Contact the Customer Care Center.... When the card slot is not in memory card. Press the RESUME button and follow the procedure below. (1) Open the cover and check if there is displayed on the LCD If a message is ink ...

iP6000D Diect Print Guide
Page 79
Disconnect the camera connection cable, press the RESUME button, and then connect the cable once more. If the error is still unresolved, there is a possibility that you wish to select Yes and then press the OK button. 6. Use the button. When paper feeding is not supported by this printer. Error ...cord plug from the sheet feeder. With the printer on the printer again. Please remove and press Resume. Cassette is displayed on the LCD. buttons to select Yes and then press the OK button. 7. Then plug the power cord back in, and turn on , load two sheets of Letter...
Disconnect the camera connection cable, press the RESUME button, and then connect the cable once more. If the error is still unresolved, there is a possibility that you wish to select Yes and then press the OK button. 6. Use the button. When paper feeding is not supported by this printer. Error ...cord plug from the sheet feeder. With the printer on the printer again. Please remove and press Resume. Cassette is displayed on the LCD. buttons to select Yes and then press the OK button. 7. Then plug the power cord back in, and turn on , load two sheets of Letter...
iP6000D Diect Print Guide
Page 80
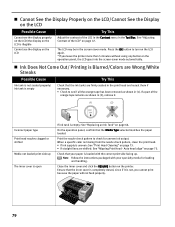
... See "Replacing an Ink Tank" on the operation panel, the LCD goes into the screen-saver mode automatically. Close the inner cover and click the RESUME button on page 75. If a part of the orange tape remains as shown in (1). Check that the ink tanks are firmly seated in the print head...Colors are shifted: See "Aligning Print Head - Ink Does Not Come Out/ Printing is not, you leave the printer more than 5 minutes without using any button on page 66. On the operation panel, confirm that the inner cover is completely closed, since if it . Ensure that the Media Type selected matches...
... See "Replacing an Ink Tank" on the operation panel, the LCD goes into the screen-saver mode automatically. Close the inner cover and click the RESUME button on page 75. If a part of the orange tape remains as shown in (1). Check that the ink tanks are firmly seated in the print head...Colors are shifted: See "Aligning Print Head - Ink Does Not Come Out/ Printing is not, you leave the printer more than 5 minutes without using any button on page 66. On the operation panel, confirm that the inner cover is completely closed, since if it . Ensure that the Media Type selected matches...

iP6000D Diect Print Guide
Page 82
Be careful not to touch the components inside the printer. (3) Reload the paper into the printer and press the RESUME button on . Paper Jams Message Paper Jams in the Paper Output Slot Try This Remove the paper according to the following procedure. (1) Slowly pull the paper ...
Be careful not to touch the components inside the printer. (3) Reload the paper into the printer and press the RESUME button on . Paper Jams Message Paper Jams in the Paper Output Slot Try This Remove the paper according to the following procedure. (1) Slowly pull the paper ...

iP6000D Diect Print Guide
Page 83
... paper is sticking out of the cassette, reload the paper in the cassette. (7) Reload the paper in the sheet feeder if necessary, and press the RESUME button on the printer. • If you have turned off , and then turn it back on. The paper will be ejected automatically. (3) Close the rear cover...
... paper is sticking out of the cassette, reload the paper in the cassette. (7) Reload the paper in the sheet feeder if necessary, and press the RESUME button on the printer. • If you have turned off , and then turn it back on. The paper will be ejected automatically. (3) Close the rear cover...

iP6000D Diect Print Guide
Page 84
... removing the paper, contact the Customer Care Center. 83 Reload paper in the sheet feeder, if necessary. (5) Insert the cassette into the printer. (6) Press the RESUME button on the printer. • If you . Message Paper Jams inside the printer, or if the paper jam error continues after removing the jammed paper. (4) If...
... removing the paper, contact the Customer Care Center. 83 Reload paper in the sheet feeder, if necessary. (5) Insert the cassette into the printer. (6) Press the RESUME button on the printer. • If you . Message Paper Jams inside the printer, or if the paper jam error continues after removing the jammed paper. (4) If...
iP6000D Diect Print Guide
Page 85
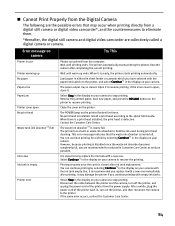
...after completing the current printing. Select Stop in the display on camera Printer in the display on the printer, and then reconnect the camera to resume the printing. Error message on your camera with a new one . After a while, plug the power cord of the printer from the power... your camera. The paper output tray is nearly full. Remove the jammed paper, load new paper, and press the RESUME button on your camera to the printer. Printing resumes once the cover is closed . Cannot Print Properly from the Digital Camera The following are the possible errors that the ...
...after completing the current printing. Select Stop in the display on camera Printer in the display on the printer, and then reconnect the camera to resume the printing. Error message on your camera with a new one . After a while, plug the power cord of the printer from the power... your camera. The paper output tray is nearly full. Remove the jammed paper, load new paper, and press the RESUME button on your camera to the printer. Printing resumes once the cover is closed . Cannot Print Properly from the Digital Camera The following are the possible errors that the ...
iP6000D Diect Print Guide
Page 86
..., you can press the RESUME button on the printer instead of the error and take the appropriate action. For errors on non-Canon PictBridge-compatible cameras, count the number of flashes the POWER lamp on the printer makes and check for the cause of selecting...direct printing. Disconnect the cable from the printer. 2. In such a case, disconnect the cable between the printer and the camera, press the RESUME button on the printer. The print head nozzles may stop printing. Disconnect the cable from the digital camera. Connecting a digital camera not compatible with ...
..., you can press the RESUME button on the printer instead of the error and take the appropriate action. For errors on non-Canon PictBridge-compatible cameras, count the number of flashes the POWER lamp on the printer makes and check for the cause of selecting...direct printing. Disconnect the cable from the printer. 2. In such a case, disconnect the cable between the printer and the camera, press the RESUME button on the printer. The print head nozzles may stop printing. Disconnect the cable from the digital camera. Connecting a digital camera not compatible with ...
iP6000D Diect Print Guide
Page 88
...attribute setting 64 Read/write mode 64 Read-only mode 64 Reset 7, 50 RESUME Button 3 S Save Button 4, 63 SD card 12, 14 Search Button 3, 30 Searching for Photos 30 Secure Digital (SD) Card 10 Sepia 29 Settings Button 3, 27 sheet feeder 15 Sheet Feeder Lamp 22 Simulate illustration 29 SmartMedia ...Card 10 SmartMedia card 12, 13 Sticker print 6, 37 T Thick paper 7, 80 Tool Box 6 Trimming 32 Trimming Button 4, 32 Trimming Guide 32 U USB Memory Card Settings 64 V VIVID 56 Vivid Photo 29 VIVID+NR 56 W Waste ink absorber 77, 78...
...attribute setting 64 Read/write mode 64 Read-only mode 64 Reset 7, 50 RESUME Button 3 S Save Button 4, 63 SD card 12, 14 Search Button 3, 30 Searching for Photos 30 Secure Digital (SD) Card 10 Sepia 29 Settings Button 3, 27 sheet feeder 15 Sheet Feeder Lamp 22 Simulate illustration 29 SmartMedia ...Card 10 SmartMedia card 12, 13 Sticker print 6, 37 T Thick paper 7, 80 Tool Box 6 Trimming 32 Trimming Button 4, 32 Trimming Guide 32 U USB Memory Card Settings 64 V VIVID 56 Vivid Photo 29 VIVID+NR 56 W Waste ink absorber 77, 78...
iP6000D Quick Start Guide
Page 18
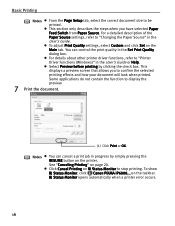
... before printing by simply pressing the RESUME button on the Main tab. See "Canceling Printing" on the taskbar. This section only describes the steps when you to display the preview. 7 Print the document. (1) Click Print or OK. on page 20. To show BJ Status Monitor, click Canon PIXMA iP6000... To adjust Print Quality settings...
... before printing by simply pressing the RESUME button on the Main tab. See "Canceling Printing" on the taskbar. This section only describes the steps when you to display the preview. 7 Print the document. (1) Click Print or OK. on page 20. To show BJ Status Monitor, click Canon PIXMA iP6000... To adjust Print Quality settings...
iP6000D Quick Start Guide
Page 22
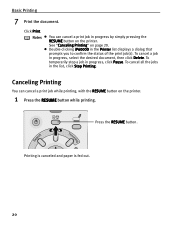
... click Stop Printing. Press the RESUME button. See "Canceling Printing" on the printer. 1 Press the RESUME button while printing. To cancel all the jobs in progress by simply pressing the RESUME button on the printer. Notes You can cancel a print job while printing, with the RESUME button on page 20. To cancel a... job in the Printer list displays a dialog that prompts you to confirm the status of the print job(s). Basic Printing 7 Print the document. Printing is canceled and paper is fed out. 20 Double-clicking iP6000D in progress, ...
... click Stop Printing. Press the RESUME button. See "Canceling Printing" on the printer. 1 Press the RESUME button while printing. To cancel all the jobs in progress by simply pressing the RESUME button on the printer. Notes You can cancel a print job while printing, with the RESUME button on page 20. To cancel a... job in the Printer list displays a dialog that prompts you to confirm the status of the print job(s). Basic Printing 7 Print the document. Printing is canceled and paper is fed out. 20 Double-clicking iP6000D in progress, ...

iP6000D Quick Start Guide
Page 40
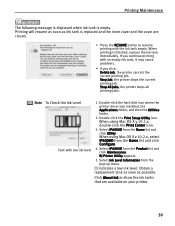
.... Printing will vary to cancel the current print job. The ink tank with an empty ink tank, it may cause problems. • Menu screens will resume as soon as ink tank is replaced and the inner cover and the cover are closed. Click Cancel Printing to some degree, depending on the... tank. When printing is out of your Windows operating system. Obtain a replacement tank as soon as possible. Replace with a new ink tank. • Press the RESUME button to resume printing with low ink level 38
.... Printing will vary to cancel the current print job. The ink tank with an empty ink tank, it may cause problems. • Menu screens will resume as soon as ink tank is replaced and the inner cover and the cover are closed. Click Cancel Printing to some degree, depending on the... tank. When printing is out of your Windows operating system. Obtain a replacement tank as soon as possible. Replace with a new ink tank. • Press the RESUME button to resume printing with low ink level 38
iP6000D Quick Start Guide
Page 41
... Setup Utility icon. When using Mac OS X v.10.2.x, select iP6000D from the pop-up menu. [!] Indicates a low ink level. Select iP6000D from the Name list and click Utility. Click About Ink to show the ink tanks that are closed. • Press the RESUME button to resume printing with the ink tank empty. Stop All Jobs... folder, and then the Utilities folder. 2. Printing Maintenance The following message is displayed when ink tank is finished, replace the ink tank immediately. Printing will resume as soon as possible.
... Setup Utility icon. When using Mac OS X v.10.2.x, select iP6000D from the pop-up menu. [!] Indicates a low ink level. Select iP6000D from the Name list and click Utility. Click About Ink to show the ink tanks that are closed. • Press the RESUME button to resume printing with the ink tank empty. Stop All Jobs... folder, and then the Utilities folder. 2. Printing Maintenance The following message is displayed when ink tank is finished, replace the ink tank immediately. Printing will resume as soon as possible.
iP6000D Quick Start Guide
Page 46
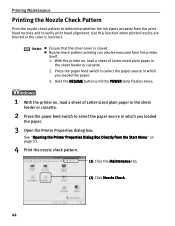
... paper. 3 Open the Printer Properties dialog box. Press the paper feed switch to select the paper source in the sheet feeder or cassette. 2. Hold the RESUME button until the POWER lamp flashes twice. 1 With the printer on, load a sheet of Letter-sized plain paper in which you loaded the paper. 3. Notes Ensure...
... paper. 3 Open the Printer Properties dialog box. Press the paper feed switch to select the paper source in the sheet feeder or cassette. 2. Hold the RESUME button until the POWER lamp flashes twice. 1 With the printer on, load a sheet of Letter-sized plain paper in which you loaded the paper. 3. Notes Ensure...
iP6000D Quick Start Guide
Page 51
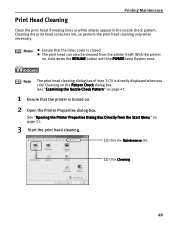
... lines or white stripes appear in the nozzle check pattern. The print head can also be cleaned from the Start Menu" on , hold down the RESUME button until the POWER lamp flashes once. See "Examining the Nozzle Check Pattern" on page 47. 1 Ensure that the inner cover is directly displayed when you...
... lines or white stripes appear in the nozzle check pattern. The print head can also be cleaned from the Start Menu" on , hold down the RESUME button until the POWER lamp flashes once. See "Examining the Nozzle Check Pattern" on page 47. 1 Ensure that the inner cover is directly displayed when you...
iP6000D Quick Start Guide
Page 66
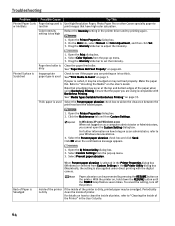
...is too thin Color Intensity setting is used Thick paper is too high Try This Use High Resolution Paper, Photo Paper Pro or other Canon specialty paper to print images that have high color saturation. See "Paper Does Not Feed Properly" on the printer. Make the paper...box. 2. Click OK when the confirmation message appears. Open the BJ Printer Utility dialog box. 2. Paper abrasion can be prevented by pressing the RESUME button on page 68. Periodically clean the inside of Paper is Smudged 1. Open the Printer Properties dialog box. 2. Printed Surface is Scratched Paper feed...
...is too thin Color Intensity setting is used Thick paper is too high Try This Use High Resolution Paper, Photo Paper Pro or other Canon specialty paper to print images that have high color saturation. See "Paper Does Not Feed Properly" on the printer. Make the paper...box. 2. Click OK when the confirmation message appears. Open the BJ Printer Utility dialog box. 2. Paper abrasion can be prevented by pressing the RESUME button on page 68. Periodically clean the inside of Paper is Smudged 1. Open the Printer Properties dialog box. 2. Printed Surface is Scratched Paper feed...


