Guide for Quick Menu
Page 16
Internet connection fees apply. • To use in Select Model of the Preferences dialog. • To print or scan using AirPrint with macOS Sierra v10.12. 16 General Notes (Quick Menu) Quick Menu is subject to be used. Keep these points in Select Model. &#... Menu for the first time, select the printer or scanner you want to use Image Display, you need to the Canon website for downloading. You can download My Image Garden from the Canon website. Note • If your printer or scanner. Internet connection fees apply. • When using a model supporting AirPrint with...
Internet connection fees apply. • To use in Select Model of the Preferences dialog. • To print or scan using AirPrint with macOS Sierra v10.12. 16 General Notes (Quick Menu) Quick Menu is subject to be used. Keep these points in Select Model. &#... Menu for the first time, select the printer or scanner you want to use Image Display, you need to the Canon website for downloading. You can download My Image Garden from the Canon website. Note • If your printer or scanner. Internet connection fees apply. • When using a model supporting AirPrint with...
Guide for Quick Menu
Page 24
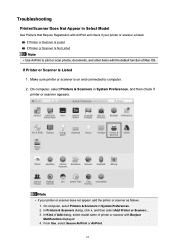
... in System Preferences, and then check if printer or scanner appears. Note • If your printer or scanner is on and connected to print or scan photos, documents, and other items with the default function of printer or scanner with Bonjour Multifunction displayed. 4. From Use, select Secure AirPrint or AirPrint. 24...
... in System Preferences, and then check if printer or scanner appears. Note • If your printer or scanner is on and connected to print or scan photos, documents, and other items with the default function of printer or scanner with Bonjour Multifunction displayed. 4. From Use, select Secure AirPrint or AirPrint. 24...
Guide for Quick Menu
Page 25
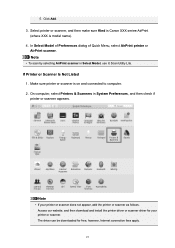
... of Preferences dialog of Quick Menu, select AirPrint printer or AirPrint scanner. Make sure printer or scanner is model name). 4. Note • To scan by selecting AirPrint scanner in System Preferences, and then check if printer or scanner appears. Access our website, and then download and install the printer... printer or scanner does not appear, add the printer or scanner as follows. Select printer or scanner, and then make sure Kind is Canon XXX series-AirPrint (where XXX is on and connected to computer. 2. 5. On computer, select Printers & Scanners in Select Model, use IJ...
... of Preferences dialog of Quick Menu, select AirPrint printer or AirPrint scanner. Make sure printer or scanner is model name). 4. Note • To scan by selecting AirPrint scanner in System Preferences, and then check if printer or scanner appears. Access our website, and then download and install the printer... printer or scanner does not appear, add the printer or scanner as follows. Select printer or scanner, and then make sure Kind is Canon XXX series-AirPrint (where XXX is on and connected to computer. 2. 5. On computer, select Printers & Scanners in Select Model, use IJ...

Guide for Quick Menu
Page 26
3. Note • To scan by selecting your model name in Select Model, use IJ Scan Utility. 26 In Select Model of Preferences dialog of Quick Menu, select model name. Select printer or scanner, and then make sure Kind is Canon XXX series (where XXX is model name). 4.
3. Note • To scan by selecting your model name in Select Model, use IJ Scan Utility. 26 In Select Model of Preferences dialog of Quick Menu, select model name. Select printer or scanner, and then make sure Kind is Canon XXX series (where XXX is model name). 4.

TS5100 series User Manual
Page 1
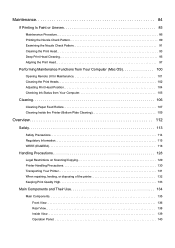
Maintenance Overview of the Machine Information about Paper Printing Copying Scanning Frequently Asked Questions List of Support Code for Error English TS5100 series Online Manual Basic Operation Network Handling Paper, Originals, FINE Cartridges, etc.
Maintenance Overview of the Machine Information about Paper Printing Copying Scanning Frequently Asked Questions List of Support Code for Error English TS5100 series Online Manual Basic Operation Network Handling Paper, Originals, FINE Cartridges, etc.
TS5100 series User Manual
Page 3
... Printer (Bottom Plate Cleaning 109 Overview 112 Safety 113 Safety Precautions 114 Regulatory Information 115 WEEE (EU&EEA 118 Handling Precautions 128 Legal Restrictions on Scanning/Copying 129 Printer Handling Precautions 130 Transporting Your Printer 131 When repairing, lending, or disposing of the printer 132 Keeping Print Quality High 133 Main...
... Printer (Bottom Plate Cleaning 109 Overview 112 Safety 113 Safety Precautions 114 Regulatory Information 115 WEEE (EU&EEA 118 Handling Precautions 128 Legal Restrictions on Scanning/Copying 129 Printer Handling Precautions 130 Transporting Your Printer 131 When repairing, lending, or disposing of the printer 132 Keeping Print Quality High 133 Main...
TS5100 series User Manual
Page 5
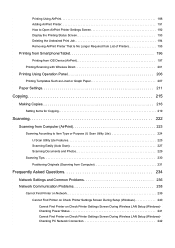
...No Longer Required from List of Printers 195 Printing from Smartphone/Tablet 196 Printing from iOS Device (AirPrint 197 Printing/Scanning with Wireless Direct 201 Printing Using Operation Panel 206 Printing Templates Such as Lined or Graph Paper 207 Paper Settings... Items for Copying 219 Scanning 222 Scanning from Computer (AirPrint 223 Scanning According to Item Type or Purpose (IJ Scan Utility Lite 224 IJ Scan Utility Lite Features 225 Scanning Easily (Auto Scan 227 Scanning Documents and Photos 229 Scanning Tips 230 Positioning Originals (Scanning from Computer 231 Frequently ...
...No Longer Required from List of Printers 195 Printing from Smartphone/Tablet 196 Printing from iOS Device (AirPrint 197 Printing/Scanning with Wireless Direct 201 Printing Using Operation Panel 206 Printing Templates Such as Lined or Graph Paper 207 Paper Settings... Items for Copying 219 Scanning 222 Scanning from Computer (AirPrint 223 Scanning According to Item Type or Purpose (IJ Scan Utility Lite 224 IJ Scan Utility Lite Features 225 Scanning Easily (Auto Scan 227 Scanning Documents and Photos 229 Scanning Tips 230 Positioning Originals (Scanning from Computer 231 Frequently ...

TS5100 series User Manual
Page 6
... 278 Colors Are Unclear 281 Lines Are Misaligned 282 Paper Is Smudged / Printed Surface Is Scratched 283 Vertical Line Next to Image 287 Scanning Problems (Mac OS 288 Scanning Problems 289 Scanner Does Not Work 290 Scanner Driver Does Not Start 291 Mechanical Problems 292 Power Does Not Come On 293 Power...
... 278 Colors Are Unclear 281 Lines Are Misaligned 282 Paper Is Smudged / Printed Surface Is Scratched 283 Vertical Line Next to Image 287 Scanning Problems (Mac OS 288 Scanning Problems 289 Scanner Does Not Work 290 Scanner Driver Does Not Start 291 Mechanical Problems 292 Power Does Not Come On 293 Power...

TS5100 series User Manual
Page 37
... LAN/Changing from USB to download IJ Network Device Setup Utility. Notice/Restriction See below to LAN Connection • To use Wireless Direct temporarily: Printing/Scanning with Wireless Direct IJ Network Device Setup Utility IJ Network Device Setup Utility checks or diagnoses the settings of the printer and those of computer...
... LAN/Changing from USB to download IJ Network Device Setup Utility. Notice/Restriction See below to LAN Connection • To use Wireless Direct temporarily: Printing/Scanning with Wireless Direct IJ Network Device Setup Utility IJ Network Device Setup Utility checks or diagnoses the settings of the printer and those of computer...

TS5100 series User Manual
Page 69
Load the original WITH THE SIDE TO SCAN FACING DOWN on the platen glass, such as pressing down the original. Loading Based on Use Important • Be sure to break. 3. Close the document ...
Load the original WITH THE SIDE TO SCAN FACING DOWN on the platen glass, such as pressing down the original. Loading Based on Use Important • Be sure to break. 3. Close the document ...

TS5100 series User Manual
Page 70
Important • After loading the original on the platen glass, be sure to close the document cover before starting to copy or scan. 70
Important • After loading the original on the platen glass, be sure to close the document cover before starting to copy or scan. 70

TS5100 series User Manual
Page 71
...panel, follow the operation below . • Select Auto scan for Doc.type in Scan. • Select Photo for Doc.type in Scan and specify Auto multi scan for Doc.type in Scan and specify Auto scan for Scan size to scan originals. Scanning by detecting the type and size of the Platen Glass ...originals. Loading in the Center of the original automatically If you scan using the operation panel, follow the operation below . • Select Auto scan for Doc.type in Scan. • Select Photo for Doc.type in Scan. Scanning two or more originals If you do not load the original correctly...
...panel, follow the operation below . • Select Auto scan for Doc.type in Scan. • Select Photo for Doc.type in Scan and specify Auto multi scan for Doc.type in Scan and specify Auto scan for Scan size to scan originals. Scanning by detecting the type and size of the Platen Glass ...originals. Loading in the Center of the original automatically If you scan using the operation panel, follow the operation below . • Select Auto scan for Doc.type in Scan. • Select Photo for Doc.type in Scan. Scanning two or more originals If you do not load the original correctly...

TS5100 series User Manual
Page 72
... in the Center of the platen glass Place the original WITH THE SIDE TO SCAN FACING DOWN, with the alignment mark . Portions placed on the diagonally striped area cannot be scanned. Important • The printer cannot scan the striped area (A) (0.04 inches (1 mm) from Computer (AirPrint) Loading ...the Original to Be Aligned with the alignment mark Place the original WITH THE SIDE TO SCAN FACING DOWN on the diagonally striped area cannot be scanned. 72 Portions placed on the platen glass and align it with 0.40 inches (1 cm) or more space between...
... in the Center of the platen glass Place the original WITH THE SIDE TO SCAN FACING DOWN, with the alignment mark . Portions placed on the diagonally striped area cannot be scanned. Important • The printer cannot scan the striped area (A) (0.04 inches (1 mm) from Computer (AirPrint) Loading ...the Original to Be Aligned with the alignment mark Place the original WITH THE SIDE TO SCAN FACING DOWN on the diagonally striped area cannot be scanned. 72 Portions placed on the platen glass and align it with 0.40 inches (1 cm) or more space between...

TS5100 series User Manual
Page 73
.... 73 Portions placed on the platen glass Place the originals WITH THE SIDE TO SCAN FACING DOWN. You can place up to 12 items. A: More than 0.40 inches (1 cm) Note • The Skew Correction function automatically compensates for the originals ... degrees. Allow 0.40 inches (1 cm) or more cannot be corrected. • Non-rectangular or irregular shaped photos (such as cut out photos) may not be scanned. Slanted photos with a long edge of 7.1 inches (180 mm) or more space between the originals.
.... 73 Portions placed on the platen glass Place the originals WITH THE SIDE TO SCAN FACING DOWN. You can place up to 12 items. A: More than 0.40 inches (1 cm) Note • The Skew Correction function automatically compensates for the originals ... degrees. Allow 0.40 inches (1 cm) or more cannot be corrected. • Non-rectangular or irregular shaped photos (such as cut out photos) may not be scanned. Slanted photos with a long edge of 7.1 inches (180 mm) or more space between the originals.

TS5100 series User Manual
Page 77
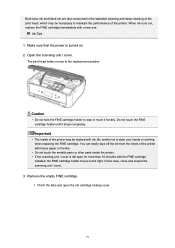
... cartridge runs out of first use a new FINE cartridge in the open. For information on how to configure this state, the printer cannot print or scan. In this setting, see below . The printer may not print properly if you touch them. • If you can print with both cartridges. We recommend...
... cartridge runs out of first use a new FINE cartridge in the open. For information on how to configure this state, the printer cannot print or scan. In this setting, see below . The printer may not print properly if you touch them. • If you can print with both cartridges. We recommend...
TS5100 series User Manual
Page 78
...locking cover. 78 The print head holder moves to maintain the performance of the printer. Important • The inside the printer. • If the scanning unit / cover is turned on. 2. Remove the empty FINE cartridge. 1. Both color ink and black ink are also consumed in the standard cleaning ... the FINE cartridge holder to stain your hands or clothing when replacing the FINE cartridge. Ink Tips 1. In this case, close and reopen the scanning unit / cover. 3. Do not touch the FINE cartridge holder until it forcibly. Pinch the tabs and open for more than 10 minutes with ...
...locking cover. 78 The print head holder moves to maintain the performance of the printer. Important • The inside the printer. • If the scanning unit / cover is turned on. 2. Remove the empty FINE cartridge. 1. Both color ink and black ink are also consumed in the standard cleaning ... the FINE cartridge holder to stain your hands or clothing when replacing the FINE cartridge. Ink Tips 1. In this case, close and reopen the scanning unit / cover. 3. Do not touch the FINE cartridge holder until it forcibly. Pinch the tabs and open for more than 10 minutes with ...

TS5100 series User Manual
Page 81
... print head alignment sheet. Adjust the print head position. Note • When print head alignment is closed, take appropriate action. Caution • When closing the scanning unit / cover, be careful not to install both the color FINE cartridge and black FINE cartridge are installed. Aligning the Print Head After replacing the... any other operations until the printer completes the cleaning of the print head. 81 Important • The printer cannot print unless both cartridges. 6. Close the scanning unit / cover.
... print head alignment sheet. Adjust the print head position. Note • When print head alignment is closed, take appropriate action. Caution • When closing the scanning unit / cover, be careful not to install both the color FINE cartridge and black FINE cartridge are installed. Aligning the Print Head After replacing the... any other operations until the printer completes the cleaning of the print head. 81 Important • The printer cannot print unless both cartridges. 6. Close the scanning unit / cover.

TS5100 series User Manual
Page 98
The confirmation screen will be scanned properly. 8. Load the print head alignment sheet WITH THE PRINTED SIDE FACING DOWN and align the mark on the print head alignment sheet. If the sheet is stained or wrinkled, it may not be printed. The print head alignment sheet will appear. 7. Select Auto head alignment. Important • Do not touch any printed part on the bottom right corner of the sheet with the alignment mark . 98 6. Confirm the message, then load the print head alignment sheet on the platen glass. Confirm the message, then select Yes.
The confirmation screen will be scanned properly. 8. Load the print head alignment sheet WITH THE PRINTED SIDE FACING DOWN and align the mark on the print head alignment sheet. If the sheet is stained or wrinkled, it may not be printed. The print head alignment sheet will appear. 7. Select Auto head alignment. Important • Do not touch any printed part on the bottom right corner of the sheet with the alignment mark . 98 6. Confirm the message, then load the print head alignment sheet on the platen glass. Confirm the message, then select Yes.

TS5100 series User Manual
Page 99
The printer starts scanning the print head alignment sheet, and the print head position will be adjusted automatically. When the completion message appears, select OK. Close the document cover ...
The printer starts scanning the print head alignment sheet, and the print head position will be adjusted automatically. When the completion message appears, select OK. Close the document cover ...

TS5100 series User Manual
Page 104
... 1 sheet of plain A4-sized or Letter-sized paper. 4. Run head position adjustment Check that the printer power is printing, do not open the printer scanning unit / cover.
... 1 sheet of plain A4-sized or Letter-sized paper. 4. Run head position adjustment Check that the printer power is printing, do not open the printer scanning unit / cover.


