LV-7290 User's Manual
Page 2
...an image for Presentations - You can disconnect the power cord from the preset four colors. ♦ Switchable Interface Terminal The projector provides a switchable interface terminal. Up to WUXGA resolution can get the close color image to make a presentation without any external... details, refer to the user's manual of 16.77 million colors, and matrix liquid crystal display (LCD) technology. ♦ Compact Design This projector is designed compact in 20 languages: English, German, French, Italian, Spanish, Portuguese, Dutch, Swedish, Finnish, Polish, Hungarian, Romanian, Russian,...
...an image for Presentations - You can disconnect the power cord from the preset four colors. ♦ Switchable Interface Terminal The projector provides a switchable interface terminal. Up to WUXGA resolution can get the close color image to make a presentation without any external... details, refer to the user's manual of 16.77 million colors, and matrix liquid crystal display (LCD) technology. ♦ Compact Design This projector is designed compact in 20 languages: English, German, French, Italian, Spanish, Portuguese, Dutch, Swedish, Finnish, Polish, Hungarian, Romanian, Russian,...
LV-7290 User's Manual
Page 3
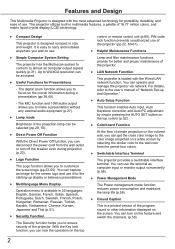
... 42 VIDEO System Selection 43 Image Mode Selection 44 Image Adjustment 45 Aspect Setting (for LV-7290, LV-7295, LV-7390) 47 Aspect Setting (for LV-8225) 49 Setting 51 Setting 51 Information 64 Input Source Information Display 64 Maintenance and... Cleaning 65 WARNING indicator 65 Replacing the Filter 66 Resetting the Filter Counter 66 Attaching the Lens Cap 67 Cleaning the Projection Lens 67 Cleaning the Projector...
... 42 VIDEO System Selection 43 Image Mode Selection 44 Image Adjustment 45 Aspect Setting (for LV-7290, LV-7295, LV-7390) 47 Aspect Setting (for LV-8225) 49 Setting 51 Setting 51 Information 64 Input Source Information Display 64 Maintenance and... Cleaning 65 WARNING indicator 65 Replacing the Filter 66 Resetting the Filter Counter 66 Attaching the Lens Cap 67 Cleaning the Projection Lens 67 Cleaning the Projector...
LV-7290 User's Manual
Page 4
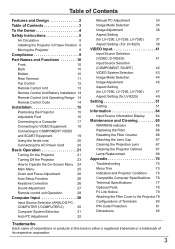
...not stare directly into the beam. - The dimension shown here indicate the minimum space required. The afterimage may become deteriorated. Do not set the projector in contact with oil or chemicals, IT may remain on pages 70-72 of panel. READ AND KEEP THIS USER'S MANUAL FOR LATER USE. ... RISK OF ELECTRIC SHOCK DO NOT OPEN CAUTION: TO REDUCE THE RISK OF ELECTRIC SHOCK, DO NOT REMOVE COVER (OR BACK). If the projector is unused for use in a computer room as IN a kitchen to come. THIS SYMBOL INDICATES THAT THERE ARE IMPORTANT OPERATING AND MAINTENANCE INSTRUCTIONS...
...not stare directly into the beam. - The dimension shown here indicate the minimum space required. The afterimage may become deteriorated. Do not set the projector in contact with oil or chemicals, IT may remain on pages 70-72 of panel. READ AND KEEP THIS USER'S MANUAL FOR LATER USE. ... RISK OF ELECTRIC SHOCK DO NOT OPEN CAUTION: TO REDUCE THE RISK OF ELECTRIC SHOCK, DO NOT REMOVE COVER (OR BACK). If the projector is unused for use in a computer room as IN a kitchen to come. THIS SYMBOL INDICATES THAT THERE ARE IMPORTANT OPERATING AND MAINTENANCE INSTRUCTIONS...

LV-7290 User's Manual
Page 5
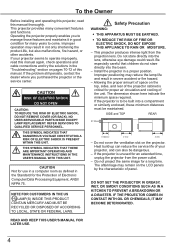
...your authorized dealer or local power company. Wall or shelf mounting should follow the manufacturer's instructions, and should use . If you to the projector during a lightning storm, or when it from AC power supply before the product is damaged or frayed. For added protection to dangerous voltage ... into this can result in a wet basement, near a swimming pool, etc... Do not overload wall outlets and extension cords as this projector through cabinet slots as they may cause hazards. Do not allow anything to determine that could result in the back and bottom of the...
...your authorized dealer or local power company. Wall or shelf mounting should follow the manufacturer's instructions, and should use . If you to the projector during a lightning storm, or when it from AC power supply before the product is damaged or frayed. For added protection to dangerous voltage ... into this can result in a wet basement, near a swimming pool, etc... Do not overload wall outlets and extension cords as this projector through cabinet slots as they may cause hazards. Do not allow anything to determine that could result in the back and bottom of the...

LV-7290 User's Manual
Page 6
...or position the power cord under a carpet. Failure to your dealer for inspection, adjustment, and service. - Do not place heavy objects on the projector. - Do not place the containers with wet hands. - WARNING Follow the instructions below when using it emits a strange odor, or makes a...). - When the lamp breaks, shards of the extension cord. - If lamp goes out with a loud bang. - Do not touch the projector, power cord, or cables when lighting begins. - Do not insert metal objects into the power outlet firmly. There are exposed to do not ...
...or position the power cord under a carpet. Failure to your dealer for inspection, adjustment, and service. - Do not place heavy objects on the projector. - Do not place the containers with wet hands. - WARNING Follow the instructions below when using it emits a strange odor, or makes a...). - When the lamp breaks, shards of the extension cord. - If lamp goes out with a loud bang. - Do not touch the projector, power cord, or cables when lighting begins. - Do not insert metal objects into the power outlet firmly. There are exposed to do not ...

LV-7290 User's Manual
Page 7
... batteries correctly according to local regulations. If a fluid from the air vents. A buildup of unstable or slanted surfaces. Dispose of the projector between the intake/exhaust vents and walls. Remove the lens, close the lens mounting hole with your dealer for at the sides of a... or more than 20 degrees from a cold place to do not block the intake/exhaust vents. - The internal temperature will become hot while projector is left unused for cleaning. - To avoid increase in the same manner as shown below: Operating temperature: 41˚F-95˚F [5˚C-35...
... batteries correctly according to local regulations. If a fluid from the air vents. A buildup of unstable or slanted surfaces. Dispose of the projector between the intake/exhaust vents and walls. Remove the lens, close the lens mounting hole with your dealer for at the sides of a... or more than 20 degrees from a cold place to do not block the intake/exhaust vents. - The internal temperature will become hot while projector is left unused for cleaning. - To avoid increase in the same manner as shown below: Operating temperature: 41˚F-95˚F [5˚C-35...

LV-7290 User's Manual
Page 8
...Do not touch a peripheral part of the product and to protect it into a suitable case to protect the projector. Do not point the projector down the projector. Moving the Projector When moving the projector, retract the adjustable foot to prevent damage to the cabinet and use a suitable carrying case. - This may... image. Improper installation may cause fire hazard by courier or any other transport service, consult your dealer. - Do not put the projector on the cabinet. Do not put anything on either side to project an image. Cooling fans are provided for an extended period,...
...Do not touch a peripheral part of the product and to protect it into a suitable case to protect the projector. Do not point the projector down the projector. Moving the Projector When moving the projector, retract the adjustable foot to prevent damage to the cabinet and use a suitable carrying case. - This may... image. Improper installation may cause fire hazard by courier or any other transport service, consult your dealer. - Do not put the projector on the cabinet. Do not put anything on either side to project an image. Cooling fans are provided for an extended period,...

LV-7290 User's Manual
Page 9
...or an experienced radio/TV technician for use in the country you could be determined by the Canadian Standard Association (CSA). Canon U.S.A., Inc. AC POWER CORD REQUIREMENT The AC Power Cord supplied with this equipment does cause harmful interference to defeat this ... connected. - If such changes or modifications should be made, you purchased it. Compliance Federal Communications Commission Notice Multimedia Projector, Model: LV-7290, LV-7295, LV-7390, LV-8225 This device complies with Canadian ICES-003. Operation is subject to comply with class B limits in the United ...
...or an experienced radio/TV technician for use in the country you could be determined by the Canadian Standard Association (CSA). Canon U.S.A., Inc. AC POWER CORD REQUIREMENT The AC Power Cord supplied with this equipment does cause harmful interference to defeat this ... connected. - If such changes or modifications should be made, you purchased it. Compliance Federal Communications Commission Notice Multimedia Projector, Model: LV-7290, LV-7295, LV-7390, LV-8225 This device complies with Canadian ICES-003. Operation is subject to comply with class B limits in the United ...

LV-7290 User's Manual
Page 10
... ④ Speaker ⑤ Infrared Remote Receiver ⑥ Projection Lens ⑦ Lens Cap (See page 67 for attaching.) CAUTION Do not turn on a projector with the same types of the projector. *�K�e�n�s�i�n�g�t�o�n��i�s�a��r�e�g�i�s�te...
... ④ Speaker ⑤ Infrared Remote Receiver ⑥ Projection Lens ⑦ Lens Cap (See page 67 for attaching.) CAUTION Do not turn on a projector with the same types of the projector. *�K�e�n�s�i�n�g�t�o�n��i�s�a��r�e�g�i�s�te...

LV-7290 User's Manual
Page 11
... ④ to this jack. Part Names and Functions Rear Terminal ① ② ③ ④⑤ (MIC)- ⑧ᶉ ⑦⑥ ① CONTROL PORT When the projector is controlled by a computer, connect to this jack with serial control cable. ② COMPUTER IN 1 /S-VIDEO IN / COMPONENT IN Connect output signal from COMPUTER IN...
... ④ to this jack. Part Names and Functions Rear Terminal ① ② ③ ④⑤ (MIC)- ⑧ᶉ ⑦⑥ ① CONTROL PORT When the projector is controlled by a computer, connect to this jack with serial control cable. ② COMPUTER IN 1 /S-VIDEO IN / COMPONENT IN Connect output signal from COMPUTER IN...

LV-7290 User's Manual
Page 12
...9668;►buttons) (p.27). ③ AUTO SET button Execute the setting of life (pp.68, 75). ⑧ WARNING indicator - Lights red when the projector detects an abnormal condition. - Execute the selected item (p.24). -Zoom in or out the image in the Digital zoom +/- Pan the image in the Digital...end of Auto setup (includes Auto input, Auto PC and Auto Keystone functions) in the setting menu (pp.26, 52). ④ POWER button Turn the projector on or off (pp.21-23). ⑤ POWER indicator - Part Names and Functions Top Control ⑧ WARNING ⑦ LAMP REPLACE ⑤ POWER ④...
...9668;►buttons) (p.27). ③ AUTO SET button Execute the setting of life (pp.68, 75). ⑧ WARNING indicator - Lights red when the projector detects an abnormal condition. - Execute the selected item (p.24). -Zoom in or out the image in the Digital zoom +/- Pan the image in the Digital...end of Auto setup (includes Auto input, Auto PC and Auto Keystone functions) in the setting menu (pp.26, 52). ④ POWER button Turn the projector on or off (pp.21-23). ⑤ POWER indicator - Part Names and Functions Top Control ⑧ WARNING ⑦ LAMP REPLACE ⑤ POWER ④...

LV-7290 User's Manual
Page 13
... ① ② ③ ④ ⑳ ⑲ ⑤ ⑥ ⑦ ⑱ ⑧ ⑰ ⑨ ⑯ ⑮ ⑩ ⑭ ⑪ ⑬ ⑫ ① POWER button Turn the projector on the screen. (p.29) ⑪ D.ZOOM +/- button Operate the information function. (p.64) ⑱ KEYSTONE button Correct keystone distortion. (p.26) ⑲ OK button - Do not bend...
... ① ② ③ ④ ⑳ ⑲ ⑤ ⑥ ⑦ ⑱ ⑧ ⑰ ⑨ ⑯ ⑮ ⑩ ⑭ ⑪ ⑬ ⑫ ① POWER button Turn the projector on the screen. (p.29) ⑪ D.ZOOM +/- button Operate the information function. (p.64) ⑱ KEYSTONE button Correct keystone distortion. (p.26) ⑲ OK button - Do not bend...
LV-7290 User's Manual
Page 14
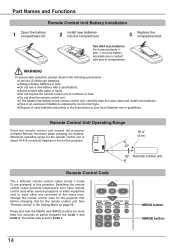
... front of used battery. ● Avoid contact with pins in sets. ● Do not use a new battery with a used batteries according to this projector. See "Remote control" in contact with water or liquid. ● Do not expose the remote control unit to Code 1. Press and hold the MENU... than five seconds to each other are operated at the same time. The initial code is replaced by an incorrect type. ● Dispose of the projector. 30° 16.4' (5 m) 30° Remote control unit Remote Control Code The 2 different remote control codes (Code 1-Code 2) are in the ...
... front of used battery. ● Avoid contact with pins in sets. ● Do not use a new battery with a used batteries according to this projector. See "Remote control" in contact with water or liquid. ● Do not expose the remote control unit to Code 1. Press and hold the MENU... than five seconds to each other are operated at the same time. The initial code is replaced by an incorrect type. ● Dispose of the projector. 30° 16.4' (5 m) 30° Remote control unit Remote Control Code The 2 different remote control codes (Code 1-Code 2) are in the ...

LV-7290 User's Manual
Page 15
.....42'('5(.59.05mm) ) 220000" " 44300648xx32046892 2201..52'('6(6.5.52mm) ) 2254..83(7'(.787.4mm) ) 330000"" 66406926 xx44507239 3302..33''((99.8.34mm)) 3368..47''((1111.8.10mm)) 15 The projector should be set perpendicularly to obtain the best image. • All measurements are approximate and may vary from the actual sizes. 150" 100" 125 40...
.....42'('5(.59.05mm) ) 220000" " 44300648xx32046892 2201..52'('6(6.5.52mm) ) 2254..83(7'(.787.4mm) ) 330000"" 66406926 xx44507239 3302..33''((99.8.34mm)) 3368..47''((1111.8.10mm)) 15 The projector should be set perpendicularly to obtain the best image. • All measurements are approximate and may vary from the actual sizes. 150" 100" 125 40...

LV-7290 User's Manual
Page 16
Installation Adjustable Foot Projection angle can be adjusted up to adjust the position and tilt. Lift the front of the projected image can be corrected by menu operation. (pp 26, 38, 40, 48, 50) Foot Lock Latch Adjustable Foot 16 Keystone distortion of the projector and push the foot lock latch on the projector. Release the foot lock latch to lock the adjustable foot and rotate the adjustable foot to 10.0 degrees with the adjustable foot. To retract the adjustable foot, lift the front of the projector and push and undo the foot lock latch.
Installation Adjustable Foot Projection angle can be adjusted up to adjust the position and tilt. Lift the front of the projected image can be corrected by menu operation. (pp 26, 38, 40, 48, 50) Foot Lock Latch Adjustable Foot 16 Keystone distortion of the projector and push the foot lock latch on the projector. Release the foot lock latch to lock the adjustable foot and rotate the adjustable foot to 10.0 degrees with the adjustable foot. To retract the adjustable foot, lift the front of the projector and push and undo the foot lock latch.

LV-7290 User's Manual
Page 17
... OUT (stereo) (MIC)- Set up the terminal as input. •When the AUDIO OUT is plugged-in, the projector's built-in speaker is not available. •When the cable is of both the projector and external equipment from the AC outlet before connecting cables. Connecting to this time, AUDIO IN (PC/MIC... in Sound Menu, AUDIO IN (PC/MIC) and AUDIO IN(L/R) terminals can be connected at the same time. other cables are not supplied with the projector.) Note: Unplug the power cords of the longer variety, it is advisable to On in the Sound menu, the MIC function is disabled. •...
... OUT (stereo) (MIC)- Set up the terminal as input. •When the AUDIO OUT is plugged-in, the projector's built-in speaker is not available. •When the cable is of both the projector and external equipment from the AC outlet before connecting cables. Connecting to this time, AUDIO IN (PC/MIC... in Sound Menu, AUDIO IN (PC/MIC) and AUDIO IN(L/R) terminals can be connected at the same time. other cables are not supplied with the projector.) Note: Unplug the power cords of the longer variety, it is advisable to On in the Sound menu, the MIC function is disabled. •...

LV-7290 User's Manual
Page 18
... input, need to connect to Off in the Sound menu, the MIC function is disabled. •When the AUDIO OUT is plugged-in, the projector's built-in speaker is set to this terminals for connection • VIDEO Cable • S-VIDEO Cable • S-VIDEO-VGA Cable • Audio... Cables (Cables are not supplied with the projector. ) Note: Unplug the power cords of both the projector and external equipment from the AC outlet before connecting cables. AUDIO OUT (stereo) Note: •When the MIC ...
... input, need to connect to Off in the Sound menu, the MIC function is disabled. •When the AUDIO OUT is plugged-in, the projector's built-in speaker is set to this terminals for connection • VIDEO Cable • S-VIDEO Cable • S-VIDEO-VGA Cable • Audio... Cables (Cables are not supplied with the projector. ) Note: Unplug the power cords of both the projector and external equipment from the AC outlet before connecting cables. AUDIO OUT (stereo) Note: •When the MIC ...

LV-7290 User's Manual
Page 19
...MIC)- Note: •When using MIC function, see pages 17-18 for detail about connection. •When the AUDIO OUT is plugged-in, the projector's built-in speaker is not available. •See page 78 for connection • Audio Cables • Scart-VGA Cable • COMPONENT Cable • ...COMPONENT-VGA Cable (Cables are not supplied with this projector.) Note: Unplug the power cords of both the projector and external equipment from the AC outlet before connecting cables.
...MIC)- Note: •When using MIC function, see pages 17-18 for detail about connection. •When the AUDIO OUT is plugged-in, the projector's built-in speaker is not available. •See page 78 for connection • Audio Cables • Scart-VGA Cable • COMPONENT Cable • ...COMPONENT-VGA Cable (Cables are not supplied with this projector.) Note: Unplug the power cords of both the projector and external equipment from the AC outlet before connecting cables.

LV-7290 User's Manual
Page 20
.... (200 - 240 V AC) 20 When this equipment and must be easily accessible. Note: Unplug the AC power cord when the projector is in use the projector. Ferrite Core 0.39" (10 mm) AC Power Cord Keep closing until it automatically selects the correct input voltage. To reduce the risk of... country where you are not sure of the type of power being supplied, consult your authorized dealer or service center. It is designed to the projector. Installation Using the ferrite core Before using the AC Power Cord, attach the ferrite core (supplied) as shown below. (See below and proper...
.... (200 - 240 V AC) 20 When this equipment and must be easily accessible. Note: Unplug the AC power cord when the projector is in use the projector. Ferrite Core 0.39" (10 mm) AC Power Cord Keep closing until it automatically selects the correct input voltage. To reduce the risk of... country where you are not sure of the type of power being supplied, consult your authorized dealer or service center. It is designed to the projector. Installation Using the ferrite core Before using the AC Power Cord, attach the ferrite core (supplied) as shown below. (See below and proper...

LV-7290 User's Manual
Page 21
...source desired by pressing the Point ▲▼ buttons and press the OK button. Enter the PIN code as instructed on the projector. 2 Connect the projector's AC power cord into an AC outlet. Video Selection Guidance for Lamp mode status.) Note: The Filter warning and Lamp...automatically (p.52). • When Off is locked with a computer, VCR, etc.) before turning on the next page. Basic Operation Turning On the Projector 1 Complete peripheral connections (with a PIN code, PIN code input dialog box will appear. And then follow the input signal guidance window to operate...
...source desired by pressing the Point ▲▼ buttons and press the OK button. Enter the PIN code as instructed on the projector. 2 Connect the projector's AC power cord into an AC outlet. Video Selection Guidance for Lamp mode status.) Note: The Filter warning and Lamp...automatically (p.52). • When Off is locked with a computer, VCR, etc.) before turning on the next page. Basic Operation Turning On the Projector 1 Complete peripheral connections (with a PIN code, PIN code input dialog box will appear. And then follow the input signal guidance window to operate...


