User Manual
Page 4
.../Editing Dialog Box 56 Admin Dialog Box 60 Chapter 6 Maintenance 62 1. Regular Maintenance 62 Cleaning the Scanner 62 Cleaning the Inside of Documents as Search Keywords 32 Specifying Security Settings for PDF Files 32 5. Other Functions 35 Setting the Long... Driver and Job Registration Tool 75 Uninstalling CapturePerfect 3.0 76 Chapter 8 Appendix 77 Specifications 77 Replacement Parts 78 External Dimensions 79 INDEX 81 4 DR-2010C / DR-2510C Contents Back Previous Page Next Page Scanning Documents That Include Both Color and Black-and-White Pages 29 Scanning Different Sized...
.../Editing Dialog Box 56 Admin Dialog Box 60 Chapter 6 Maintenance 62 1. Regular Maintenance 62 Cleaning the Scanner 62 Cleaning the Inside of Documents as Search Keywords 32 Specifying Security Settings for PDF Files 32 5. Other Functions 35 Setting the Long... Driver and Job Registration Tool 75 Uninstalling CapturePerfect 3.0 76 Chapter 8 Appendix 77 Specifications 77 Replacement Parts 78 External Dimensions 79 INDEX 81 4 DR-2010C / DR-2510C Contents Back Previous Page Next Page Scanning Documents That Include Both Color and Black-and-White Pages 29 Scanning Different Sized...

User Manual
Page 11
...Connecting the Scanner to the Computer 15 3. Scanner System Requirements 11 2. Turning the Power ON 16 Scanner Recognition 16 11..SSccanannenreSrysStyesmteRmeqRuiereqmueirnetms ents To use the DR-2010C/DR-2510C scanner, your ...specifications: y CPU: Pentium 4 (3.2 GHz or faster) y Memory: 1 GB or more y Hard disk: 1 GB or more available space y CD-ROM drive y Hi-Speed USB 2.0 y Monitor: Resolution of 1024 × 768 (XGA) or better recommended. • An ISIS-compatible application or a TWAIN-compatible application that is compatible with the above operating systems. 11 DR-2010C / DR...
...Connecting the Scanner to the Computer 15 3. Scanner System Requirements 11 2. Turning the Power ON 16 Scanner Recognition 16 11..SSccanannenreSrysStyesmteRmeqRuiereqmueirnetms ents To use the DR-2010C/DR-2510C scanner, your ...specifications: y CPU: Pentium 4 (3.2 GHz or faster) y Memory: 1 GB or more y Hard disk: 1 GB or more available space y CD-ROM drive y Hi-Speed USB 2.0 y Monitor: Resolution of 1024 × 768 (XGA) or better recommended. • An ISIS-compatible application or a TWAIN-compatible application that is compatible with the above operating systems. 11 DR-2010C / DR...

User Manual
Page 12
...DR-2010C/DR-2510C Setup disc. • DR-2010C/DR-2510C Driver The scanner driver for using either [Typical Installation] or [Custom Installation]. Menu Screen Typical Installation Read Manuals Custom Installation 12 DR-2010C / DR-2510C For details, contact your computer system, contact the store where you are lower if your local authorized Canon...Even if the computer satisfies the recommended specifications, the scanning speed may vary, depending on the specified scan settings. • The ISIS/TWAIN Drivers provided with Canon document scanners. For details, consult your computer. ...
...DR-2010C/DR-2510C Setup disc. • DR-2010C/DR-2510C Driver The scanner driver for using either [Typical Installation] or [Custom Installation]. Menu Screen Typical Installation Read Manuals Custom Installation 12 DR-2010C / DR-2510C For details, contact your computer system, contact the store where you are lower if your local authorized Canon...Even if the computer satisfies the recommended specifications, the scanning speed may vary, depending on the specified scan settings. • The ISIS/TWAIN Drivers provided with Canon document scanners. For details, consult your computer. ...

User Manual
Page 13
Software Installation Follow the procedure below to reinstall only specific software that you have previously uninstalled, select [Custom Installation] and specify the software. 13 DR-2010C / DR-2510C Contents Back 4 Click [Install]. If you select [Typical Installation], all of the computer. 5 Click [Next]. 3... before connecting the scanner to the computer. • Log on to accept it. Previous Page Next Page IMPORTANT • Install the software before installing the software. 1 Turn the power of the computer ON. 2 Insert the DR-2010C/DR-2510C Setup disc into...
Software Installation Follow the procedure below to reinstall only specific software that you have previously uninstalled, select [Custom Installation] and specify the software. 13 DR-2010C / DR-2510C Contents Back 4 Click [Install]. If you select [Typical Installation], all of the computer. 5 Click [Next]. 3... before connecting the scanner to the computer. • Log on to accept it. Previous Page Next Page IMPORTANT • Install the software before installing the software. 1 Turn the power of the computer ON. 2 Insert the DR-2010C/DR-2510C Setup disc into...

User Manual
Page 37
... 47 Image Contour Adjustment 48 Image Rotation 48 Correcting Text Orientation 49 Removing the Document Background/Preventing Bleed Through ......... 49 Omitting a Specific Color 50 Enhancing the Red Color 50 Rapid System Recovery 51 Double Feed Detection...DR-2010C/DR-2510C with an ISIS/TWAIN-compliant application, the DR-2010C/DR-2510C must first be selected as the scanner to [All Programs] → [CapturePerfect 3.0] → click [CapturePerfect 3.0]. 2 From the [Scan] menu, select [Select Scanner]. 3 Select [Canon DR-2510C] or [Canon DR-2010C] → click [OK]. 37 DR-2010C / DR...
... 47 Image Contour Adjustment 48 Image Rotation 48 Correcting Text Orientation 49 Removing the Document Background/Preventing Bleed Through ......... 49 Omitting a Specific Color 50 Enhancing the Red Color 50 Rapid System Recovery 51 Double Feed Detection...DR-2010C/DR-2510C with an ISIS/TWAIN-compliant application, the DR-2010C/DR-2510C must first be selected as the scanner to [All Programs] → [CapturePerfect 3.0] → click [CapturePerfect 3.0]. 2 From the [Scan] menu, select [Select Scanner]. 3 Select [Canon DR-2510C] or [Canon DR-2010C] → click [OK]. 37 DR-2010C / DR...

User Manual
Page 50
NOTE You can specify different settings for setting the scanner to enhance the red color when performing black-and-white scanning. Contents Back Previous Page Next Page Omitting a Specific Color This section describes the procedure for the front and back side of the document. 50 DR-2010C / DR-2510C NOTE If you select [24-bit Color] or...] tab, you cannot specify this setting. NOTE If you select [24-bit Color] or [Auto Color Detection] from the [Mode] drop-down list of the document.
NOTE You can specify different settings for setting the scanner to enhance the red color when performing black-and-white scanning. Contents Back Previous Page Next Page Omitting a Specific Color This section describes the procedure for the front and back side of the document. 50 DR-2010C / DR-2510C NOTE If you select [24-bit Color] or...] tab, you cannot specify this setting. NOTE If you select [24-bit Color] or [Auto Color Detection] from the [Mode] drop-down list of the document.
User Manual
Page 77
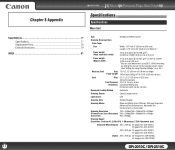
Chapter 8 Appendix Contents Back Previous Page Next Page SSppeeccifiifciactaiotnios ns Specifications Main Unit Specifications 77 Specifications 77 Replacement Parts 78 External Dimensions 79 INDEX 81 77 Type Desktop sheetfed scanner Scanning Document Size Plain Paper Size Width: 1.97" to 8.5" (50 mm to 216 mm..., LTR/A4 document size) Black and White Simplex 200 x 200 dpi 25 pages/min.(DR-2510C), 20 pages/min.(DR-2010C) 300 x 300 dpi 25 pages/min.(DR-2510C), 20 pages/min.(DR-2010C) Duplex 200 x 200 dpi 50 images/min.(DR-2510C), 40 images/min.(DR-2010C) DR-2010C / DR-2510C
Chapter 8 Appendix Contents Back Previous Page Next Page SSppeeccifiifciactaiotnios ns Specifications Main Unit Specifications 77 Specifications 77 Replacement Parts 78 External Dimensions 79 INDEX 81 77 Type Desktop sheetfed scanner Scanning Document Size Plain Paper Size Width: 1.97" to 8.5" (50 mm to 216 mm..., LTR/A4 document size) Black and White Simplex 200 x 200 dpi 25 pages/min.(DR-2510C), 20 pages/min.(DR-2010C) 300 x 300 dpi 25 pages/min.(DR-2510C), 20 pages/min.(DR-2010C) Duplex 200 x 200 dpi 50 images/min.(DR-2510C), 40 images/min.(DR-2010C) DR-2010C / DR-2510C
User Manual
Page 82
...clearing 33 Power connector 10 Power indicator 10 Power switch ...10 Practical examples 32 Preparing the scanner 20 Document eject tray 20 Document feed tray 20 Document stopper 20 R Recognizing the scanner by computer 16 Replacement parts 78 Retard roller Attaching 68 Removing 67 Roller, replacing Counter, resetting... data for keyword search 32 Security setting for PDF 32 Skipping blank pages 30 Text orientation, correcting 31 Specifications 77 System requirements 11 T Troubleshooting 72 Typical Installation 13 U USB connector 10 USB Link switch 8 82 DR-2010C / DR-2510C
...clearing 33 Power connector 10 Power indicator 10 Power switch ...10 Practical examples 32 Preparing the scanner 20 Document eject tray 20 Document feed tray 20 Document stopper 20 R Recognizing the scanner by computer 16 Replacement parts 78 Retard roller Attaching 68 Removing 67 Roller, replacing Counter, resetting... data for keyword search 32 Security setting for PDF 32 Skipping blank pages 30 Text orientation, correcting 31 Specifications 77 System requirements 11 T Troubleshooting 72 Typical Installation 13 U USB connector 10 USB Link switch 8 82 DR-2010C / DR-2510C

Reference Guide
Page 3
... Cleaning the Sensor Glass and the Rollers 27 2. Practical Examples 21 6. Regular Maintenance 26 Cleaning the Scanner 26 Cleaning the Inside of the DR-2010C/DR-2510C Document Scanner 4 3. ii - Setup Disc 8 Chapter 2 Basic Operation 9 1. Troubleshooting 35 4. Scanning Methods ...Creating Smaller Files 20 Saving the Text Data of Parts 6 4. Specifications 38 Specifications 38 External Dimensions 39 INDEX 41 - Documents 9 2. Removing and Attaching the Rollers and Document Holding Guide .......... 29 Roller Replacement Cycle 29 Removing/Attaching the Feeding...
... Cleaning the Sensor Glass and the Rollers 27 2. Practical Examples 21 6. Regular Maintenance 26 Cleaning the Scanner 26 Cleaning the Inside of the DR-2010C/DR-2510C Document Scanner 4 3. ii - Setup Disc 8 Chapter 2 Basic Operation 9 1. Troubleshooting 35 4. Scanning Methods ...Creating Smaller Files 20 Saving the Text Data of Parts 6 4. Specifications 38 Specifications 38 External Dimensions 39 INDEX 41 - Documents 9 2. Removing and Attaching the Rollers and Document Holding Guide .......... 29 Roller Replacement Cycle 29 Removing/Attaching the Feeding...

Reference Guide
Page 10
... specifications, the scanning speed may vary, depending on the specified scan settings. • The ISIS/TWAIN Drivers provided with the above operating systems. IMPORTANT • If you do not necessarily operate on the computer. For details, contact your application software retailer. - 7 - Chapter 1 Before Using the Scanner 44..SSccanannenreSrysStyesmteRmeqRuiereqmueirnetms ents To use the DR-2010C/DR...
... specifications, the scanning speed may vary, depending on the specified scan settings. • The ISIS/TWAIN Drivers provided with the above operating systems. IMPORTANT • If you do not necessarily operate on the computer. For details, contact your application software retailer. - 7 - Chapter 1 Before Using the Scanner 44..SSccanannenreSrysStyesmteRmeqRuiereqmueirnetms ents To use the DR-2010C/DR...

Reference Guide
Page 29
... turn OFF the power switch and disconnect the power cord from the document feed opening and the inside the scanner. - 26 - Regular Maintenance 26 Cleaning the Scanner 26 Cleaning the Inside of the scanner, dampen a cloth with water or a mild detergent, wring the ... then wipe the dirt away. Chapter 3 Appendix Chapter 3 Appendix 11..RReeguglualraMr aMinateinntaennceance Clean the scanner on scanned images. Use compressed air to clean the scanner. Specifications 38 Specifications 38 Replacement Parts 39 External Dimensions 39 FCC REGULATIONS (For 120 V model 40 INDEX 41 ...
... turn OFF the power switch and disconnect the power cord from the document feed opening and the inside the scanner. - 26 - Regular Maintenance 26 Cleaning the Scanner 26 Cleaning the Inside of the scanner, dampen a cloth with water or a mild detergent, wring the ... then wipe the dirt away. Chapter 3 Appendix Chapter 3 Appendix 11..RReeguglualraMr aMinateinntaennceance Clean the scanner on scanned images. Use compressed air to clean the scanner. Specifications 38 Specifications 38 Replacement Parts 39 External Dimensions 39 FCC REGULATIONS (For 120 V model 40 INDEX 41 ...

Reference Guide
Page 41
.../min.(DR-2010C) Specifications Main Unit Grayscale Simplex 200 x 200 dpi 25 pages/min.(DR-2510C), 20 pages/min.(DR-2010C) 300 x 300 dpi 25 pages/min.(DR-2510C), 20 pages/min.(DR-2010C) Duplex 200 x 200 dpi 50 images/min.(DR-2510C), 40 images/min.(DR-2010C) Type Scanning Document Size Plain Paper Size Paper weight: (Page separation mode) Desktop sheetfed scanner Width...
.../min.(DR-2010C) Specifications Main Unit Grayscale Simplex 200 x 200 dpi 25 pages/min.(DR-2510C), 20 pages/min.(DR-2010C) 300 x 300 dpi 25 pages/min.(DR-2510C), 20 pages/min.(DR-2010C) Duplex 200 x 200 dpi 50 images/min.(DR-2510C), 40 images/min.(DR-2010C) Type Scanning Document Size Plain Paper Size Paper weight: (Page separation mode) Desktop sheetfed scanner Width...

Easy Start Guide
Page 1
... the Canon DR-2010C/DR-2510C Document Scanner. Click [Install]. Click [Finish] to setup the scanner for using the scanner, and the Job Registration Tool. After you have finished reading these manuals, store them . Reference Guide This manual outlines the specific items ... Vista Home Premium - You must keep the machine's packaging and packing materials for the Canon document scanner application, CapturePerfect 3.0. During the DR-2010C/DR-2510C driver installation, the DR-2010C/DR-2510C driver and the Job Registration Tool are installed. 7. Continued on your computer by ...
... the Canon DR-2010C/DR-2510C Document Scanner. Click [Install]. Click [Finish] to setup the scanner for using the scanner, and the Job Registration Tool. After you have finished reading these manuals, store them . Reference Guide This manual outlines the specific items ... Vista Home Premium - You must keep the machine's packaging and packing materials for the Canon document scanner application, CapturePerfect 3.0. During the DR-2010C/DR-2510C driver installation, the DR-2010C/DR-2510C driver and the Job Registration Tool are installed. 7. Continued on your computer by ...


